Grittinks. This is a DAR of Nazi Germany's last months. The scenario which I am playing is on a hex map, 10 km per hex. The time scale is daily turns. It begins Dec. 16. It ends in Sept. '45, if I can hold on to Berlin. I am now on Turn 57 (February 10). Instead of committing my Pz. divisions to Wacht am Rhein, I canceled the operation and railed them off to the Ostfront. I shall describe the consequences.
**This is a turn-based game, so posts are only up-to-date for my playthrough of the day: I move first for a day, then the Allies move. Much of my turns are spent assessing the damage caused by the Allies in their turn "yesterday".
This has been a bloody bloodfeast:
I will post the Allied losses in a couple of turns.
Monty's Quality Scale for Soviet Corps/Allied Divisions:
(Numbers referring to Attack (Anti-personnel)-Defense numerals on Unit Counters)
Unit Hierarchical Symbols
17-16 and up: Good/Excellent
13-12 to 16-16: Fair
10-10 to 12-12: Decent
7-6 to 9-9: Mediocre
Below: 
Acronyms & Abbreviations:
AD - Armored Division
ID - Infantry Division
IR - Infantry Regiment
RD - Rifle Division
RC - Rifle Corps
TC - Tank Corps
TD - Tank Division
AT - Antitank
SPG - Selfpropelled Gun
RR - Rail Repair
Cav - Cavalry
Mech - Mechanized
Inf - Infantry
Amd - Armored
Mot - Motorized
Eng - Engineer(ing)
Bde - Brigade
Reg - Regiment
Btn - Battalion
WARNING: LARGE IMAGES; BE AWARE
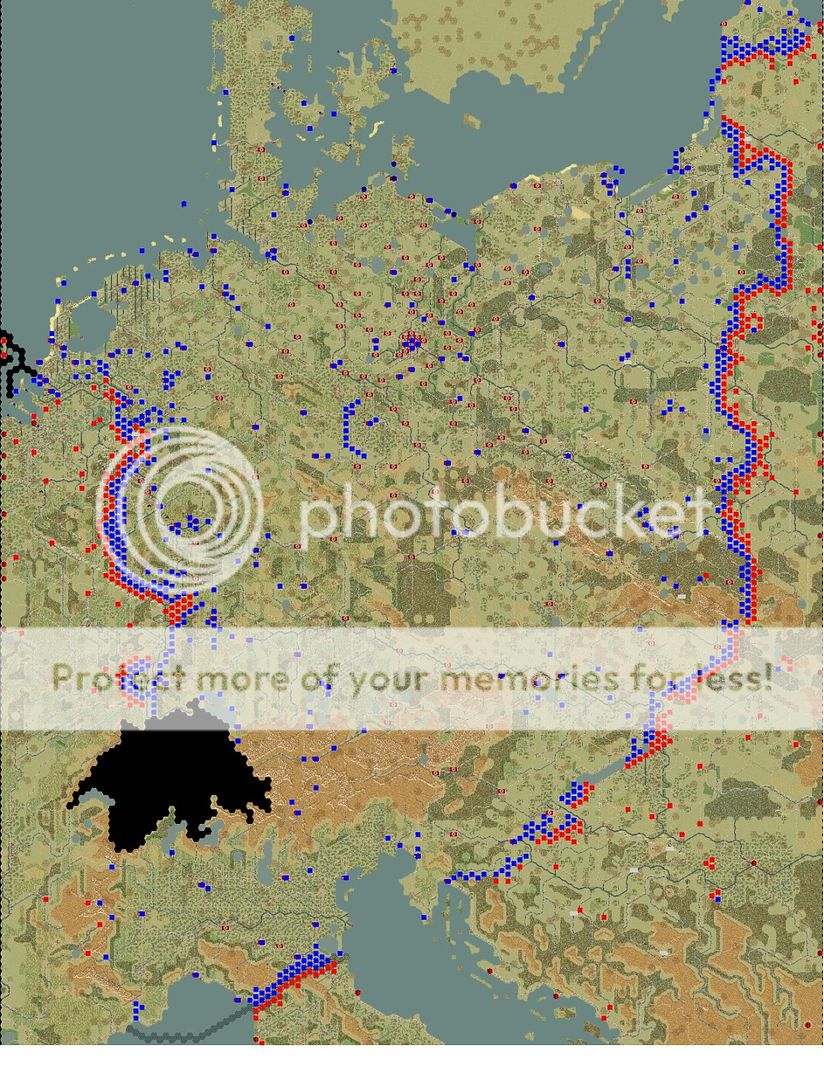
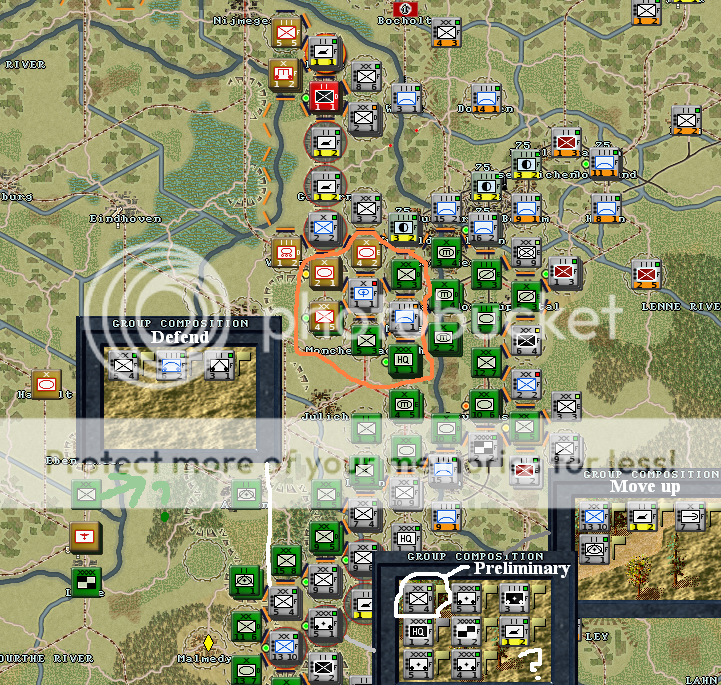
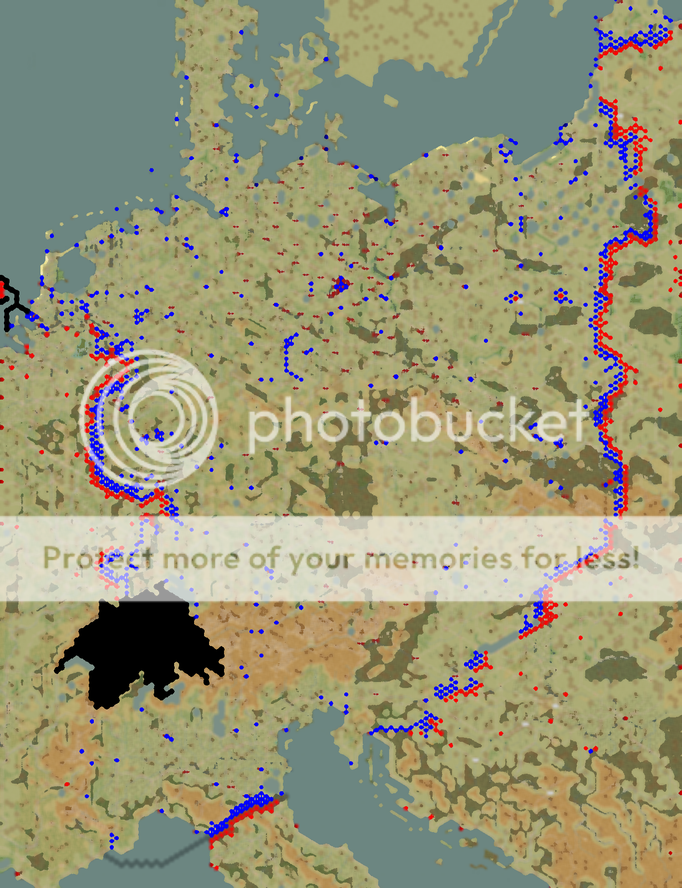
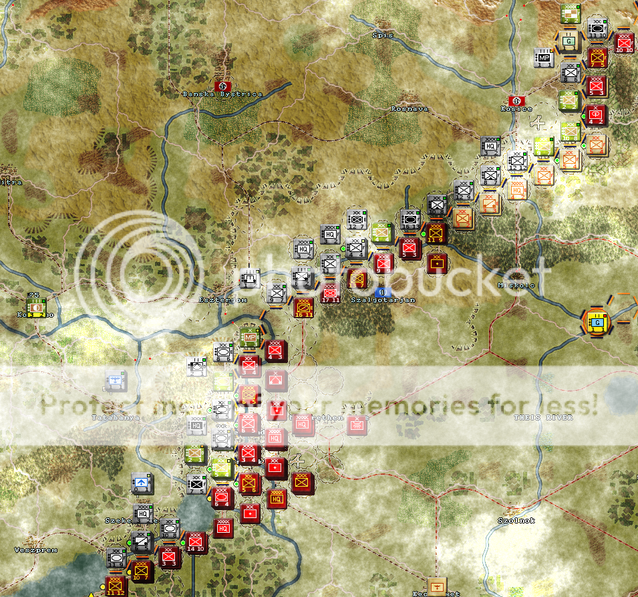
Game Map and Frontlines as of Now:
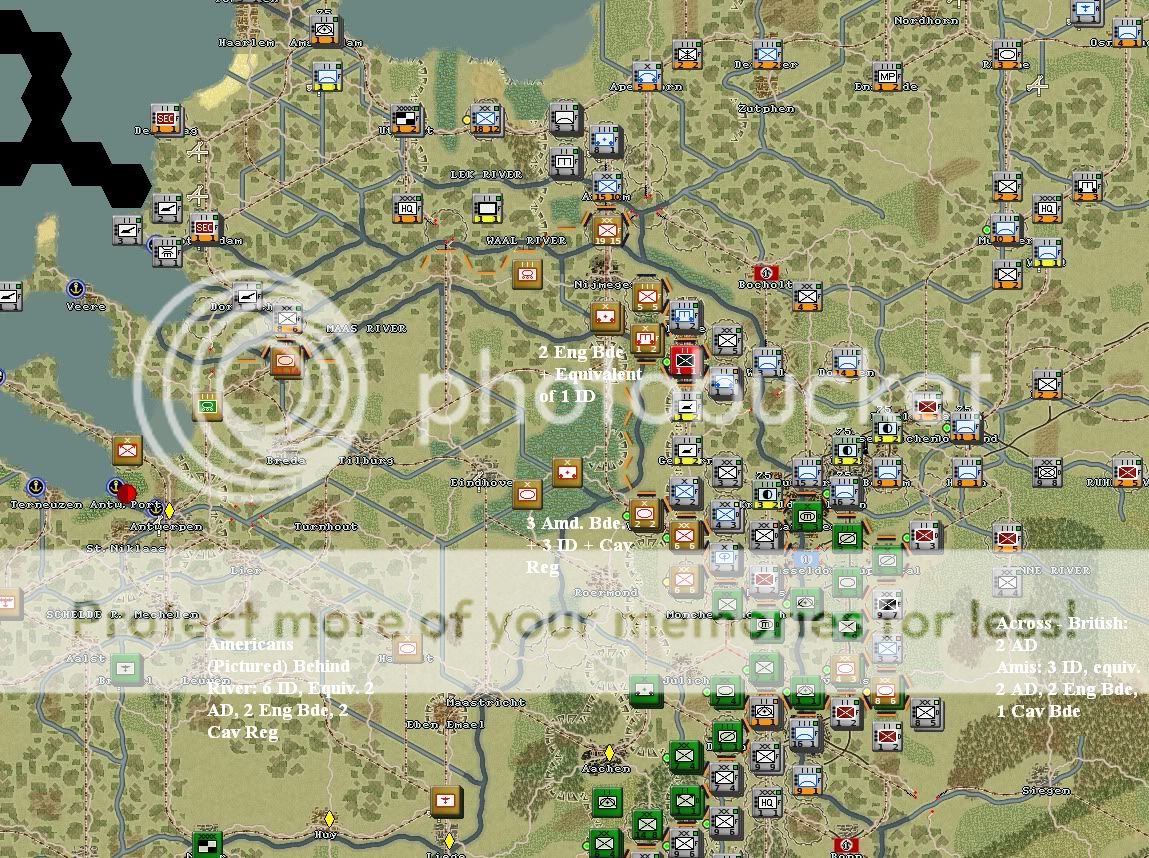
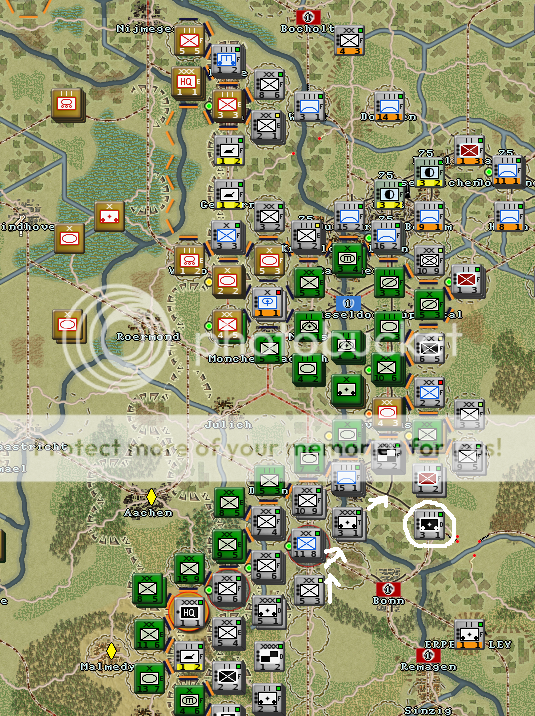
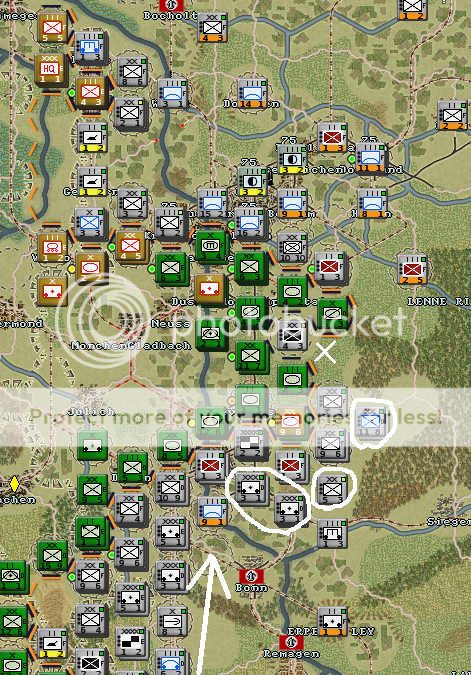
Netherlands:
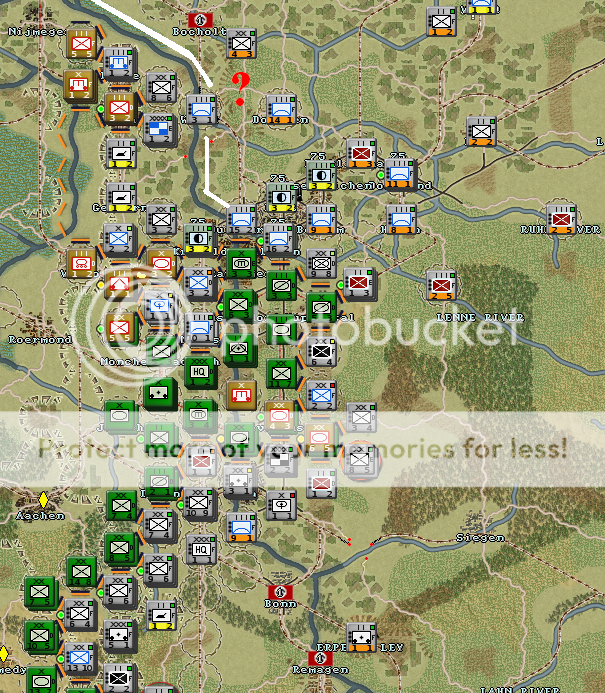
The Allies have crossed the Rhine here in force after a breakthrough a week ago. Back in December, after I failed to launch the Battle of the Bulge, the Americans attacked strongly here and were repulsed. Unfortunately, some British corps were activated and gave me a lot of grief. Thankfully, the rest of the Commonwealth units will not be released until late March, at which point I will abandon the Netherlands and hide behind the Rhine. The Ruhr factories aren't under immediate threat, but the situation is developing poorly, and if he strips other parts of his line to exploit this gap...
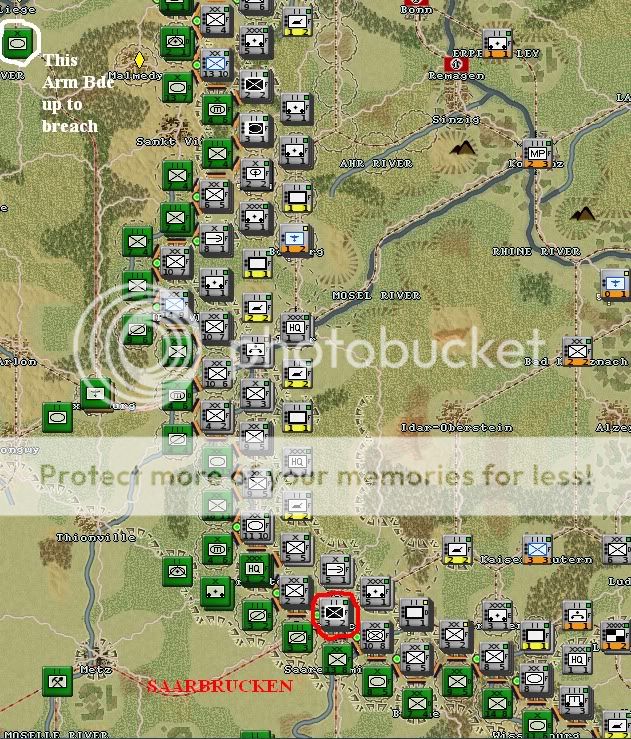
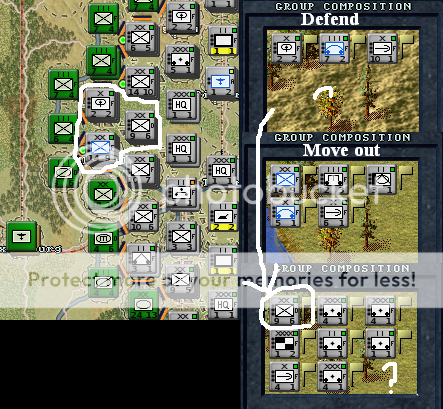
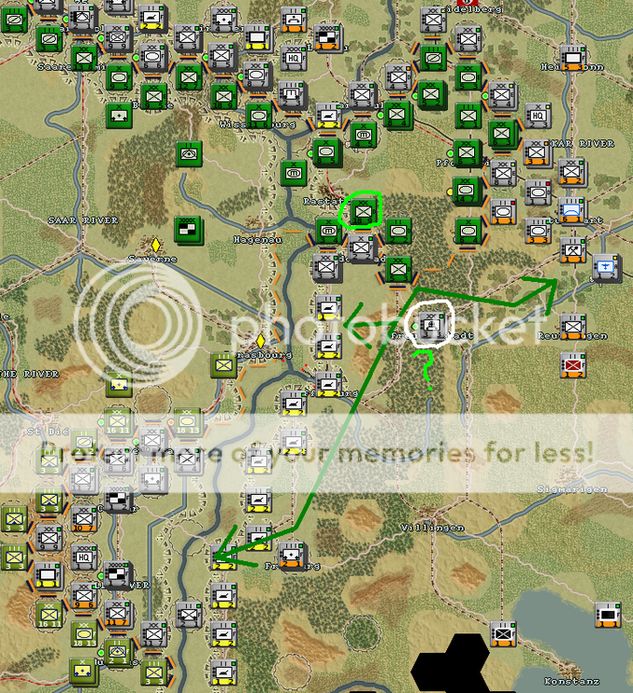
West Front 2: Mostly quiet here, except for the south. In December and January, there was brutal fighting around Saarbrucken. Eventually, the Americans gave up. Many units have been moved from this sector to one of the two breaches in the West Front. Remaining (pictured) are: 9 ID, 3 AD, 4 Cav Reg, 3 Eng Bde, 6 Arm AT Btn, 1 Amd Btn.
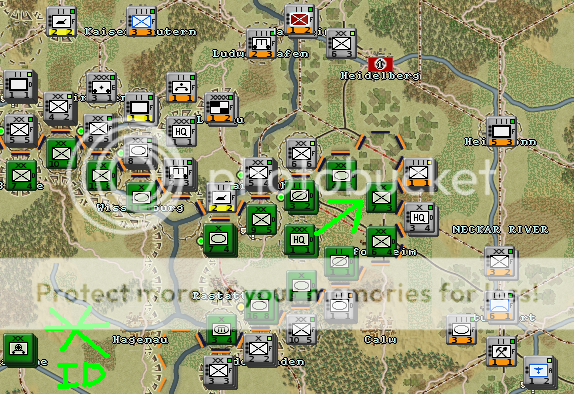
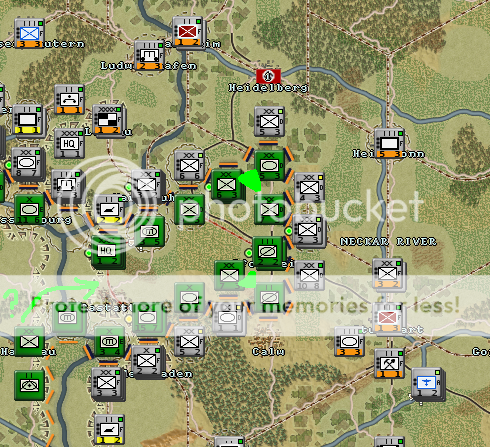
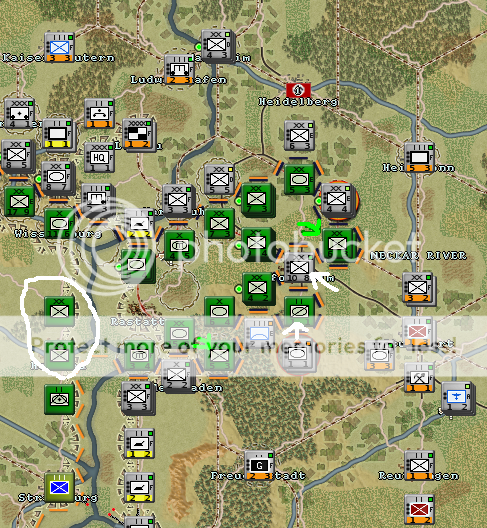
West Front 3: Just south of Karlsruhe, a few kilometers west of Stuttgart, has been another massive crossing over the Rhine. This one is actually bigger than the aforementioned. Much bigger. Oh my. The Free French, at least, are keeping out of the way. They aren't all that strong, either. Maybe later, when they activate, I can quickly beat a withdrawal to the Rhine. Replacements for French units are very low, I hear.
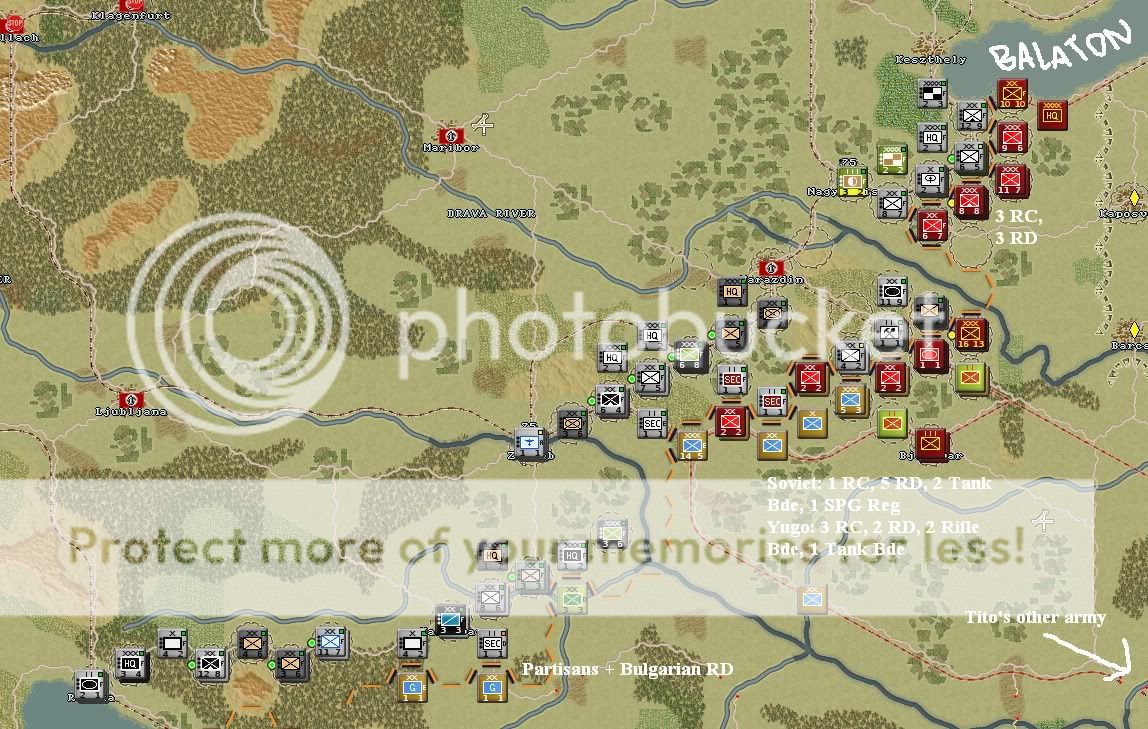
Yugoslavia: I fell back to my current positions in December. For a week in early January, I tried to surround Tito's army in a trap, but was tricked myself. Not much of note occurred in the last month. I am facing here mainly Tito's PLA, some Bulgarians and a couple token Soviet rifle corps. Beside what he has in the front, Tito has another full army in the mountainous interior of Yugoslavia. I'm not sure why he's holding it back. Overall, my position here is quite secure.
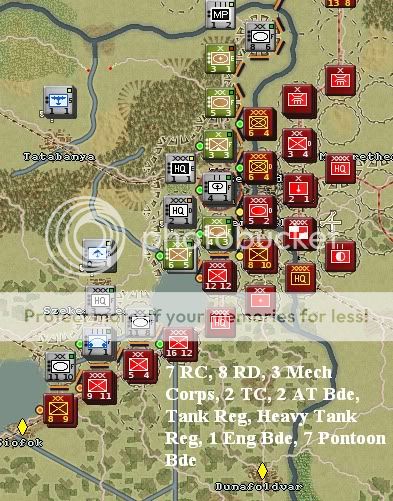
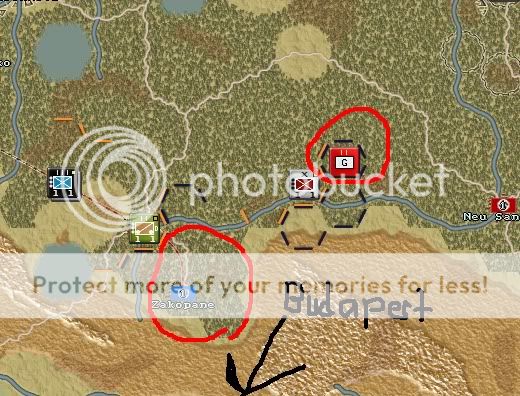
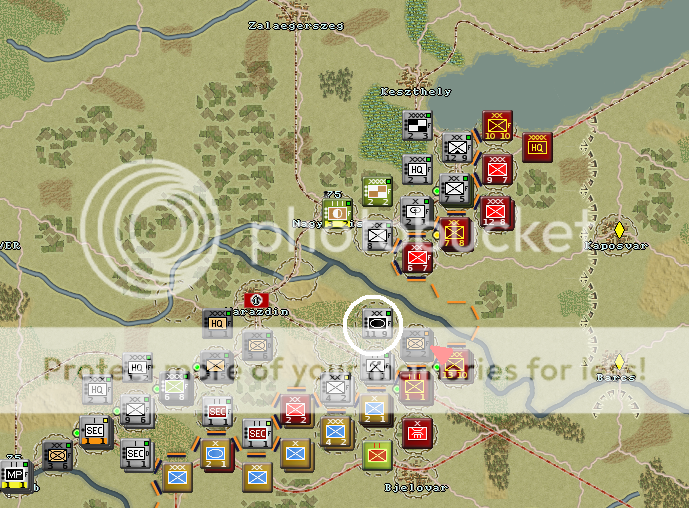
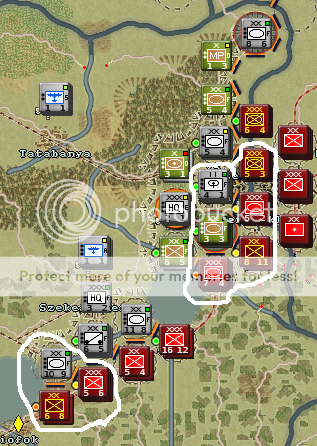
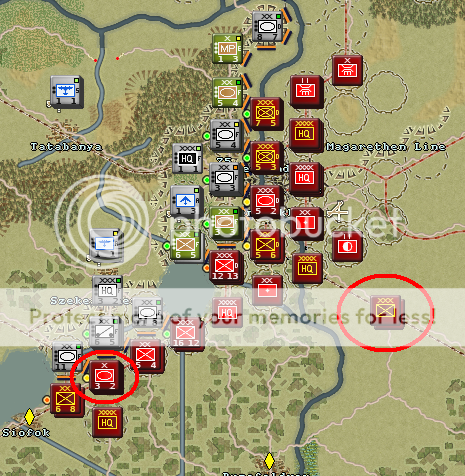
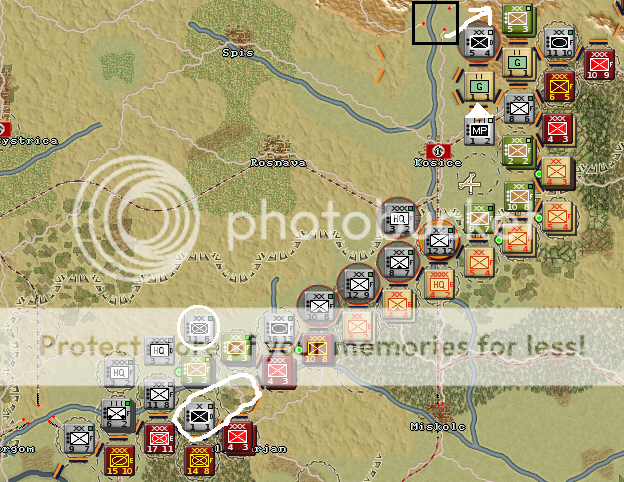
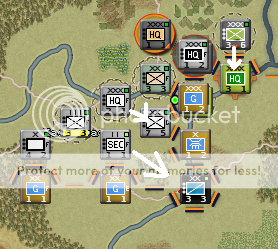
Budapest: This has been the site of a grueling battle of attrition. For a month and a half, I held the entire city. In the last few days, however, I have been forced to abandon Pest and retreat behind the Danube. Everyone here is exhausted and depleted. Of course, I must hold here. A defeat would lead the Hungarians to lay down their arms and/or defect to the Soviets, something that would cripple me along half the Eastern Front.
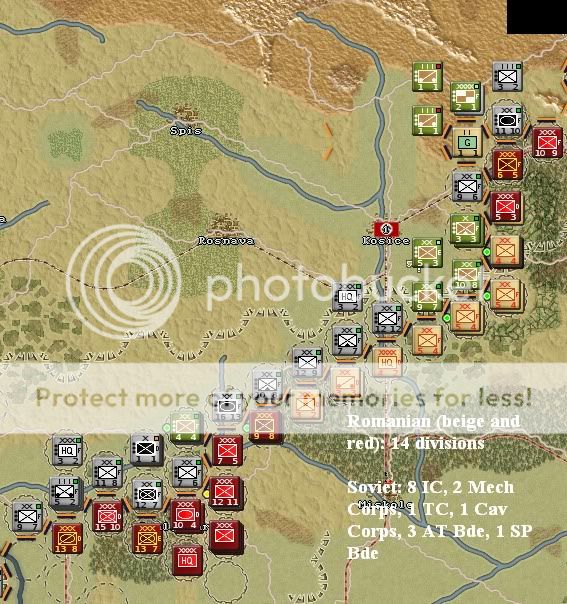
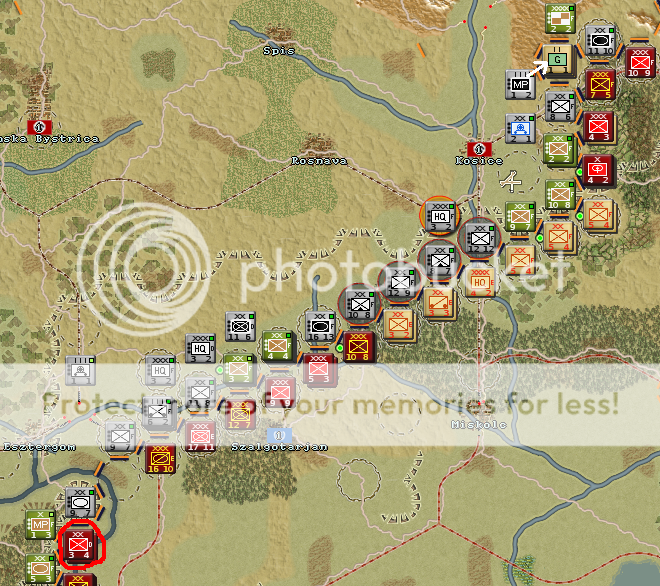
Hungary: Pretty ok. The enemy is not strong here, and I've held my ground everywhere except along the flanks, where I was pushed back a few 10s of km.
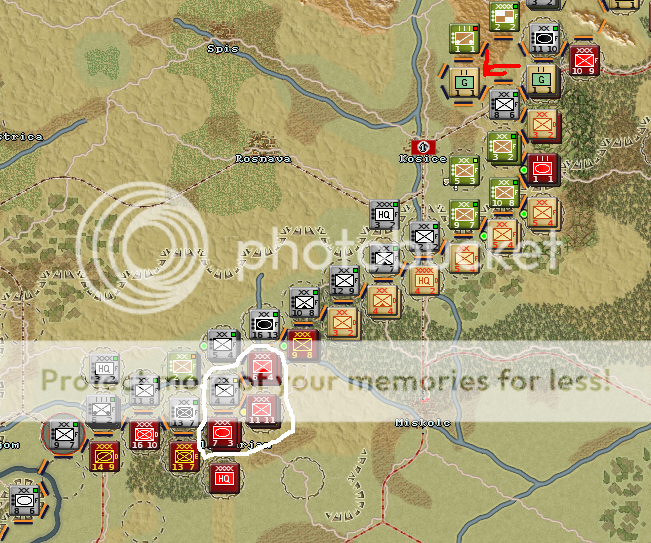
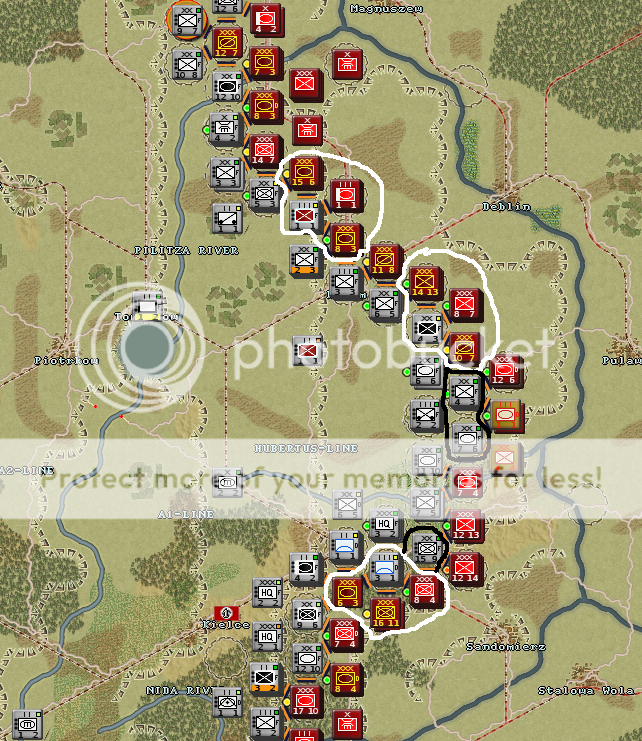
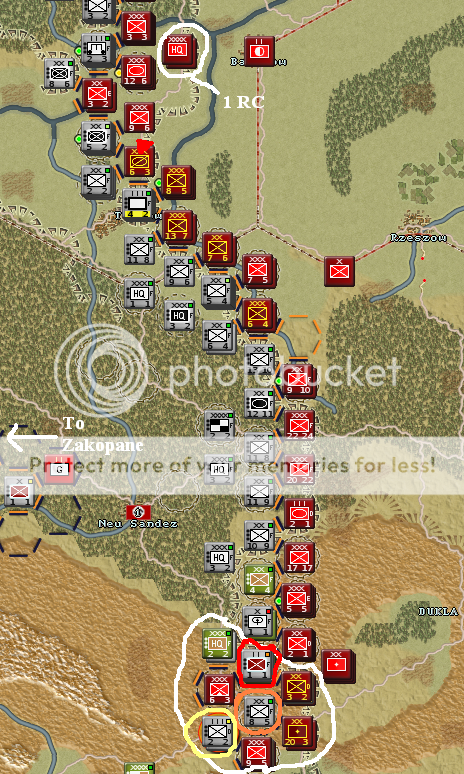
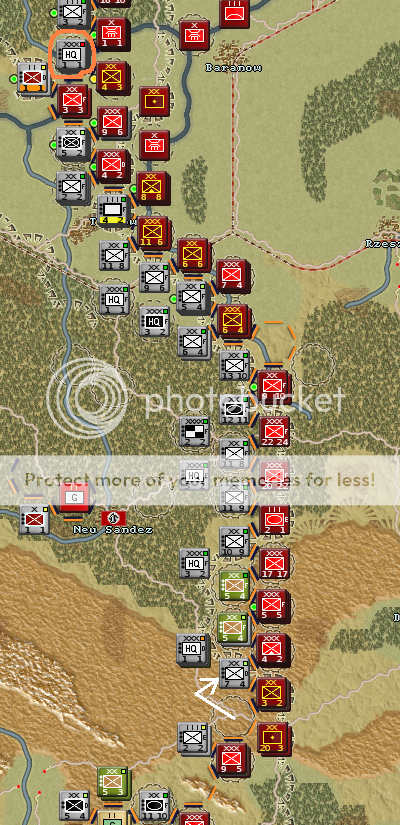
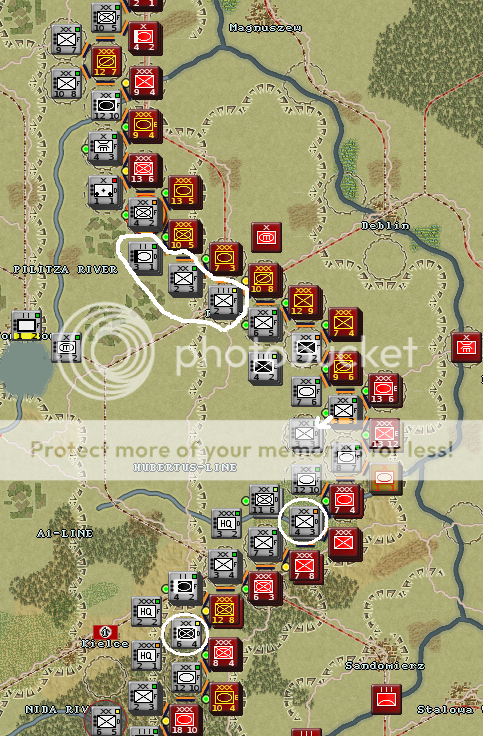
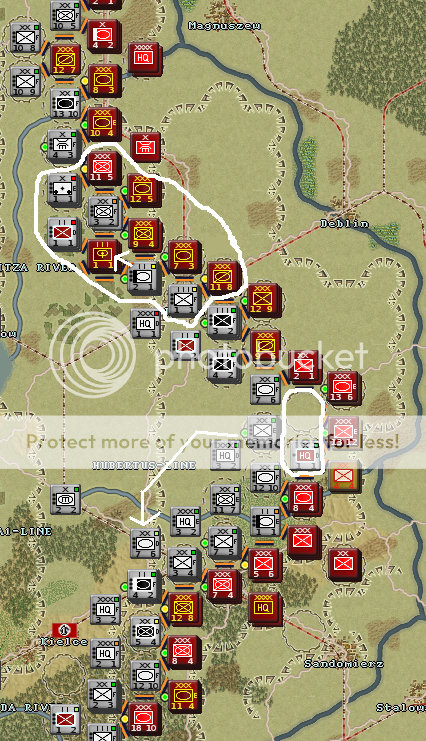
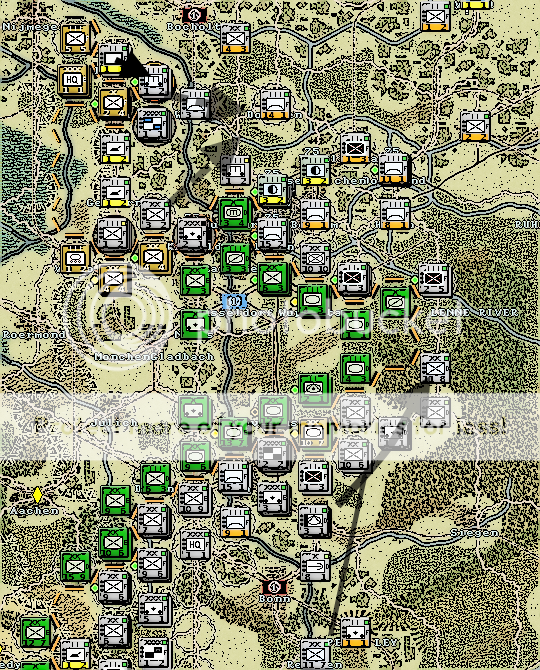
Poland 1: Here, the middle area saw the greatest success. All Soviet assaults were smashed. At the bottom, I have stood my ground, giving up only 2 or three hexes. The Soviets have been concentrating here; the defenders are pretty chewed up. At the top, a Soviet bridgehead allowed them to drive me back from the river (marked) and swallow up a very small pocket. Stable for now.
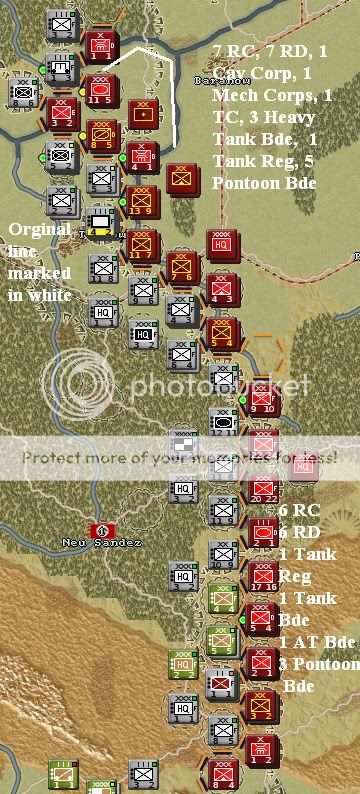
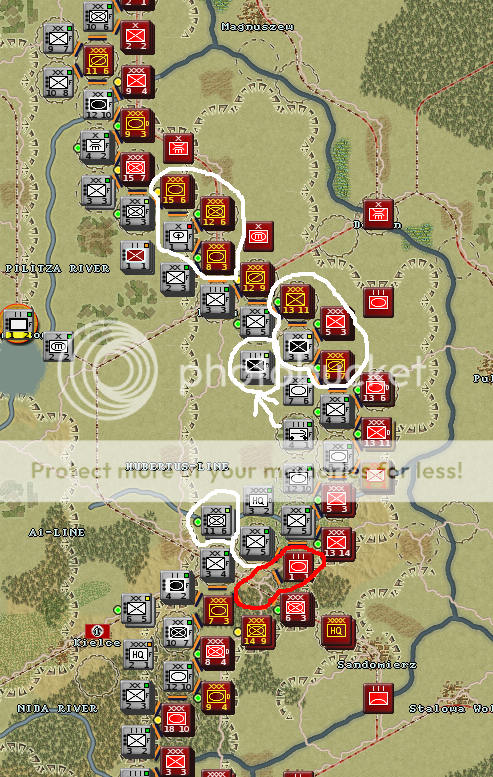
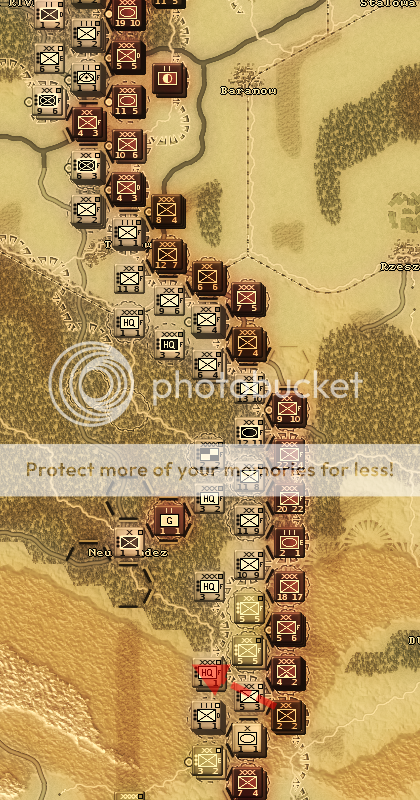
Poland 2: In this sector I was pushed back a ways. My line up until mid-January was along the Vistula River, from top to bottom. Thankfully, I've usually been able to bring in reinforcements in time to set up defense in depth. There are several weak links in my line, and there is a preponderance of Guards armies in the area, but I'm not facing catastrophe here as of now.
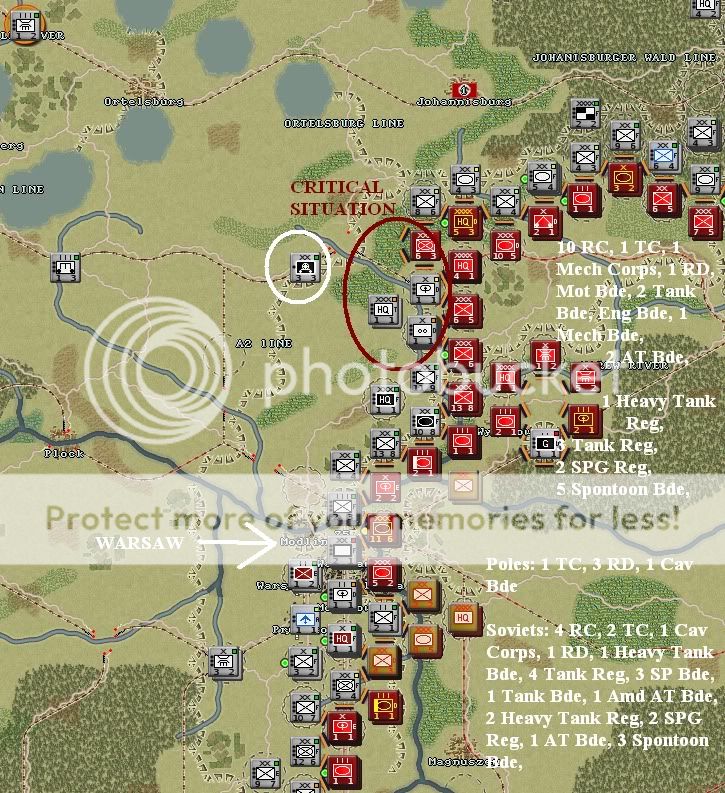
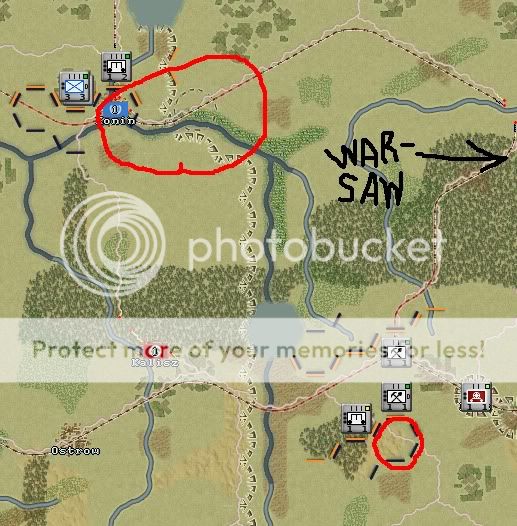
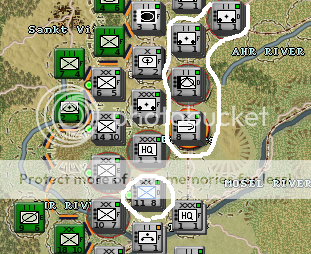
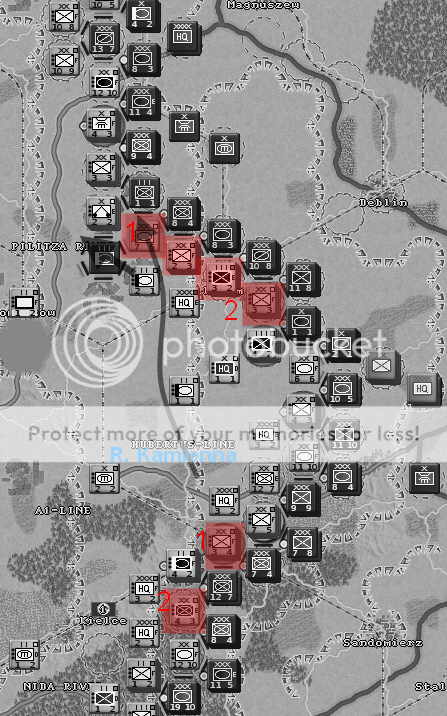
Poland 3: In this sector, many important bridges have been blown by Soviet bombers. I am working furiously to repair or replace them. This is especially critical for the northern reaches, which are cut off from reinforcements and rail supply.
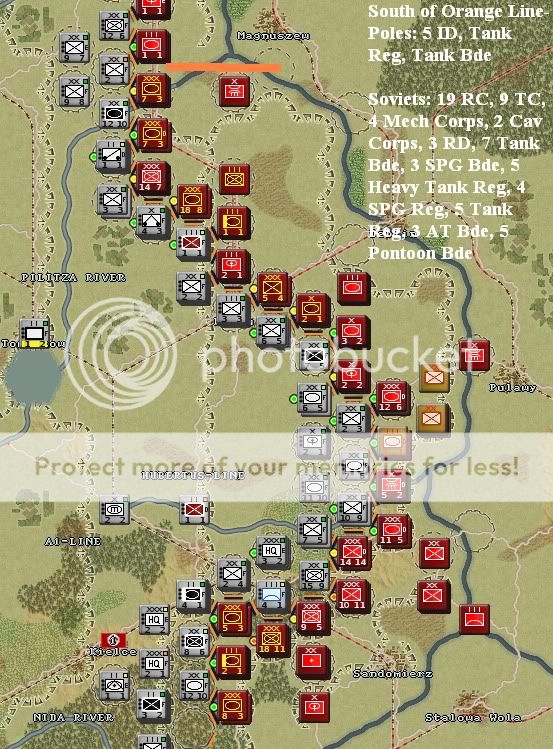
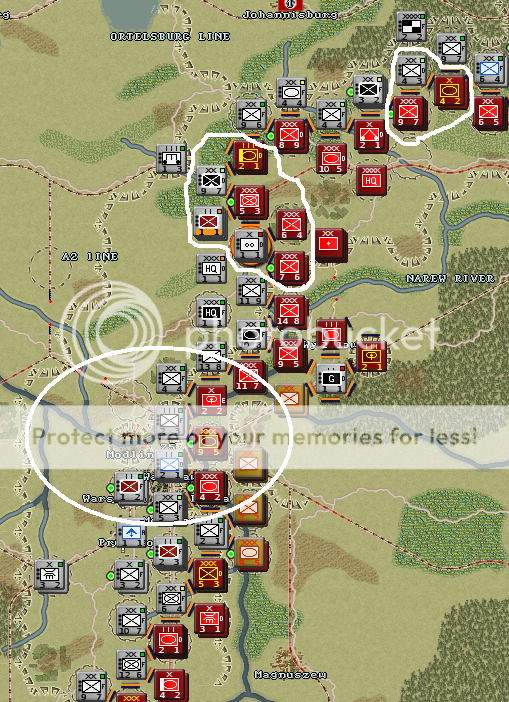
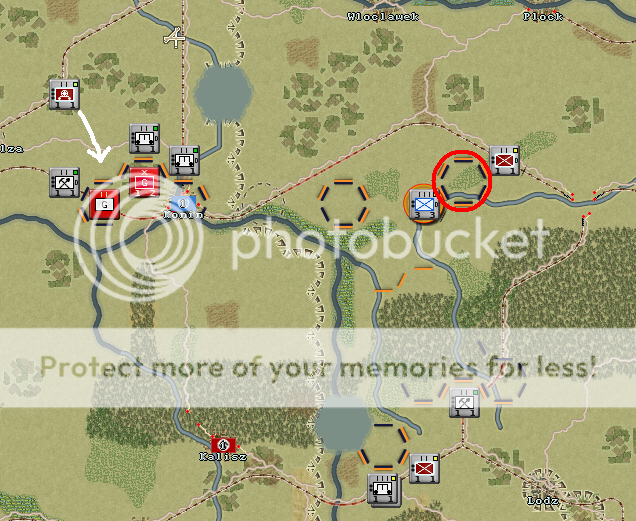
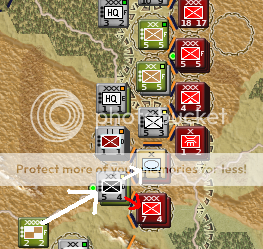
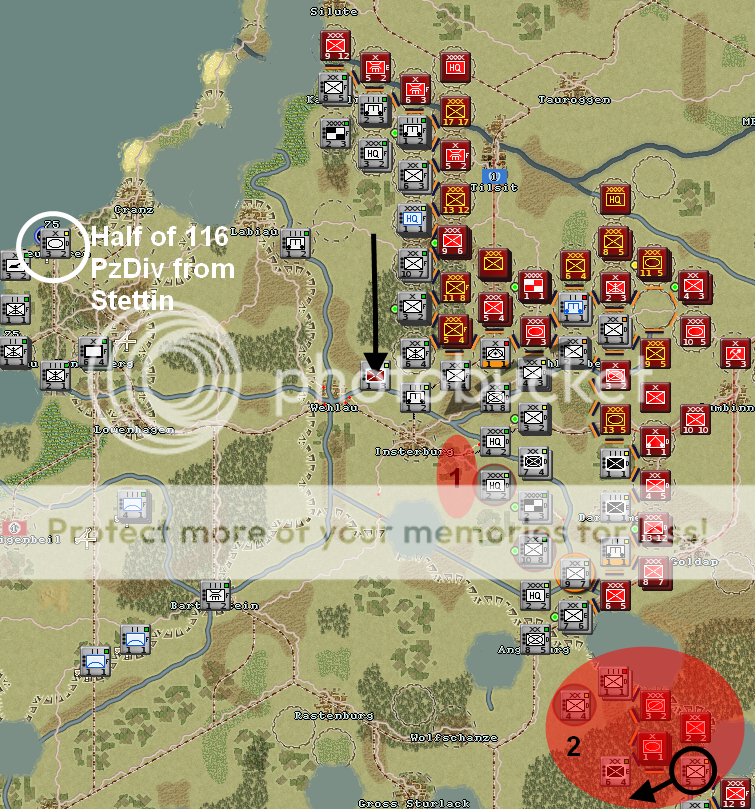
You might have noticed that this is Warsaw. Warsaw is hanging on by the tetherhooks. It's being hit hard. Soviet fighter cover is thick here. Only my jets have survived the last month. In the north, a big hole has been blown through my line. Though the Soviets can't easily exploit it - he seems to lacks reserves - they can definitely roll down my weak line all the way to Warsaw if I can't do something. Due to my low rail transport, I have only been able to rail in the one indicated division.
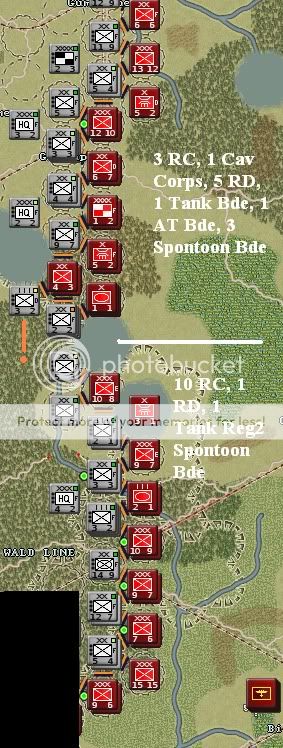
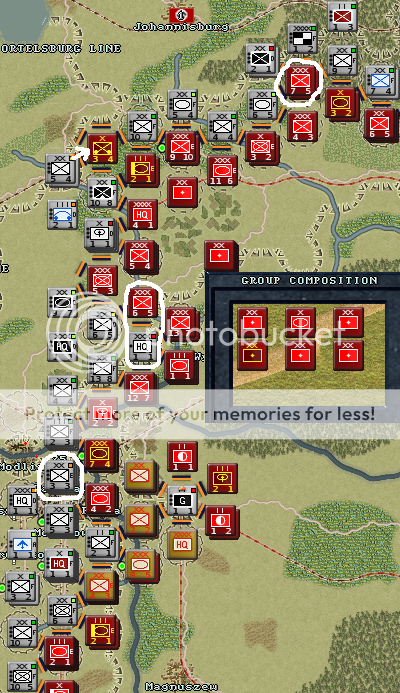
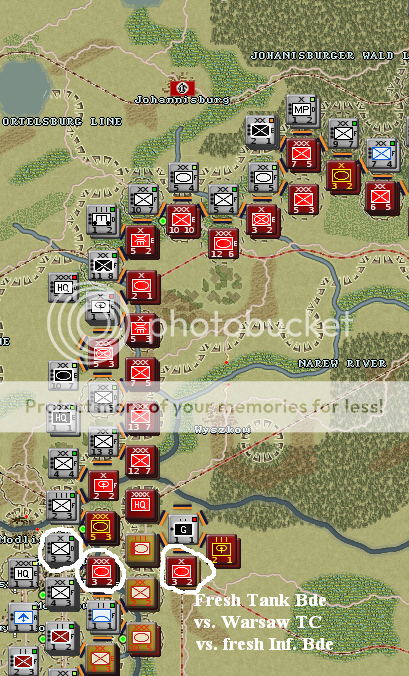
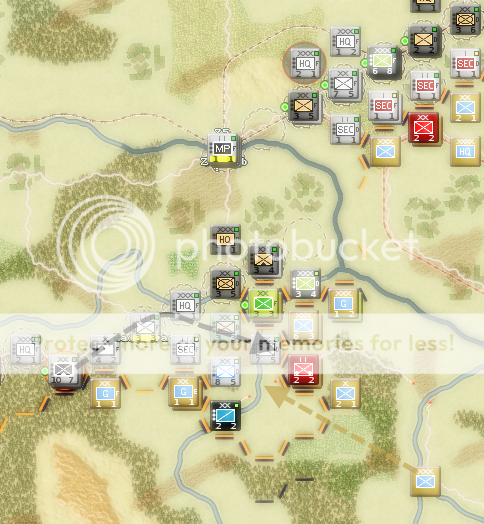
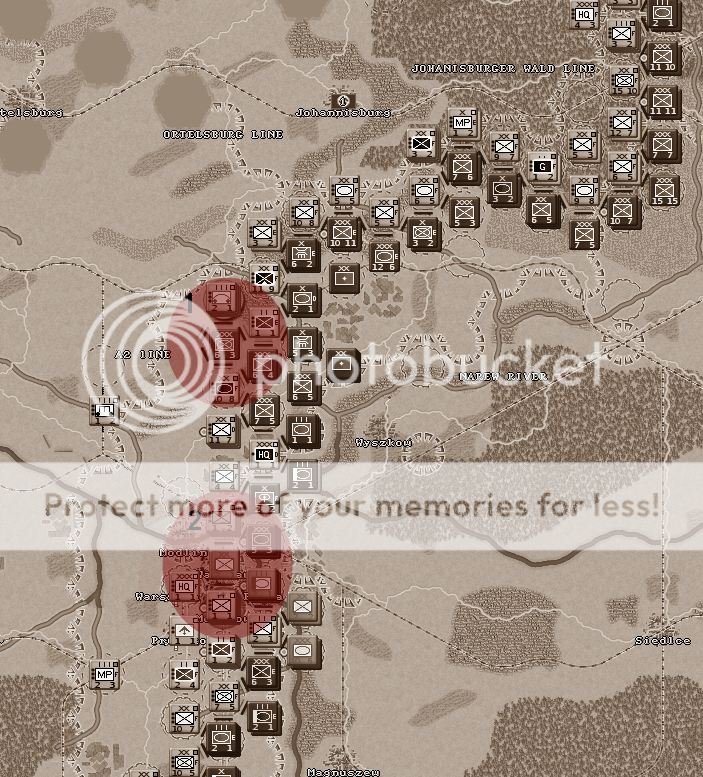
Poland 4: The line here is solid everywhere except the very middle - between the two small lakes. I have few men there, and the Soviets have just moved in 2 more divisions. I am at the breaking point. A breakthrough there would endanger the entire southern half of the asector. Unfortunately, I don't have the transport assets to send more than a token relief force.
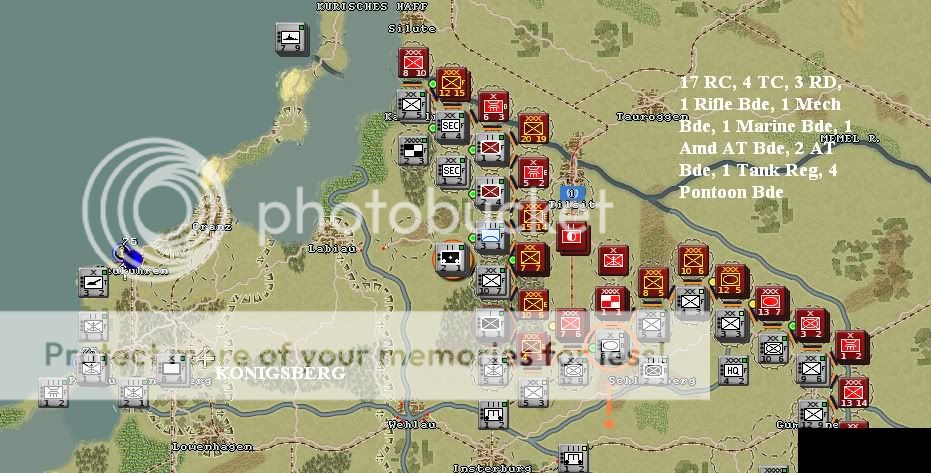
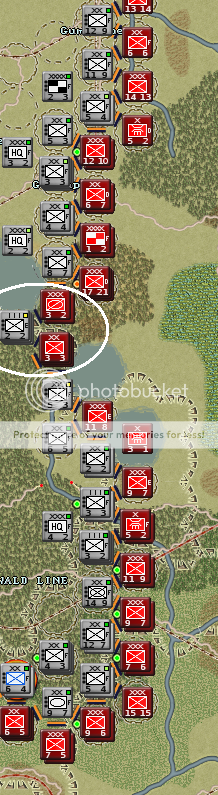
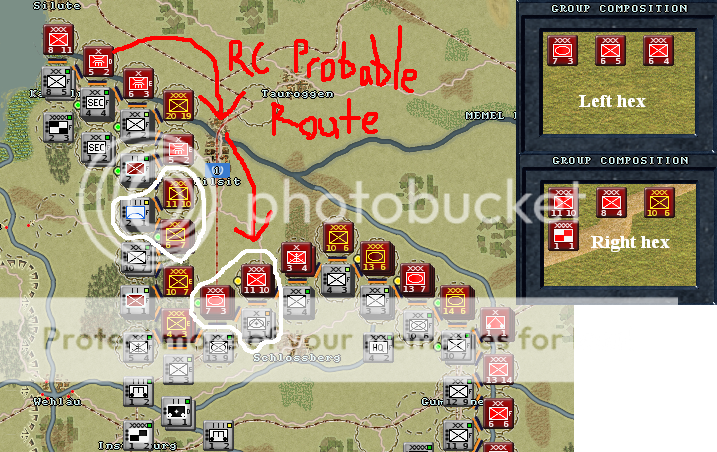
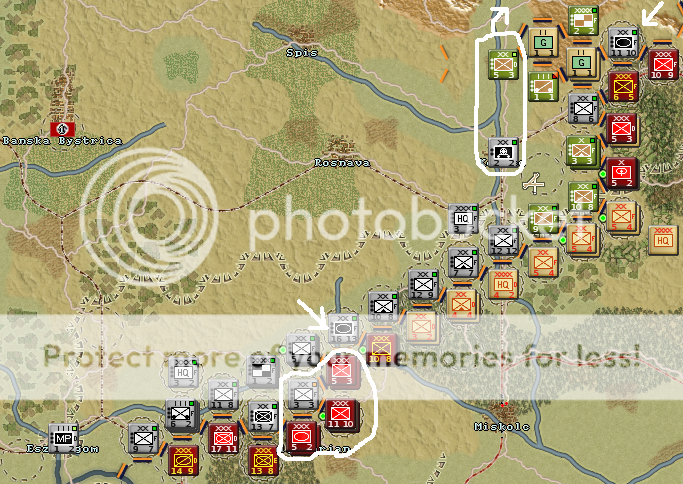
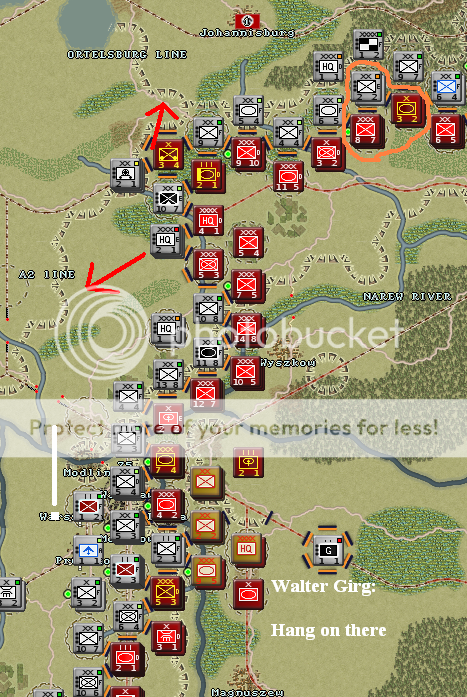
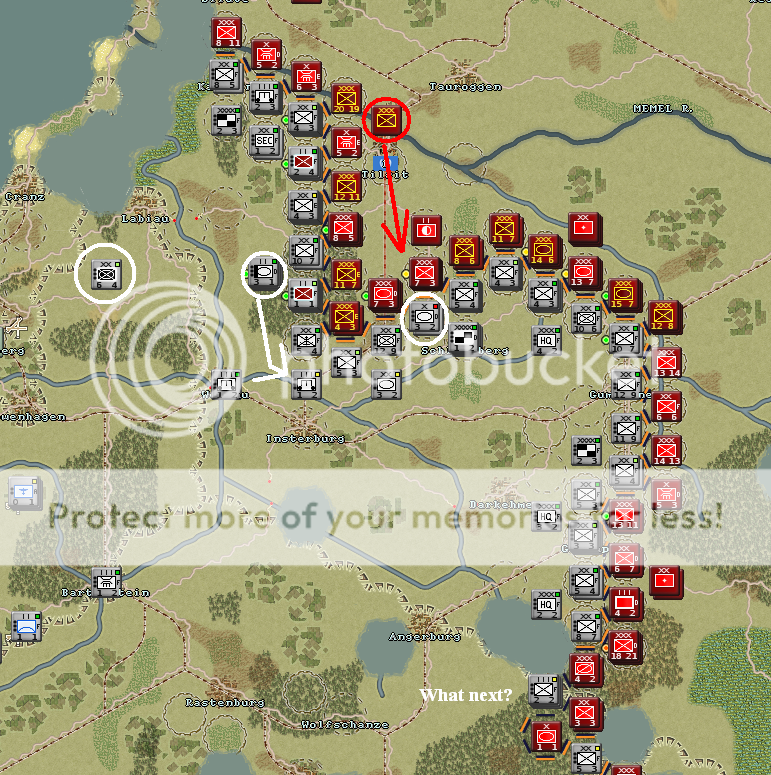
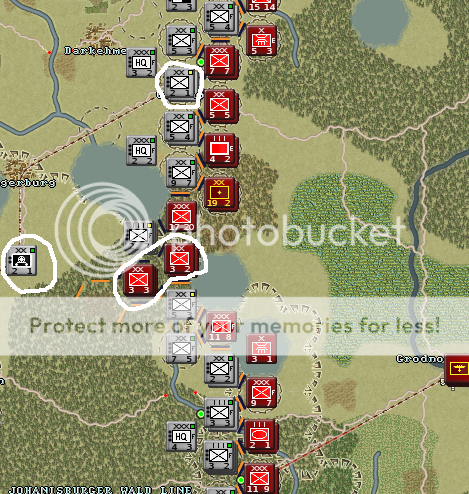
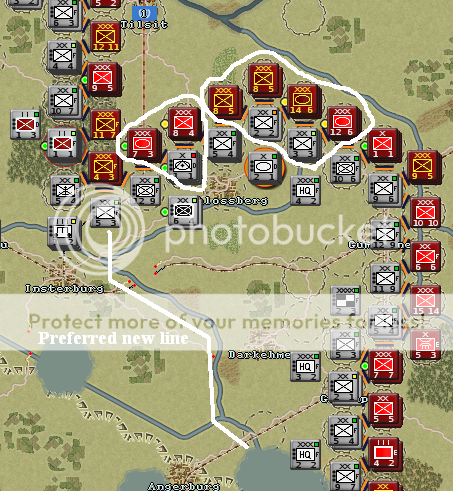
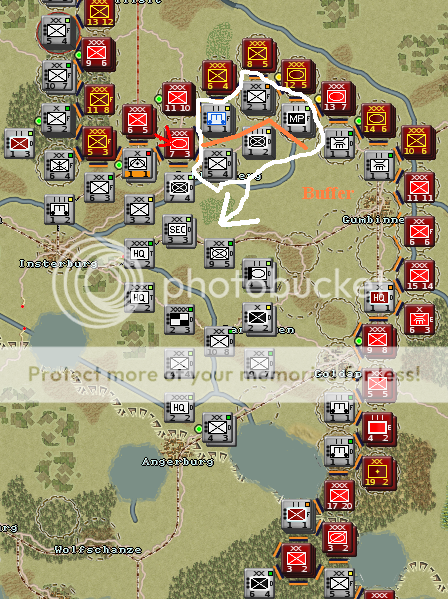
Prussia: As you can see, I have been forced back from the river almost everywhere. A steady influx of reinforcements, however, has allowed me to erect a formidable defense. The Prussian port Neukuhren, north of Konigsberg, has been invaluable. I have shipped in units from Kurland and Denmark to bolster my force. Of course, the Soviets have also shifted an army or two away from the Baltic. Consequently, in one troubling spot (orange circle) the Soviets oppose me with 4 rifle corps and a tank corps. Another RC is in reserve and may be commited there too.
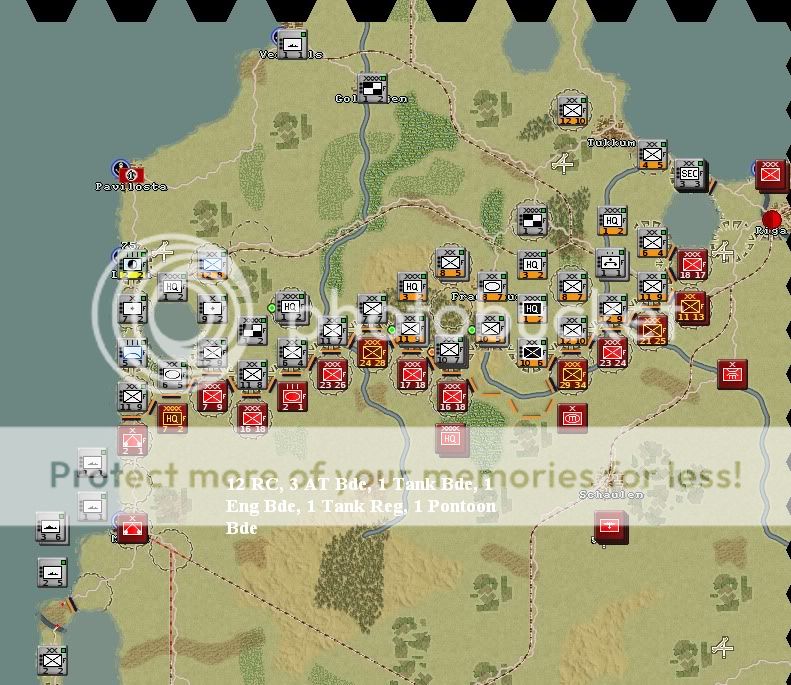
Kurland: Worthless piece of land. As soon as Hitler lets me, I'll ship out half a dozen divisions. What I have is more than enough to fend off with the Soviets, who have depleted themselves in the sector to beef up the one below.
Polish Interior: Just when I thought I had eliminated the partisan scourge, a few more revealed themselves and blew a couple major rail bridges. Anti-partisan TF consists of 2 Pioneer regiments, 2 RR Pioneer battalions, 2 infantry battalions, and an infantry regiment.
Zakopane: I seem to have rounded up all anti-Nazi Hungarian partisans except for a few around Zakopane (which, yes, is technically in the southern tip of Poland). I have a few units there equivalent to 2 brigades, maybe.
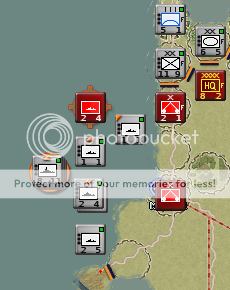
Berlin: This is where most of my reinforcements show up. Currently, I have 6 ID, a Pz division, and a mechanized division sitting around here. I have other units doing the same elsewhere in Austria and Czecholovakia. This backlog is due to the difficulty of transporting men over long distances. Allied interdiction, I suppose.
Denmark: I have an infantry corps garrisoned here. Eventually, Hitler will release it for whatever duties may need to be fulfilled at that point.
Air: For the most part, I seem to have achieved air parity. End of turn Air Superiority was 35-43 in the Allies' favor. I have lost 25 planes for 122 so far today. From the old enemy loss report (c. January) that I managed to acquire, I can deduce that the British have been mauled, the Americans given a broken nose, and the Soviets slightly winded.
Italy: Not yet.
____________________________________________________
Note: Enemy OOB details are minimums, taken from what I can see. Fog of War is hiding some.
Correction: I appear to have written "spontoon" instead of "pontoon" in some of the screenshots. I must have been thinking of Ancient Greece or something. 
Thoughts? Demands?


 Reply With Quote
 A definitive figure for aerial losses: 22 for 50.
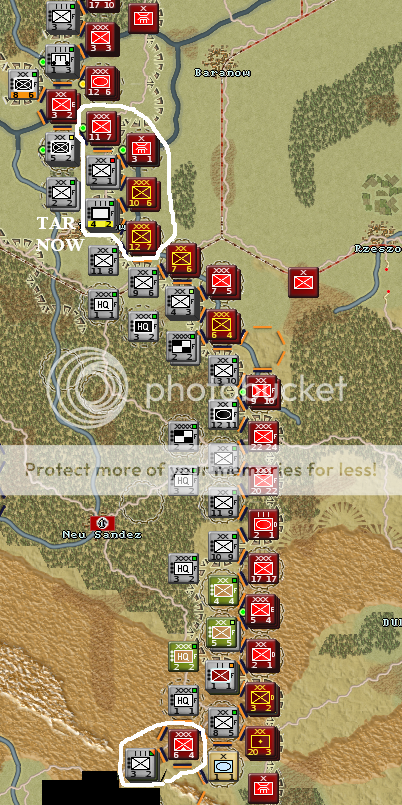


 Looks bit dim for the Germans, no surprise there. Do you think you could have any possibilities for strategic withdrawals in any fronts in order to shorten your lines or redeploy to a better defensive positions, or are your troops too committed everywhere to even try any such thing?For example, would it be possible to abandon Italy and set a defensive perimeter to Alps, in order to gain more reserves for other fronts?

 - Horseman of the


Bookmarks