Results 1 to 10 of 10

Thread: The Battle of Trent

Threaded View

Previous Post Previous Post   Next Post Next Post
  1. #5
    Illuminated Moderator Pogo Panic Champion, Graveyard Champion, Missle Attack Champion, Ninja Kid Champion, Pop-Up Killer Champion, Ratman Ralph Champion GeneralHankerchief's Avatar
    Join Date
    Mar 2006
    Location
    On a pirate ship
    Posts
    12,546
    Blog Entries
    1

    Default Turn 1 - dawn

    Umpire notes for Turn 0

    As it was the turn for initial deployments, I allowed more leeway to let the Overall Commanders direct everything. No unit was subject to orders tests this turn. In all following turns more decentralization will be represented. Individual army commanders must specifically give me orders; no more letting the Overall Commanders do everything.

    Feedback

    Turn 0 feedback to the Imperialists

    Quote Originally Posted by GeneralHankerchief
    Turn 0 feedback to Peter

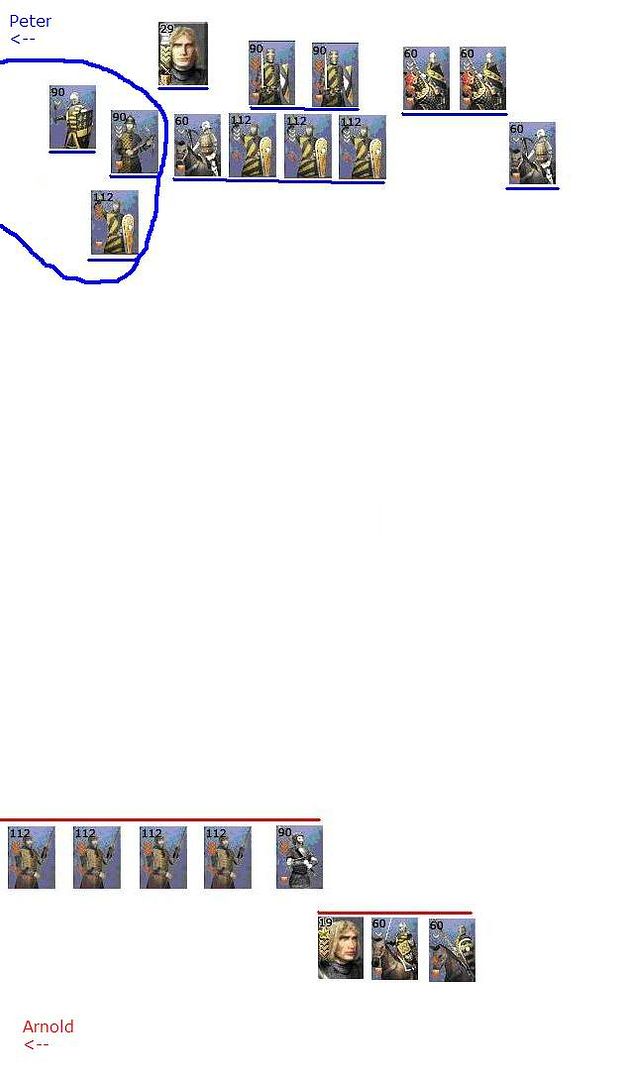
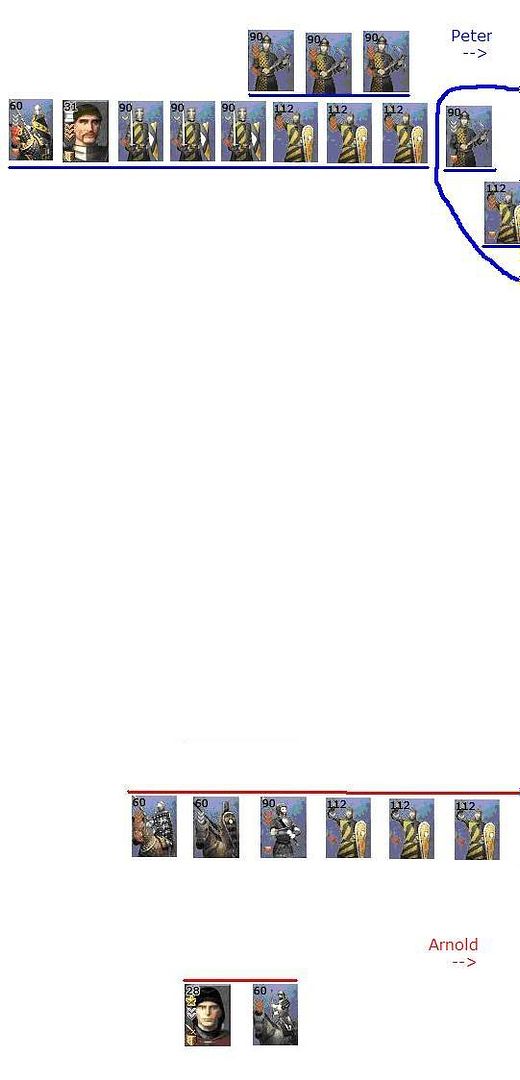
    As a proper Kaiser and leader would do, you stick your army front and center. You do this more specifically with your own escort. You are lucky that there won't be any artillery on the field today. You observe that Duke Arnold, Grand Master of the Illuminati and Republican Overall Commander, has taken the field directly opposite your troops. Excellent.

    Your battle plan is already mapped out: A general advance, fronted by a glorious charge led by you and your old mate Tancred von Tyrolia, designed to break the Republican lines and send them running, ending the battle before it began. You will finally right the injustice that was done to your brother Siegfried all those years ago...

    Siegfried. The word brings a trigger of memories. He grew distant in his later years, but the fact still remains that he was a brother to you. You still hate the Illuminati for bringing him down. Four men willfully disobeying the Divine Mandate... how dare they?!

    But even deeper in your mind, something else flashes. Only four men? Sure, they were powerful, well-connected men, but Herrmann Steffen was only a child back then. You presume that he took Dietrich von Dassel's place, but Dietrich had zero influence in Diet circles back then, and Matthias Steffen was a mere Count, not Viceroy of Outremer. Four men? The Illuminati were masters of subtilty and intrigue. For all you know you could be walking into a giant Illuminati trap.

    You brush the thought from your mind. You have more important things to worry about as Overall Commander. Already a minor crisis is brewing. Athalwolf von Salza, displaying the same "hands-on" approach that lost him the Battle of the Flemish Crossroads, neglected to deploy his troops. You were able to step in on time but in the heat of battle will not be able to repeat this feat. Tancred von Tyrolia is available and will be able to substitute nicely for Athalwolf, but losing him takes some punch out of your cavalry charge, and it will have been a wasted trip if Athalwolf does decide to show up. You must decide what to do with Tancred.

    In addition, you have to attend to your usual duties, meaning planning the overall strategy as well as the specific strategy for your troops.

    Spoiler Alert, click show to read: 


    In Turn 1, you may advance but may not engage.

    The division closest to Peter's escort have a 100% chance of obeying his orders. Currently this is cavalry. If this changes, please notify me when diagramming your movements for Turn 1.
    Quote Originally Posted by GeneralHankerchief
    Turn 0 feedback to Ruppel

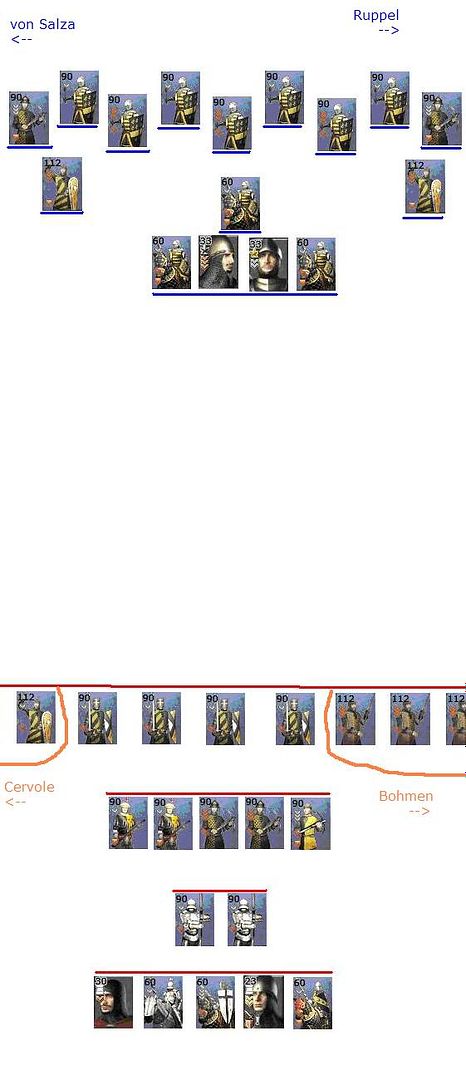
    You line up on the eastern side of the battlefield. Directly opposite of you are the men, most notably Pikemen, of Ludwig von Bohmen. That damned Swabian is at it again. Duke von Salza should never have offered him amnesty. It is up to you to finish him.

    His Pikemen, however, are a perfect countermeasure to your mastery of cavalry. You must outmaneuver them or they will give you fits. What's interesting is that Duke Arnold seems to lent him a regiment of Zweihanders. This development must also be focused on, but you are ready to do so.

    Spoiler Alert, click show to read: 


    In Turn 1, you may advance but may not engage.

    The division closest to Ruppel's escort have a 100% chance of obeying his orders. Currently this is his spearmen (horse archer division appears to be split). If this changes, please notify me when diagramming your movements for Turn 1.
    Quote Originally Posted by GeneralHankerchief
    Turn 0 feedback to Athalwolf

    You opted to sleep in, figuring that you would need your energy later. It will be a long day, after all. However, this does not change the fact that your army needs a commander. The Kaiser cannot do everything for both his and your armies, and if you do not act then you may find yourself relieved by Tancred von Tyrolia.

    You find yourself opposite the very capable Hugo de Cervole. His foot gunners are over by Arnold, but he still has spearmen, cavalry, Reiters, and a regiment of Zweihanders lent by Arnold. Your wing is longer than his and may be vulnerable to a flank attack, however, it will not be easy.

    Spoiler Alert, click show to read: 


    The division that Athalwolf is in will obey orders 100% of the time. Currently this is his cavalry.
    Quote Originally Posted by GeneralHankerchief
    Turn 0 feedback to Tancred

    You take your position alongside Peter in the front and center of the Imperial army. Not the best use of your command talents, but it certainly add some punch to Peter's planned charge.

    You hear that Athalwolf von Salza is, once again, inactive, however. It might be wiser to play it safe and take command of his army in his absence. If Hugo de Cervole overruns the Duke's flank then it will not be good for the Imperial forces, numerical advantage or not. On the other hand, if Duke von Salza has decided to take control of things, then you will have wasted a trip and potentially a chance to take part in Peter's charge.


    For Turn 1, please notify me whether you want to stay with the Kaiser, take command of Athalwolf von Salza's wing, or something else entirely. If you choose to take command of another army/division, you will arrive there at the beginning of Turn 2.
    Turn 0 feedback to the Republicans

    Quote Originally Posted by GeneralHankerchief
    Turn 0 feedback to Arnold

    You line up in the center, flanked by Cervole and Bohmen. Directly ahead of you, Peter von Kastilien does the same. The two Overall Commanders have placed themselves in the exact same positions.

    You are a bit perplexed about the Kaiser's placement of cavalry. General principle dictates that they go either behind the line or on the flanks, but Peter has his in front of his infantry. You will certainly have to mark its position as two full escorts' and three regiments of Imperial Knights' worth of charge is bound to be deadly.

    You do not see Max Zirn in the Advance Guard. Evidently Peter is holding him back. Either that or he has discovered Max, but that is unlikely. All you know is what lies ahead of you, and that's the Kaiser. It will be a difficult fight in the early stages. Hopefully by the time Max and Fritz arrive all will not be lost.

    As Overall Commander you find yourself once again busy shooing off couriers. There is a lot to coordinate. You must determine the overall strategy for the Republicans on Turn 1 and more specifically your own army.

    Spoiler Alert, click show to read: 


    In Turn 1, you may advance but may not engage.

    The division closest to Arnold's escort has a 100% chance of obeying his orders. Currently this is cavalry. If this changes, please notify me when diagramming your movements for Turn 1.
    Quote Originally Posted by GeneralHankerchief
    Turn 0 feedback to Bohmen

    You line up on the right of Duke Arnold, in the Advance Guard. You note with pleasure that you will be facing Ehrhart Ruppel. Obviously the planners did their work well. You more than anyone else on the Republican side have the ability to counter his cavalry. You might even get the chance to slay the man whose army ended the dream of Wolfgang Hummel so long ago.

    However, you will need to be careful. The Pikemen can counter cavalry, yes, but they can also be outmaneuvered. And you also need to worry about Ruppel's infantry. If they can get in close, your Pikemen are doomed, and the one regiment of Zweihanders that Duke Arnold sent over won't be enough. You definitely have to think about how to go about this.

    Spoiler Alert, click show to read: 


    The division that Bohmen is in will obey orders 100% of the time. Currently this is his cavalry.
    Quote Originally Posted by GeneralHankerchief
    Turn 0 feedback to Cervole

    You find yourself opposite your Duke, Athalwolf von Salza. During your time in Swabia you saw little of him; Ehrhart Ruppel did most of the ruling. He is on the field today, but you remember his performance in the Battle of the Flemish Crossroads and are not as worried as if, say, you were facing Ruppel himself.

    The biggest thing to worry about is the length of von Salza's wing; it is longer and could easily wrap around and flank you should you be engaged in melee. Your Arquebusiers would certainly help in that regard but you sent them over to Arnold; in return he gave you a regiment of Zweihanders. Successful handling of this wing will require some inprovisation and all of your tricks.

    Spoiler Alert, click show to read: 


    The division that Hugo is closest to will obey orders 100% of the time. Currently this is his regiment of Reiters. If you want this to change then notify while diagramming your movements for Turn 1.
    Quote Originally Posted by GeneralHankerchief
    Turn 0 feedback to Bernhard

    You take your position with Duke Arnold's escort and the rest of his cavalry. The Duke insisted that you come as part of the Advance Guard, but for now, it seems to have been as a precaution more than anything else. You see little that you can do.

    It might be wise to discuss with your Duke and the rest of the forces where you will be most needed.


    For Turn 1, please notify me if you want to stay in place or move to take command of a particular division. If you choose the latter option, you will arrive there and take command beginning Turn 2.
    Orders

    Imperialist orders

    Quote Originally Posted by gibsonsg91921
    Tancred is to take control of Athalwolf's army.

    The Imperials shall hold the line and prepare to engage with our crossbows on their pikes and cavalry.

    Peter's cavalry shall withdraw behind his infantry and the crossbows will prepare to engage their advancing units.
    Quote Originally Posted by FactionHeir
    Hi GH,

    I like to reorganize my divisions from what you posted:

    HQ: GB
    Div 1+2: 1 FeudalK 1 MCB each
    Div 3: 1 DFK 1 AS
    Div 4: 1 DFK 2 AS

    How far can Pavise shoot on that diagram and how far MCBs? Game ranges are 160 and 120 respectively but I'm not sure what the range on this field is.
    Quote Originally Posted by GeneralHankerchief
    I'm not going to bother with specific distances; if you just put in "right outside of crossbow range/MCB range" or "within range" then I will execute it like that and make sure those are the results. Remember, medieval soldiers can't really judge exact distances that well.

    As for reorganization, each regiment will face an orders test (since you did it Turn 1 and not Turn 0) to join their new divisions. Do you still want to reorganize?
    Quote Originally Posted by FactionHeir
    Right, I was just making sure that when I say "MCB fire at X" they don't walk up right to them and get themselves slaughtered instead

    Wasn't aware of changing divisions T0, must have skipped that part. Reorganize the infantry now, but leave cavalry for the moment.

    Orders for MCB T1 are to stay away from enemy fire but shoot at whatever they can get at. Preferrably pikes, second priority are cavalry. If chased, retreat back to our lines.

    Cavalry stays put and will only engage if enemy cavalry approaches, retreating back if getting into clear fire of enemy missiles or in danger of being entangled by enemy infantry.

    Infantry reorganizes and readies with spears before swords to absorb any charge. Infantry will
    stay close to Peter's flank to react.

    HQ runs around encouraging people and shouting orders.
    Quote Originally Posted by Dutch_guy
    Apologies for the late reply, I was busy communication with the rest of the 'good guys'. I will take over command of Athawolfs army, as he's inactive. If I am limited to taking command over a segment of the army, let me command the cavalry.

    No orders received from Warluster.

    Republican orders

    Quote Originally Posted by AussieGiant
    Turn 1:

    https://i184.photobucket.com/albums/.../1KotRDawn.jpg

    IC: Right you bastards I don't want this taken the wrong £"$%ing way...

    HALT!! We are calling a General Halt my lords.

    Berhard you now have command of my Cavalry division...don't £$%£ it up. Take yourself to the Right Flank and support Ludwig and his cavalry...I want you to scare the shiet out of that bastard Ruppel...but don't charge unless charged upon. That goes for you too Ludwig!!

    Ludwig I'd like your Heavy foot Div to refuse from my front rank and provide cover and secure the right flank.

    Hugo I want you to do the same. Refuse your Heavy Infantry off my DFK Division and make room for the new Gunner Division. I'm placing them between our two divisions for some target practice. If they look like being charged it's YOUR job to move YOUR division back onto mine if this happens. Make sure your don't dither or they be cut down in droves and I'll have to bloody well dive in myself and we will have a nice whole in our lines.

    Otherwise I'd like you centrally located in case your spears don't close the gap because it will be your job to plug the hole if it happens!!

    Keep your Cav Division on the wing and you might want to send out those Ritters for some skirmish practise if von Salza comes to close...keep them out of range of those Xbow's though...you'll lose that engagement very quickly.

    Gentlemen we are waiting...let them come to us. I want Lothar to be right up our asses when he hits this field...then we'll knock the snot out of them.

    ------------
    Arnold's Specific orders (Should this be IC next time? I'm enjoying this more and more *smile*):

    Using a spare Division slot the gunners will be placed in this command formation and moved into the gap created when Hugo's Inf Div refuses between the two divisions. Orders are to shot at "in range" targets with The Kaiser, Cav then Heavy Inf as the order of preference. They are still in the central corridor so that includes the whole enemy line of advance.

    If they are charged they are ordered to fall back and form back up on the Xbow divsion directly behind them.

    Xbow Division...Have not moved. Orders are to shot at "in range" targets with The Kaiser, Cav then Heavy Inf as the order of preference. They are still in the central corridor so that includes the whole enemy line of advance.

    DFK Division...hold and pray to god men!!

    Gothic Division...be prepared to charge forward in support of the DFK Div in the event they are charge by Cav. This is also true of the Gunners...if Hugo's Spearmen don't close the gap YOU Must fill it.

    If this is not the case then hold and wait on my signal.

    -----------

    As you mentioned at the very bottom of the previosu post, the closest division is now the Gothics which will be 100% certain...just to be sure those Gunners don't get murdered *grin*

    Thanks GH!! You're doing a great job.
    [QUOTE=Tristan de Castelreng]
    Quote Originally Posted by Tristan de Castelreng
    Hughes de Cervole's Orders :

    https://i184.photobucket.com/albums/x79/aussiegiant/Trent/1KotRDawn.jpg

    To all men : Halt !

    Spearmen : You are to refuse flank starting on our gunners' position. Once in position, prepare to receive a cavalry charge. If none seems to be directed your way, keep a vigilant eye on the gunners and provide support should they become the target of said cavalry. Fall back on their position if that seems to happen. Plug that hole in our line as fast as possible.

    Zweihanders : You are to prevent any flanking maneuver on our line of spears.

    Cavalry : You are to provide support by charging the enemy units engaging our spearmen, if any. Otherwise keep a vigilant watch for any cavalry unit trying to outflank us.

    Reiters : You are to provide fire support when in range, with a preference for any bodyguard or Heavy cav in range. If our spearmen should become engage and our cavalry forced to charge in the engaged enemy units, you are to march forward and skirmish taking as many of the advancing enemy heavy infantry as possible without making contact. Be sure to remain out of range of enemy Xbows, even if that means that you cannot shoot... You'll have ample time to prove your worth...

    Hugo : Should our spearmen fail to close the gap left by our retreating gunners, I will ride forward to meet the enemy and close the gap.
    No orders from deguerra or Warmaster Horus.

    Umpire notes for Turn 1

    Units failing orders test: Ruppel’s Division 4 (proposed 1 DFK, 2 AS) – new divisions are formed but will not carry orders.

    Not sure how to implement Ruppel’s orders for MCB; they can’t fire at anything on Turn 1. The “if chased retreat back to our lines” bit made me decide to have them advance somewhat. They will be able to fire next turn (only division on the map that may).

    Deguerra and WH did not provide orders. Followed AG’s directions for both. Since deguerra didn’t provide a map I won’t go exactly with AG’s map for his right flank, but it’ll be close (based off verbal orders).

    No orders from Warluster again – Dutch_guy as Tancred will take over Imperial west flank. Since I didn’t specify how many divisions the generals-in-waiting could command, decided to make Tancred his own division (not counting) and keep Athalwolf’s old divisional structure intact (cavalry, DFKs, spearmen, archers).

    Roll for Fritz (needs a six): gets a three.
    Roll for Matthias (needs a six): gets a three.

    Fritz and Matthias will not appear Turn 2. Next turn they will have a 1-in-3 chance at appearing (5-6 good, 1-4 bad).

    Public feedback for Turn 1

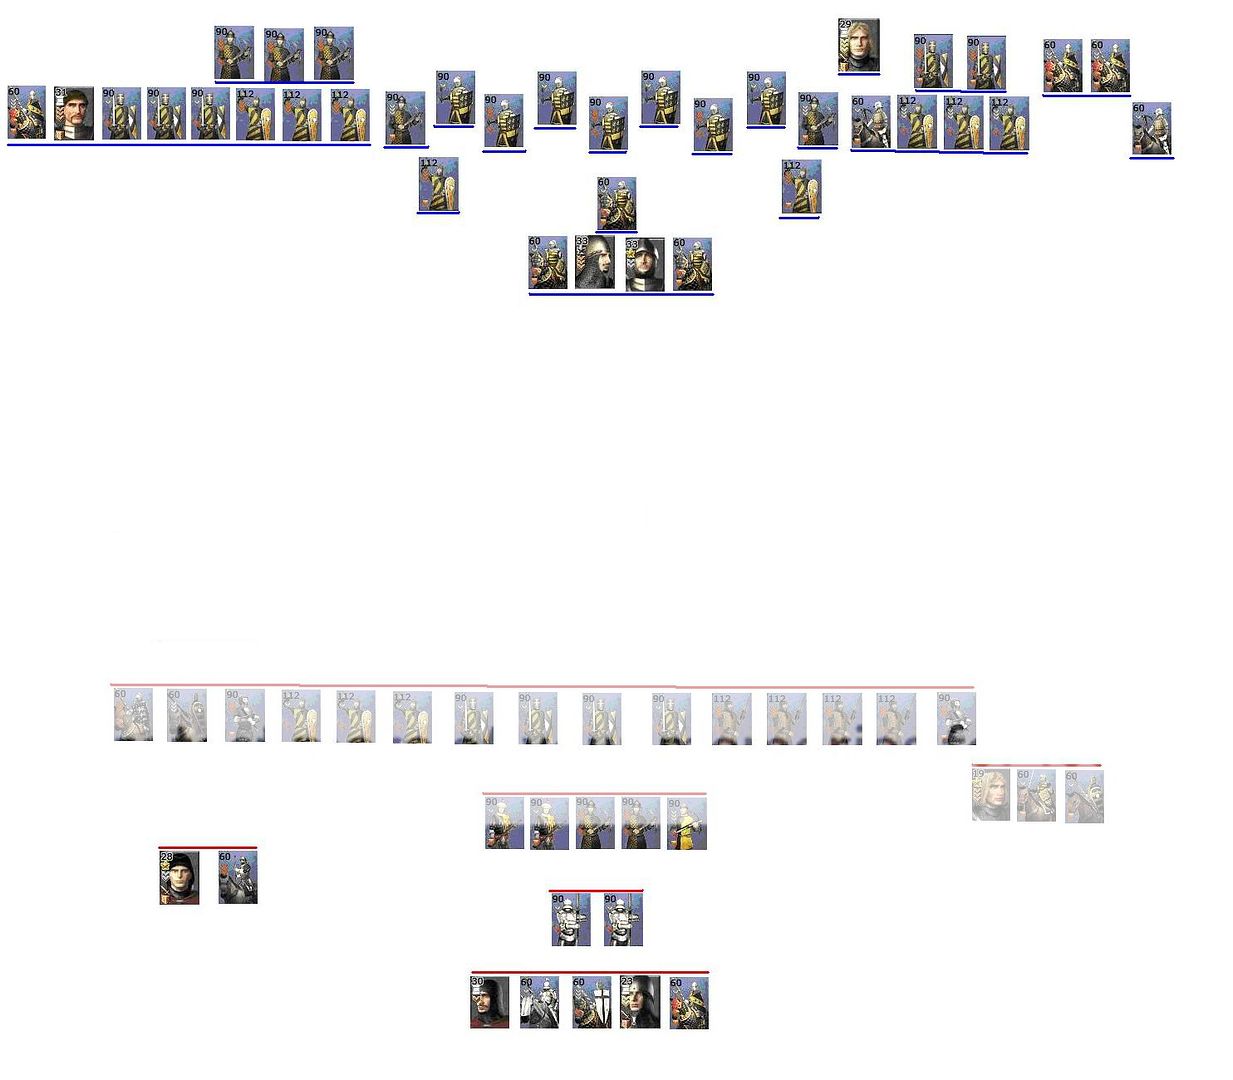
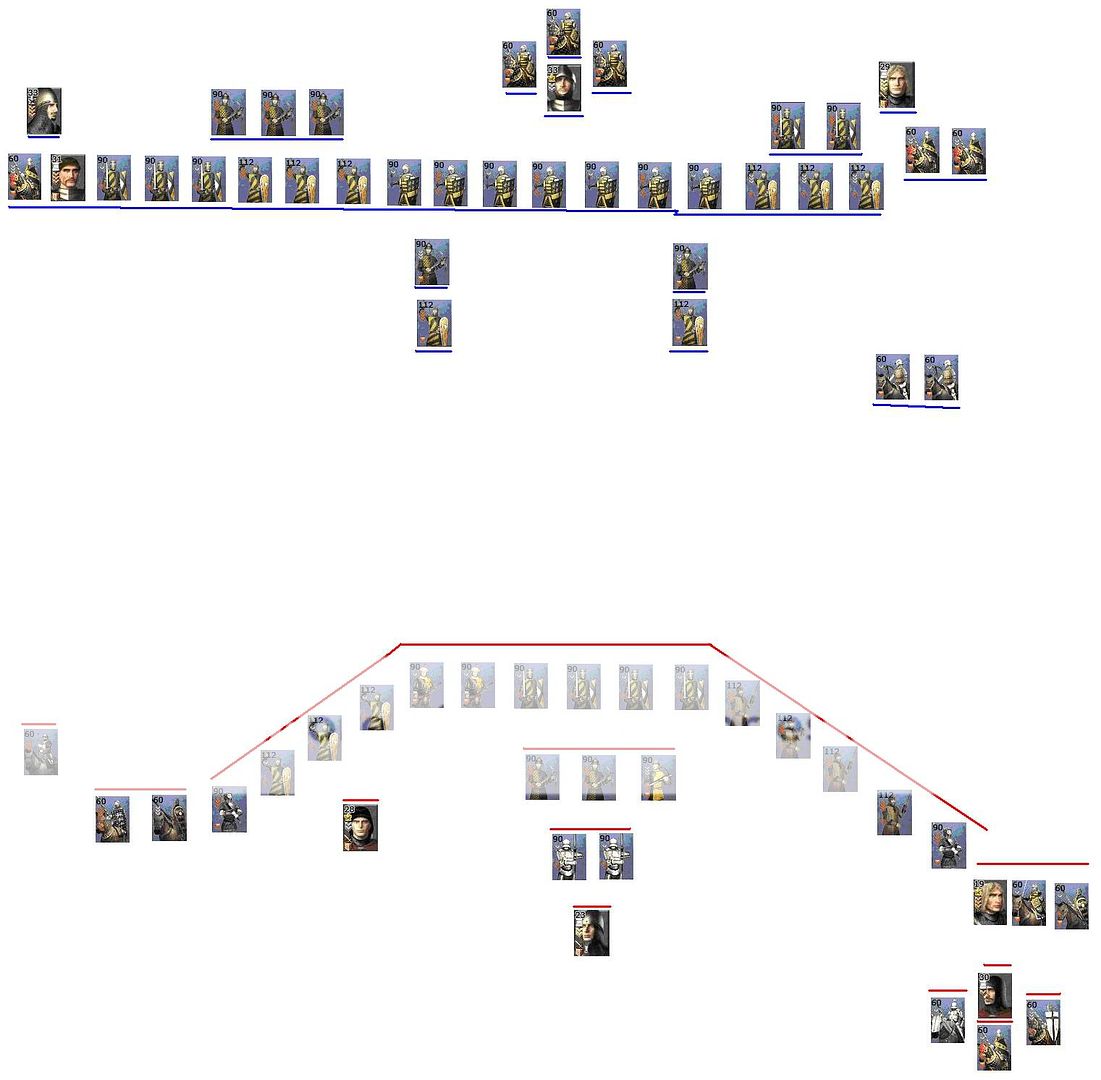
    The Imperial line consolidates somewhat and its Republican counterpart extends. They are now fairly equal in length, Becker observes, although there is still the danger of a flank attack on both sides.

    After the aggressive opening strategy by the Kaiser's men, he cautions somewhat, pulling his cavalry back behind the lines of infantry. Tancred von Tyrolia and his escort detach from the mass and make their way west. Tancred now seems to be involved with Athalwolf von Salza's army in some way; whether he is now its commander or simply buffering up the cavalry on that particular flank remains to be seen.

    The Republican spears and pikes, flanking Duke Arnold's knights, change formation somewhat, now appearing to refuse both flanks. The Arquebusiers move to the front lines. Any advance on that particular position will be met by a hail of gunfire - until they are overwhelmed. Finally, and most notably, Becker can detect a large shift behind Arnold's lines. Bernhard Steffen has taken a significant contingent of cavalry and placed it to the east, significantly buffering Ludwig von Bohmen's flank and threatening Ruppel's. Clearly, the general's reputation has preceded him.

    Speaking of Ruppel, his men have made the only significant forward movement on the battlefield this turn. His two regiments of mounted crossbowmen have detached from his main body of infantry, moving foward and threatening to harass Republican lines. It will be able to fire on several targets next turn, but there is always the possibility that the Republicans will counter and respond.

    Since there was no other significant movement this turn, no contact will be able to be made until Turn 3, aside from engagements that may have to do with Ruppel's mounted crossbowmen. With the Rear Guards about to deploy, Becker supposes that both armies are hunkering down and waiting for the other to make the first move. This may take a little longer than he thought. Becker feels slightly guilty for leaving his family behind, but he must see how this ends.

    Map:


    DEADLINE FOR TURN 2 ORDERS: Sunday March 30th, 12:00 GMT-5. I will be out until later in the afternoon that day, but I expect all orders to be in when I get back.

    The Rear Guards should PM me with their deployment and location on the battlefield this turn. Matthias and Fritz also have a chance of showing up for Turn 2; if either makes it to the field they will receive a PM shortly.
    Last edited by GeneralHankerchief; 04-08-2008 at 01:41.
    "I'm going to die anyway, and therefore have nothing more to do except deliberately annoy Lemur." -Orb, in the chat
    "Lemur. Even if he's innocent, he's a pain; so kill him." -Ignoramus
    "I'm going to need to collect all of the rants about the guilty lemur, and put them in a pretty box with ponies and pink bows. Then I'm going to sprinkle sparkly magic dust on the box, and kiss it." -Lemur
    Mafia: Promoting peace and love since June 2006

    Quote Originally Posted by TosaInu
    At times I read back my own posts [...]. It's not always clear at first glance.


Bookmarks

Posting Permissions

  • You may not post new threads
  • You may not post replies
  • You may not post attachments
  • You may not edit your posts
  •  
Single Sign On provided by vBSSO