Results 1 to 10 of 10

Thread: The Battle of Trent

Threaded View

Previous Post Previous Post   Next Post Next Post
  1. #10
    Illuminated Moderator Pogo Panic Champion, Graveyard Champion, Missle Attack Champion, Ninja Kid Champion, Pop-Up Killer Champion, Ratman Ralph Champion GeneralHankerchief's Avatar
    Join Date
    Mar 2006
    Location
    On a pirate ship
    Posts
    12,546
    Blog Entries
    1

    Default Turn 6 - early afternoon

    Turn 5 feedback

    Turn 5 feedback to the Imperialists

    Quote Originally Posted by GeneralHankerchief
    Feedback to Peter

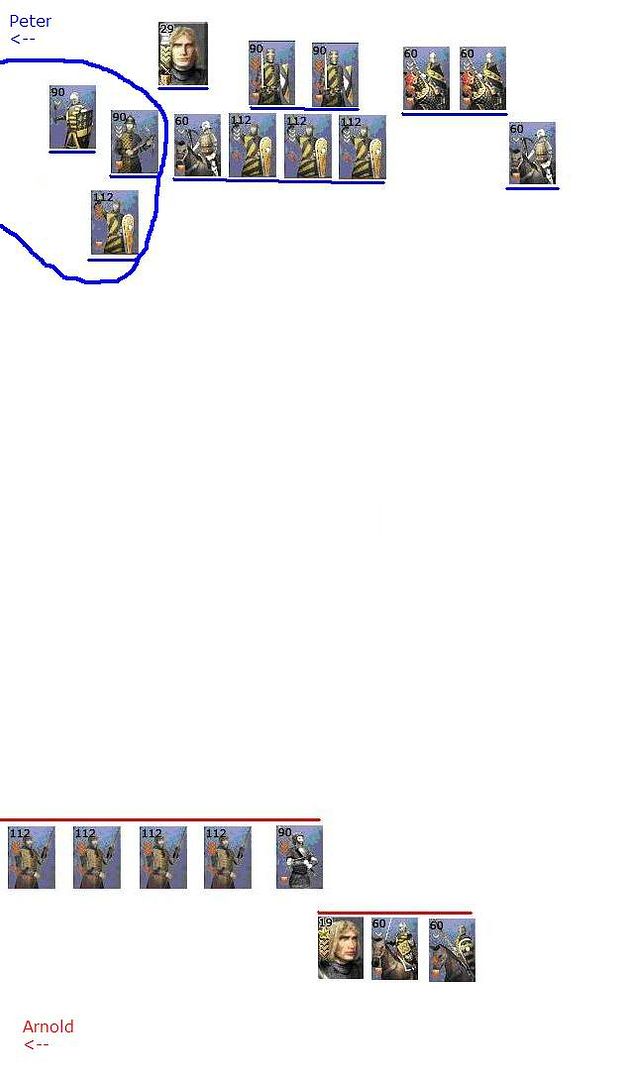
    You are Péter von Kastilien, son of Günther, brother of Ansehelm, Siegfried, and Fritz, Holy Roman Emperor. All your life, you have fought for what you believed was right. Sure, some of these opinions were in contrast with the majority’s belief, such as your arguments against Outremer when the land was in its heyday, or in conflict with each other at points, but you always did the best you could. More importantly, you never abandoned your main priorities: The advancement of your family, your House, and your Reich.

    You watched as the country around you grew and shrank; all the while you were fighting to keep it great, against the Russians, Poles, Hungarians, and whoever else was stupid enough to invade Imperial territory. You wish it could always have been that simple. Unfortunately, it wasn’t.

    The tragedy and the complexity probably began when your brother Siegfried became Kaiser through a freak accident. Everything that man ever did was controversial and contested, beginning with his very ascension to the throne. You supported him, as a good Franconian and loving brother would naturally do. Unfortunately, Siegfried did not reciprocate, as he became infatuated with the Byzantines in general and Theodora specifically.

    He proposed a hare-brained reunification plan that most of the Diet, you included, saw could be catastrophic. Ansehelm and Fritz, your two older siblings, agreed with the majority opinion and did your very best to convince Siegfried to listen to reason. Instead he banned you and made Fritz apologize before he let the man back in. As reunification plans went on and the overall outcome became more and more clear, you and several people realized that they had to take things into your own hands. Deciding that a blunt, direct approach was always effective, you took a large army and drove right for Constantinople. You failed, but Tancred von Tyrolia succeeded. Reunification, however, still dragged on. And then Siegfried died, killed by the Illuminati.

    You now had a new passion in life. For whatever Siegfried had done wrong, he did not deserve to die for it. You were certain that your brothers stood with you on this. Fritz did, as did Ansehelm, at least for a little while before he perished. And so, you began your slow rise to power, again killing the foreign enemies and helping restructure the Reich, but never taking that main goal out of your mind. Neither did Fritz.

    It all came to a head after the new evidence surfaced that Lothar, in fact, did order Siegfried to die. Finally, you had an excuse to act. Finally, there was general outrage. You and Fritz, by this time Chancellor and pretty much second-in-command to you, despite Dieter von Kassel’s official title, declared Lothar and the rest of the Illuminati outlaws. The time had come to strike.

    Instead, the Illuminati turned it all around, blaming you and Fritz for causing tyranny, blasting Fritz’s over-the-top antics as proof, declaring that the Kaisership over and proclaiming the Reich a Republic. Amazingly, it worked, with most of the defectors citing Fritz’s menacing demeanor as the chief reason why they did what they did. Still, you never told him to cool it down, to watch what he was saying. Instead, you were encouraged by his behavior and also ramped up yours. Fritz, of course, took it in stride.

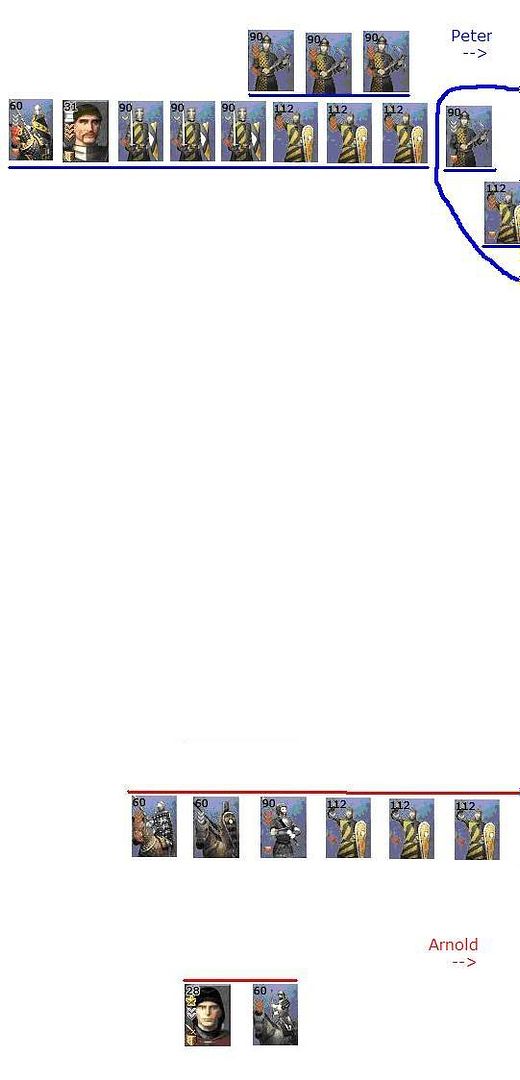
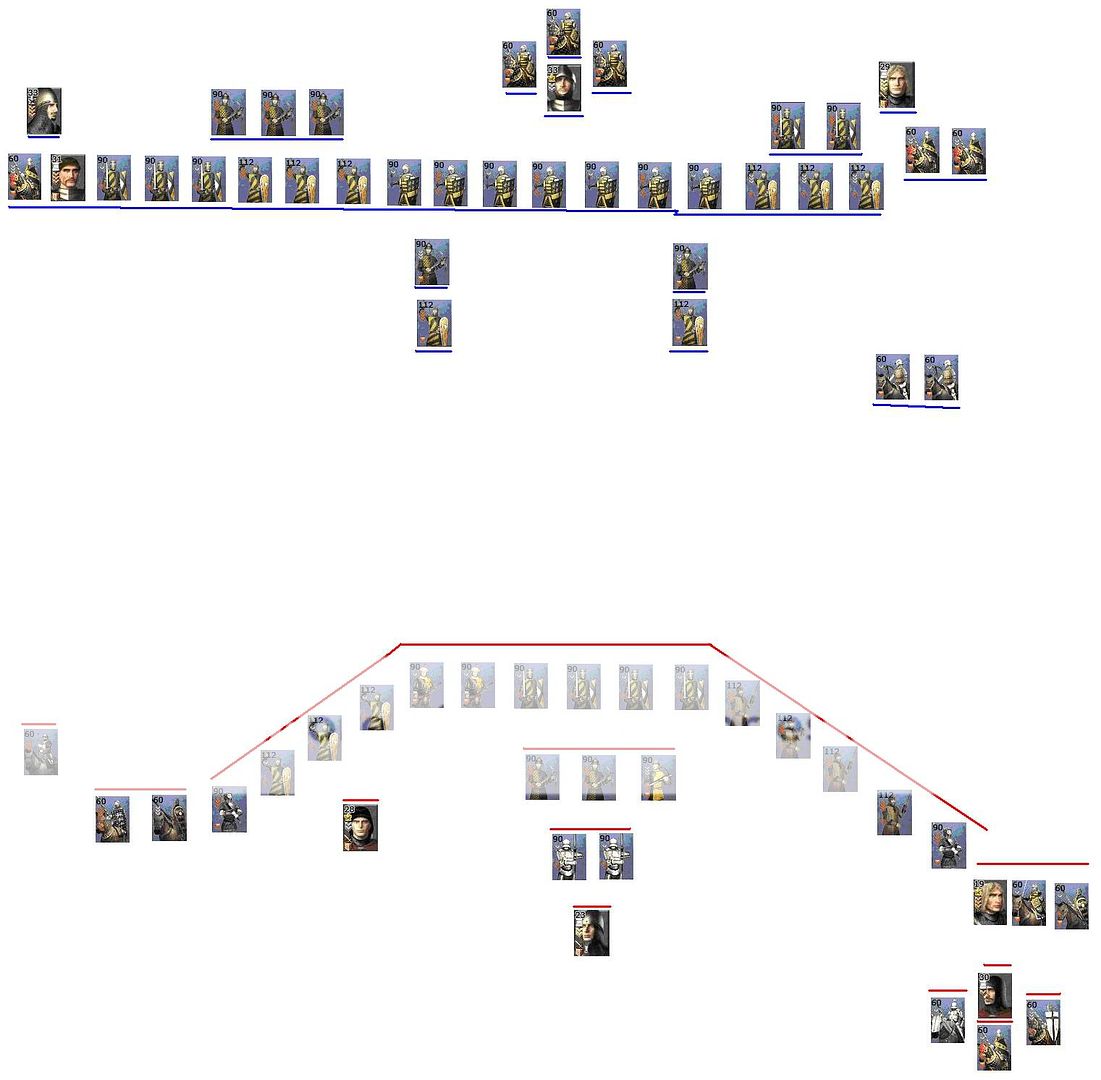
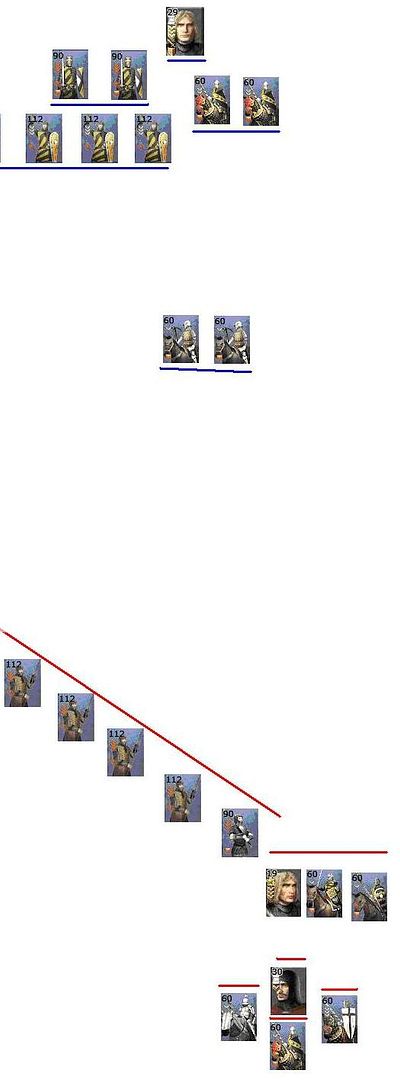
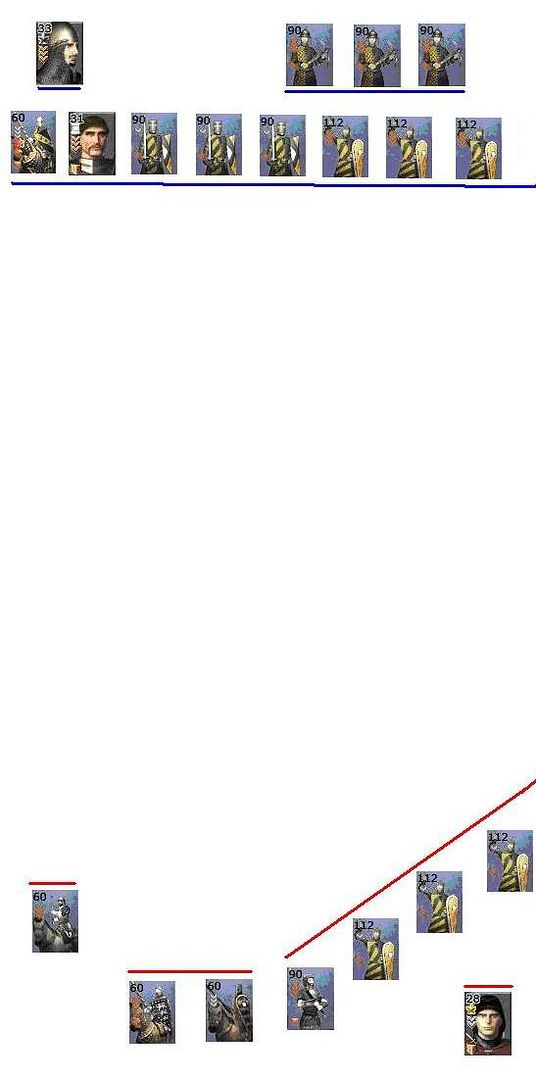
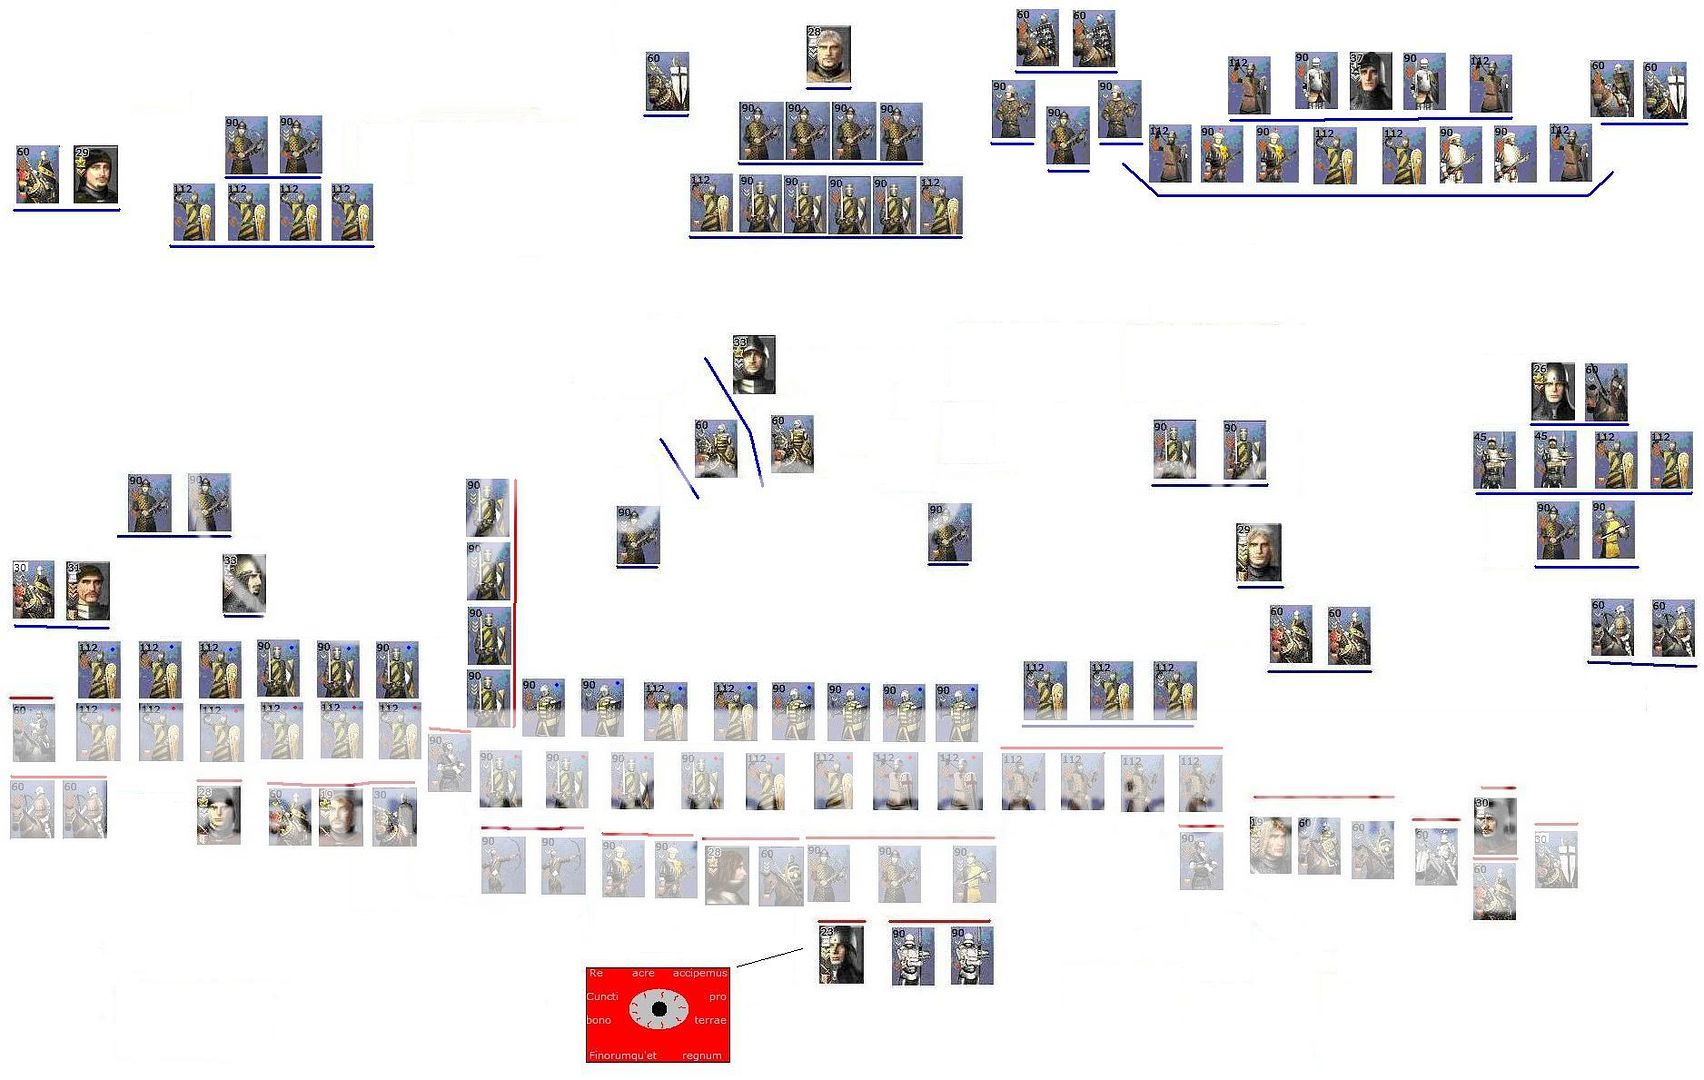
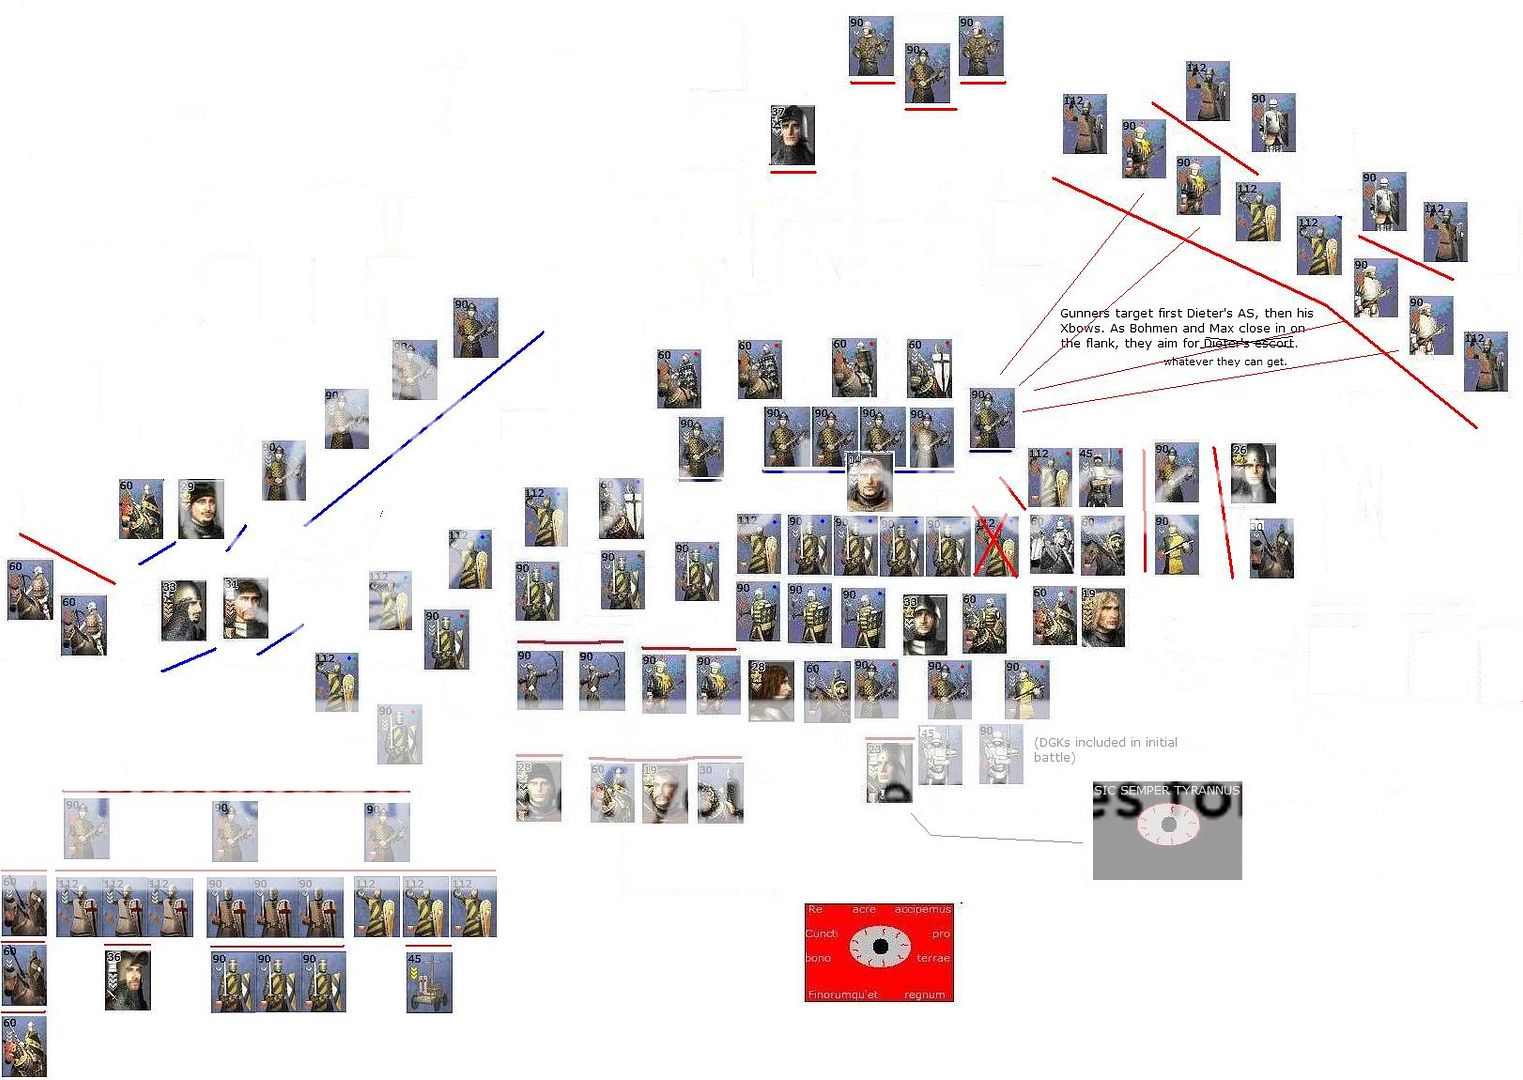
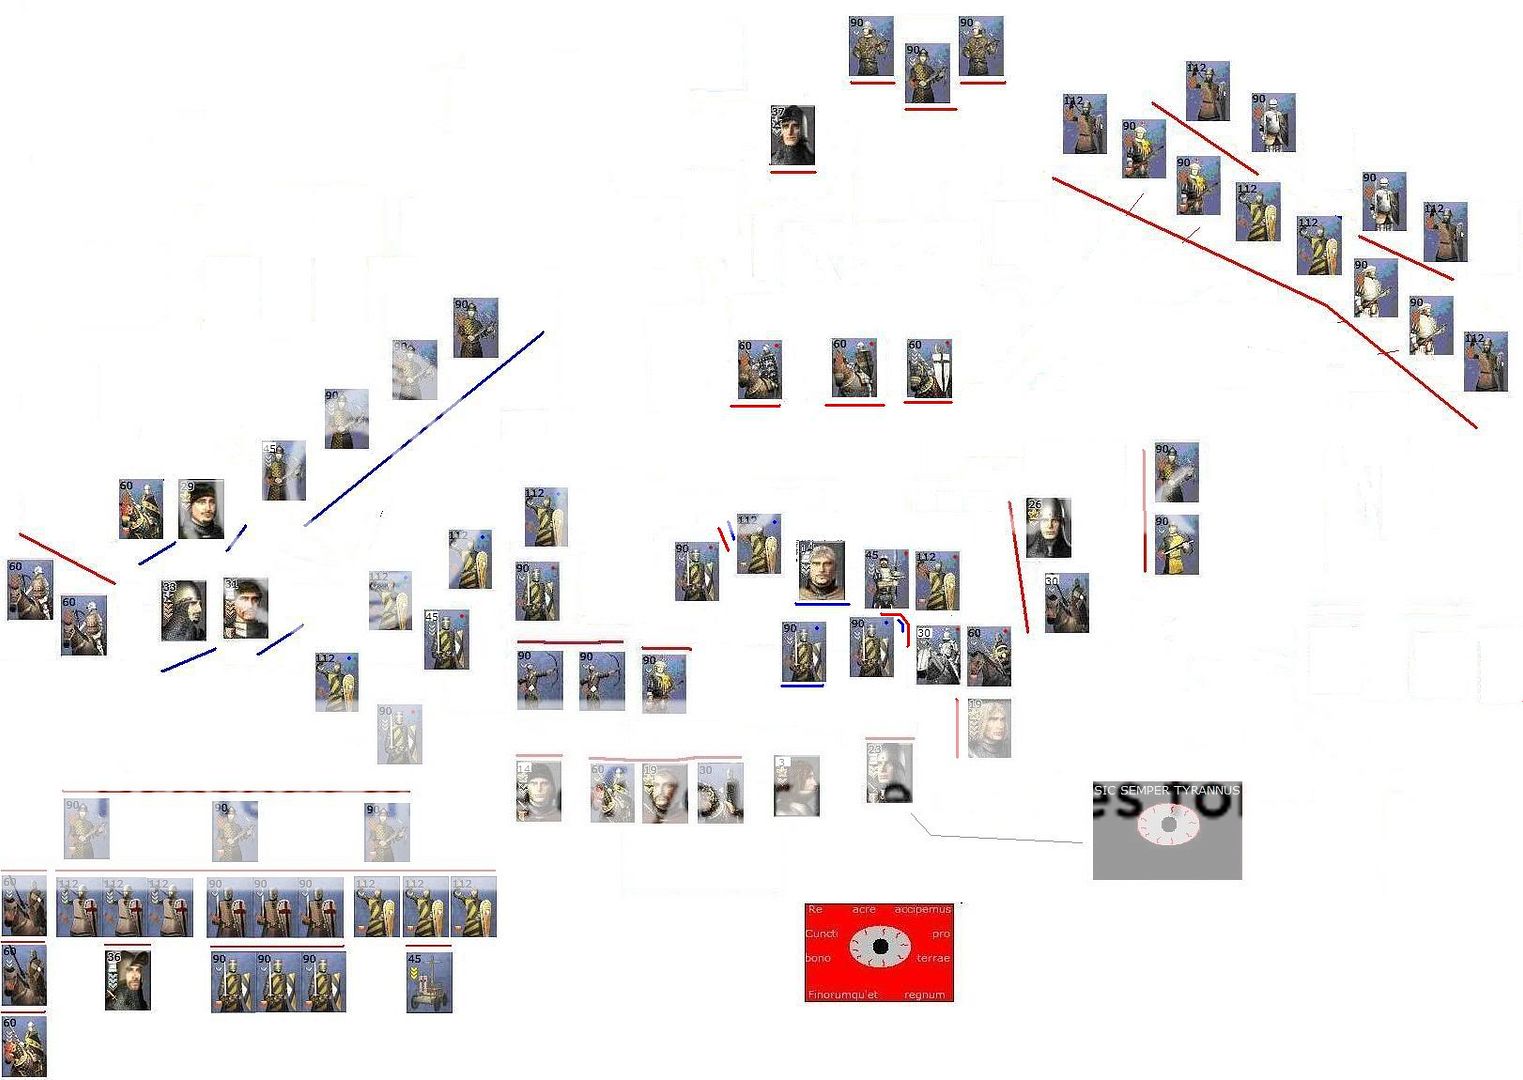
    You found yourself at Trent, finally ready to shape the Reich according to your beliefs, finally ready to rid the world of the evil Illuminati, after all these years. But not all went well. During the first critical moment, with the red flag waving, Max Zirn switched sides and annihilated Ehrhart Ruppel’s flank. You were surprised at this, for treachery was always in the back of your mind, but not too concerned. After all, Fritz, your brother, your last brother alive, your comrade until the end, was up and in a good position to correct the mistake. He would take up the flank and prevent the east from closing in.

    With that in mind, you ordered an all-out charge for the center. It would be the glorious charge you had always hoped for, somehow righting the world. But it was different. Your horsemen were depleted, having participated in two other charges and undergoing heavy missile fire, and Tancred was off commanding in the west. Still you charged, running through Arnold’s crossbowmen whose only objective seemed to be to stand in your way. Still you charged, despite Arnold activating his dismounted Gothic Knights. Still you charged, killing quite a few of the armored terrors, because you knew that righteousness was on your side. Of course you would break through.

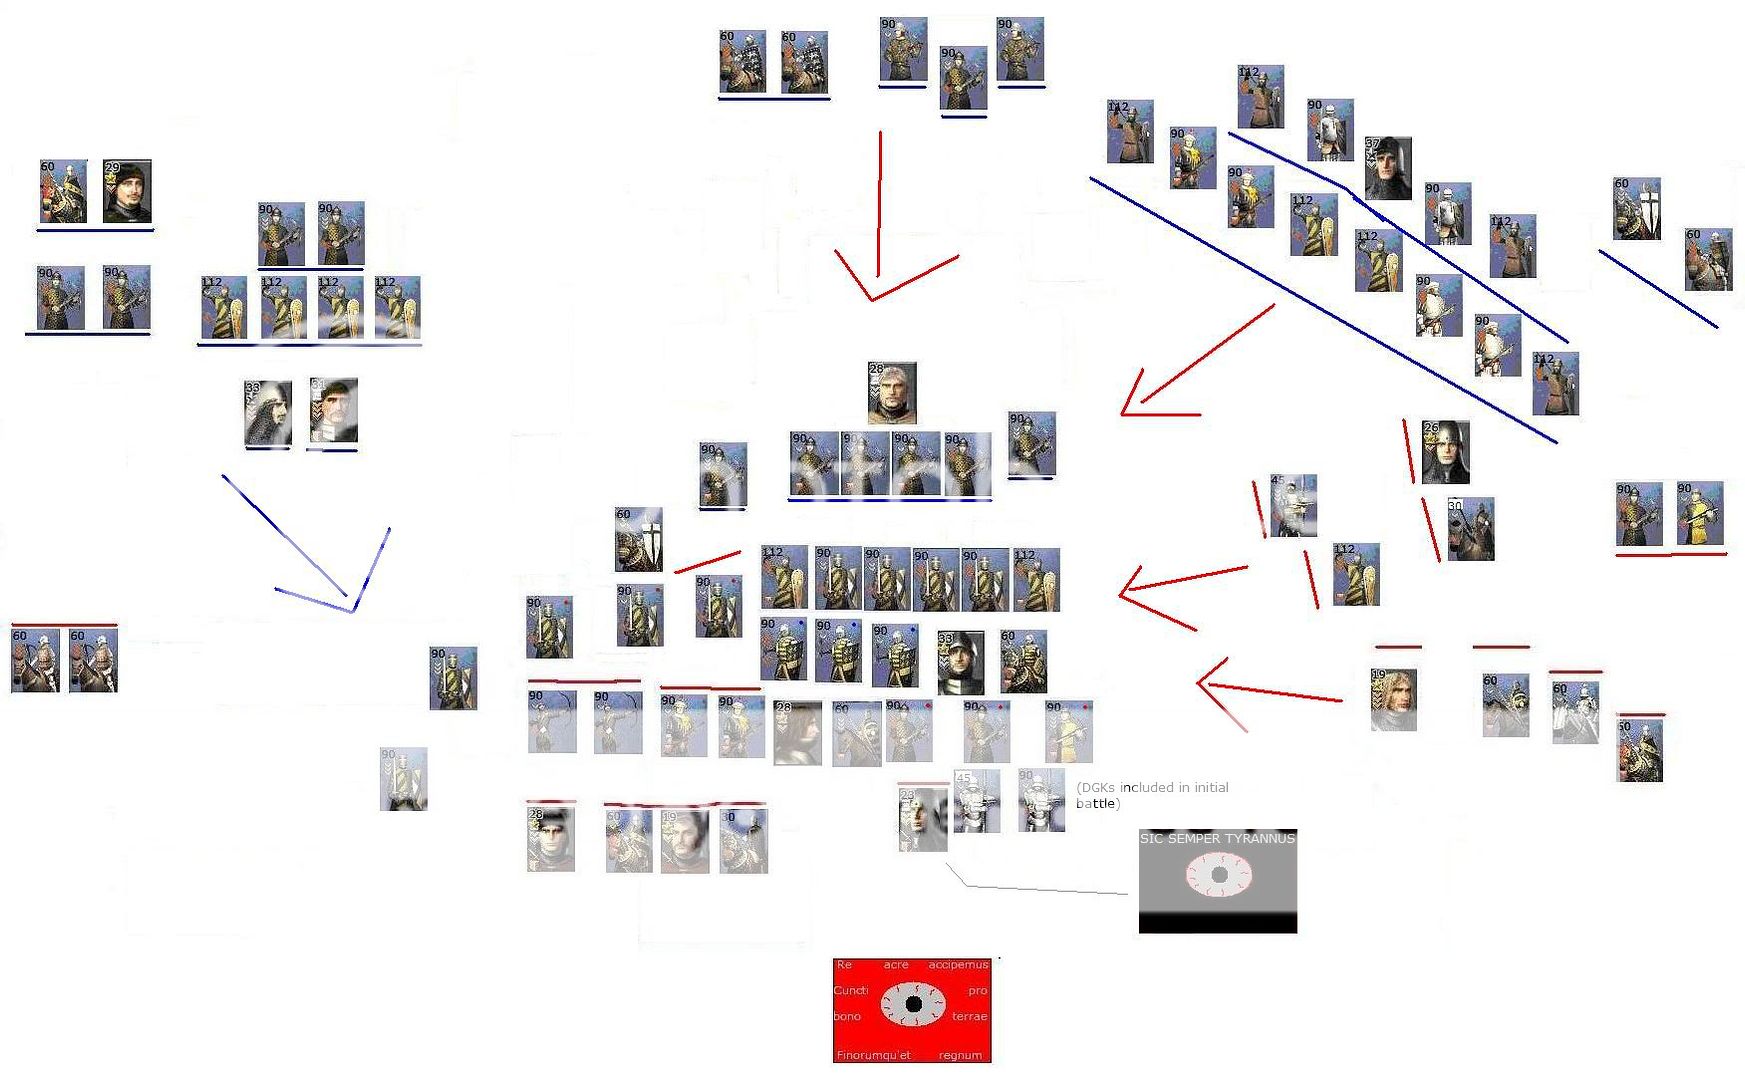
    But what you didn’t notice is that you were the only spot where you were breaking through. To the immediate west, Jan Zirn and his horsemen were giving the same treatment to your remaining Dismounted Imperial Knights, shattering them without any thought to the cost. To the north, Dieter Bresch was closing in around you. Not betraying you, as you suspected, for the black flag was up, but trying to get a shot in at Arnold. And to the east, Ludwig von Bohmen and Max Zirn were closing in, unchecked, ready to roll over your flank.

    You had put everything into the frontal attack, trusting that the flank would be safe. And it wasn’t, for here the Republicans came, the crossbowmen and Gothic Knights just holding on long enough for help to come. And then you looked north while setting up for another charge, with the handful of men left, and you realized why in an instant.

    You saw Fritz’s cavalry charging at Dieter’s unsuspecting crossbowmen, killing them. You saw Fritz’s gunners getting their last shots in at Dieter’s infantry before the flank closed up. You saw Fritz’s infantry simply standing there, doing nothing as the flank closed around them.

    In an instant, you realized it all. Everything. The black flag. It was all a setup, everything. Fritz had always been one of them, playing an elaborate deception game all of these years. He had dawdled getting to the battlefield, maybe not so much as to hire as many mercenaries as he could, but maybe to ensure that he was in the rear and hitting you the hardest.

    How long? How long had the Illuminati been plotting this? Since Lothar revealed himself as a Brother? Since Fritz became Chancellor? Since you became Kaiser? Did they rig the Chancellor election to make it look like an Illuminati loss? Were they the ones who had brought the prisoner the new information? Was Fritz involved in the Siegfried assassination plot? Was he the one that proposed it?

    In the end, it didn’t matter how they did it, only that they did do it. You realized that you had lost the war just by fighting it in the first place.

    As the rest of the horsemen go down around you, you realize it’s just you left. You try to get out, but cannot. Dieter Bresch’s men are all around you, pressed by Max, Ludwig, and of course, Fritz, closing in. You have nowhere left to go.

    In the distance, you see a new body of cavalry coming in, charging right for you. Their lances are drawn, ready to destroy what was left of the breakthrough. As the charge draws closer, you see that it is led by a figure, armored in black obsidian as well as the usual metal. The Grand Master has come to finish the job.

    You wait for the inevitable lance blow to come, to finish the Illuminati’s plan. For while Arnold is about to end your physical life, it’s already over. Fritz von Kastilien has killed you.
    Quote Originally Posted by GeneralHankerchief
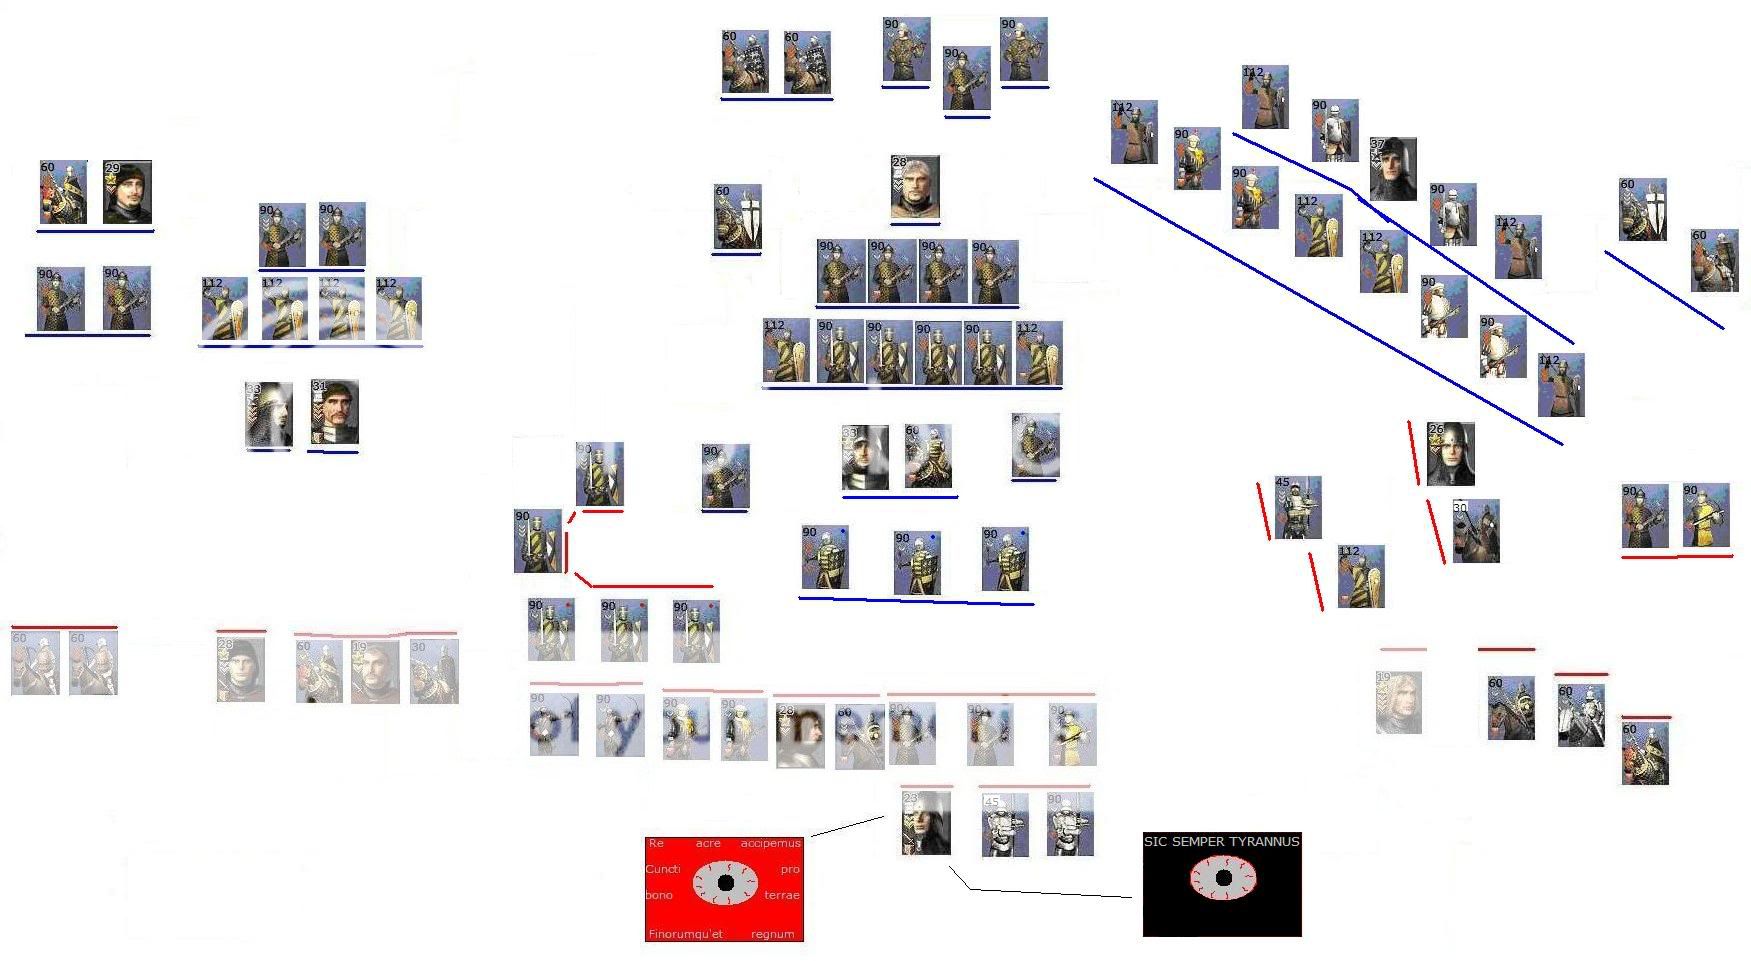
    Feedback to Tancred

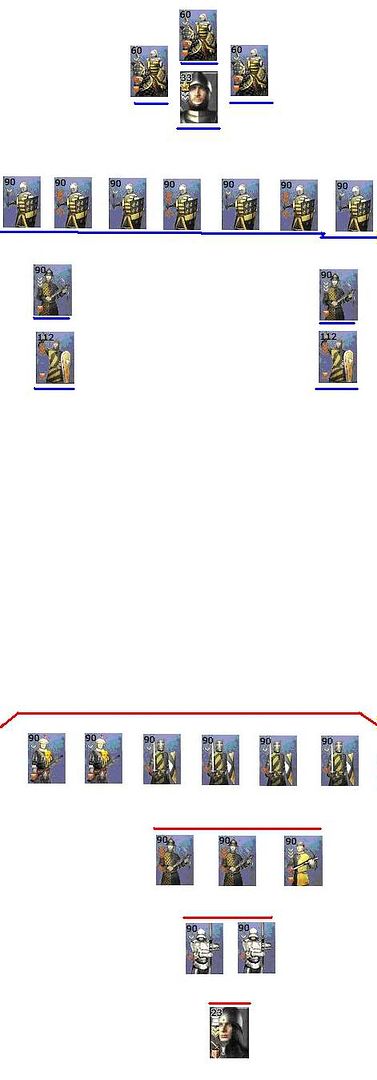
    You try to charge Lothar and Hugo, but cannot as they retreat behind a refused flank of DFKs. Before you can react, Hapsburg's spearmen charge in, engaging the Republican infantry. You have no room to break through.

    You and Athalwolf try to go around the south and flank the line, but cannot. Matthias Steffen has arrived and placed himself in a perfect position. Trying to go that way would be suicidal. Instead, you retreat, spending the rest of the turn chasing away Lothar's mounted crossbowmen. Your archers do some moderate damage against Hugo de Cervole's escort.

    However, to the east, you see that the battle has not gone in your favor. Peter is dead, Fritz turned traitor, much like Max Zirn. You can't believe it. You more than any other Imperial commander have held your own today, but it is for nothing. The battle is lost. You now have some options:

    - Will you surrender, flee, or fight?
    - If you flee, which direction will you flee in (can only pick directions such as north or southeast – nothing more complicated)?
    - If you are captured while fleeing, will you surrender or fight?
    - If you flee, what units will you bring with you?
    Quote Originally Posted by GeneralHankerchief
    Feedback to Bresch

    Abandoning all organization, you order an all-out charge on Arnold's position. Along the way, you notice that half of your escort is dead - the only things that are behind you are Fritz von Kastilien's crossbows. Damn him, he's turned too.

    Once you're in the fray, you realize that this order probably wasn't a good one. You mentioned nothing about guarding the flanks, and even if you did, Fritz's gunners obliterated your best anti-flank unit - your Armoured Sergeants. Your men swirl in trying to get a shot at Arnold, but all they accomplish is giving Peter nowhere to go.

    You take a look to the north: nothing is good. Your crossbowmen have taken a massive cavalry charge to the back, courtesy of Fritz. Your Teutonic Knights have broken through Lothar's refused line of DFKs, but were destroyed in the countercharge.

    Back in the maelstrom, the door has closed. Max Zirn and Ludwig von Bohmen have flanked, pushing in. Your men have nowhere to go and most of them are destroyed. To the south, you see the Kaiser fall at the hands of Duke Arnold himself. You try to reach him, but still cannot - things are that tight.

    The Imperialists have lost the battle, and you are trapped. There are some ways to get out: You could try to flee through the gap your Teutons created, or attempt to just charge Arnold in a "if I go, you're going down with me!"-type attempt. You have two regiments of infantry remaining, one of them engaged. You have some things to decide:

    - Will you surrender, flee, or fight?
    - If you flee, which direction will you flee in (can only pick directions such as north or southeast – nothing more complicated)?
    - If you are captured while fleeing, will you surrender or fight?
    - If you flee, what units will you bring with you?
    Quote Originally Posted by GeneralHankerchief
    Feedback to Hapsburg

    You charge Lothar, but break it off when you see he has retreated behind a line of DFKs. Your spearmen crash into them, beginning an engagement that will not be decided until next turn.

    In the meantime, you try to flank the line, but again have to break it off - more bad news, as Matthias is up. Dammit, the only thing going moderately well is your crossbows are assisting in the effort against the DFKs.

    And, judging by the rest of the battlefield, that's the only thing going moderately well - period. Peter is dead and Fritz has revealed his true colors. Despite your best efforts, you cannot win the battle. You instead must choose from these options. At least you are in a better position than Dieter Bresch.

    - Will you surrender, flee, or fight?
    - If you flee, which direction will you flee in (can only pick directions such as north or southeast – nothing more complicated)?
    - If you are captured while fleeing, will you surrender or fight?
    - If you flee, what units will you bring with you?
    Turn 4 feedback to the Republicans

    Quote Originally Posted by GeneralHankerchief
    Feedback to Arnold

    Peter begins an all-out charge at your position. Your crossbows stand in the way of his cavalry and Jan Zirn and Peter's infantry charge each other. Your Dismounted Gothic Knights try to get to Jan, but cannot at the moment. Instead, they try to hold back the mass of troops coming your way.

    You take your eyes away from this melee for the moment and focus them to the northwest. Your Gunners aren't firing. Again. Damn them.

    Eventually Dieter Bresch's men close in around Peter's cavalry, effectively denying them a way out. Man, those Imperialists really want to get to you. You pray that your infantry holds on long enough for the flankers to arrive, and luckily, they do. However, it is very close.

    Then you see the moment of opportunity: Peter, alone. Dieter's infantry is behind him, but it's all swordsmen and not sergeants. Plus, they're getting creamed on the flank and in the rear. Fritz did his job, you note.

    You yell your final order, to charge. Bane, Grom, the others, who have been with you through everything, do so. Poor Peter doesn't stand a chance. The Kaiser is dead at your hands. Congratulations.

    When the dust clears, the Imperialist troops in the center are all but gone. You have won perhaps the greatest victory of all-time today, equivalent to the ranks of Cannae and Guagemala. You now have a few, glorious options left:

    - If someone surrenders to you, what will you do?
    - If someone flees, will you pursue them, and what units will you use to do so?
    Quote Originally Posted by GeneralHankerchief
    Feedback to Bohmen

    You gather up the remainder of Bernhard's cavalry without much of a problem and begin the charge into Dieter's flank with Max Zirn. As the Republicans informed you, you do not run into a problem. Fritz von Kastilien lets you by.

    As it turns out, the third time is the charm for your rebellious tendencies. You spearhead the hammer blow that ruins any chance the Imperialists have of winning this day or even eking out a draw. Some of your cavalry dies in this effort but this is inevitable as you order them to keep pushing farther and farther in. To the north, you see Fritz's cavalry closing in on Dieter's archers.

    Congratulations, you have won. You now have some things to decide:

    - If someone surrenders to you, what will you do?
    - If someone flees, will you pursue them, and what units will you use to do so?
    Quote Originally Posted by GeneralHankerchief
    Feedback to Hugo

    Not much to report this turn. Your and Lothar's cavalry fall back behind the refused flank. You notice a gap to the north - Dieter's Teutonic Knights have broken through! Along with Lothar, you charge and correct the error.

    A few of your men drop due to archer fire. You have certainly taken the worst losses out of all the Republican forces, but it's all but over. Kaiser Peter is dead, Matthias is up, and Fritz has turned. You now have some things to decide:

    - If someone surrenders to you, what will you do?
    - If someone flees, will you pursue them, and what units will you use to do so?
    Quote Originally Posted by GeneralHankerchief
    Feedback to Lothar

    Well done, Voice. The plan has gone splendidly. Peter is dead. Matthias is up. The Illuminati are victorious.

    You cavalry, along with Hugo de Cervole's, retreated behind the refused line of DFKs, and watch as Maximilian von Hapsburg's spearmen start engaging them. In the one open spot, to the north, Dieter Bresch's Teutonic Knights punched a hole through, but you and Hugo quickly countercharged and destroyed them.

    Far to the west, your Mounted Crossbows were limitedly effective in skirmishing the Imperial foot archers, but spent most of their time being chased around.

    Now, however, you don't have to worry too much. The battle is over. While Bernhard is dead, the Republic is born. You now have several things to decide:

    - If someone surrenders to you, what will you do?
    - If someone flees, will you pursue them, and what units will you use to do so?
    Quote Originally Posted by GeneralHankerchief
    Feedback to Jan

    Peter is gunning for you, sending his remaining infantry against your escort. Luckily, you've ordered to charge against him... and charge, and charge, and charge.

    You know your cavalry tactics well. Against all odds, your inexperienced escort and fairly weak Mailed Knights manage to destroy the most powerful infantry in the Reich. However, not many men can say they did so - you and two other members of your escort are the only ones that survived.

    You look around, and see victory. Peter is dead, Dieter mauled. Matthias is up. Your archers didn't fire again, but it doesn't matter. You are victorious, and you have played a big part in it. You now have some options:

    - If someone surrenders to you, what will you do?
    - If someone flees, will you pursue them, and what units will you use to do so?
    Quote Originally Posted by GeneralHankerchief
    Feedback to Max

    Well done, Max Zirn. You've done it again, proving more valuable to the Republicans than potentially Fritz himself.

    With Fritz definitely not intervening, you and Ludwig von Bohmen are free to wreak havoc on Dieter's flank. While Ludwig's cavalry charges the east, you wrap around to the north, slamming the door. To the immediate west, Fritz's cavalry is busy taking care of the Imperial archers.

    The battle is over, thanks in no small part to your efforts. You now have some things to decide:

    - If someone surrenders to you, what will you do?
    - If someone flees, will you pursue them, and what units will you use to do so?
    Quote Originally Posted by GeneralHankerchief
    Feedback to Matthias

    Your men deploy, are ready to kill... and find the battle over. Curse that stupid Great Cross!

    Nevertheless, you did play a good part in the battle - Hapsburg's and Tancred's cavalry were discouraged from flanking Lothar's line with your men up. In addition, you are now in a very good position to catch them should they flee, if you desire. You now have some options:

    - If someone surrenders to you, what will you do?
    - If someone flees, will you pursue them, and what units will you use to do so?
    Quote Originally Posted by GeneralHankerchief
    Feedback to Fritz

    Ahh, revenge.

    None of your regiments defect or desert - excellent. With that done, it's time to concentrate on your task: destroying Dieter Bresch.

    Your gunners get their shots in, wrecking his Armoured Sergeants and later, his crossbowmen. Your cavalry also assist in that regard, helping trap the general himself. His escort is down to half strength thanks to your crossbow volleys.

    Thanks largely to your reveal, the battle is all but over. You cannot communicate with the Republicans yet, but for the meantime, enjoy the satisfaction of victory. Right now, you have some things to decide:

    - If someone surrenders to you, what will you do?
    - If someone flees, will you pursue them, and what units will you use to do so?
    Orders

    Imperialist orders

    Quote Originally Posted by Dutch_guy
    I read in the OOC thread that you had some suggestions yourself, as to the ending of this battle. Care to share ? I would't want to spoil a potentially better ending than the one I've thought out for me and my troops.

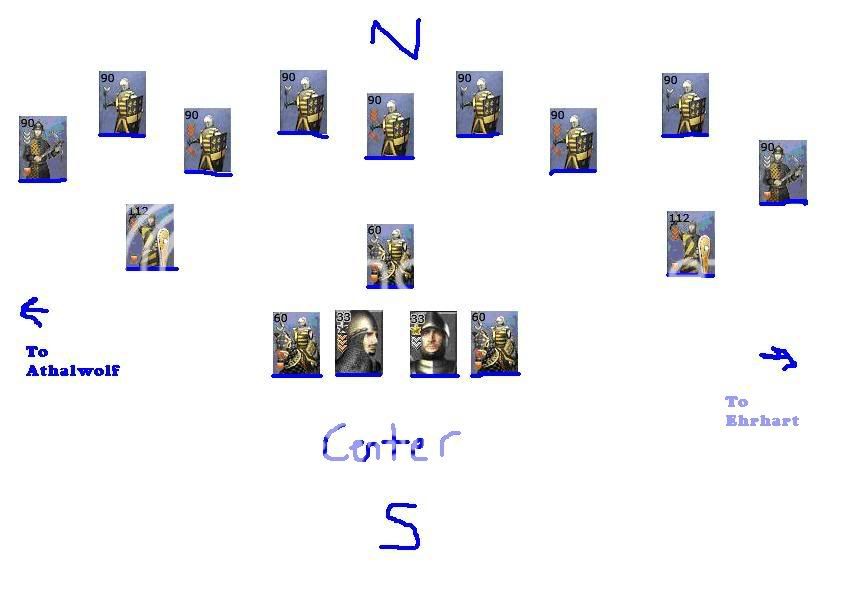
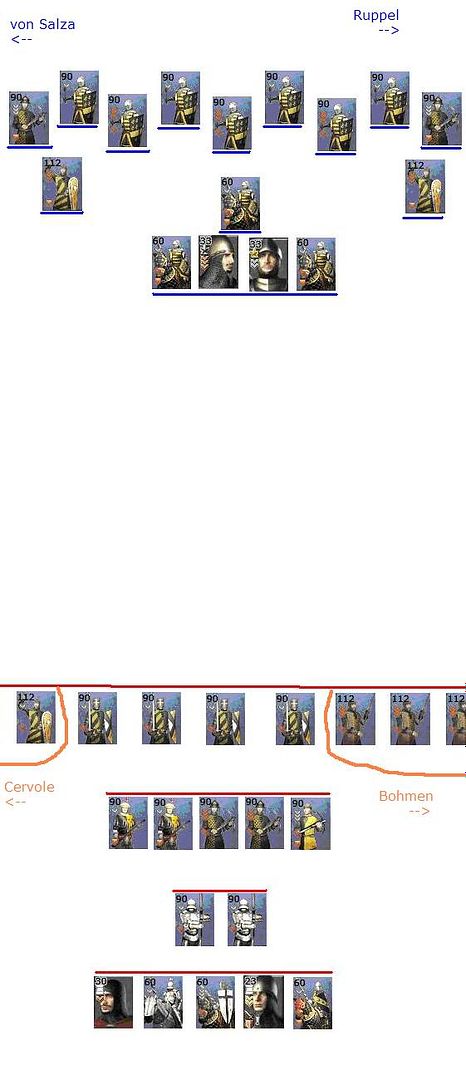
    I'm heading north, and I'm taking von Salza with me. I'm heading towards Fritz (who's standing there all alone, looking just a bit too smug for my liking) in the north. I'm sure von Salza and myself should be able to kill Fritz where he stands. Making it seem like we're running away, off the battlefield, before charging in should make him feel safer than he should - and prevent him from retreating.

    I'm not going to surrender, so if von Salza and I manage to take care of Fritz in the north, we'll charge into the centre to help Bresch. If Bresch has made plans of his own (IE, he retreats) I'm using my cav. force to charge into any illuminati general I can find and damage with a good degree of certainty.

    This plan is under construction,as I haven't heard from Igno yet. If this is all you hear from me before the deadline, then these count as my orders.

    Quote Originally Posted by Elite Ferret
    I will attempt to take Arnold down with me. Tell all my men to fight to the death.
    Quote Originally Posted by Ignoramus
    1.) Flee
    2.) North-west(north away from Fritz).
    3.) Fight
    4.) Hapsburg's escort and the Feudal Knights

    If the Mounted Crossbowmen start shooting at Hapsburg, the Feudal Knights will attempt to drive them off before trying to follow after Hapsburg and his escort.

    Ignoramus.
    Republican orders

    (this section seems to get longer and longer every turn)

    Quote Originally Posted by AussieGiant
    OOC: To GH and all Republican General minus Fritz.

    IC:

    My Lords!!

    The battle is not yet over here are the overall commands.

    Ludwig, Max;

    Press on the right flank there if you would and keep yourself alive gentlemen. Ludwig charge with the remainder of your cavalry.

    Max send in the infantry and support with your cavalry as the situation presents itself.

    Jan (and Arnold specific): Jan for the love of God! Retire with me towards the rear and stay alive. I'm not interested in giving Bresch any satisfaction. The Kaiser is down and that is enough blood for me. Send your Archers into the flank of those DFK and my gunners will follow. Then I'll hit them in the flank once for good measure and then retire to your position. I have no wish to give Bresch the satisfaction of a moral victory at my demise. (Same as TC's orders. If Arnold's life is in danger get out of the situation Pronto).

    Hugo, Lothar;

    Hugo you've done enough withdraw south.

    Lothar if you would be so kind as to slam your Cav Div into that DFK regiment. Feel free to pursue the Imperial General's as the opportunity presents itself.

    Viceroy:

    A general forward advance if you would. Bring yourself to bare on the left flank and push on them for a resolution.

    MY LORDS!!

    A general order for you all!!

    If any German noble or solider surrenders then by GOD I want you all to honour it!! If they've had enough them let them do the right thing!

    BUT if any of them continue to fight or flee then go after them!! Give quarter if they ask for it...and if they don't, then you all know what to do!!
    Quote Originally Posted by deguerra
    Anyone who surrenders is to be taken prisoner but treated honourably and protected from any who might seek to kill him.

    Anyone who flees is to be pursued by my cavalry, and either taken prisoner or cut down.
    Quote Originally Posted by deguerra
    Just wanted to add movement-specific orders:

    My cavalry is to continue to charge the DFKs of Peters on the right side. Should they break, chasing down Peter is priority number one. However, if faced with overwhelming odds, Ludwig should run rather than charge suicidally.
    (assumed Peter meant Dieter, as Peter is dead.)

    Quote Originally Posted by Tristan de Castelreng
    Hughes de Cervole :

    Taking profit of Viceroy Steffen's arrival, I will cross the western flank of the battlefield between (or behind Matthias' lines) and assume command of the Mounted Xbows with whom I intend to capture or kill (if he so desires) Von Hapsburg.

    If Hapsburg cannot be reached then either Tyrolia or Von Salza will be prime targets with the same terms of surrender or death.
    Quote Originally Posted by TinCow
    Accept any surrender that is offered and spare their life. At least for now.

    If anyone flees, chase after them with all available cavalry. However, I will not take any risks with my own life to capture a fleeing Imperial. If an enemy unit cannot be circumvented or overcome with ease, I will break off the pursuit.
    Quote Originally Posted by Northnovas
    I will let Fritz handle the rest of the work. I will accept all surrenders and will not chase anybody fleeing.
    Quote Originally Posted by Northnovas
    Gh, Surrendering is the same but will follow up on AG's request from his last general orders just received. Tks,
    Quote Originally Posted by Zim
    Guess this might be the last time we do this...

    Archers: Tight formation, skirmish off, full charge at the Dismounted Feudal Knights threatening Jan and Arnold. If Bresch tried to charge through and the can stop him they should. If Bresch and the Dismounted Knights get stuck in melee with other Republican forces the archers should shoot fire arrows into the rear of the Imperial units.

    Jan: Jan and his mighty 2 bodyguards should pull back along with Arnold. In the event of pursuit that can't be shaken off he'll try to stick with Arnold. Should Arnold decide to charge, Jan will retreat to the nearest safe, Republican controlled section of the battlefield (possibly towards his brother, or Matthias). After being reduced this far I think the time for heroics is over.

    I can ask TC to do a map for me if neccessary.
    Quote Originally Posted by Zim
    But on the off chance any Imperial makes it to Jan and surrenders to his might 3 man host, he would accept.
    Quote Originally Posted by OverKnight
    GH,

    Matt will continue fighting until given an order to stop.

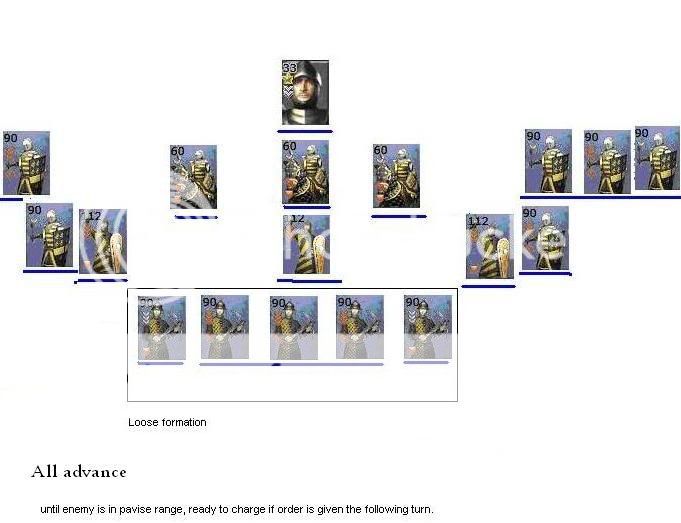
    The Pavise Crossbowmen will advance until within range of the remainig BGs (if not there already) and concentrate fire on them.

    The Infantry will move up behind them and will take position in front of them if they are charged. This includes the GC, though if the inf has to sprint to take up position in front, it can be left behind.

    The cavalry, joined by Matthias, will move to the position close by the mounted CBs. If the Imps haven't surrendered yet, the Cav will charge in. I hope the CBs can get some shots in before the cav is in position, but the empasis is speed once, Matt wants to sweep in and finish the job before the remaining Royalists go to ground. If they flee the cav will pursue as well.

    Once the cav have made contact with the Imperials, the Pavis CB are to break off fire and the infantry is to charge into the fray. If the Imps flee before the Infantry can come to grips, they are to flank and engage the remaining Imperial spearmen to the east.

    I would also like to send a messenger to Arnold requesting that the mounted CBs, due to their speed, be used to chase any noblemen if they flee. If the Imps don't flee, I'd appreciate if they continue skirmishing.

    Overall, the capture or death of the remaing Royalist commanders is the overarching goal here. If Tancred von Tyrolia or Athalwolf von Salza surrender, they are to be taken prisoner. If Maximillian von Hapsburg is taken alive, he is to be immediately bundled off to Arnold with Matt's compliments. Imperial soldiers are to be captured as well, if it doesn't interfere with the above.

    I can doodle this on a map if needed, let me know.

    Great job on the battle,

    OK
    Quote Originally Posted by Ramses II CP
    (OOC: Can you tell it was hard for me to believe none of them were going to flip. I was so sure at least one of them would crack and throw chaos into my whole line. )

    Spoiler Alert, click show to read: 


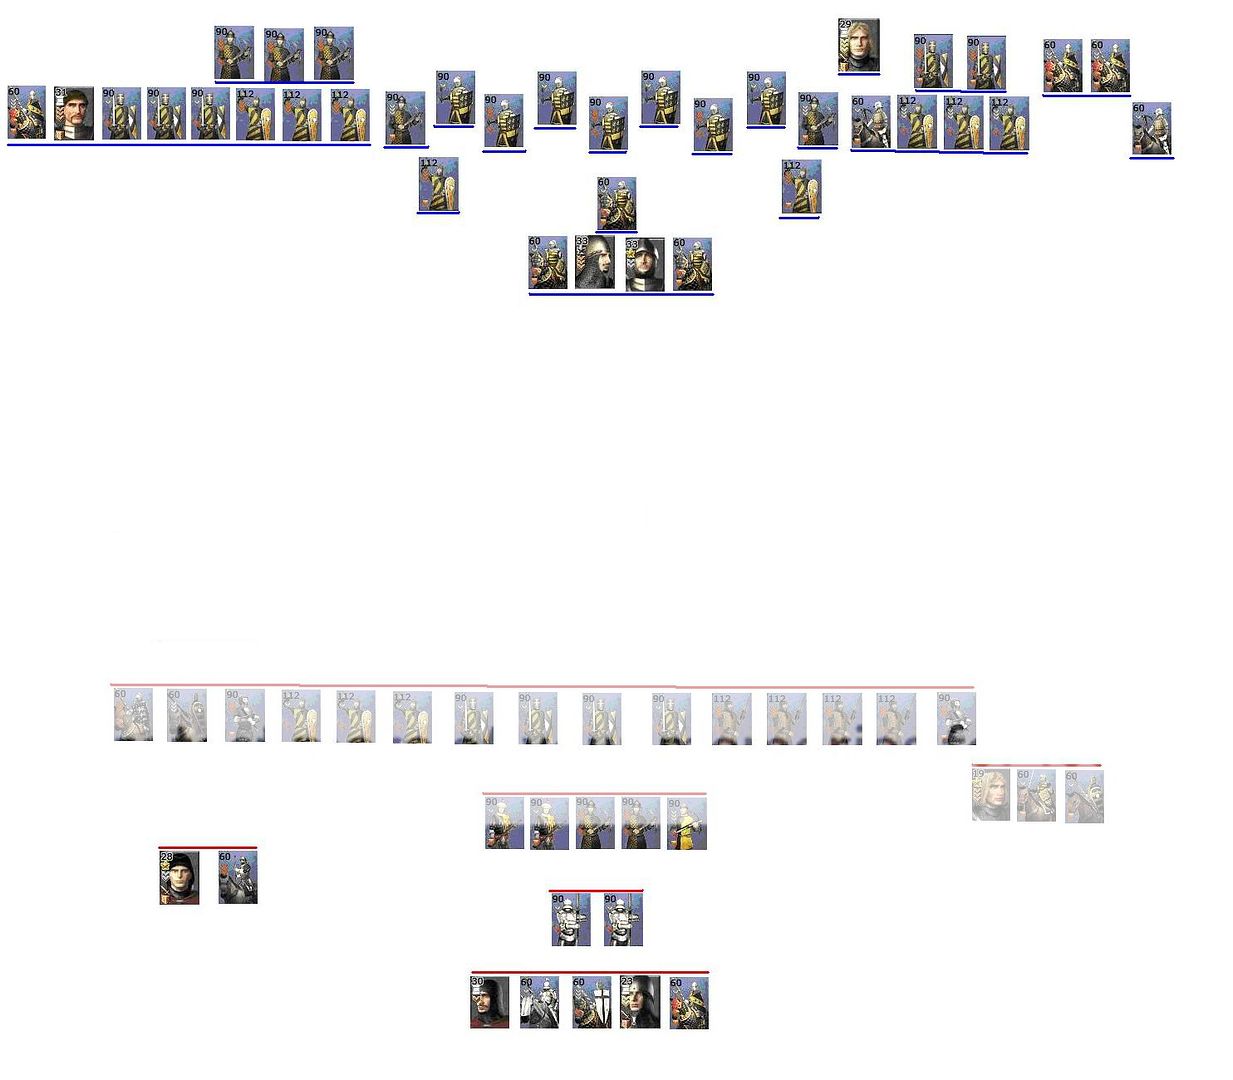
    Orders to all divisions: No Imperial troops are to be allowed to escape this field today. Not a single one if it can be helped, even if the line has to be spread very thinly indeed due to failure of orders or similar. Press your men to the max to accomplish this goal and you will be greatly rewarded. Any soldier or noble who surrenders is to be disarmed and treated with respect except for Dieter Bresch, who should be executed immediately if taken. The company which kills Dieter Bresch will have it's pay tripled.

    Division 1, Fritz and HQ, are to execute a charge against the nearest end of the Pavise Crossbowmen line of Hapsburg. Fritz should sweep through the first company to reach the second and then remain in melee with them unless threatened by spearmen, in which case he is to withdraw east and await the support of his infantry. If all of the crossbowmen rout or are killed Fritz is to engage in general pursuit of Imperial nobles, with priority of targets being Dieter Bresch, Hapsburg, von Salza, and von Tyrolia. If Tancred von Tyrolia or Athawolf von Salza surrender to Fritz they are to be disarmed and held safely clear of the melee. If von Hapsburg surrenders to Fritz he and his men are to be disarmed and if a safe moment presents itself Hapsburg himself should be executed. If Dieter Bresch surrenders to Fritz he is to be disarmed and executed immediately. Fritz should not leave the field to pursue routers who are escaping and should call for support if outnumbered in a melee.

    Division 2, the infantry, are to break formation, spearmen staying on guard mode, and attempt at a run to extend a wide, thing line in coordination with the gunners and crossbowmen across the entire west end of the field to capture routers and fleeing soldiers. All companies are charged to respect the surrender of any Imperial soldiers except for the personage of Dieter Bresch, who should be executed on capture. If during the extension of the line the infantry should note friendly forces engaged in a battle against strong odds the nearest single company should break off the line and move to aid them while the remainder extend the line to cover the gap. Priority of orders is thus: Prevent friendly companies, especially HQ who may call for support, from being overwhelmed, hold northern line, capture and execute Dieter Bresch if he flees north, prevent any Imperials from escaping the field. Unless there are no Imperial nobles left in the south none of the infantry should leave the field in pursuit of escaping enemies, if there are none left south all should turn to pursue as far north as necessary, choosing targets based on nearness. (Specifically the line should be 2 deep for all companies so as to stretch it as far as possible)

    Division 3, the gunners, are to stow their guns, turn off skirmish, turn on loose line, and draw swords. There will be no more firing today. All men should move at a run to extend the line in the north to capture routers and prevent any Imperial flight. Gunners will take the central position extending all the way to the east spread as wide and thin as possible. Surrender is to be respected except in the case of Dieter Bresch, who should be disarmed and executed immediately if captured. Unless there are no Imperial nobles left in the south none of the gunners should leave the field in pursuit of escaping enemies, if there are none left south all should turn to pursue as far north as necessary. (Their line should be 2 deep, and with loose on they should cover quite a lot of distance. The east won't be as well covered because there are simply no Imperials left in the east.)

    Division 4, the crossbowmen, will stow their crossbows, draw swords, all turn off skirmish/guard mode and move at a run to anchor the most north-westerly corner of the wide, thing line across the rear of the field. There will be no more firing today. These men must extend their lines all the way from the west edge of the field back to where they will meet the infantry in the center/west. Surrender is to be respected except in the case of Dieter Bresch, who should be disarmed and executed immediately if captured. Unless there are no Imperial nobles left in the south none of the crossbowmen should leave the field in pursuit of escaping enemies, if there are none left south all should turn to pursue as far north as necessary. (Their lines should be ~3 deep and very wide, but without loose formation on.)

    Division 5, the Teutons, are ordered in the strongest possible terms to charge and kill Dieter Bresch at all costs. If he flees, they should pursue to the ends of the earth if necessary, ignoring all other enemy forces. If Duke Dieter surrenders or is otherwise taken he should be disarmed and executed at once. If Dieter surrenders to a non-noble company of Republicans not in Fritz's own force the Teutons should attempt to insist that the prisoner is theirs, even to the extent of being threatening or imposing, but under no circumstances are to resort to force to claim him. Republican nobles should obviously not be threatened, but the Teutons should request the prisoner from them in the name of Fritz von Kastilien of the Illuminati Deiter is the sole priority of the Teutons, only in the event of his death should they consider any pursuit of other Imperial soldiers.

    Division 6, the middle mercenary knights, should move at a run towards the northwest, hooking around the Imperial Pavisemen and avoid entanglements to attempt to capture Max von Hapsburg. He is their sole priority, only if they can be certain of his death or capture should they attempt to pursue other routers. Pursuit beyond the boundries of the field is authorized. If somehow they should encounter Dieter Bresch he is to be executed immediately.

    Division 7, the western most mercenary knights, are to charge the third Imperial pavise crossbowmen, counting from the northeast edge, sweep through them and take up pursuit of any fleeing Imperial nobles in range. Priority of targets is Hapsburg, von Salza, von Tyrolia. If the other mercenary knights or Teutons should be encoutered they should be aided in their pursuit.

    Umpire notes for Turn 6

    Didn’t bother doing the orders test for anybody except Fritz and Matthias, and the mounted Xbows due to distance. Really, I wasn’t expecting to have to work this turn, but apparently the Imperialists wanted to go out kicking and screaming.

    Units failing orders test: Fritz’s gunners, Lothar’s Xbows (Lmao, Hapsburg might just get away). Two of Fritz’s cavalry off engaging to the west pass a second orders test when Fritz calls for support.

    Combat resolution:

    Center:
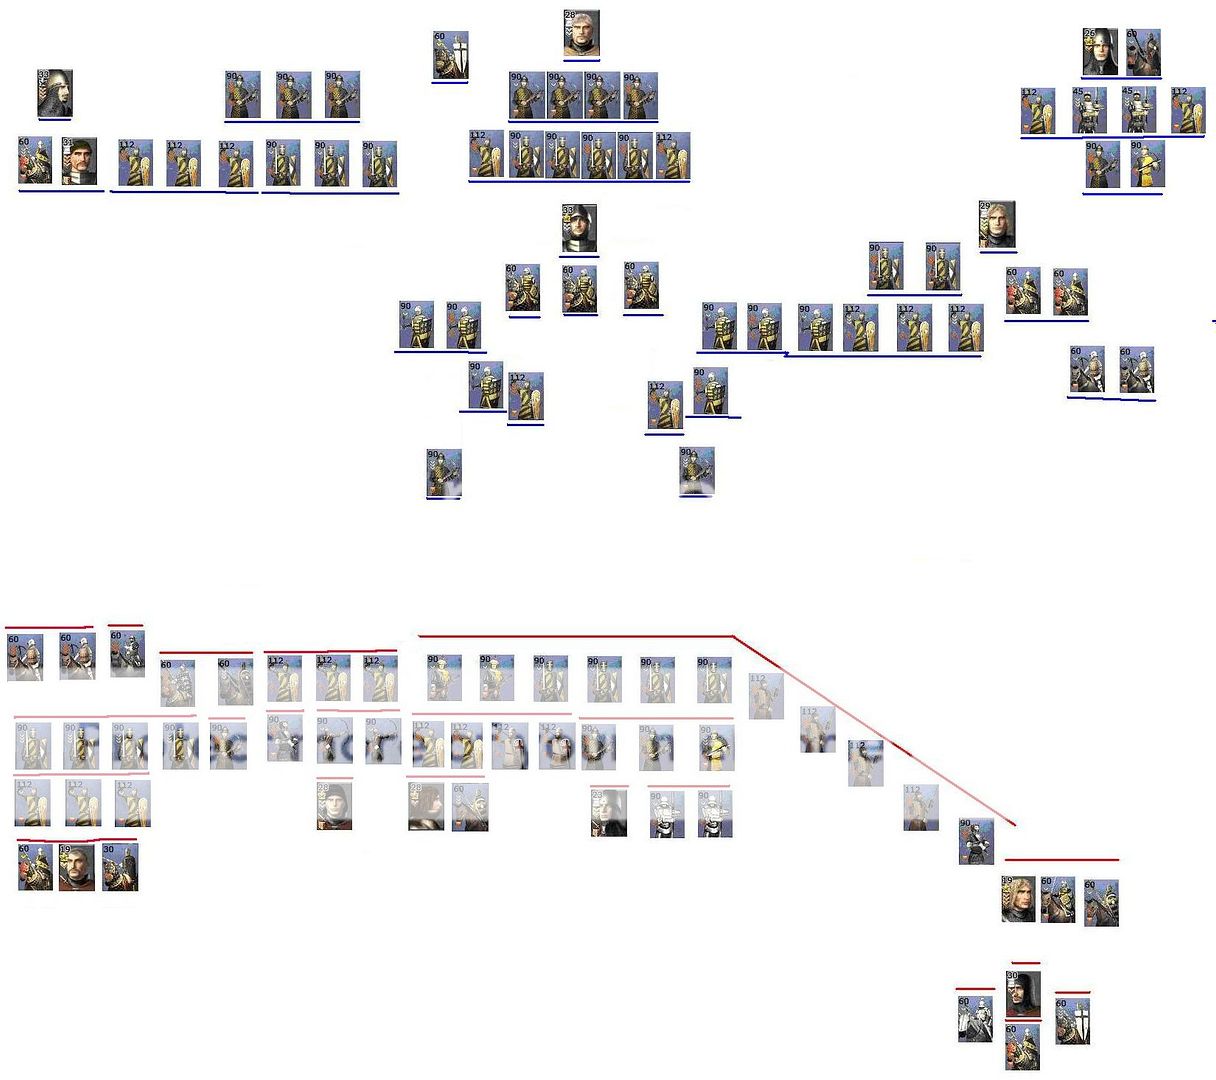
    Bresch and his free unit of DFKs charge Arnold. The DFKs get bogged down by Jan’s archers and Arnold’s gunners and are destroyed in Ludwig’s charge. That leaves the two escorts. Simple math and unit experience take over (Arnold has 2 gold chevrons and the weapon/armor. Dieter has 2 silver and neither). Dieter dies.

    West:
    Hapsburg and his FKs make a beeline for it. With the mounted Xbows inactive, Matthias and anybody else can’t catch him. Hapsburg escapes. Ignoramus survived due to a roll of the die. It finally did something good! His spears were still fighting. Decided to just have them surrender with a Matthias assault on its way.

    Northwest:
    Fritz charges the Xbows. Tancred and Athalwolf countercharge, putting Fritz in danger. He calls for help and the other two merc cav units arrive after some time. The question is: soon enough? Simulated both sides one last time. As Fritz, he died shortly after Tancred/Athalwolf arrived. As Tancred/Athalwolf, Tancred died pretty early on and Fritz survived. Either way, Fritz’s men won. Flipped a coin (a real one, just for the heck of it) to determine Fritz’s fate. Heads, he lives. Tails, he dies.

    Tails it is.

    Public feedback for Turn 6

    The Imperialist resistance, although weak after the twin treacheries, is still fierce.

    In the center, Dieter Bresch continues his effort to get at Arnold, dragging his one free infantry unit and what remains of his escort south, still fighting to the very end. That one infantry regiment is quickly pinned by Jan Zirn's archers and Arnold's gunners and charged once again by Ludwig von Bohmen's cavalry, still frightfully effective.

    Dieter breaks through, facing a withdrawing Arnold and Jan Zirn. Arnold turns and sees his opposition, almost sighing in disgust. He looks to the north. Fritz von Kastilien's Teutonic Knights are coming, but not quickly enough. Arnold orders his escort to charge and, outnumbering his enemy 2:1, kills another Franconian noble.

    The remainder of the action is to the west. Maximilian von Hapsburg's spearmen, locked in combat with the Republican foot knights, surrender when they see their general running off and Matthias Steffen's men closing in from the rear. Hapsburg himself packs up and flees to the northwest, evading both Matthias's cavalry and Fritz's screen of men to the north.

    His archers, however, remain and are mercilessly charged by Fritz and his mercenary cavalry. They pin Fritz long enough for the two remaining Imperialist generals, Tancred von Tyrolia and Athalwolf von Salza, to make their move. Abandoning the appearance of fleeing to the north and turning around, they hit Fritz's escort from the rear.

    Fritz, sensing danger, quickly calls in his cavalry for assistance, but the fight is on. For a little while, Tancred and Athalwolf have both the numbers and the position. Fritz's cavalry arrives, but still the Imperialists continue their fight. Clearly, there is no surrender in the generals.

    His men being hacked down all around him, Athalwolf going down a little ways off, Tancred rides directly at Fritz, surprising the Franconian traitor with his ferocity and plunging his sword into the weak point of Fritz's armor. The revenge completed, Tancred realizes and embraces his fate, but not before taking down a few more Republican cavalry.

    With all remaining Imperialist men having either surrendered, fled, or died, the Republicans have triumphed in a crushing victory. However, they have paid one final price. The last von Kastilien is dead.
    Last edited by GeneralHankerchief; 04-08-2008 at 01:45.
    "I'm going to die anyway, and therefore have nothing more to do except deliberately annoy Lemur." -Orb, in the chat
    "Lemur. Even if he's innocent, he's a pain; so kill him." -Ignoramus
    "I'm going to need to collect all of the rants about the guilty lemur, and put them in a pretty box with ponies and pink bows. Then I'm going to sprinkle sparkly magic dust on the box, and kiss it." -Lemur
    Mafia: Promoting peace and love since June 2006

    Quote Originally Posted by TosaInu
    At times I read back my own posts [...]. It's not always clear at first glance.


Bookmarks

Posting Permissions

  • You may not post new threads
  • You may not post replies
  • You may not post attachments
  • You may not edit your posts
  •  
Single Sign On provided by vBSSO