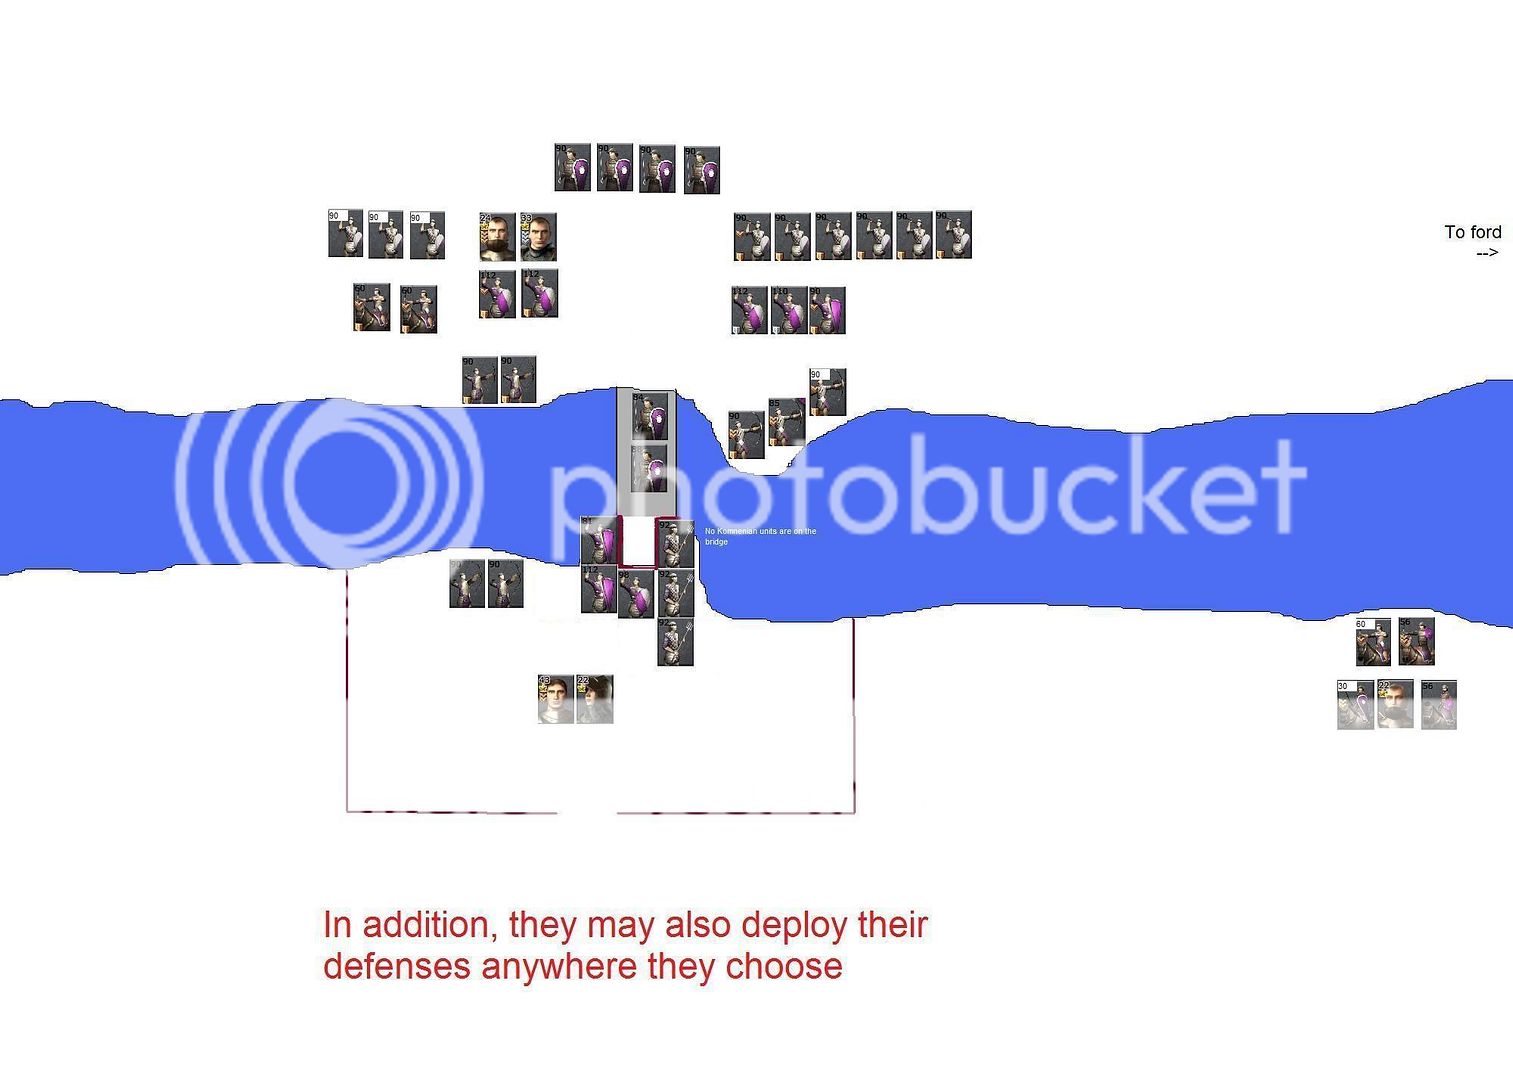
Alright, replayed it from the Komnenoi side with Tristan's cav as a second, allied AI army. I couldn't find a way to make that army come in to the battle later. They still deployed right from the start and the cav defended the bridge first. However, I played around a bit and got some useful results.
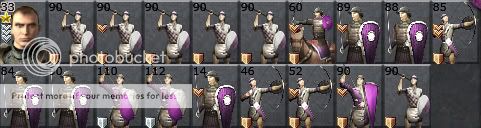
First, the two Komnenoi spear units can tear up Tristan's cav on their own as long as they are not charged. Both spear units are almost completely destroyed in the process, but so is Tristan's cav. Since Tristan's charge would almost certainly hit the right side of the line, which would be held by the dismounted lancers, it should be accurate to say that the Komnenoi spears would avoid the charge, which would instead be soaked up by the easternmost unit of dismounted lancers.
In addition, I also put the Komnenoi horse archers back in. Interestingly, they have a longer range than the peasant archers, because they can comfortably hit the southern side from the head of the bridge. If they were on the promontory where the Trebizond archers were or moved onto the bridge itself, they could comfortably shoot the archer militia in the west or Tristan's horse archers when they arrived in the east.
So, I would say the battle unfolds like this:
Dismounted lancers charge across, followed by the spearmen. 1/2 unit of dismounted lancers are killed by the defending archers in the crossing. The dismounted lancers then proceed to maul the defenders, with the peasants on the east side breaking first. By the time that the peasants break, another 1/2 unit of dismounted lancers has been lost. Aleksios ek Kerkiras tries to plug the gap, but it's impossible to get a full charge off in the chaos, and he can only engage with normal melee. This takes down half a unit of dismounted lancers, but he is killed (or captured depending on his preferences) in the process.
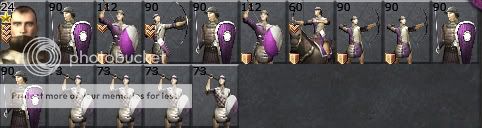
So, the Komnenoi would at that point hold a bridgehead on the south side with 2.5 dismounted lancer units facing the increasingly depleted Tagarian spears, but also outflanking the Tagarians on the east side where the peasants have bugged out and Aleksios has fallen. Behind the dismounted lancers, backed up on the bridge, are the spearmen, waiting to get into the mix. The horse archers are backed up behind them.
Tristan's charge then hits. This makes the eastern most dismounted lancer unit evaporate. This opens a gap for the spearmen to move forward, and they move off the bridge and engage the melee cav. Nikitas rides in behind them to give added punch against the melee cav. In the process, all melee cav are destroyed. Combined with minor losses from archer fire while they were on the bridge, the spearmen take enough casualties to eliminate them from the battle. While this has been going on, the 1.5 remaining dismounted lancers have routed the spearmen that they were facing, taking another 1/2 unit in casualties in the process.
At this point, the round ends. I imagine the end state as follows:
All Komnenoi infantry on the south side have been killed. The south side of the bridge is held by a single unit of dismounted lancers and Nikitas' bodyguard. To the west, the archer militia is still in place. To the east is Tristan (now alone without any bodyguards, giving orders only) and his two units of horse archers. To the south, Ioannis Tagaris remains in his current spot.
In addition, the Komnenoi horse archers have eliminated one unit. The unit eliminated depends on where the horse archers went. If the horse archers went right to the north end of the bridge, or onto the bridge, it is one unit of the west side archer militia. If they went to the promontory to the east where the Trebizond archers are, it is one unit of Tristan's horse archers.
All in all, a bloody round, but the Komnenoi have succeeded in breaking the bridge defenses. They will now pour across and prepare for the fight with the reinforcing armies that Ioannis Tagaris had better pray arrive soon.


 Reply With Quote


 )
)


 )
)


Bookmarks