Page 1 of 6 12345 ... LastLast
Results 1 to 30 of 174

Thread: The Complete Total War Unit Guide

  1. #1

    Post

    The Complete Total War Unit Guide. by Frogbeastegg

    I regret to say that I will no longer be updating this guide with corrections or suggestions; I just don't have the time any more. This is the final version.

    This document is entirely the work of frogbeastegg unless otherwise indicated. You may do what you wish with this document as long as you do not make money from it, alter it in any way, or claim it as your own work. I did this for free and I worked hard. Don't steal my stuff. I prefer it if people ask my permission before doing anything with this that may go public, if you are doing something for just yourself then fine, but if you plan to distribute it please ASK me. Leave a note in this topic or something, and I will get back to you. The same applies if you want to use this on your website, I get a lot of mail on this guide and I like to know what is happening, being asked questions based on versions I don't know exist is not fun. I almost always grant permission if asked.

    Confused by cavalry? Annoyed by archers? Pounded by Polearms? Then this is the guide for you This guide contains an in-depth analysis of every single unit and unit class to appear in the Total War series. It tells you what the units do, what they don't do and explains the differences between units of the same class. You will also find the most important unit stats in here. This guide is written for single player but it should hold up well in multiplayer, just remember that Total War changes to a whole new game when your up against another human. This guide also assumes a basic knowledge of the principles of battle, you should know how to manoeuvre behind your opponent, ensure your troops have the best position etc. If you are a complete beginner or don't know the basics of the battlefield take a look at The Beginner's Guide to Total War.

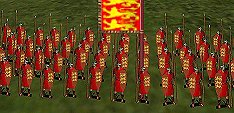
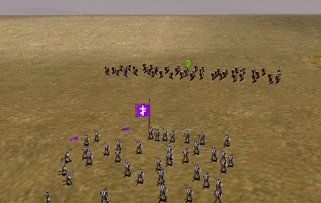
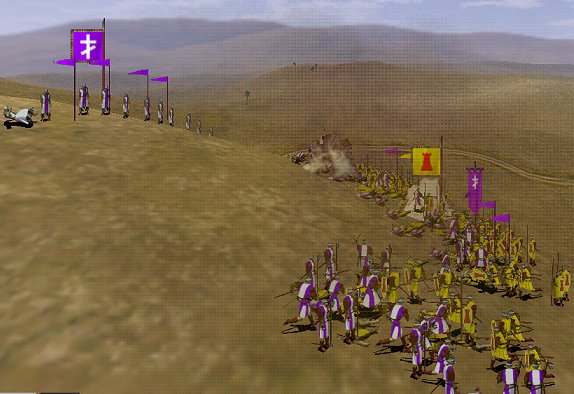
    NB: All the screenshots in this guide have been enhanced with PaintShop Pro in an effort to make them clearer. Please don't think my games look this good Also note that the pictures in the chapter headings are not intended to demonstrate good deployment of units, they are intended to break up the 80 page long text and look good Screenshots labelled S(number) are from Shogun and the Mongol Invasion add-on and therefore feature units not in plain Shogun. Pictures labelled M(number) are from Medieval and feature no units etc from the Viking Invasion add-on. Pictures labelled V(number) are from Medieval with the Viking expansion installed, they feature units not in plain Medieval.

    I should probably add that I chose the factions for the screenshots based on colour contrasts to make the two sides as clear as possible. No bias is intended.

    A PDF version of this guide is now available, as compiled by Tricky Lady. You can download a copy here. This is a beautiful conversion, and much better than my own Word version - also up to date to 29th March 2004.

    A printable version of this guide is now available in MS Word format. If you do not have Word then you can download this free Word reader to view the document. The guide is 105 pages long and has all the pictures etc present in this web guide, although some picture quality has been lost in the transition. Please note that the guide is correct and up to date as of 12th January 2004 and will not be updated at any point. This on line guide will remain the most current version. To get a copy follow this link and look for 'printable unit guide.doc' by frogbeastegg. Make sure you disable any download accelerators you may have before following the link or the link may not work correctly.

    A HTML version of this guide is now available with links to each unit to make looking up a specific entry easy. This is all thanks to TosaInu - he made the whole thing himself so point all your praise in his direction HTML guide Again this is a static guide and will not alter unless something very drastic is wrong. Correct to 1st February 2004.

    Contents
    1. Shogun: Total War and the Mongol Invasion (also called Shogun: Warlords Edition).
    1.1 The Japanese
    1.2 Yari Ashigaru
    1.3 Arquebusiers
    1.4 Musketeers
    1.5 Yari Samurai
    1.6 Samurai Archers
    1.7 No-Dachi
    1.8 Warrior Monks
    1.9 Naginata
    1.10 Yari Cavalry
    1.11 Cavalry Archers
    1.12 Heavy Cavalry
    1.13 Naginata Cavalry
    1.14 Kensai
    1.15 Battlefield Ninja
    1.16 Ashigaru Crossbowmen
    1.17 The Mongols
    1.18 Mongol Light Cavalry
    1.19 Mongol Heavy Cavalry
    1.20 Korean Skirmishers
    1.21 Korean Spearmen
    1.22 Korean Guardsmen
    1.23 Thunder Bombers
    2. Medieval: Total War
    2.1 Spearmen
    *Feudal sergeants
    *Chivalric sergeants
    *Gothic sergeants
    *Italian light infantry
    *Muwahid foot soldiers
    *Nubian spearmen
    *Order foot soldiers
    *Saracen infantry
    *Spearmen
    2.2 Archers and ranged units
    *Archers
    *Bulgarian brigands
    *Desert archers
    *Genoese sailors
    *Golden horde warriors
    *Hashishin
    *Janissary archers
    *Janissary infantry
    *Ottoman infantry
    *Trebizond archers
    *Turcoman foot soldiers
    *Crossbowmen
    *Pavise crossbowmen
    *Arbalesters
    *Pavise arbalesters
    *Longbowmen
    *Handgunner
    *Mamluk handgunner
    *Arquebusier
    2.3 Swordsmen
    *Byzantine infantry
    *Feudal men at arms
    *Chivalric men at arms
    *Feudal foot knights
    *Gothic foot knights
    *Hospitaller foot knights
    2.4 Axemen
    *Abyssinian guards
    *Ghazi infantry
    *Varangian guard
    *Vikings
    *Woodsmen
    2.5 Pikemen
    *Pikemen
    *Swiss Pikemen
    *Swiss armoured Pikemen
    2.6 Polearms
    *Billmen
    *Chivalric foot knights
    *Halberdiers
    *Janissary heavy infantry
    *Swiss halberdiers
    2.7 Barbarians and Religious Fanatics
    *Fanatics
    *Futuwwas
    *Gallowglasses
    *Highland clansmen
    *Nizaris
    2.8 Peasants
    *Almohad urban militia
    *Militia sergeants
    *Muslim Peasants
    *Peasants
    *Urban militia
    2.9 Knights
    *Feudal knights
    *Chivalric knights
    *Gothic knights
    *Knights Hospitaller
    *Knights of Santiago
    *Knights Templar
    *Early royal knights
    *High royal knights
    *Late royal knights
    *Teutonic knights
    2.10 Heavy Cavalry
    *Armenian heavy cavalry
    *Gendarmes
    *Early Ghulam bodyguards
    *High Ghulam bodyguards
    *Late Ghulam bodyguards
    *Ghulam cavalry
    *Golden horde heavy cavalry
    *Kataphraktoi
    *Khwarazmian cavalry
    *Lancers
    *Mamluk cavalry
    *Ottoman Sipahi
    *Pronoiai Allagion
    *Teutonic sergeants
    2.11 Missile Cavalry
    *Boyars
    *Byzantine cavalry
    *Sipahi of the Porte
    *Golden horde horse archers
    *Horse archers
    *Mamluk horse archers
    *Mounted crossbowmen
    *Spanish Jinetes
    *Turcoman horsemen
    *Turcopole
    2.12 Light Cavalry
    *Alan mercenary cavalry
    *Hobilars
    *Lithuanian cavalry
    *Mounted sergeants
    *Polish retainers
    *Saharan cavalry
    *Steppe cavalry
    2.13 Camels
    *Bedouin camel warriors
    *Berber camels
    2.14 Naptha and Javelin
    *Almughavars
    *Kerns
    *Murabitin infantry
    *Naptha throwers
    2.15 Artillery
    *Ballista
    *Bombard
    *Catapult
    *Culverin
    *Demi cannon
    *Demi culverin
    *Mangonel
    *Mortar
    *Serpentine
    *Siege cannon
    *Trebuchet
    3. The Viking Invasion
    3.1 New Spearmen
    *Armoured spearmen
    *Dismounted nobles
    *Fyrdmen
    *Royal bodyguard (infantry version)
    *Round shield spearmen
    *Rus spearmen
    3.2 New Swordsmen
    *Arab infantry
    *Berserkers
    *Celtic warriors
    *Dismounted faris
    *Jobbagy
    *Swabian swordsmen
    *Slav warriors
    *Viking Carls
    3.3 New Heavy Cavalry
    *Avar nobles
    *Byzantine lancers
    *Khazar royal cavalry
    *Mounted nobles
    *Royal bodyguards (mounted version)
    3.4 New Light Cavalry
    *Druzhina cavalry
    *Horsemen
    *Pictish cavalry
    *Viking raider cavalry
    3.5 New Missile Cavalry
    *Faris
    *Steppe heavy cavalry
    *Szekely
    *Pictish mounted crossbows
    3.6 New Axemen
    *Saxon huscarles
    *Viking landsmenn
    *Viking huscarles
    *Joms Vikings
    3.7 New Peasants
    *Viking thralls
    3.8 New javelin units
    *Jobbagy
    *Slav javelin men
    *Spanish javelin men
    *Bonnachts
    3.9 New missile units
    *Irish dartmen
    *Pictish crossbows
    *Sherwood foresters
    *Welsh bandits
    3.10 New Artillery
    *Organ gun
    Appendix 1: Cheat codes and command lines for Shogun, Medieval and Vikings.
    Appendix 2: Unit size comparison chart for MTW's different settings.
    Appendix 3: Shield bonuses.
    Appendix 4: Armour piercing bonus formulae and explanation.
    Appendix 5: Spears and the charging thereof.


    1. Shogun: Total War and The Mongol Invasion (also called Shogun: Warlords Edition)
    Shogun and its add-on are the first in the Total War series. It has fewer units than Medieval but each unit serves a distinct purpose and all of them have a use. For this guide all stats come from my UK English copy, which has been patched to 1.02. If you are using a different version these stats will not apply. All unit sizes are from the troop stats file and are based on the default size. Speed is shown as marching, running, charging e.g. Yari Ashigaru = Speed 5 (marching), 10 (running), 12 (charging). All units are assumed to be at honour 0. All unit costs are taken from the custom battle section, the actual campaign costs are different depending on your selected unit size.

    1.1 The Japanese.


    The Japanese are the main culture in Shogun, they have more units and those units are more varied. Once you learn to use each unit in the best way you will be able to do or counter anything.

    1.2 Yari Ashigaru.
    Charge 0 Attack -1 Defence -1 Armour 0 Speed 5, 10, 12 Morale -4 Cost 100

    Yari ashigaru are the cheapest and simplest troops in your army. They are slightly more than conscripted peasants; they have been given equipment and a little training but nothing else. Because they wear light armour they are reasonably speedy for foot soldiers. This makes them good for flanking manoeuvres and chasing routers before you can build cavalry. Their speed also makes them reasonable reserves as they can quickly move to plug the gaps in your line, but don't count on them to fight for long if the situation is really bad. Ashigaru are not samurai so they are upset by any routing troops, samurai scare the ashigaru even more than other peasants running because the Samurai are the professionals. This makes using them as reserves risky because when your army breaks your reserves will often flee with everyone else, sometimes before they even get near the enemy. Because the ashigaru are armed with spears they are effective against the weaker cavalry, namely yari cavalry and cavalry archers (if they can catch them). Sending ashigaru against warrior monks or heavy cavalry is asking them to die. To use ashigaru most effectively you should place them in hold formation, this will force them to keep their spear wall and increase their defence substantially.

    Best deployed: In three or more ranks in hold formation.

    Ashigaru main uses are: Chasing routers before cavalry appears, bulking out an early army, providing reserves in the early game, drawing enemy fire to waste their arrows and flanking in the early game before cavalry becomes available.

    1.3 Arquebusiers.
    Charge 0 Attack -6 Defence -3 Armour 1 Speed 5, 7.5, 9 Morale -4 Cost 100

    Arquebusiers are the first gunpowder troops you get. They are peasants, just like the yari ashigaru, and suffer the same morale problems. Arquebusiers melee stats suck; you should never use them in melee if you can avoid it. The real appeal of this unit is the combination of gunpowder and cheapness. Cheapness speaks for itself - you can afford to have lots of these units, and to be honest you should never use guns in anything less than pairs to cover for each others reload times. The gunpowder requires more explanation. In Shogun guns have a very short range, they require a long time to reload, won't fire in heavy rain or blizzards, fire at a reduced rate in light rain or light snow, have poor accuracy and fire on a flat trajectory - you can't arc your shots over obstacles like you can with a bow. With all these drawbacks why should you bother? Guns do much more damage than arrows when they hit armour; Samurai armour is not made to be bullet proof during this period. This means that gunners are more deadly than archers. The short range required by the weapon often allows the gunner to take good aim compensating slightly for the accuracy. When deployed three or more ranks deep the gunners use a revolving fire system where the front rank shoots before retiring to the rear to reload. This increases the rate of fire three fold. The final advantage is that gunpowder causes fear, any unit under fire from guns is much more likely to break and run. Guns are also highly effective against cavalry; the horse is a nice big target When defending deploy several units of guns in the front line of your army, set them to hold their position and allow them to shoot freely at anything that comes into range. When the enemy is almost at your line of guns, charge with your other units to prevent the enemy engaging your guns. The main problem with arquebusiers is that musketeers are much, much better and they are only a short hop (and a few koku) away once you can build arquebusiers. When musketeers are available you should use them instead, they are better in every respect and only a tiny bit more expensive.

    Best deployed: In three ranks on hold position and hold formation.

    Arquebusiers main uses are: Forming the front defensive line, scaring units, shooting down cavalry, providing cheap bangs in your army, killing heavily armoured troops.

    1.4 Musketeers.
    Charge 0 Attack -6 Defence -3 Armour 1 Speed 5, 8.4, 10 Morale -4 Cost 250

    Musketeers are basically improved arquebusiers, they can do everything better. They have a longer range, higher accuracy and slightly faster rate of fire. Everything I said about the uses of Arquebusiers applies to musketeers - use them in ranks of three, use several units at once, keep them out of the wet, make sure they have a clear line of sight and order them to hold their position. Guns are especially good when defending a bridge, just set two units up within range of the bridge and let them fire away. Gunners have more ammo than archers and fire at a slower rate; this means that they will rarely use up all their ammo making them invaluable in long, defensive battles. Guns are less use when attacking because they cannot fire without a clear line of sight (the AI loves to park behind obstacles preventing a clear line of sight for your guns) and they have a short range, which leaves them incredibly vulnerable to dug in troops and defensive archers. With practise however you can get some use out of guns on the attack, use careful positioning and try to get them on good ground to the enemies flanks. With practise you can use musketeers to kill archers, just put them on loose formation, three ranks deep and make them run up close to the archers. Then stick them on close and order them to fire. Running up to another unit before firing can work very well on the attack as long as the unit doesn't charge and kill your guns.

    Best deployed: In ranks of three, on hold position and hold formation.

    Musketeer's main uses are: Everything the arquebusiers do, but better

    1.5 Yari Samurai.
    Charge 0 Attack 0 Defence 2 Armour 2 Speed 5, 8, 9.5 Morale 2 Cost 200

    Yari samurai are the backbone of your army. They are the first decent melee troops you get, the best cavalry killers and good all-round troops who can both attack and defend. Yari samurai have good armour that will protect them well against missiles and melee attacks. However yari Samurai are vulnerable to ranged units because they are so slow, it takes them too long to close with the ranged units and they take casualties along the way. Cavalry archers in particular will cause yari Samurai trouble as they can skirmish quickly away from the spears. As their name suggests yari Samurai use long yari spears. This makes them effective against cavalry, especially when they are in hold formation. As long as the cavalry is caught on the front of the formation (rather than the flanks or rear) yari Samurai should win without problems, if the yari are flanked then they will have a more difficult time winning. Because of their armour and the bonus provided when they are on hold formation yari Samurai are the second best defensive troops. Use them to hold a front line protecting your archers or to hold a vital point on the battlefield like a bridgehead. When using the yari Samurai for defensive purposes it is sometimes better to put them on hold formation and hold position and let the enemy charge into them - don't charge them yourself. This will cause the enemy to become entangled in a long fight allowing you to flank easily with other units. The yari Samurai's combination of good armour and good attack makes them a candidate for leading bridge assaults and castle attacks until the naginata appear later in the game. Yari Samurai are Samurai (wow ), this means that they aren't bothered by routing peasants and they generally have good morale.

    Best deployed: In hold formation with ranks three or more deep.

    Yari samurai's main uses are: Holding your line, sheltering archers and other important troops, pinning the enemy in place to allow for easy flanking, killing cavalry, bulking up the army with useful troops, guarding an important spot and leading assaults early in the game.

    1.6 Samurai Archers.
    Charge 2 Attack 0 Defence 0 Armour 1 Speed 5, 9.2, 11 Morale 0 Cost 300

    Samurai archers are one of the most versatile troops in Shogun. You will be using them throughout the game; the gunpowder units cannot replace them. Every army should have some samurai archers, especially early in the game. Samurai archers are mostly used for the ranged attack they provide. They can shoot with reasonable accuracy, have a long range and are quite deadly. Because they fire in an arc the archers can shoot over the heads of men in front (with reduced accuracy if you are firing over three or more ranks, the archers can't see their targets with a lot of men blocking the view) and over hills, which would obstruct guns. This means that you can deploy your archers behind a protective screen of infantry or behind a unit of guns to add to the missile barrage. Archers can shoot up or down slopes with reasonable success so they are useful when attacking, especially if you can find a hill to place them on thereby reducing the defenders height advantage. Archers should always be placed on high ground regardless of whether you are attacking or not, the height gives them a longer range and increases their damage. As their honour increases Samurai archers get more accurate, high honour archers are something to fear. The attack upgrades you can purchase don't affect the archer's arrows; instead they affect the archers' melee ability. Archers are not outstanding fighters but they are capable of beating same honour ashigaru without difficulty and they can beat Yari samurai if they have a slight advantage (numbers, position, fatigue etc.). Archers should only be sent into the melee when things are desperate, where possible you should flank with them to improve their damage and impact. Because they are Samurai the archers have good morale and will not be bothered by routing peasants. Archers are very useful against most units but they really shine when you meet warrior monks and no-dachi. These two units are very powerful in melee combat; they will tear your army apart if you cannot counter them with monks, no-dachi or heavy cavalry of your own. The best way to kill these units is to take advantage of their weakness to missiles and shoot them with archers or guns. Samurai archers loose accuracy and range when it is raining or snowing. Windy weather also lowers their accuracy. Shooting into or out of a forest is unwise because many of the arrows will hit the trees and be wasted.

    Best deployed: In ranks two deep (three deep on loose formation) on either skirmish or hold formation and hold position.

    Samurai archer's main uses are: Providing ranged support, acting as a reserve, killing warrior monks and no-dachi with their arrows.

    1.7 No-dachi.
    Charge 8 Attack 5 Defence -2 Armour 1 Speed 5, 10, 12 Morale 8 Cost 300

    No-dachi are specialist troops, they have one use and one use only - charging the enemy and hacking their way through. No-dachi have a high attack and charge value that allows them to carve their way through most troops with ease. Their Achilles Heel is their poor defence; it doesn't take much to kill these swordsmen. So basically the no-dachi will do but they will die in the process. To maximise their effectiveness and aid their survival you need to use them carefully. No-dachi have sky-high morale, this enables them to fight a long way from the general without problems. Add this to their deadly charge and you have the makings of the perfect flanker and ambusher. Instead of sending your no-dachi in a brave but costly charge straight at the enemy you should instead try to hide them at the edges of your lines and send them around the enemy to hit from the rear. If you can hide them in forests so much the better, this will give them an ambush bonus and enable them to hit the rear more effectively. As mentioned in the archer section no-dachi are vulnerable to missiles, so always endeavour to keep them sheltered either behind other units or in tree cover.

    Best deployed: Always use engage at will to maximise killing power. The wedge formation is very good for the initial seconds of the charge before ordering the no-dachi into a close line to bring the unit together for support. no-dachi can also be used in the close line formation from the get go, place them in ranks two to three deep.

    No-dachi's main uses are: Flanking, ambushing, leading death or victory charges against powerful enemies

    1.8 Warrior Monks.
    Charge 4 Attack 5 Defence 2 Armour 1 Speed 5, 10, 12 Morale 8 Cost 550

    To many players this unit is the cream of the crop; it is certainly the best infantry in Shogun. Warrior monks are deadly, in hand to hand combat they can beat any other unit; although naginata cavalry and heavy cavalry can pose a slight problem the monks should win as long as you use them intelligently. Because the monks carry a portable shrine into battle (you can't see it but the morale effects are there) other Buddhist units are afraid of them, Christian and Pagan units don't have this fear. No unit is perfect however and the monks are no exception. They are highly vulnerable to missiles, the cheap peasant gunners are the most effective monk killers but Samurai archers and cavalry archers acquit themselves well. The basic rule is when all things are equal the monks win if they get close to the unit, if they don't reach it they loose, if you significantly reduce their number before they reach you things are more even and you should be able to win with good tactics. Therefore try to do plenty of damage before the monks reach you or keep them well protected as they advance. Monks have the same high morale as no-dachi so it takes a lot to make them flee, in normal combat they generally need to be down to 10% of the original unit and surrounded before they will break. Remember that these monks think dying in battle takes them to nirvana; don't underestimate their staying power So how should you use you monks? It's quite simple; keep them screened to protect them from missile fire and then when you are close to the enemy charge Monks can attack the front of a line with admirable success and fervour while other units (no-dachi, cavalry, and more monks) flank the enemy to hit them where it hurts. To kill monks you should shoot them as much as possible, if it comes down to melee combat send your own monks to meet them. If you have no monks you should hold the enemy monks in place with some yari samurai, naginata or ashigaru and flank with no-dachi or cavalry.

    Best deployed: Always use engage at will, it sets your monks free to hack through the enemy individually. The wedge isn't bad for when your monks are charging but they work very well in the close line, two or three ranks are especially effective.

    Warrior monks main uses are: Doing most of the killing, supplying reliable power, killing other powerful units, hitting the enemy with a psychological blow (remember the enemy Buddhists hate fighting monks ).

    1.9 Naginata.
    Charge 2 Attack -1 Defence 8 Armour 6 Speed 5, 8, 8 Morale 4 Cost 425

    Naginata are the polar opposite of no-dachi, they are slow, heavily armoured and none to good at melee fighting. Just like no-dachi they are a specialist unit made for certain situations and less useful when away from those specialties. As the stats suggest naginata are not made for killing, they are made for surviving. The heavy armour and high defence allows naginata to walk into a hail of arrows (bullets are still somewhat effective against them) with only one or two casualties. This makes them ideal for leading assault parties on bridges and in sieges, as they will reach the target in good shape and will be able to hang on long enough for other units to join them and take over the fight. Naginata are also perfect for holding an enemy unit in position for a long time while you flank with other units or destroy another part of the enemy army. If you are about to be charged by heavy or naginata cavalry then naginata can receive that charge with fewer casualties than yari Samurai, but the ensuing melee will not go as well. They can also take a monk or no-dachi charge quite well. Some people like to use naginata when defending a bridge, when the enemy makes it to their end of the bridge they send in the naginata to hold them in place while they continue shooting. Naginata are expensive and their lack of effective melee power means that they cannot replace yari samurai as the main backbone of your army; instead you should have a unit or two for use in assaults. Naginata need a special note on weather - cold weather and rain tire them out very quickly because of all their armour.

    Best deployed: Hold formation increases the already high defensive values of the naginata and keeps them grouped together. Naginata should try to keep in ranks of three to four as this enables them to absorb charges without being scattered.

    Naginatas main uses are: Leading assault parties, holding a certain position for a long time, receiving cavalry, no-dachi and monk charges.

    1.10 Yari Cavalry.
    Charge 15 Attack 1 Defence 2 Armour 3 Speed 8, 24, 28 Morale 4 Cost 475

    Yari cavalry are the fastest unit the Japanese get. They are armed with spears which gives them an advantage (+4 attack versus any cavalry) over other cavalry types, but generally not enough of one to beat heavy cavalry, naginata cavalry can be beaten on most occasions. They also have a reasonable attack against archers. Yari cavalry are not made to go toe to toe with most infantry, you should use them to charge from the rear, kill archers or chase routers only, unless you want them to die en-mass. The speed is the main advantage and weapon these troops have, use it to chase cavalry archers, threaten the enemy from the rear and to get your yari cavalry away from trouble. Never use yari cavalry to charge missile units from the front, always move to the side or rear before charging, otherwise your cavalry will be killed before they reach the enemy. Because they are so fast and reasonably expendable (read cheap) yari cavalry are excellent scouts. If you can't find the enemy because they are hiding in trees use yari to scout OUTSIDE the woods, never send them into forested areas because all cavalry gets massive penalties for fighting in forests.

    A tip that works for all types of cavalry: When your cavalry are engaged in a melee and you want them to stop fighting and move somewhere else try putting them on hold position and then immediately double clicking where you want them to go. Because hold position applies to the destination rather than where they are now they will disengage and move quickly to your chosen spot. When they arrive take them off hold position and continue your battle plan. This is much more reliable than double clicking a destination and hoping they will follow your order and it is safer than ordering them to withdraw (crlt+w) before ordering a halt when they are safe. Be aware that you will take casualties as the unit pulls back, but not as many as the other two methods.

    Best deployed: Use engage at will. A long line of cavalry in close formation makes for a devastating charge; try to use them in two ranks.

    Yari cavalry's main uses are: Chasing routers, running down cavalry archers, killing infantry missile units, scouting.

    1.11 Cavalry Archers.
    Charge 10 Attack 0 Defence 1 Armour 3 Speed 8, 23, 27 Morale 2 Cost 450

    Cavalry archers are something of an acquired taste. On paper they seem fantastic, in reality they require hours of practise to use effectively. Firstly the good news, cavalry archers are the second fastest Japanese unit, they can melee with some effectiveness, they have the same number of arrows as their infantry counterparts and they are versatile. The bad news is that they have a shorter range and lower accuracy than infantry archers, they are very vulnerable to infantry missile units (the horse is a nice, big target), they are the least effective cavalry in a melee, they aren't all that effective when left on the default AI controlled skirmish so you have to control them yourself, and they are expensive - at 500 koku they cost the same as a unit of warrior monks So what can you do? Firstly keep them away from any infantry based missiles; even guns outrange them when they are at the same height. Secondly you need to keep them away from trees, cavalry die fast in trees and any arrows the archers fire are likely to hit the trees and be wasted. Thirdly you need to manage them yourself, don't let the AI decide when they should pull back, give the order yourself. Don't let them skirmish themselves into a corner or the waiting arms of an enemy unit. Fourthly you need to practise targeting unprotected enemy units and drawing them away from the main army by irritating them with your arrows. When you can do all that then cavalry archers will be quite useful, to get maximum efficiency out of them you need to learn how to use them in melee without losing large numbers of men. Basically you must always flank, preferably attack from the rear. Only attack units that are already engaged or they will turn around and destroy you. If you don't smash the enemy of the first charge you should consider withdrawing (by double clicking some distance away from the fight) your unit and charging again and again until they do win. You can also use them to chase down routers.

    Best deployed: This one's tricky, ideally they need to be in two ranks to maximise accuracy but this is too unwieldy for skirmishing. Three ranks works well if the unit size is 60-80 men, anything above that and you will need to go to four, maybe five ranks. Always try to keep close formation as it makes the unit easier to skirmish.

    Cavalry archer's main uses are: Harassing the enemy, shooting missile vulnerable units to damage/distract them, acting as a spare melee cavalry.

    1.12 Heavy cavalry.
    Charge 9 Attack 2 Defence 7 Armour 6 Speed 8, 20, 24 Morale 6 Cost 600

    And so we reach the pinnacle of cavalry, the heavy cavalry unit. Before the Mongol Invasion add-on this was the best of the best, now they are somewhat less useful but still valuable when compared to naginata cavalry. Why are heavy cavalry so fantastic? Just take a look at their stats, some of the best in the game. Heavy cavalry are powerful, well armoured, fast and versatile. This is the unit your Daimyo has as a personal bodyguard and they cost 600 koku for 60 men So what can they do? Almost everything, that's what. They are well protected so they can lead an assault on a defended position, they have high morale so they can operate independently and will keep fighting after taking many losses, they can kill most units when out in the open: even warrior monks fall beneath their hooves when the cavalry has a slight advantage (morale, fatigue, honour, positioning, numbers etc), they have a good attack and charge so they will do plenty of damage on impact and can keep fighting for some time because they are hard to kill, And they can chase routers. Of course just because they can do something doesn't mean that they should, yari cavalry are better for chasing routers, naginata are more disposable when leading an assault, naginata cavalry are better for sheer charge power and missiles are cheaper when killing monks. What you should do is keep a unit or two of heavy cavalry and send them where they are needed i.e. to strengthen the line, intercept the enemy flanking attempt, run down the enemy missiles or what ever else is needed at that moment in time. When you buy heavy cavalry you are buying flexibility and the abilities of several units in one. When using heavy cavalry there are several things you need to keep in mind. Firstly KEEP THEM OUT OF THE TREES I have said this with the other cavalry but it is most important here. Heavy cavalry die incredibly quickly when in trees, even simple ashigaru have no problem in killing your expensive investment. If you send heavy cavalry into trees you will only get bloody chunks of horsemeat back and you will have wasted 600 koku and one awesome unit. Comprende? Secondly you should never charge missiles head on, even with their heavy armour the unit will take significant damage. That horse is just a big target. Thirdly don't get over confidant, simple yari samurai will kill your fancy cavalry and yari ashigaru will do a lot of damage if they meet head on, try to charge from the rear if you really must take on spears. Fourthly try not to use this unit in the snow, the heavy armour tires the rider out quickly in the cold air and the horse doesn't like snow much either.

    Best deployed: Use engage at will to increase the number of men in the melee. Close formation is a good all rounder; try to use ranks of two to three to enable most men to engage on the first charge. On some occasions (e.g. charging at warrior monks) the wedge formation is good, just remember to change back into the close formation a few seconds after impact.

    Heavy cavalry's main uses are: What ever you need, although they are best for packing a tide turning punch in a fierce melee or killing other 'power' units like monks. Heavy cavalry are the perfect reserves, use them like that and you'll grow to love them.

    1.13 Naginata Cavalry.
    Charge 11 Attack 4 Defence 1 Armour 4 Speed 8, 22, 26 Morale 8 Cost 425

    Naginata cavalry are assault cavalry; they are made to kill quickly and efficiently. They are not made to fight in a long melee, their low defence means they begin to die quite quickly. Naginata cavalry are also slow for a cavalry unit, the slowest in the game to be exact, this lack of speed can make it harder to manoeuvre them to hot spots and flanking requires more organisation (compared to other cavalry, Naginata cavalry is still faster than infantry when galloping) to prevent the enemy intercepting your units. This unit seems to have a bonus against infantry so it is very good at killing them, just don't expect them to kill monks without loses. Naginata cavalry are best used like no-dachi - flank and rear attacks in support of your army. They are wasted on chasing routers and killing missile troops, although they can do both of these tasks well if you have no more suitable men left. As with all cavalry keep them out of the woods and don't charge missiles head on.

    Best deployed: Use engage at will and the wedge to kill many men on impact, before switching to close formation after a few seconds.

    Naginata cavalry's main uses are: flank attacks, leading death or victory charges, killing infantry.

    1.14 Kensai.
    Charge 8 Attack 18 Defence 7 Armour 3 Speed 5, 10.9, 13 Morale 8 Cost 600

    The Kensai (sword saint) is unique, no other unit can compare to this sword-wielding maniac. For starters there is only one (1) man in each unit. This one man can kill hundreds of other samurai with no problems. He has such high morale it is nearly impossible to rout him, and he is so tough it is very hard to kill him in melee combat. The kensai's only weakness is missiles, so if you see one headed towards you make him the top priority for your missile units. It will take many shots to fell this behemoth so don't give up after a few volleys. If the kensai is close to your lines you may want to hold him in place with a sacrificial unit while your archers get busy. If you are using a kensai you should point him at the most important part of your battle and let him kill everything. Sending a kensai after the general is a good idea most of the time. Never send your kensai after missiles; they are too expensive to throw away. The kensai should be placed in woods if possible; this protects him from missiles and makes it easier to kill any cavalry that may attack him.

    Best deployed: Just stick him on engage at will.

    Kensai's main uses are: Killing generals, holding strategic points (e.g. bridges, castle gates etc), defending an important unit, leading the second wave in an assault (after the naginata/yari samurai/heavy cavalry), and fighting strong units.

    1.15 Battlefield Ninja.
    Charge 8 Attack 8 Defence 4 Armour 2 Speed 8, 10.9, 13 Morale 10 Cost 600

    Battlefield ninja only have 12 men per unit; these twelve men can hide at any point on the battle map, rather than just in trees like everybody else. They use a unique missile weapon - ninja throwing stars (aka shuriken). They have a short range but they are quite dangerous, if you place the ninja on the top of a hill then the foot of the hill will just be in range. If you can train a unit of ninja to about 4 or 5 honour they become rather deadly. To train the ninja you should use them as a rear guard so they can make opportunistic attacks on weak or routing troops (chase the routers, don't put them in front). Eventually they will get enough kills to boost their honour, it doesn't take many because of the small unit size. To be sure of getting at least one unit of good ninja you can train several units at once and combine the units to replace losses without introducing green troops to the unit. If battlefield ninja are in the way of routing troops they will be mown over, so keep them out of the way. Ninja are vulnerable to missiles, so keep them protected. Ninja are not to strong in melee combat (even simple ashigaru can kill ninja with ease if both units honour is equal) because they are often vastly outnumbered, instead you should use their throwing stars to do most damage. If you must use them in a melee try to make sure they are high honour and flank with them. They can beat a kensai in single unit combat. Shinano suggests this 'Usually if I see that my opponent has battlefield ninja I send a unit of Naginata cavalry after them, because their running speed is faster than any other infantry unit except kensai.'

    Best deployed: There are only 12 men so the formation doesn't matter that much, try putting them on engage at will.

    Battlefield ninja's main uses are: Assassinating generals on the battlefield, being sneaky, damaging important troops.

    1.16 Ashigaru crossbowmen.
    Charge 0 Attack -6 Defence -3 Armour 1 Speed 5, 9.2, 11 Morale -5 Cost 100

    Ashigaru crossbowmen replace the gun units in the Mongol campaign. They are pretty similar, they have a slow rate of fire, work best in ranks of three or more, they need a clear line of sight to fire, they have poor morale and they can be deadly when used correctly. The only major differences between the crossbows and the guns is that the crossbows can fire in the rain and falling snow, with reduced range and accuracy, and that they don't cause the gunpowder morale penalty. Otherwise everything I said about guns applies to crossbows.

    Best deployed: In ranks of three or more on hold position.

    Ashigaru crossbowmen's main uses are: Forming the front defensive line, shooting down cavalry, providing cheap bangs in your army, killing heavily armoured troops.

    1.17 The Mongols.


    The Mongols are the second civilisation in Shogun and they play differently to the Japanese. The Mongols get most of their power from their cavalry; their infantry is for support only. The Mongols need to use their speed and mobility to out manoeuvre the Japanese and weaken their position ready for a cavalry charge. They have a couple of unique unit types, namely javelins and thunder bombers. Both of these units are hard to use well, but they are incredibly deadly in practised hands. You really need to practise with the Mongols before you master their new tactics.

    1.18 Mongol Light Cavalry.
    Charge 11 Attack 2 Defence 2 Armour 4 Speed 8, 24, 28.8 Morale 4 Cost 625

    Mongol light cavalry have 48 men per unit with sizes set to default. This is both a blessing and a curse. The blessing is that it makes this unit of ranged cavalry much easier to control; the downside is that it reduces their potency when compared to larger units. Mongol light cavalry is more versatile than the Japanese cavalry archer, as it possesses a better melee ability. This allows them to defeat weak troops (samurai archers etc, but definitely not spear troops) head on and significantly damage and occasionally defeat tougher troops when they can flank. Mongol light cavalry is also slightly faster than the Japanese cavalry archers; this makes them even better for skirmishing, chasing, flanking, and killing routing enemy.

    Best deployed: In ranks of two or three in close formation.

    Mongol Light Cavalry's main uses are: Harassing the enemy, shooting missile vulnerable units to damage/distract them, acting as a spare melee cavalry and scouting, running down routers.

    1.19 Mongol Heavy Cavalry.
    Charge 10 Attack 3 Defence 3 Armour 5 Speed 8, 22, 26.4 Morale 8 Cost 800

    Mongol heavy cavalry also only have 48 men per unit. They are quite similar to Naginata cavalry and should be used in a similar manner.

    Best deployed: In two to three ranks set to close formation and engage at will.

    Mongol Heavy cavalry's main uses are: flank attacks, leading death or victory charges, killing infantry.

    1.20 Korean Skirmishers.
    Charge 0 Attack -1 Defence -1 Armour 5 Speed 5, 8, 10 Morale 0 Cost 450

    This is the first of the Mongol 'oddball' units. On the surface these guys are just bad swordsmen, the real beauty of this unit lies in their javelins. There are 4 javelins per man and they must be thrown at a very short range but they are deadly. Javelins go straight through armour, they are accurate and they inflict heavy casualties on the target unit. The first time I successfully used javelins I killed a quarter of a unit with just one volley To use javelins successfully you must take them off skirmish, or they will withdraw before throwing. Due to their short range you shouldn't expect them to stand in front of a charging enemy and expect them to do much before the enemy engages them in melee combat. The key is to use the skirmishers to flank an engaged unit and throw from behind, killing the pinned enemy with minimal casualties to your pinning force. A variation on this is to pin an enemy unit with one of your own before moving your skirmishes up behind your unit and ordering them to throw over the heads of the pinning unit. The skirmishers are more likely to receive accuracy penalties when used like this, so you shouldn't be surprised if you lose a few of your men with javelins in their backs. Skirmishers aren't particularly good in melee combat but if you charge them into the rear of an enemy after all their javelins are gone you should get some mileage out of them. Because of their heavy armour and expendability skirmishers can be useful for drawing missile fire, just set them to loose and keep them at the edge of the enemies range.

    Best deployed: In ranks three deep set on hold formation. Don't set them to skirmish or they will pull back before throwing. If they are entering melee combat order them to engage at will.

    Korean Skirmishers main uses are: Ducking around the enemy lines to cause massive damage with their javelins, drawing missile fire, killing heavily armoured and dangerous units while they are pinned by another unit.

    1.21 Korean Spearmen.
    Charge 0 Attack 0 Defence 1 Armour 2 Speed 5, 9.2, 11 Morale 1 Cost 200

    Korean spearmen are quite similar to the Japanese Yari samurai and they play a similar role on the battlefield, go and read the yari samurai section.

    Best deployed: In hold formation with ranks three or more deep.

    Korean Spearmen's main uses are: Holding your line, sheltering archers and other important troops, pinning the enemy in place to allow for easy flanking, killing cavalry, bulking up the army with useful troops, guarding an important spot and leading assaults.

    1.22 Korean Guardsmen.
    Charge 4 Attack 2 Defence 4 Armour 4 Speed 5, 7.5, 9 Morale 4 Cost 450

    Korean guardsmen are the main 'tough' infantry for the Mongols. They are able to lead a charge and defend an area, but they do neither task as well as the more specialised Japanese. They can fight well in melee but they are not outstanding, they can hold on when under attack for a while but not forever, they can kill cavalry but not spectacularly. Use them as a jack-of-all-trades but keep them well supported by other units.

    Best deployed: In ranks of two or more on engage at will. They can charge with the wedge for extra damage before switching to the close line after a few seconds. If they are being used to hold a position then you should use three or more ranks on hold formation and hold position.

    Korean Guardsmen's main uses are: Acting as shock troops, leading an infantry charge, defending an important area.

    1.23 Thunderbombers.
    Charge 0 Attack -6 Defence -3 Armour 2 Speed 5, 9.2, 11 Morale 4 Cost 400

    This is the second Mongol 'oddball' unit. There are only 30 men per unit and each man has 3 grenades. Their range is even shorter than the Korean skirmishers and the AI tends to blow your own troops up, so you must carefully micromanage them. Without sufficient practise you will not do very well with Thunderbombers, at best you will achieve nothing because they run away, at worst you will blow up half your army The key is to keep in mind these simple rules and to practise extensively. Firstly never leave your bombers on skirmish; they will be gone before the enemy arrive in range. Secondly don't let them fire at an enemy pinned by a unit you want to keep, the bombs are very indiscriminate and you will kill a lot of your own men. Always use junk troops to pin when working with grenades. Thirdly accuracy increases dramatically with honour, so place them with a good general and guard them well. To really get the most out of the grenades you need to understand how they work, unlike other missiles they don't target a person. Instead they explode on the ground creating an explosion, any man caught up in this explosion will die. Therefore to maximise the carnage you need to force as many people into the explosions as possible. That's where bridges, castles and choke points come in, just order your bombers to target a unit in this cramped space and everyone in that space will die. This is amazingly effective on bridges; you can destroy whole units with just one shot. Sometimes when you are attacking a castle you can move a unit of Thunderbombers up to the gate and blow everyone in it to kingdom come, other times the defenders will charge you and you will do no damage. If you want your thunderbombers to save their ammo or act with restraint set them up in wedge formation and only the front few men will open fire. When using this formation you can expect the men at the front of the formation to get bombed by their comrades so be careful when you use this tactic, only use it when you don't mind casualties.

    Best deployed: In ranks of two in close formation. Turn skirmish off or they will run away before throwing.

    Thunderbombers main uses are: holding tight spaces, assaulting tight spaces, destroying expensive/dangerous units with the aid of a junk unit.


    Frogbeastegg's Guide to Total War: Shogun II. Please note that the guide is not up-to-date for the latest patch.

    Member thankful for this post:


  2. #2

    Default


    2. Medieval: Total War.
    This section uses unit stats from Clan Berserks excellent unit comparison guide, you can get a copy here. All the units from the Viking Invasion add-on are covered in the third chapter; this chapter only covers plain Medieval. All unit sizes in this chapter are based on the one above default, medium. This gives sizes like 133 spearmen, 80 men at arms, 53 knights etc. Each unit has been placed in it’s appropriate section, it’s mostly common sense but the index at the beginning lists what’s where if you’re having difficulty.

    All unit costs are taken from a list provided by Quokka. They are for the default unit size, to work out the costs for other unit sizes follow this formula:
    1)Open "crusaders_unit_prod11.txt" in WordPad
    2)Copy all content
    3)Paste into Excel
    4)Delete all columns except i)Unit Name, ii)Support cost and iii)Number of men
    5)Multiply Support cost with 0.125, and multiply that with Number of men for each unit.
    6)Example: peasants; 100 men(on default), support cost 3:
    3 x 0.125 x 100 =37.5
    7)If you want support costs for varying unit sizes just multiply "Number of men" with percentage increase.
    This formula is thanks to Norseman. You can download a free excel viewer here.
    Purchasing costs are listed for units you cannot build in the campaign; this is because you can use them in custom battles and multiplayer mode. Support costs are listed for all units as you have to pay upkeep for units gained by crusading etc.

    2. 1 Spearmen.


    The spear units are the backbone of most early armies and they continue to be useful when other, more advanced units come into play. All spear-armed units get a bonus when they are in tight, ordered ranks. The bonus is +1 defence and +1 charge for each supporting rank and +1 to attack for a second supporting rank. A supporting rank is simply the rank behind the one at the front, which is doing all the fighting. You can tell when a man in the rear ranks is giving support; he will play his fighting animation even though he is not engaged in combat. A spearman can only get support from the two ranks directly behind him so there is no reason to deploy spears in ranks thicker than four (one at the front, two to support and one to supply reinforcements so the unit can take losses without losing effectiveness). Spearmen are best left in hold formation as this forces them to maintain their supportive ranks and keeps their bonus intact, as well as bestowing another bonus to defence at the expense of a small (mostly unimportant) penalty to attack. Trees disrupt the formation causing the rank bonus to apply unevenly (some men will still get support while others will be isolated) so you should endeavour to keep spears out of trees. Moving for long distances or running will also disrupt the spears formation so you should try to move them slowly and in several stages to give them time to re-form. When spearmen are placed on hold position they keep their formation much better and can consequently survive combat much better. Therefore you shouldn’t worry about charging your enemy, instead halt slightly in front of them, go to hold position and wait for them to charge you. This is even easier on defence; just wait for the enemy to come to you. Spear units have little to gain by charging (there are some exceptions noted in the detailed unit analysis below) and much to gain by holding their position. Spears need to engage the enemy head on; if they are flanked or attacked from behind their formation quickly falls apart, making them extremely vulnerable. Sword armed units kill spearmen very quickly so try to keep them away from your spears, however if you cannot avoid it your spears will be able to hold out for a short time, giving you the chance to send aid. For the most part you will be using spears to pin an enemy unit while you use more effective ones to do the actual killing, although some spearmen can attack effectively (again these units are noted below). All spear-armed units get a bonus of +1 attack and +4 defence when they are facing cavalry; it is this unique bonus that makes them so effective when faced with mounted troops (both horses and camels).

    Spear units are best at: Holding a front line from which your other units can operate (e.g. cavalry sheltering behind the spears before charging out to attack and then retreating behind the spears to rest and regroup.), protecting archers and other more vulnerable units, receiving charges – especially cavalry charges, killing cavalry, pinning an enemy in place ready for another attack, delaying the enemy while you fight elsewhere, holding an important location (e.g. a bridge or a breach in a castle wall), and adding cheap, capable bulk to an army.

    For a more in-depth explanation of why I don’t think charging spears is worthwhile in most situations read appendix 5 at the bottom of this guide. You don’t need to read it to understand tactics, it is mostly for the benefit of number liking people and those who want to know the whys and wherefores of everything.

    M1
    M2
    Images M1 and M2:This unit of spears is in excellent order and can fight with maximum efficiency.

    M3
    Image M3:This unit of spears is so disordered most men will not receive the rank bonus. This is a disaster in the making.

    THE UNIT STATS IN THIS SECTION DO NOT CONTAIN THE RANK BONUS, YOU WILL HAVE TO ADD THAT YOURSELF

    NONE OF THESE STATS INCLUDE THE SHIELD BONUS, YOU CAN FIND OUT WHAT KIND OF SHIELD (IF ANY) A UNIT POSSESSES IN THE WRITE UP AND THEN CHECK APPENDIX 3 FOR THE BONUS YOU NEED TO ADD TO THESE BASE STATS.

    Feudal sergeants.
    Charge 5 Attack 0 Defence –1 Armour 1 Speed 6, 10, 11 Morale 2 Cost 200 Support cost 62

    Feudal sergeants are solid spearmen with pretty average statistics. They represent a noticeable improvement on the basic spearman and serve well in the early period (1088-1205). Because their defence and armour stats are fairly low they can die quite quickly. They have good morale which stops them fleeing in terror after a few losses and enables them to work in morale damaging circumstances (e.g. when they are under missile fire or outnumbered). Feudal sergeants have a large shield that protects them from missile fire and adds slightly to their defence. When more advanced sergeant types (Chivalric and Gothic) become available you can still get some use out of Feudal sergeants. Because they have higher morale than Chivalric sergeants and are faster than Gothic sergeants Feudal sergeants can make reasonable attack troops. They won’t do much damage compared to more specialist troops but they will be able to tie up enemy reinforcements (circle your feudal sergeants around the enemy line and attack the rearguard), keep a persistent attack on a flank (send them to the flank and have them hold position, forcing the enemy to fight them for a long time under morale harming conditions) and lead suicide mission that require something tougher than peasants. They have a large shield.

    Chivalric sergeants.
    Charge 5 Attack –1 Defence 3 Armour 3 Speed 6, 10, 11 Morale 0 Cost 300 Support cost 62

    Chivalric sergeants are very tough spearmen; they have plenty of armour and defence as well as a big shield and the spear rank bonus. It takes a lot to kill Chivalric sergeants because they are only really vulnerable to swordsmen and armour piercing troops and even against these troops Chivalric sergeants can keep going for a long time. Arrows are not very effective against this unit - they have too much armour, only ranged units with armour piercing capabilities (e.g. longbow men, javelins and crossbows etc) can do much damage. Chivalric sergeants have low morale but this is not as big a problem as it may appear. As long as you are using the spearmen properly the only things to impact morale should be casualties, missile fire and routing friendly units. Because chivalric sergeants are so tough they die slowly, often meaning they are on equal footing with Feudal sergeants and their higher morale and greater casualties. Missile fire only causes a morale penalty when it kills a man in the unit; since most non-armour piercing missiles glance off the armour the penalty often only applies when armour-piercing units are firing, and chivalric sergeants still have good protection (the large shield) from armour piercing missiles. Finally if your army starts to rout your spearmen are probably right in the thick of the fighting so they would join the rout anyway. The only real problem with chivalric sergeants is the era in which they appear, after 1205 (the high era) spearmen are less useful because polearm troops become more common. Polearm troops don’t get rank bonuses or defence bonus when against cavalry but they do get an attack bonus vs cavalry and they all possess armour-piercing attacks. This means that polearm troops will rip through cavalry like there’s no tomorrow, taking one of the spearmen’s major jobs in the process. You will still need chivalric sergeants to make up part of your front line but you will be using them less than before. They have a large shield.

    Gothic sergeants.
    Charge 5 Attack 0 Defence 5 Armour 5 Speed 4, 8, 9 Morale 2 Cost 350 Support cost 62

    Gothic sergeants are the best-protected spearmen in the game, they have the highest defence and armour and they still have the large shields. This massive quantity of armour weighs them down, making them the slowest spearmen around. This lack of speed makes it harder to use them on the offensive but doesn’t really matter if you are defending since the enemy must come to you. They are even more invulnerable to non-armour piercing arrows than chivalric sergeants, but once again armour piercing missiles will do some damage. Gothic sergeants are still vulnerable to swordsmen but since there is no new sword unit available in Late (1321) they will mostly be fighting outdated swordsmen like chivalric men at arms. This does improve their chances of survival, although they will still lose eventually (if everything is equal or they only have a small bonus). Armour piercing melee units like billmen are the bane of gothic sergeants because the high armour value of the gothic sergeants gives a larger boost to the armour piercing effect. Gothic sergeants also have more competition because Pikemen become available in the late era and they can perform similarly to spearmen. So in the end gothic sergeants may be the best of the spearmen but it is rather unlikely that you will ever need (or want) to use them in large numbers. They have a large shield but it only has a 0.5 modifer.

    Italian light infantry.
    Charge 5 Attack 0 Defence 3 Armour 3 Speed 6, 10, 11 Morale 2 Cost 400 Support cost 62

    Italian light infantry are available in early but they are just like an upgraded version of chivalric sergeants. Whenever you get the chance to use this unit (either by playing as the Italians or via mercenaries) in early you should take it because they are simply devastating in early – nothing can match them. When the clock hits 1205 and the high era units become available Italian infantry looses some of its shine because the competition is on a more even footing. This doesn’t mean that Italian infantry becomes obsolete; it means that they go from being outstanding to being very good. Italian infantry are capable of doing any of the tasks listed in the spears introduction and they can do them all well. In early it is quite reasonable to use them to attack by flanking and their charge should be used on occasion because the individual soldiers are strong enough to fight on their own if the formation breaks up. After early is finished you should start to use your Italian infantry more carefully, don’t charge with them and ensure they keep formation at all times, use them like chivalric sergeants after 1205. They have a large shield.

    Muwahid foot soldiers.
    Charge 7 Attack 1 Defence –1 Armour 1 Speed 6, 12, 13 Morale 4 Cost 225 Support cost 37

    Muwahid foot soldiers are very different to the other spear units. Firstly they have just 80 men instead of the usual 133. This makes it much harder to keep them in the optimal four ranks and ensures that the unit can only cover a small area. Muwahid’s have a very high charge and a good attack (for spears), when this is combined with their small number it is obvious that this spear unit is made to attack rather than defend. Set them up in for ranks and order them to hold formation, then use their high speed to get around the enemies flanks and charge them from behind. Try to let the unit reform before charging them; this will enable them to do more and take less damage. You shouldn’t charge sword units because swords will still slaughter your Muwahids even though they are more offence orientated. They have a large shield.

    Nubian spearmen.
    Charge 4 Attack 0 Defence –1 Armour 1 Speed 6, 10, 11 Morale 2 Cost 175 Support cost 37

    Nubian spearmen are slightly different from the usual spear units because they are disciplined. This means that they are easier to control and the death of your general or routing troops that are not disciplined or elite doesn’t bother them. Otherwise Nubian spearmen are the Muslim equivalent of feudal sergeants and should be used in a similar manner. They have a small shield.

    Order foot soldiers.
    Charge 5 Attack 0 Defence 3 Armour 3 Speed 6, 10, 11 Morale 2 Cost 400 Support cost 62

    Order foot soldiers are only available through crusades: you can’t build them. They are slightly better chivalric sergeants, they have higher morale and if you get them in early they will be nearly as dangerous as Italian infantry. Take a look at the sections on chivalric sergeants and Italian infantry, and then apply that knowledge to this unit. They have a large shield.

    Saracen infantry.
    Charge 5 Attack –1 Defence 3 Armour 3 Speed 6, 10, 11 Morale 0 Cost 300 Support cost 50

    Saracen infantry are something of a coup for the Muslims. Saracens are available to build from early and they are quite easy to reach, the advantage is that they are very similar to chivalric sergeants, so for one era the Muslims have a much better spear unit that any of the other factions, with the exception of the Italians. Use your Saracens aggressively throughout the early period and then use them defensively after 1205, take a look at the Italian infantry section for more. They have a large shield.

    Spearmen.
    Charge 5 Attack –1 Defence –1 Armour 1 Speed 6, 10, 11 Morale 0 Cost 150 Support cost 50

    Well, someone had to come bottom of the class and spearmen have this ‘honour’. They are the weakest of the bunch in every way and there is no reason to use them as main line troops when another variety of spearman is available (if you’re the Byzantines then you will have to make do or hire mercenaries). This is your pinning unit for the times when you want to use ranged attacks that will damage your own men (e.g. naptha, close range volleys of missiles, and javelins) because they will hold the unit in place for longer than peasants and they are less likely to run away before your can finish your attack. Spearmen are also useful for pinning dangerous units that will need swarming from several directions, using them frees up better troops to do the swarming and it doesn’t matter if they take a lot of casualties. Whenever I refer to a junk unit think spearmen So what can you do if you are forced to use spearmen, especially against more advanced units? Firstly you must always keep them on hold formation and keep them properly formed up, if they get scattered they will die fast. Secondly you should use them in combination with other units, the spearmen should take the attack while the other unit flanks and does the actual killing. Thirdly you should keep their flanks well protected as well as positioning them on high ground to guard their low morale and prevent them running. If you can you should try to keep your general nearby to get another morale bonus from him. Always endeavour to keep a single unit from routing when you are using spearmen, their morale is not up to watching their comrades fleeing and they will join the rout very quickly. They have a large shield.

    2.2 Archers and ranged units.


    To make life easier I will split this section into three, with one section each for normal bows, crossbows and gunpowder. This is because these missile weapons are significantly different in the way they are used and what they are capable of. There are some general points that apply to all ranged units, firstly the higher up the unit is the longer the range and the more deadly their missiles, so always put ranged units on high ground if you have the chance. Secondly rain affects the range and accuracy of most weapons (normal bows and crossbows and gunpowder, arbalests have metal strings so they escape this penalty), wind reduces accuracy by blowing missiles off course. Gunpowder has more specific weather problems, which are noted in its section.

    A small note that applies to all missile units (including javelins, mounted missiles, naptha throwers – the whole lot) valour increases accuracy. The difference per level of valour is only slight but it is there. If you keep using valour 0 missile troops don’t be surprised by their relatively low kill counts. Firstly make sure you use them correctly (pick the correct targets etc), secondly make sure they have skill (get them valour, just a few points makes a difference) and you should be able to turn the enemy into a pin cushion every time.

    Normal bows
    This category includes the standard short bows used by most archers and the longbows used exclusively by the English longbowmen. None of the archers in this category, with the exception of the longbowmen, are armour piercing so they are much less effective against armoured targets. Longbows have a slight armour piercing effect, they are not as effective as crossbow types, but they will do respectable damage when faced with armoured targets. When they are used against unarmoured targets (for example peasants, militia or plain spearmen) archers are quite effective as long as the target is not moving. Archers have difficulty hitting moving targets, especially when the target is moving quickly so you should try to target stationary or slow units where possible. Using archers to shoot at galloping cavalry is a futile exercise that will only waste your arrows. Normal bows shoot in an arc, this is their strong point as it enables them to stand behind friendly units and fire over their heads with slightly reduced accuracy if they are not on a slope with a clear view above the unit’s heads. The firing arc also allows them to shoot over obstacles like uneven terrain that can block missiles travelling in a straight line.

    Normal bows possess the highest rate of fire, an archer using a normal bow can release a couple of shots in the time it takes a crossbowman to shoot one, and they can release three or more shots in the time it takes to reload a gunpowder weapon. All archers have exactly 28 arrows in their quiver. When you are defending you can use multiple units of archers to lay down a hail of arrows that will kill the advancing enemy and reduce the morale of the survivors. This tactic works best in the early game when there are fewer armoured units, if you can place your archers on a hill or mountain they will be even more effective as height increases both their range and killing power. If you need to defend a bridge then you should pack several units of archers at the minimum, the enemy get all bunched up when they try to cross the bridge making them an excellent target for missiles. In a bridge battle missile units reign supreme. When you are attacking you can use several units of archers to skirmish and try to draw the enemy out of position, if the enemy have ranged units then you should place your archers in the loose formation and try to get them on the best high ground available to give them some protection against the defending archers who are often well dug in on a good hill.

    To draw the enemy out of position you need to shoot at the unit you want to draw and start causing casualties, once men start dying the enemy will either decide to weather the storm or to move and attack you. If they choose to stay put then you should keep shooting, if they move to attack then you should pull your archers back and send in good melee units to cut the enemy unit to pieces as quickly as possible before it can withdraw or get support from other enemy units. Generally speaking most archers are rubbish in a melee, however there are several very worthy exceptions to this and they are noted in the unit descriptions. Because of their low combat ability you should try to keep your archers far away from hand to hand unless you are very desperate for more bodies to throw at the enemy. You should try to use up all a units arrows before sending them into a melee, this allows you to cause maximum damage and use up all your valuable ammo instead of losing it on the body of a dead archer. Foot archers have an inherent advantage against their mounted counterparts as they have both better accuracy and superior range when compared to the mounted missile units. The horse of a mounted archer also provides a bigger target making it even easier for an infantry archer to kill the mounted version. For maximum effect most archers should be left on fire at will, if you let them choose their own targets they will wait until they have a good chance of hitting the target as well as making sure there are no friendly units at risk of getting an arrow in the back. On some occasions you may need your archers to shoot at a specific target, for best results you should put them on hold position. This prevents them from running off after their target or altering their alignment and making themselves vulnerable to flank attacks as well as disrupting your army’s formation. For the most part you should take your archers off skirmish as they cannot pull back fast enough to stay safe, I generally put my archers on hold formation to stop them engaging in melee if the enemy get too close (i.e. if you have the archers behind a unit of spears the archers will stay back and keep firing if they are on hold formation. If the archers were on skirmish they would pull back and if they were on engage at will they would probably charge into the melee.).

    Archers are considered to have a clear view of their target (a clear view aids accuracy substantially) if they are deployed in ranks of two or less in close formation. If they are deployed in more than two ranks in close formation the ranks behind the second one will shoot with reduced accuracy. If the unit is in loose formation it can be deployed in three or less ranks before the men at the back start getting their view blocked. Having units stood in front of archers will reduce their view and consequentially their accuracy; therefore you should always try to deploy your men on a slope so the archers will be slightly higher up than the other men giving them a clear view.

    Normal bow units are best at: killing unarmoured units, damaging enemy morale with both casualties and arrow fire, bulking up a defensive army and using the advantage of height to kill the attacking enemy, drawing out defending enemy units, killing enemy ranged units in a ranged duel, massacring enemy units trying to cross a bridge, killing the enemy before they reach you and thereby reducing friendly casualties from melee combat, dealing with mounted missile units.

    M4
    M5
    Images M4 and M5:This unit of archers has been deployed so it can shoot over the heads of the spearmen without receiving an accuracy penalty because they are higher up than the spears and this gives them a clear view. The spears will protect the archers and the archers can provide ranged support without needing to move to a safer position.

    M6
    Image M6: This unit of archers is deployed in a four rank deep formation. The rear two ranks are hit by the accuracy penalty but there is an advantage to this deployment in very specific situations. Because the unit is on a very steep slope (a mountain) all four ranks are able to shoot – on flatter ground sometimes the rear ranks will not do anything. The compact formation allows them to focus their firepower on a specific target area, longer formations sometimes only have one half of the formation shooting because the other half is out of range. With this compact formation all the men will be shooting at once so you get more arrows in the air, albeit with less accuracy. Use this formation when you have a nice steep slope and really need more arrows in the air now.

    Crossbows and Arbalesters.
    The difference between crossbows and arbalests is quite small but very significant. Arbalests have a longer range, more killing power and better armour penetration making them much more deadly than plain crossbows. Although they are different they operate in an identical manner and will be referred to from here on as crossbows. Unlike normal bows crossbows cannot arc their fire, this leaves them unable to fire over obstacles or the heads of friendly troops. If crossbows are placed behind friendly troops on flat ground they will shoot individually with reduced accuracy through any gaps in the friendly unit, this is because they will not shoot through friendly men unless you order them to. In the unlikely event that you are mad enough to order them to open fire in a situation like this they will mow down the friendly unit by shooting them in the back. If you can place your crossbows on a slight slope they will be able to fire over the heads of the friendly units without many problems, it only takes a tiny height advantage to allow them both a clear view and a clear shot. You will be able to tell when your crossbows have enough of a height advantage if you look closely, there should be a small patch of empty ground between the units when viewed from the front. If there is no open ground then you are in danger of shooting the front unit in the back. See pictures F, G, H and I below for a demonstration of this principle.

    Crossbow units should be deployed into two ranks if they are in close formation to ensure that all the men get a good view of their targets. If the unit is in loose formation you can deploy into ranks of three before the men at the back get an accuracy penalty. Like their normal bow using counterparts it is best to place crossbows on fire at will and take them off skirmish, since crossbows fire much slower than normal bows they are not exactly good skirmishers anyway as they will only get one, two shots at the most before they have to pull back. If crossbowmen have to move during the reloading process they will have to start from scratch next time they try to fire – they cannot reload on the move and if you don’t remember this you can spend a lot of time waiting for them to shoot, only to move them again before they shoot and slowly becoming frustrated because they won’t shoot at the enemy. Because they fire armour piercing missiles crossbows are devastating against heavily armoured units like knights, they can quite literally kill the entire front rank of a formation in just one volley (but this is a rare event so don’t expect results like this every time). Even when they don’t kill the entire front rank crossbows tend to do plenty of damage because they are more accurate then normal bows and the missiles are more lethal in the first place (they have a higher kill chance).

    If you are attacking you can still use crossbows to draw the enemy out of position and if you are anticipating a ranged duel crossbow units have an advantage that normal bows and gunpowder do not – there is a pavise version of each unit. A pavise is a man-sized shield behind which a crossbowman can hide while he reloads his weapon. This makes them very hard to kill with missile weapons and can give them a significant advantage in a missile duel if their opponent does not possess a pavise. However the pavise does slow the crossbowmen’s movement down considerably, so you will want to avoid them in situations that require mobility. For more on the difference between pavise and non-pavise crossbowmen read the relevant sections below (crossbows, pavise crossbows, arbalesters and pavise arbalesters). Crossbow units have exactly the same amount of ammunition as normal bows (28 quarrels) but it will last much longer due to their slower rate of fire, this enables them to keep shooting long after normal bows have run out of arrows. Crossbow units have the same advantage against mounted missile units as normal bows; in fact they are even better due to their longer range and higher accuracy and killing power. Crossbow units are the unit of choice for disposing of troublesome mounted missiles.

    Crossbow units are best at: Killing armoured units, inflicting high amounts of damage on enemy units, inflicting the morale penalty for missile fire on enemy units, defending a strategic location (e.g. bridge) for long periods of time, drawing enemy missile fire without taking much damage (as long as you are using the pavise version of the unit), luring the enemy down from a defensive location, reducing the number of enemy that reach hand to hand with your troops, dealing with mounted missile units, providing a relatively cheap way to kill powerful units like knights.

    M7
    M8
    Images M7 and M8:These crossbows are deployed badly – the second unit will shoot the first in the back.

    M9
    M10
    Images M9 and M10:With a tiny adjustment both units receive a clear view and the second unit is not going to shoot their comrades in the back. This is a small difference in deployment but it is vital to master if you want to use these units well.

    Gunpowder units.
    Gunpowder units are very different to the other missile units and not exactly in a good way. Firstly they have a very short range; they can improve their range by standing on high ground but generally speaking the enemy must be very close before the guns can open fire. Secondly, they have very low accuracy, it is not uncommon to watch a unit of 80 arquebusiers fire three volleys into a unit of 133 men and only kill two or three men. Thirdly, they have serious problems with the weather, heavy rain or falling snow will stop them from firing because the primitive gunpowder gets wet. In lighter rain or falling snow the units will fire at an even slower rate than usual. Fourthly the guns take a long time to reload so unless you arrange them carefully you will often only get one volley before the enemy are on you. Gunpowder units do have some advantages and proper usage can alleviate their problems a little but you should never consider gunpowder a replacement for more conventional bow and crossbow weapons. At best they are a useful novelty that should be used in small numbers and in specific circumstances, at worst they are a liability and a waste of space.

    To improve the rate of fire you must deploy the gunners in ranks of three or more as this will force them to use a revolving reload system where the front rank will fire before retiring to the rear to reload leaving the man behind to fire his weapon before the process repeats. This speeds up the rate of fire considerably although it still takes a few seconds for a man to prime his weapon upon reaching the front rank. Three ranks is the most efficient balance between speed of fire and maximum number of shots per volley. If guns are deployed in one or two ranks they will fire one massive volley before taking a long time to reload, you should never use your guns in this way.

    Accuracy is a more important, and harder to fix, problem. Valour helps slightly so try to use guns in an army commanded by a good general and build them in a master gunsmith, or in custom battles you should buy them several levels of valour. Valour is only a slight fix, you should also try firing at close range to maximise the chance of hitting something so use a junk unit to pin the enemy in place before flanking with a unit of guns and firing into their rear at close range. Pinning an enemy like this also counteracts the gun’s short range. Gunpowder does have some advantages, it causes fear in units so units that are under fire from a gun unit get two penalties one for being under fire and one for being shot at by gunpowder. Secondly gunpowder units take even longer to use all their ammo than crossbows, which enables them to last a long time even though they only have 10 rounds per man. Honestly I can’t really recommend the use of gunpowder troops apart from the Catholic hand gunners and I only recommend them because they are good melee swordsmen who benefit from firing a single volley into their enemy before charging.

    M11
    Image M11:These arquebusiers have been run around the enemies flanks so they can fire into the rear of the pinned unit.

    NONE OF THESE STATS INCLUDE THE SHIELD BONUS, YOU CAN FIND OUT WHAT KIND OF SHIELD (IF ANY) A UNIT POSSESSES IN THE WRITE UP AND THEN CHECK APPENDIX 3 FOR THE BONUS YOU NEED TO ADD TO THESE BASE STATS.

    Archers.
    Charge 1 Attack –1 Defence –2 Armour 1 Speed 6, 10, 11 Morale –1 Cost 225 Support cost 37

    Archers are the simplest ranged unit in the game. They are the most basic and have no advantages like shields so you should use a more specialist type of archer (i.e. one with a longer name) whenever there is one available. The basic archer is still very useful as a ranged unit although you should never send it into a melee as they really cannot hold their own. Archers have low morale so you need to keep a close eye on them if your units start routing or if the archers start to get into a disadvantageous position.

    Bulgarian brigands.
    Charge 1 Attack 2 Defence 0 Armour 2 Speed 6, 12, 13 Morale 0 Cost 300 Support cost 30

    Bulgarian brigands are slightly better at hand-to-hand combat than the standard archer as well as being faster and having slightly better morale. The fact that they are fast for infantry allows this unit to skirmish more effectively than many foot based ranged units, as there are only a handful of melee infantry units capable of catching the speedy brigands. Because brigands still have low morale you must be careful to stop them getting surrounded or skirmishing themselves into a morale damaging position as it is likely they will loose their nerve and run away if this happens. Bulgarian brigands are not very good in a fight but they can cause some damage if they charge from a flank or the rear and they should be able to hold their own against most infantry units for a short time, allowing you to send aid. They have a small shield.

    Desert archers.
    Charge 1 Attack –1 Defence -2 Armour 1 Speed 6, 12, 13 Morale 0 Cost 250 Support cost 37

    Desert archers are faster than standard archers which allows them to skirmish effectively, just like Bulgarian brigands. Desert archers also have slightly better morale but they are still likely to flee the field if things get hairy, and just like Bulgarian brigands you must watch them while they skirmish to prevent any unfortunate morale problems. They have a small shield.

    Genoese sailors.
    Charge 1 Attack 0 Defence –2 Armour 1 Speed 6, 12, 13 Morale 2 Cost 275 Support cost 30

    Genoese sailors are slightly better in a melee than plain vanilla archers because they have one point more in attack. They are also faster than ordinary archers and this allows them to skirmish effectively with other infantry units. They have a small shield.

    Golden horde warriors.
    Charge 2 Attack 3 Defence 0 Armour 2 Speed 6, 10, 11 Morale 2 Cost 300 Support cost 22

    Golden horde warriors are disciplined, which makes them very valuable in a fight where things are going badly. Routing units, unless they are also disciplined or elite, will not affect their morale. The death of your general will have less of an impact on this unit’s morale. Golden Horde archers also have a large shield to protect them from missiles; this makes them very handy in a ranged duel if you have no pavise units. If this unit is not already appealing enough they are very good light infantry and capable in a melee. This is one unit of archers that can kill effectively at both long range and close up.

    Hashishin.
    Charge 2 Attack 6 Defence 5 Armour 2 Speed 6, 12, 13 Morale 12 Cost 500 Support cost 15

    Hashishin have 12 men per unit. They come with a small shield to protect them from missiles and they are very deadly in melee combat. The major problem is that there are only 12 men total – this means they often get pulverised by weight of numbers before they can do much damage. To get maximum benefit from this unit you need to remember their other, special talent – they can hide anywhere on the battlefield, not just in trees like everyone else. This enables you to set ambushes and run this unit behind enemy lines to snipe at the general. Since they are good in melee combat you can charge your Hashishin into the rear of an enemy unit that is already engaged to cause significant damage without risking them being outnumbered and slaughtered. You should try to train Hashishin up a few valour levels by killing peasants and other easy targets; because there are only 12 men they will level up quickly. After gaining several valour levels they become much more deadly and can take on larger, tougher units like the enemy general without too many problems. You should remember that they will become visible the moment they move so you should take them off skirmish when using them to ambush.

    Janissary archers.
    Charge 1 Attack 1 Defence 0 Armour 2 Speed 6, 10, 11 Morale 4 Cost 275 Support cost 52

    Janissary archers are both disciplined and elite. This makes them very reliable when things get hairy, as only other elite units will affect their morale by routing. Janissary infantry can act as a capable set of flankers after you run out of arrows because they have high morale and tolerable melee stats, however this is not their best use and they should only be used like this in emergencies. They have a small shield.

    Janissary infantry.
    Charge 1 Attack 4 Defence 2 Armour 3 Speed 6, 10, 11 Morale 4 Cost 350 Support cost 52

    Janissary infantry are elite, disciplined and generally a very scary set of men. Like the Golden Horde warriors they can kill effectively at both long and short range, they make brilliant flankers and can be used as a reserve to plug gaps in your line or intercept new threats to your flanks. They have small shields to improve their survival rating. Because they have high morale in addition to elite and disciplined status they will take a heck of a lot of misfortune before they rout. When you can use Janissary infantry you have no real reason to use any other infantry based archers unless you are very short of cash.

    Ottoman infantry.
    Charge 2 Attack 1 Defence 0 Armour 2 Speed 6, 10, 11 Morale 0 Cost 275 Support cost 37

    Ottoman infantry have a small shield that makes them valuable in ranged duels if there are no pavise units. They have similar melee stats to the Janissary archers so they can do some melee fighting but they won’t be outstanding at it, although they will do better if they face armoured opponents – this unit has an armour piercing attack. Even so they are just pepped up standard archers and should be used as such, with an emphasis on fighting armoured opponents rather than unarmoured ones.

    Trebizond archers.
    Charge 1 Attack 3 Defence –2 Armour 1 Speed 6, 10, 11 Morale 2 Cost 275 Support cost 52

    Trebizond archers are disciplined and have a small shield; they also have a high (for an archer) attack so they can kill other units surprisingly quickly in a melee. At the same time they will die quickly due to their low defence, however the shield does alleviate this problem slightly.

    Turcoman foot soldiers.
    Charge 1 Attack –1 Defence 2 Armour 3 Speed 6, 12, 13 Morale –1 Cost 300 Support cost 30

    Turcoman foot have a small shield alongside reasonable defence and armour. This makes them quite tough for simple archers. They are also fast and these two facts combine to make an effective skirmisher who excels in a ranged duel. Turcoman have low attack values so they should stay away from melees as much as possible. If you send your Turcoman to skirmish you must remember to watch them more carefully than usual as they have a very low morale and it won’t take much for them to rout while skirmishing. Turcoman foot also possess a ‘rabble’ formation – no matter what you tell them to do they look like a rabble. This makes them harder to hit with missiles because the men are strung out and disorganised but at the same time it can make them harder to include in tight formations with other units. This unit is one of the best pure archers.

    Crossbow.
    Charge 1 Attack –1 Defence 2 Armour 3 Speed 6, 10, 11 Morale 0 Cost 200 Support cost 22

    Crossbows are the first unit available to use the armour penetrating crossbow type weapon. This is both their advantage and their disadvantage. It is their advantage because there is no one else who can do their job until the appearance of arbalesters. It is a disadvantage because arbalesters are available only a few short turns after the crossbowmen appear. In multiplayer and custom battles the two units are always available together. The thing is arbalesters are everything crossbows are and then some – they can do everything crossbows can and they do it far better. There is only a small price difference between the units and arbalesters really do provide enough extra bang for that buck. This means that you should always take arbalesters over crossbows when offered the opportunity. Crossbowmen are poor in melee combat, have low morale and are not very speedy so you should keep them safe and well protected and let them snipe away at the foe.

    Pavise crossbows.
    Charge 1 Attack –1 Defence 2 Armour 3 Speed 4, 8, 9 Morale 0 Cost 225 Support cost 22

    Pavise crossbows are the anti-missile version of normal crossbowmen. The giant pavise shield makes them almost immune to missiles so they are the unit of choice when it comes to ranged duels. The pavise is so heavy it slows the bearer down making this unit ineffective at skirmishing and manoeuvring quickly. Otherwise this unit is exactly the same as a normal crossbowman.

    Arbalesters.
    Charge 1 Attack –1 Defence 2 Armour 3 Speed 6, 10, 11 Morale 0 Cost 275 Support cost 22

    Arbalesters are crossbows +1. Statistically speaking they are identical – arbalesters are just as bad in a melee as their lesser counterparts. The real difference is in the ranged weapon. Arbalesters use a larger, stronger crossbow with a steel string. This means that the wet weather doesn’t reduce their accuracy, as well as making each shot more powerful. Arbalests also have a longer range, more killing power, and more armour piercing power – this makes them deadly.

    Pavise arbalesters.
    Charge 1 Attack –1 Defence 2 Armour 3 Speed 4, 8, 9 Morale 0 Cost 300 Support cost 22

    Pavise arbalesters are arbalesters with pavise shields. In function they are exactly the same as pavise crossbowmen but they have the advantage of the more powerful arbalest crossbow.

    Longbowmen.
    Charge 1 Attack 3 Defence –2 Armour 1 Speed 6, 10, 11 Morale 4 Cost 350 Support cost 45

    Longbows have a small shield and they use a unique bow – the long bow. This is the only standard bow with anti-armour capabilities; while it may not be as good against armour as an arbalest, or even a crossbow, it will prove effective against most targets. In the original release of MTW these guys fired faster than ordinary archers but in 1.1 and onwards they fire at the same rate. Against unarmoured units like peasant longbows will perform at the same standard as ordinary shortbow equipped archers, therefore you should always try to target armoured units to get maximum usage from them. Longbowmen also have the ‘rabble’ natural formation making them harder to hit with missiles and generally look untidy

    Handgunners.
    Charge 1 Attack 1 Defence 3 Armour 4 Speed 6, 10, 11 Morale 4 Cost 200 Support cost 30

    Handgunners are one of the better gunpowder units because they are also very handy swordsmen. If there is a melee you can rely on your handgunners standing their ground unless they are facing cavalry. The guns they use have incredibly short range and are very inaccurate, the unit will often only get one shot before the enemy reaches and engages them. Because of their short range the enemy are often very close when the unit fires – this does compensate for the poor accuracy to some extent. The best way to use handgunners is as swordsmen with the benefit of firing a single volley before charging. Therefore you should put them in two ranks and on hold formation (skirmish will let them pull back before doing any good, engage at will risks them charging prematurely), have them fire one volley at the enemy before switching them to engage at will and ordering them to charge. Alternatively you can put them in three ranks and hold formation before using them to run around the enemies flanks and firing a few volleys before charging (once again switch to engage at will before the charge for maximum efficiency) into the stunned enemies rear. Remember that gunpowder will apply a –6 penalty to morale if a single casualty is caused in a unit, therefore all your handgunners need to do is kill one man before charging to stand a good chance of breaking a unit shortly after impact.

    Mamluk handgunners.
    Charge 1 Attack 0 Defence –2 Armour 1 Speed 6, 10, 11 Morale 2 Cost 100 Support cost 30

    Mamluk gunners are no where near as good as their western counterparts. They are rather rubbish in combat and they have the same dodgy handgun complete with short range, slow rate of fire and long reload times. Put them in three ranks on hold formation, run them around the enemies flanks and let them fire into the rear, there is little else you can do with them.

    Arquebusiers.
    Charge 1 Attack –1 Defence 3 Armour 4 Speed 6, 10, 11 Morale 0 Cost 175 Support cost 22

    Arquebusiers are a slight upgrade from handgunners in one sense but at the same time they are a significant downgrade when compared to the western handgunners’ melee capabilities. Like the Mamluk handgunners arquebusiers are no good in a melee and should stay well out of it. To get the best usage out of your arquebusiers you should put them in hold formation and three ranks before sending them around the enemy’s flanks and shooting the foe in the back.

    2.3 Swordsmen.


    Swordsmen are the bread and butter unit of most medieval armies. They are inexpensive and not very exciting; they are also very reliable and acquit themselves well against most other units with the sole exception of cavalry. Cavalry is the bane of swordsmen, just as swordsmen are the bane of spear and pike units. Swordsmen can take down cavalry under certain circumstances but generally it is inefficient and a last resort in desperate circumstances. If you have to take on cavalry with swords you should try to find a wood to place them in as the cavalry receive a significant penalty for fighting in trees, this gives the swords a fighting chance. You should also try to attack the horsemen with several units to gain the advantage of numbers and inflict the morale penalties for being flanked on the cavalry. If at all possible you should have a more capable unit, like spearmen, stand and receive the charge before sending your swords to attack the cavalry in the rear. When you have no choice but to receive a cavalry charge with swordsmen you should put them in four or more ranks and on hold formation, this gives them a larger chance of surviving the charge and fighting back. If a thin line of swordsmen is hit by a cavalry charge they will be swept away with massive casualties, often the unit will break and run almost immediately.

    When you use swordsmen against anything other than cavalry you should deploy them in two ranks, this allows the formation to wrap around the enemies flanks when combat is engaged and this in turn allows the swordsmen to do much more damage. It also adds a morale penalty to the enemy. If you do not deploy your swords so they can wrap around at least one flank they can struggle to fight as effectively as you might wish. This two rank deployment is especially important when you charge a unit of spears as they will hold their formation together for much longer if the swordsmen cannot attack from the sides, the longer the spears hold formation the more damage they can do to your swords.

    Swordsmen have no spectacular bonuses against other units – even when facing spears they gain a simple +1 to attack and most of the swordsmen are not armour piercing, neither do they have a significant charge bonus. This can lead to them looking rather unimpressive in combat unless you watch closely – it may take them a while to kill but they do it steadily and reliably, in fact reliable is the key word with swordsmen – they are nothing if not reliable. Most swords units have very good morale and elite or disciplined status, this combines with their ability to hold their own in almost any situation to create a unit you can rely on to hold the line and do damage in a hard fight. Spearmen can hold your line reliably but it is often the swordsmen who plug the gaps, lead the charges and generally do most of the killing. Together these two unit types can chew through more foes than you want to count, all that is really missing from this combo is the ranged support and a unit or two of cavalry to mop up routers. Because of their reliability and versatility swordsmen make excellent units for your reserve as they can go into a fight you are loosing and keep fighting until you either win or they are decimated.

    Sword units are best at: killing spears and pikes, combating other sword and axe armed units, providing a unit that can fill any gaps in your line, being a reliable set of men to send into difficult situations, being a strategic reserve.

    M12
    Image M12: This picture was taken one second after the swordsmen’s charge hit. As you can see they have wrapped around the spears right flank completely, the left flank is only partially wrapped. The spears are losing their formation because of this pressure and their situation will only get worse as the last few swordsmen reach the battle. This is why you want your swordsmen in long, two rank deep formations.

    NONE OF THESE STATS INCLUDE THE SHIELD BONUS, YOU CAN FIND OUT WHAT KIND OF SHIELD (IF ANY) A UNIT POSSESSES IN THE WRITE UP AND THEN CHECK APPENDIX 3 FOR THE BONUS YOU NEED TO ADD TO THESE BASE STATS.

    Byzantine infantry.
    Charge 3 Attack 2 Defence 2 Armour 3 Speed 6, 10, 11 Morale 0 Cost 200 Support cost 62

    Byzantine infantry are disciplined and deadly. They have a large shield that protects them from missiles and adds to their defence in combat. The real reason why Byzantine infantry is so deadly is not apparent from the stats listed above – their strength is in their numbers. Unlike most swordsmen there are 133 men in each unit, a significant increase over the usual 80 men. This means that Byzantine infantry are able to do more damage even though statistically speaking they are one of the weaker sword units. They are also able to take on cavalry far more effectively than most other swords; this is because they can outnumber the cavalry by more than two to one. Byzantine infantry will make up the front line of most Byzantine armies regardless of the period.

    Feudal men at arms.
    Charge 3 Attack 3 Defence 2 Armour 3 Speed 6, 10, 11 Morale 2 Cost 175 Support cost 45

    Feudal men at arms are elite and have large shields to protect them. They are very solid swordsmen and they will serve well until they eventually become outdated with the advent of the chivalric men at arms. Even after their successors appear feudal men at arms can be useful for budget armies and a unit of feudals with high valour will continue to strike terror in the foes hearts.

    Chivalric men at arms.
    Charge 3 Attack 4 Defence 3 Armour 4 Speed 6, 10, 11 Morale 4 Cost 250 Support cost 52

    Chivalric men at arms are elite and have large shields. They replace feudal men at arms as the deadly Catholic infantry and they do a solid job on the battlefield. The shield only has a 0.5 modifier.

    Feudal foot knights.
    Charge 3 Attack 5 Defence 2 Armour 3 Speed 6, 10, 11 Morale 8 Cost 275 Support cost N/A

    Feudal foot knights are elite and have a large shield, they are much more capable then their plain feudal men at arms counterparts. Knights also possess sky high morale – they will not break until most of them are dead. There are drawbacks however, firstly there are only 53 men per unit and this does reduce their potential significantly as they cannot deploy in a long enough line to wrap around their foes flanks without stretching perilously thin. Secondly, and perhaps most troublesome, is the fact that you can only get feudal foot knight by dismounting a unit of feudal knights at the deployment phase of a battle. Feudal knights can only dismount in siege situations so it is very rare for you to control a unit of feudal foot knights, but when you do let the carnage begin Because this unit has heavy armour keep them out of the desert or they will become exhausted in a matter of minutes. (Note: If you have the VI add-on you can get large units of feudal foot knights whenever you wish by dismounting Druzhina cavalry)

    Gothic foot knights.
    Charge 4 Attack 5 Defence 6 Armour 6 Speed 4, 8, 9 Morale 8 Cost 475 Support cost N/A

    Gothic foot knights are elite and have armour piercing two-handed swords that chop most units into tiny pieces. Once again you can only get these foot knights by dismounting gothic knights, fortunately gothic knights can dismount during the deployment phase of any battle, not just sieges. There are only 53 men per unit and they are very slow because of all the heavy armour they wear, once combat is joined they will begin hacking away and do plenty of damage. Let these armoured behemoths march straight at the enemy and attack from the front, let other, faster units worry about flanking. The sky-high morale of this unit means that they will march onto the field and continue fighting until victory is yours or your army is so badly crushed that there is no dishonour in fleeing. The gothic knights armour is so effective they can walk into a hail of missiles and take very little damage unless those missiles are armour piercing. Once again keep this unit out of the desert

    Hospitaller foot knights.
    Charge 3 Attack 5 Defence 5 Armour 6 Speed 4, 8, 9 Morale 8 Cost 400 Support cost N/A

    Hospitaller foot knights are elite and have a large shield. They are also very slow. As with all knights these men will win the battle or die trying. This is the second best unit of swordsmen as far as plain stats go; once again there are catches. In addition to the small unit size (53 men) and the need to dismount a unit of Hospitaller knights in battle there is the problem of getting the unit of Hospitallers in the first place. You can only get Hospitallers from a crusade, this also means you cannot retrain to improve equipment or replace losses. If you can get this unit they are great but the chances are you will not be able to get many of them and when you do get them you will probably hoard them as a treasured reserve. Despite being crusaders they still have too much armour to handle the desert comfortably. The shield has a 0.0 modifier which means it provides no bonus at all – it is just for show.

    2.4 Axemen


    Axemen are somewhat specialist troops. They are all armour piercing and are thus deadly against units with heavy armour. However they are not so good against unarmoured targets as they do not get any bonuses if the target is unarmoured. Because most axemen have a good attack stat they can still do a fair amount of damage in a straight fight but somehow they are seldom as effective as swordsmen, especially when faced with spears as they always seem to take more casualties. With the cheaper axemen, like Ghazi infantry, this is not such a problem but it can be troublesome if you are outnumbered badly and every man counts or if you cannot afford to replace the unit after the battle.

    Like swordsmen axemen are vulnerable to cavalry, however because they have armour-piercing weapons they can often do damage at the same rate as they take it when faced with heavy cavalry. Against lighter cavalry with little or no armour Axemen are just as bad as swordsmen. Axemen should observe the same protocols when facing horsemen, namely stay in a tight, deep formation and try to fight in the trees. Whenever you can you should use Axemen as flankers as this offsets their often low defence, use a unit like spears to pin your target and send your Axemen running around the flanks to hit from behind. This also has the advantage of inflicting a morale penalty on the foe.

    Getting the most out of axemen is quite simple – use them when faced with armour, try to flank with them and keep them away from targets lacking armour and you will find them a worthwhile part of your army. Using them against unarmoured targets is possible but it wastes their potential more than a bit, as many of the factions using axe units will be up against the heavily armoured Catholic armies at some point and need every possible advantage when facing a collection of tin cans

    Axe units are best at: killing armoured units, general fighting in your battle line.

    For more on the armour piercing bonuses look at appendix 4.

    NONE OF THESE STATS INCLUDE THE SHIELD BONUS, YOU CAN FIND OUT WHAT KIND OF SHIELD (IF ANY) A UNIT POSSESSES IN THE WRITE UP AND THEN CHECK APPENDIX 3 FOR THE BONUS YOU NEED TO ADD TO THESE BASE STATS.

    Abyssinian guards.
    Charge 4 Attack 4 Defence 0 Armour 1 Speed 6, 10, 11 Morale 6 Cost 175 Support cost 75

    Abyssinian guards are elite, disciplined and have poor defence. The substantial morale does help keep this unit on the field while it takes large numbers of casualties and the unit is capable of doing good damage when it ploughs into an armoured unit or weak unarmoured unit, however in the end the unit is not that impressive.

    Ghazi infantry
    Charge 5 Attack 5 Defence -4 Armour 1 Speed 6, 12, 13 Morale 8 Cost 175 Support cost 30

    Ghazi infantry are armour piercing and impetuous which means they tend to charge without orders, pick their own targets, ignore orders to retreat and generally give your general premature grey hair Ghazi infantry have horrible defence matched with very good attack and charge stats. This means that will kill and die quickly. Fortunately they have sky-high morale that means they will keep going even when half the unit is dead, these men are fanatics and it takes a lot to get them off the field. Ghazis are fast which aids in the rush to send them around the flanks to attack from the rear, as long as the Ghazis charge into the enemies rear most of the unit should survive the battle. This is a very nice unit when you learn its nuances.

    Varangian guard.
    Charge 4 Attack 4 Defence 5 Armour 4 Speed 6, 10, 11 Morale 6 Cost 500 Support cost 75

    Varangian guard are elite, disciplined killing machines. They have excellent stats – they are the only Axemen who do not need to flank in order to survive. Varangians are what you would expect from the Byzantines elite Axemen corps – just wind them up, point them at some armour and let them go. The only real problem is that this unit is not available in the late period. Varangian guards can also do a good job of killing unarmoured targets as their attack stat is very high and their defence and armour stats give them good protection against most attacks. If you have a choice of targets you should still send them after the armoured ones for best effect. They have a large shield but it does not give a bonus in a melee as they sling it on their back to wield the axe two handed, against missiles the shield has a 0.5 modifer.

    Vikings.
    Charge 3 Attack 3 Defence 0 Armour 2 Speed 6, 10, 11 Morale 4 Cost 175 Support cost 38

    Vikings have a shield and are generally quite balanced stat wise. This means they don’t excel at anything but they are not particularly bad at anything either. They are solid Axemen and are at home in any army, once again they are best used to flank armour units and you will get results as long as you do this.

    Woodsmen.
    Charge 8 Attack 1 Defence -1 Armour 2 Speed 6, 10, 11 Morale –2 Cost 75 Support cost 22

    Woodsmen are peasants with huge axes, this means they suffer from very low morale, poor defence and low attack values. As a nice off set to these problems the woodsmen have an abnormally high charge value for infantry so you should use this to your advantage. Woodsmen make good disposable troops, just charge them into the enemies armoured units rear and let them kill until they break and run. They are dirt-cheap and easy to replace so use them as disposable units to take out the expensive and valuable armoured units and you will have more than your moneys worth. They are less effective against unarmoured targets so it is up to you to decide whether the smaller amount of kills they will achieve is a good exchange for your money. I would say ‘not’.

    2.5 Pikemen.


    Pikemen are the successors to spearmen, they serve the same function and receive the same rank bonus as the spears ( +1 defence, +1 charge per supporting rank and +1 attack for each second supporting rank) but they can claim up to four supporting ranks. Therefore you should deploy them in ranks of six, one to fight, four to support and the sixth providing men to fill the gaps left by the dead. The supporting ranks mean that pikemen need to hold their formation in order to fight effectively, therefore keep them on hold formation at all times. You should also be careful when moving them, let them stop frequently to recover their formation. You can charge pikes somewhat more effectively than spears, just walk them up in front of the enemy, pause for a second to allow them to redress the ranks and then order the charge from close range. This arrangement allows the unit to take losses without losing the rank bonus too quickly. The need for a deeper deployment means that pikemen can cover less ground per unit as they have the same number of men as the spear units (133), this makes them less efficient for holding a front line. They are also more vulnerable to being flanked as the shorter frontage makes it very easy for enemy units to wrap around the pikes and attack from three sides simultaneously. Pikemen have one major problem – everything they can do another unit can do much better. Spears still provide a better front line troop for protecting missile units and providing a base for mobile units to work from. Polearms are much, much better at killing cavalry and they also have a bonus against armoured units, swords, spears and polearm units are also better for leading the charge into battle and engaging the enemy’s front line while others flank. These units are also less vulnerable to being wrapped in a combat situation.

    There is one bonus to their small frontage – they are ideal for holding small spaces like the mouth of a bridge or a castle gate (not breach though, they are usually much larger than the gates) for a long time. They are often able to beat off many determined attacks when given a little missile support.

    Pikes are best at: Charging the enemy, holding a position, holding a small space, guarding missile units.

    M13
    Image M13: This picture shows a unit of pikemen against a unit of spearmen. Both are in their optimal formations (pikes = 6 ranks, spears = 4). This shows just how easy it is for pike formations to get wrapped in combat, it also illustrates why spears are better for building a front line.

    M14
    Image M14: Here is an illustration of the pikes supporting rank bonus in action. Look at the row at the bottom of the screenshot. The first man is doing the actual fighting. The four behind him are in their fighting animations even though they are not near the enemy; this is because they are supporting the first man. The final man at the back is doing nothing, this is because he is the reinforcement rank – he will move in to replace a dead man. Because you can see the supporting ranks working in most of the formation you know that this unit is fighting at its best.

    THE FOLLOWING STATS DO NOT CONTAIN THE RANK BONUS – YOU WILL HAVE TO ADD THAT YOURSELF

    NONE OF THESE STATS INCLUDE THE SHIELD BONUS, YOU CAN FIND OUT WHAT KIND OF SHIELD (IF ANY) A UNIT POSSESSES IN THE WRITE UP AND THEN CHECK APPENDIX 3 FOR THE BONUS YOU NEED TO ADD TO THESE BASE STATS.

    Pikemen.
    Charge 4 Attack 1 Defence -1 Armour 1 Speed 6, 10, 11 Morale 2 Cost 250 Support cost 62

    Pikemen are a solid foundation for the class, however like any foundation they are dull in comparison to their more advanced brethren. They do the job but their morale isn’t the greatest and they don’t do much damage.

    Swiss Pikemen.
    Charge 4 Attack 2 Defence 2 Armour 2 Speed 6, 10, 11 Morale 6 Cost 525 Support cost 48

    Swiss Pikemen are much better in every way than the standard pikes, they are better in every way. These pikemen can carry the battle to the enemy and do some real damage while taking reasonable losses. They have excellent morale too.

    Swiss armoured Pikemen.
    Charge 4 Attack 2 Defence 5 Armour 4 Speed 6, 10, 11 Morale 6 Cost 750 Support cost 60

    Swiss armoured Pikemen are elite and generally the best pikemen in the game. They will pack a punch in battle as long as you keep their flanks protected, the formation intact and kill any armour piercing units before they reach this unit. You should also be extra wary of armour piercing missile units – Swiss armoured pikemen are very expensive so you don’t want them to get shot up

    2.6 Polearms.


    Polearms are another set of specialists; they are made to combat armour and cavalry. This is a very handy combination as most of the more dangerous cavalry has heavy armour allowing polearms to receive some very impressive bonuses when fighting heavy cavalry. Polearms are so effective when facing cavalry they make spears almost obsolete; the only thing that makes spears better at facing cavalry is that fact spears are not likely to be pushed back by the cavalry’s initial charge because of their dense formation and spear class bonuses. Polearms are as vulnerable to cavalry charges as any other non-spear unit, to counter this you need to use them in the opposite way to every other non-spear unit when facing cavalry. Draw them up in two to three ranks and charge Because they are charging they will kill more cavalry in the initial impact and the thinner formation allows them to get more men into the fray and increases the likelihood of men getting around the cavalries flanks. If you do this with a thicker formation the end result is less effective as fewer men get into the initial killing phase meaning more cavalrymen survive to cause damage in the ensuing melee. This approach is effective against light and medium cavalry, heavy cavalry and knights will do a lot more damage on their charge.

    When facing heavy cavalry or knights you should consider letting another unit receive the charge and use your polearms to smash into the cavalry’s flanks and rear, the carnage this can cause is incredible. This tactic allows spearmen to continue to be useful after the advent of polearms as they remain the best unit for receiving charges. Polearms should always be left on engage at will as they receive no rank bonuses and they need to get in amongst the enemy to really reach their full potential. Against infantry units you should use your polearms in two ranks and let them engage at will, in many ways they should be used like swordsmen when facing infantry. Draw them up into formation, march them close to the enemy and then charge into battle. Generally speaking the polearm units are capable of putting up a good fight if they cannot flank, unlike many of the Axemen for example. Therefore you should flank when you can but it is not vital to their proper usage. Polearms not only semi replace spears they also semi replace swords as most infantry units in the high and late eras have armour, enabling polearms to take them on very effectively. Against the unarmoured units swordsmen are still much better. This means you can reduce the number of sword and spear armed infantry in your army and replace them with the multipurpose polearm troops, this is more effective for some factions than others as the basic halberdier is not nearly as good at multitasking as the billman or Janissary heavy infantry.

    Polearms are best at: killing armoured units, killing cavalry, acting as multipurpose infantry.

    For more on the armour piercing bonuses look in appendix 4.

    M15
    Image M15: This unit of Billmen has been forced to receive an enemy cavalry charge. They formed up into two ranks and charged the knights. On impact 14 billmen and 4 knights died, the billmen wavered for a second before steadily dispersing amongst the knights and slaughtering them. The final statistics were: billmen 20 lost, knights 43 lost.

    M16
    Image M16: Here the same battle is repeated with the billmen in four ranks to resist the shocking effects of the knights charge. On the initial impact 7 billmen and 2 knights died. In the subsequent battle the billmen were slow to get in amongst the knights and fight them off. The billmen won in the end with 27 dead against the knights 36. This demonstrates how much more effective the two ranks are when receiving a cavalry charge.

    NONE OF THESE STATS INCLUDE THE SHIELD BONUS, YOU CAN FIND OUT WHAT KIND OF SHIELD (IF ANY) A UNIT POSSESSES IN THE WRITE UP AND THEN CHECK APPENDIX 3 FOR THE BONUS YOU NEED TO ADD TO THESE BASE STATS.

    Billmen
    Charge 2 Attack 2 Defence 4 Armour 3 Speed 6, 10, 11 Morale 2 Cost 300 Support cost 37

    Billmen are the first unit of proper (i.e. not a peasant militia – see the peasant section below) polearms you can get - that is as long as you are English Billmen are very good, solid polearms and they have balanced stats. This means they can kill effectively and survive the battle in reasonable numbers as long as nothing disastrous happens. While billmen can handle a front-on charge by heavy cavalry you should try to avoid this, as they are not strong enough to resist the charge without taking substantial losses in the process. Send billmen charging into the rear of a group of heavy cavalry and they will slice them up into horsemeat.

    Chivalric foot knights.
    Charge 2 Attack 4 Defence 6 Armour 5 Speed 4, 8, 9 Morale 8 Cost 550 Support cost N/A

    Chivalric foot knights are elite and are almost tied with Janissary infantry for the honour of being the best polearms, maybe even the best infantry full stop. Chivalric foot knights can charge headfirst into heavy cavalry or knights without too many problems, they have very high armour and formidable defences so you can be certain they will survive the battle unless they run into armour piercing units or get shot up by armour piercing missiles. Chivalric foot knights also have a decent attack value; it is deceptively low, as the armour piercing effect will enable them to rip through targets with a hint of armour. Unarmoured targets generally find it difficult to damage the knights meaning the battle becomes one of endurance that the knights can slowly win. Chivalric foot knights are not perfect. Firstly they are very slow, it is a good thing they can handle a head on charge because they are too slow to do anything else effectively The small size of the unit (53 men) makes them vulnerable to being overwhelmed – they may be able to fight like heroes but even a hero dies when outnumbered four to one. The final disadvantage is not actually much of a disadvantage; chivalric foot knights must be dismounted from chivalric knights during the deployment phase of the battle. However since chivalric knights are some of the best cavalry in the game this is not too much of a hardship Some people even make armies out of nothing but 16 units of chivalric knights, they keep half mounted and the other 8 units fight on foot. Apparently this is very effective even though there is no missile support.

    Halberdiers
    Charge 2 Attack 1 Defence 6 Armour 5 Speed 4, 8, 9 Morale 0 Cost 300 Support cost 45

    Halberdiers are the final unit in the peasant food chain. Unlike militia they are not classed as peasants because they have enough training and stats to squeak into the professional soldier class. Halberdiers are slow but unlike the chivalric foot knights they do not really have the stats to march straight at the enemy and damn the consequences. Their morale is too low and their attack is also low so they will not do much damage, even against armoured targets. The best use for halberdiers is hinted at by their extraordinary armour and defence ratings – most missiles will bounce off their armour. This allows them to stand in the middle of a missile storm and only take a couple of casualties – if they do not take casualties they receive no morale penalties. It is also hard for other units to kill the individual men, unless they have armour-piercing weapons and even then it will take some time before the casualties start to add up. Therefore halberdiers are very effective when you need a unit to send into an arrow shower to deplete enemy ammunition and set up a bridgehead while your other, better units move in to attack. Send halberdiers across a bridge first, they will take few casualties from the missiles and they will be able to hold their own on the other side of the bridge just long enough for your more valuable troops to cross in safety. Yes they will eventually break and run, yes they will do little damage but all that matters is that they will have absorbed the missiles and given others a chance to cross in safety.

    Janissary heavy infantry.
    Charge 4 Attack 5 Defence 3 Armour 3 Speed 6, 12, 13 Morale 8 Cost 725 Support cost 67

    Janissary heavy infantry are elite, disciplined, have a shield and are probably the best infantry in the game. Question - what can Janissary heavy infantry kill effectively? Answer – anything that is alive. Fast speed allows this unit to nip around flanks, get out of dangerous situations and chase down most infantry missile units reasonably. The high morale allows them to take massive losses or fight when heavily outnumbered and keep going like some kind of inevitable machine of doom rolling over the foe. The high attack allows them to cleave through any unit, it is high enough to do plenty of damage against unarmoured units and against armoured units the Janissary heavy infantry can be compared to a can opener The defence and armour is adequate, in fact the low armour is something of a bonus as it allows them to fight in any climate and weather without getting hit by the penalties for heavy armour. Janissary heavy infantry have no problems in the desert. The lower armour stat also protects them from armour piercing units. Janissary infantry can handle frontal assaults on just about anything and they are fast enough to flank, they can do what ever the situation requires and you should take advantage of this flexibility. Basically if you are the Turks then you want to use this unit, if you aren’t the Turks then you wish you had this unit. This unit cannot use its shield in a melee as the polearm is a two handed weapon. The shield only protects from ranged attacks.

    Swiss halberdiers
    Charge 2 Attack 3 Defence 3 Armour 2 Speed 6, 10, 11 Morale 6 Cost 375 Support cost 52

    Swiss halberdiers are the polearms you want to use if you are neither the Turkish nor the English; they are significantly better than halberdiers for most jobs. Swiss halberdiers are not as heavily armoured and have lower defence so you should not use them to absorb ranged fire, leave that to the halberdiers. Instead you should use their higher attack values and reasonable speed to strike from the flanks or rear and quickly damage the enemy. Because they have high morale they can take losses and fight in unfavourable situations with few problems, always remember this.

    2.7 Barbarians and fanatics.


    Fanatics and barbarians are an odd bunch. Generally they have a good charge and reasonable attack coupled with hideous defence and next to no armour. They either have very high morale or very low morale, the high morale units tend to be impetuous and the low morale units tend to charge, kill a few and then rout quickly. That is about as far as the generalisations can be taken, each unit will have its uses etc explained in its section.

    NONE OF THESE STATS INCLUDE THE SHIELD BONUS, YOU CAN FIND OUT WHAT KIND OF SHIELD (IF ANY) A UNIT POSSESSES IN THE WRITE UP AND THEN CHECK APPENDIX 3 FOR THE BONUS YOU NEED TO ADD TO THESE BASE STATS.

    Fanatics.
    Charge 6 Attack 3 Defence -4 Armour 1 Speed 6, 12, 13 Morale 8 Cost 125 Support cost 50

    Fanatics are impetuous so you will need to keep a close eye on them at all times if you don’t want to find them chasing after a unit they cannot hope to beat in a premature attack, ruining your whole battle plan. Fanatics are the perfect example of a unit made to flank and little else. They are speedy, have a great charge, good attack and horrible defence. Therefore you should always manoeuvre them so they can smash into the enemies rear and really put that charge to work. Attacking in this way also helps offset their non-existent defence. Fanatics kill fast and die fast but remember they are cheap so they are no great loss. You can only get fanatics from crusades - you cannot build them.

    Futuwwas.
    Charge 3 Attack 4 Defence -2 Armour1 Speed 6, 10, 11 Morale 4 Cost 300 Support cost 37

    Futuwwas are impetuous so once again you will need to keep a close eye on them. They are equipped with a large shield, simple bow and sword. This makes them one of the most versatile units in this category as they function well as archers and can fight well in a melee as long as you do something to guard against their terrible defence. Use Futuwwas as archers until they run out of missiles and then use them as flankers.

    Gallowglasses.
    Charge 8 Attack 5 Defence 0 Armour 2 Speed 6, 10, 11 Morale 0 Cost 200 Support cost 22

    Gallowglasses are impetuous and elite. Their large two-handed sword is armour piercing so you should primarily target armoured units. Once again this unit is built to attack from the flanks because of their low defence, try charging them into the rear of the enemy and leaving them to kill until their morale breaks. Because of their low armour this is a good unit to take into the desert.

    Highland clansmen.
    Charge 6 Attack 5 Defence -3 Armour 1 Speed 6, 12, 13 Morale 0 Cost 100 Support cost 22

    Highland clansmen are also impetuous. They have a small shield in addition to their sword and this helps to offset their awful defence. They are fast and once again they serve best as flankers, so use them as such. Once again this unit is good for desert warfare because of the low armour stat – those kilts must be good for airflow

    Nizaris
    Charge 7 Attack 6 Defence -4 Armour 1 Speed 6, 12, 13 Morale 8 Cost 400 Support cost 30

    Nizaris are impetuous and they have a bow, large shield and sword. They function in the same way as Futuwwas – use them as archers until they run out of ammo and then use them to deliver flanking attacks on engaged enemies.

    2.8 Peasants and militia.


    Peasants are, generally speaking, pretty damn crap The Almohad urban militia is a honourable exception to this rule. All the other units in this category range from utterly crap to slightly crap.

    NONE OF THESE STATS INCLUDE THE SHIELD BONUS, YOU CAN FIND OUT WHAT KIND OF SHIELD (IF ANY) A UNIT POSSESSES IN THE WRITE UP AND THEN CHECK APPENDIX 3 FOR THE BONUS YOU NEED TO ADD TO THESE BASE STATS.

    Almohad urban militia.
    Charge 3 Attack 3 Defence 3 Armour 4 Speed 6, 10, 11 Morale 2 Cost 200 Support cost 37

    Almohad urban militia are very similar to the Catholic feudal men at arms. They have a shield and a sword, just like the men at arms and they have the same number of men in each unit (80). As far as use goes they should be used like men at arms; put them in two ranks and on engage at will before marching them at some spears or other infantry and letting them charge into battle. Almohad urban militia don’t really need to flank so you can use them to hold a good front line against infantry attacks. You should always endeavour to keep them far away from cavalry or they will die very quickly. If you have no choice but to fight cavalry with this unit put them in three or four ranks, try to find some trees to put the cavalry at a disadvantage and mob the cavalry with as many units as possible. This is an extremely solid unit and is a steal for its price. The militia’s shield only has a 0.5 modifer.

    Militia sergeants.
    Charge 4 Attack 2 Defence 3 Armour 3 Speed 6, 10, 11 Morale 0 Cost 150 Support cost 30

    Militia sergeants are an upgrade of urban militia. They are peasant level polearm troops so they have an armour piercing attack. Before the arrival of the better polearms this is the best you can do, the sergeants are available in early. Militia sergeants fair reasonably well against other early era units however they become more and more disadvantaged as the eras go by. Statistically they are the second best peasant unit but you must adjust your polearm tactics in order to make this unit shine. Rather than charging into battle against armoured units you should try to pin the armoured unit with another unit before sending the militia in to attack from behind. You need to do this because most of the early era armoured units are knights, men at arms and other elite level badasses. Never try to take on a unit of knights or other elite heavy cavalry head on with militia They may have an advantage against cavalry and armour but they will still be swept away, instead pin the cavalry with some spears and let the militia attack from behind. Against particularly tough cavalry you may need to pin the unit and attack with more than one unit of militia. Don’t use militia sergeants against unarmoured targets if you can avoid it, as they don’t seem to do very well in that kind of situation. This unit’s main advantage is that it is the cheapest decent polearm unit and therefore quite disposable. They are also quite easy to reach in the campaign game, making them cheap to reach, cheap to build, cheap to keep and cheap to replace. They are also quite handy in the desert because of their low armour – unlike many other units the Catholics get they don’t come foil wrapped to speed cooking times

    Muslim peasants.
    Charge 4 Attack -2 Defence -4 Armour 1 Speed 6, 10, 11 Morale –2 Cost 50 Support cost 37

    Muslim peasants are the single most useless unit in the game. They are utterly crap; they should be at home tending the fields rather than trying (and failing) to fight. Their morale is horrible, their attack awful, their defence non-existent. The only use for peasants is acting as a junk unit to absorb missiles that might damage more expensive units. Peasants are also used for pinning a unit while you carry out a flank attack or use destructive missiles (for example naptha) on the pinned unit. However they are not very good at this, as they tend to break and run away before you can finish your attack. If you want a junk unit to use while pinning a target use the plain, simple spearmen. For a more constructive, and suitable, use for your peasants you should use them as garrison units in your campaign map provinces. Peasants are cheap to maintain and fill the 100 man minimum quote well. They are just as effective at maintaining a provinces loyalty as the more expensive units.

    Peasants.
    Charge 4 Attack -2 Defence -4 Armour 1 Speed 6, 10, 11 Morale –2 Cost 3 Support cost 37

    Peasants are the non-Muslim version of Muslim peasants. They are identical except in name and unit graphic. Don’t use them except as garrisons.

    Urban militia.
    Charge 4 Attack 2 Defence -1 Armour 1 Speed 6, 10, 11 Morale 0 Cost 100 Support cost 30

    Urban militia are the predecessor to the handy urban sergeants. They have armour-piercing polearms coupled with not very good stats. They should be used like their more advanced brothers – pin an armoured target and use the militia to attack from the rear. Keep them away from unarmoured targets. Once you have access to the militia sergeant you have no reason to use this unit.


    Frogbeastegg's Guide to Total War: Shogun II. Please note that the guide is not up-to-date for the latest patch.

    Member thankful for this post:


  3. #3

    Default

    2.9 Knights.


    Knights are the elite of the heavy cavalry. Very few units from the other cavalry classes can match the raw power of a knight and his charger. Knights are built to do one thing and one thing only – charge. Knights have the most damaging charge possible in the game and only spear and pike units can withstand it. Any other unit types are very likely to be swept away with many casualties and a damaged formation. To take best advantage of this charge you should try to flank and hit the enemy in the rear, this not only causes more damage but it makes it more likely that the enemy will rout. Knights are wasted in a melee so you should aim to charge and rout the enemy within a few seconds of combat. If the enemy do not break pull your knights back by either double clicking on the location you want them to go to or hitting control+W to make them withdraw. If you make them withdraw you must remember to order them to halt before they get too far away or they will leave the battlefield. As for which method is more use it depends on the situation. Sometimes your knights will ignore your move order and refuse to leave the fight; in this case ordering a withdrawal is more reliable. However in the middle of a heavy fight ordering your knights to withdraw can place them in worse danger. There is a third option that is more reliable than the others with a reasonable amount of micromanagement: put your unit on hold position and them immediately double click where you want them to go. The hold position order applies to the location you just designated and the knights will stop fighting and move without the usual hassle. Just remember to take them off hold position when they are safe. You will take casualties doing this, but often less than with the other two methods. You should learn all three methods and discover when to use each one. When your knights are a reasonable distance from the fight order them to charge back in. Keep doing this until the enemy break. Generally speaking knights possess average speed for cavalry – they are not fast but they are not slow either. This aids their flanking abilities.

    If a unit is wavering when the knight’s charge hits it then it will most likely break and run. This means that knights can be used as a shock force to speed the end of melee fights, freeing your units to double team the enemy and gain a local advantage in numbers. You should pick your targets carefully in a situation like this as knights tire quickly; they only have a few charges in them before they become exhausted. Therefore target the most important units to the situation and work from there.

    Knights are not the invincible warriors popular legend and Hollywood might portray them as. Spear and pike units will halt their charge and inflict serious casualties unless the knights hit them in the flank or rear. Charging head on into a forest of sharp points is suicide – don’t do it. Polearm units will also cut knights up as they get both anti-cavalry and anti-armour bonuses. Never allow your knights to engage polearms, even if you hit them from the rear they may not rout. If the polearms stand and fight they will win or cause very heavy damage as they die.

    Knights are well equipped to take out swordsmen and missile units so focus on these unit types for maximum efficiency. You should bare in mind that armour piercing missile units like crossbows and arbalesters will inflict many losses on any unit of knights trying to charge them through a barrage of missiles, therefore always attack from the flanks or rear. However you can always attract the attention of the missile unit with a junk unit and charge your knights in while the other unit absorbs the missiles. Plain spearmen are good for this as they are cheap, unimportant and they have shields to protect them a little.

    All knights are elite and impetuous so bear this in mind when you use them. Also because of their heavy armour any knight will quickly cook in the heat of the desert so try to keep them in cooler climates. Knights should NEVER, ever fight in trees. Cavalry receive significant penalties when fighting in trees and knights are far too expensive to waste in this way. Once again – keep them away from trees at all costs

    Knights will not only charge without orders due to their impetuous nature, they will also choose their own targets and ignore your orders. They seek glory and honour in battle and there is no glory in running down peasants. You must keep a close eye on your knights so you can stop them quickly if they charge without orders; unfortunately knights have a habit of picking unsuitable targets so if you don’t watch them they can ride into disaster. The crusader knights are much more controlled than their normal counterparts so take advantage of this.

    Knights are best at: Charging, flanking and charging, routing wavering units by charging, and just generally charging

    M17
    Image M17: A unit of knights at the moment the charge begins. Since their target is a unit of vulnerable swordsmen they can risk a head on charge. While this looks glamorous this is not really the best way to use your knights.

    M18
    Image M18: This picture demonstrates a much better use of the knights charge. The infantry line has buckled under enemy pressure and soon the line will rout. However a single unit of knights have been sent around to charge the enemy in the rear, because the knights are deployed in a long, two rank formation they managed to hit two units of enemy spearmen from an advantageous position. The enemy unit on the left routed instantly and the unit on the right followed shortly after. The knights killed 47, captured 12 and lost 3 men. The careful use of the knight’s charge won the battle.

    M19
    Image M19: A small demonstration of just how dangerous the knights charge can be. There are only 8 tired and battered French knights in the unit shown here. The Almohad urban militia is fresh and easily beating the tired Order foot in combat and their morale is high. A few seconds after this picture the first unit of Almohad urban militia had routed and the second was wavering – why? Simple the knights’ charge did a lot of damage to the militia and that combined with the morale penalty for being attacked from behind and outnumbered locally caused them to rout. This upset the second unit of militia and boosted the morale of the Order foot. 8 knights, just 8, turned the tide of this skirmish in a couple of seconds.

    NONE OF THESE STATS INCLUDE THE SHIELD BONUS, YOU CAN FIND OUT WHAT KIND OF SHIELD (IF ANY) A UNIT POSSESSES IN THE WRITE UP AND THEN CHECK APPENDIX 3 FOR THE BONUS YOU NEED TO ADD TO THESE BASE STATS.

    Feudal knights.
    Charge 8 Attack 4 Defence 3 Armour 4 Speed 9, 20, 22 Morale 8 Cost 425 Support cost 105

    Dismount: During a siege to get feudal foot knights.

    Feudal knights have a large shield and a lance. They are the weakest knights in the game but even so they are powerful when used correctly. Feudal knights are very useful in the early era but when the much better chivalric knights appear they are less useful.

    Chivalric knights.
    Charge 8 Attack 5 Defence 5 Armour 7 Speed 9, 20, 22 Morale 8 Cost 675 Support cost 85

    Dismount: Anytime for chivalric foot knights.

    Chivalric knights have a large shield and a lance. Their horses are protected by barded armour and this makes them less vulnerable. Chivalric knights represent a noticeable improvement over their feudal brethren, their defence is much more substantial, their attack is slightly better and their armour is much better. The higher armour stat is something of a double-edged sword as it makes them more vulnerable to anti-armour units. The shield only has a 0.5 modifer.

    Gothic knights
    Charge 4 Attack 4 Defence 7 Armour 9 Speed 9, 12, 16 Morale 8 Cost 725 Support cost 60

    Dismount: Anytime for gothic foot knights.

    Gothic knights are equipped with a mace, this makes their charge weaker and their attack stat is lower than a knight with a lance. However there is an advantage to this – a mace is armour piercing. This fact, combined with their high defence and armour makes gothic knights better at charging just the once before hacking it out in a melee. The horse is encased in full armour as well so this knight is more than tough to take down – only units with armour piercing capabilities stand a fair chance in combat with them. Because this unit has such low speed you are best charging them straight at the enemy, they just don’t have the speed to flank as effectively. Also they tire even faster than the other knights because of all that armour so running them around is not a good idea.

    Knights Hospitaller
    Charge 8 Attack 5 Defence 5 Armour 7 Speed 9, 20, 22 Morale 8 Cost 675 Support cost 50

    Dismount: Anytime for Hospitaller foot knights.

    Knights Hospitaller can only be got from a crusade; they cannot be built or retrained. They are equipped with a large shield and a lance, the horse is protected by barding. Basically this unit is chivalric knights by another name, when you get them from a crusade in the early period they are simply devastating. Once you are in the high and late periods they are less amazing but they remain very good units, just like chivalric knights. Unlike normal knights these crusaders are not impetuous, this makes them easier to control and more reliable. The shield only has a 0.5 modifer.

    Knights of Santiago.
    Charge 8 Attack 5 Defence 5 Armour7 Speed 9 ,20, 22 Morale 8 Cost 675 Support cost 50

    Dismount: Anytime for chivalric foot knights.

    Knights of Santiago are basically knights Hospitaller with a new name and shield graphic. Read their section for more.

    Knights Templar
    Charge 4 Attack 5 Defence 5 Armour 7 Speed 9, 20, 22 Morale 8 Cost 600 Support cost 50

    Dismount: Anytime for chivalric foot knights.

    Knights Templar are basically knights Hospitaller with a new name and shield graphic. They are armed with a sword and this makes their charge weaker. Read the Hospitaller section for more.

    Early royal knights.
    Charge 8 Attack 4 Defence 3 Armour 4 Speed 9, 20, 22 Morale 8 Cost 325 Support cost 62

    Dismount: In a siege for feudal foot knights.

    Early royal knights have a large shield and a lance. There are only 20 men in the unit, 21 if it belongs to a prince or king, and this is their greatest weakness. While each individual knight is identical to the feudal knights they work alongside the unit as a whole is more vulnerable to being overwhelmed by sheer numbers. Use this unit for surgical strikes – move to an advantageous position and charge home where you can do the most damage without getting outnumbered too severely. If this unit contains an important figure like an heir you should be doubly careful. Because of the small size they will gain valour quickly in battle, so as long as you are careful you will develop a fearsome unit relatively quickly.

    High royal knights
    Charge 8 Attack 5 Defence 5 Armour 7 Speed 9, 20, 22 Morale 8 Cost 525 Support cost 62

    Dismount: Anytime for chivalric foot knights.

    High royal knights are a better version of early royal knights (same stats as chivalric knights instead of feudal) and should be used in the same way.

    Late royal knights
    Charge 8 Attack 5 Defence 7 Armour 9 Speed 9, 20, 22 Morale 8 Cost 650 Support cost 62

    Dismount: Anytime for chivalric foot knights.

    Late royal knights are a better version of high royal knights (same stats as lancers instead of chivalric knights) and should be used in the same way. Late royal knights get no shield bonus at all because the modifer of 0.0 turns it into a decoration.

    Teutonic knights
    Charge 8 Attack 5 Defence 5 Armour 7 Speed 9, 20, 22 Morale 8 Cost 675 Support cost 50

    Dismount: Anytime for chivalric foot knights.

    Teutonic knights are the same as knights Hospitaller with a new name and shield graphic. They are also impetuous. Read the knights Hospitaller section for more

    2.10 Heavy cavalry


    Heavy cavalry are the lesser brothers of the knights. While the knights may be more powerful on the charge and have higher morale, heavy cavalry are not automatically worse. Heavy cavalry are easier to control because they are not impetuous or in possession of the knightly arrogance that can lead to disaster. Some units of heavy cavalry are disciplined which gives them another advantage over the unruly knights. Heavy cavalry are armed with a wide variety of weapons, unlike the knights who, barring a handful of exceptions, have lances. This gives them a wider range of roles than the rather one trick knight. Some heavy cavalry use axes and maces and this allows them to pierce armour, making them deadly when used against knights and other heavily armoured targets.

    Heavy cavalry can defeat knights if you keep your head and use tactics. Charge the knights from the rear or flank after pinning them with another unit. Where possible target tired knights with fresh heavy cavalry as this makes your job easier. In many ways heavy cavalry is your best bet for taking out knights with mounted units if you do not have camels. However you should try to use spears or polearms to take out knights and save your heavy cavalry for what they are best at – pounding vulnerable infantry.

    Like knights, heavy cavalry are the bane of sword and ranged units, also like they are vulnerable to spears, pikes and polearms. In many ways it is easiest to treat heavy cavalry as more fragile knights – the same tactics are relevant and the pitfalls you should avoid are identical. Just remember that their morale is often lower, that they are not always as tough in a fight, and that their charge is not as devastating and you will do fine.

    NONE OF THESE STATS INCLUDE THE SHIELD BONUS, YOU CAN FIND OUT WHAT KIND OF SHIELD (IF ANY) A UNIT POSSESSES IN THE WRITE UP AND THEN CHECK APPENDIX 3 FOR THE BONUS YOU NEED TO ADD TO THESE BASE STATS.

    Armenian heavy cavalry
    Charge 8 Attack 3 Defence 3 Armour 4 Speed 9, 20, 22 Morale 4 Cost 300 Support cost 60

    Dismount: In a siege for feudal sergeants.

    Armenian heavy cavalry is elite and has a large round shield. The horse is barded. While their charge is devastating their combat abilities are a little underwhelming, therefore you should charge and keep pulling back and charging again until the enemy break. This unit should not be left in a melee for very long as it just wastes its potential. Always try to flank with this unit.

    Gendarmes
    Charge 4 Attack 3 Defence 5 Armour 7 Speed 9, 20, 22 Morale 4 Cost 375 Support cost 70

    Dismount: Anytime for chivalric men at arms.

    Gendarmes are elite and have a large shield; the horse is barded for added protection. Gendarmes use swords; this lowers their charge power but makes them reasonable in a melee. More importantly they are heavily armoured and blessed with a high defence. This enables them to sit in a melee and fight it out better than many other cavalry types. The shield only has a 0.5 modifer.

    Early Ghulam bodyguards
    Charge 8 Attack 3 Defence 4 Armour 4 Speed 9, 20, 22 Morale 6 Cost 300 Support cost 62

    Dismount: In a siege for Saracen infantry.

    Early Ghulam bodyguards are elite and have a large shield. The horse is completely unarmoured and therefore rather more vulnerable than you may like. Ghulam bodyguards are the Muslim answer to royal knights. They are the unit your king and his heirs serve in and the numbers are made up with well-equipped and well-trained men. There are just 20 men in each unit, 21 if the unit belongs to a king or heir. This small number makes them vulnerable to being swamped in a fight and cut to pieces despite their skills, this means you should always be careful and keep them away from situations where they may become heavily outnumbered. Ghulam bodyguards are not as good as their western counterparts as they are statistically weaker. Since they are not knights your Ghulam bodyguards are more controllable so it is less likely your important royal will charge into the fray without orders and die before you can extract him to a safe location. For best results use this unit for surgical strikes, attacking carefully chosen targets from an advantageous position.

    High Ghulam bodyguards.
    Charge 8 Attack 3 Defence 5 Armour 5 Speed 9, 20, 22 Morale 6 Cost 350 Support cost 62

    Dismount: In a siege for Saracen infantry.

    High Ghulam bodyguards are elite and have a shield. The horse is unarmoured. This unit is a slight upgrade of the early Ghulam bodyguards and should be used in the same way.

    Late Ghulam bodyguards.
    Charge 8 Attack 3 Defence 7 Armour 7 Speed 9, 20, 22 Morale 6 Cost 425 Support cost 62

    Dismount: In a siege for Saracen infantry.

    Late Ghulam bodyguards are elite and disciplined. The horse is once again unarmoured. Despite the lack of a shield and slightly improved stats this upgrade of the early Ghulam bodyguards should be used in the same way.

    Ghulam cavalry
    Charge 6 Attack 3 Defence 3 Armour 4 Speed 9, 20, 22 Morale 4 Cost 275 Support cost 70

    Dismount: In a siege for Saracen infantry.

    Ghulam cavalry are elite and have a shield. The horse is unarmoured. Ghulam cavalry are a bit lacking in the stat department for heavy cavalry; while their charge is effective the rest of their stats are a little too low for them to function as traditional heavy cavalry. For best effects you need to add in a pinch of light cavalry tactics when using this unit – only ever attack engaged and vulnerable units. Only attack from the flanks or rear. Always make sure you can support your Ghulam cavalry and don’t let them fight alone.

    Golden horde heavy cavalry
    Charge 6 Attack 3 Defence 6 Armour 7 Speed 9, 20, 22 Morale 6 Cost 525 Support cost 50

    Dismount: Anytime for Golden Horde warriors.

    Golden horde heavy cavalry is elite, disciplined and have a large shield. The horse is fully armoured. This cavalry is excellently protected and it takes a lot to kill them unless they are attacked by armour piercing units. This unit can charge into the fray and hold out in the subsequent melee better than many other heavy cavalry units. Their best use is still charging into vulnerable infantry though.

    Kataphraktoi
    Charge 8 Attack 3 Defence 5 Armour 7 Speed 9, 12, 16 Morale 4 Cost 375 Support cost 105

    Dismount: In a siege for Byzantine infantry.

    Kataphraktoi are elite and disciplined, the horse is fully armoured. Two things are obvious when looking at this unit, firstly it is a tank (Kataphraktoi are sometimes referred to as katatanks ) and secondly it is slow. Kataphraktoi are faster than infantry but for cavalry they are snail like. Therefore you are best off treating them as speedy infantry and slamming them into the enemy rather than trying to pull off fancy manoeuvres. Let them charge into something and slug it out; as long as you keep them supported they will win through.

    Khwarazmian cavalry
    Charge 6 Attack3 Defence 5 Armour 7 Speed 9, 20, 22 Morale 4 Cost 375 Support cost 70

    Dismount: In a siege for Saracen infantry.

    Khwarazmian cavalry is elite and the horse is fully armoured. A rose by any other name may smell as sweet (that is Shakespeare’s Romeo and Juliet for the philistines out there ) but a Kataphraktoi by another name is not so sweet Khwarazmian cavalry are Kataphraktoi with a weaker charge and normal speed. Wearing this much armour in the desert will barbeque anyone, this unit is just begging for foreign service as the factions capable of building this unit all start with hot provinces. Send them abroad or use them sparingly

    Lancers
    Charge 8 Attack 5 Defence 7 Armour 9 Speed 9, 20, 22 Morale 8 Cost 850 Support cost 85

    Dismount: In a siege for chivalric foot knights.

    Lancers are elite and uncontrollable. The horse is so covered in armour it clanks as it moves When speaking of lancers it is hard to know where to begin. They have the same stats as late royal bodyguards but there are 53 men per unit rather than 20. This makes them the best heavy cavalry in the game and quite possibly the only unit of heavy cavalry capable of beating knights at their own game. Lancers will crush most infantry with their charge (as long as they don’t have spears or pikes) and they are more than equipped to fight in a melee if they don’t break their target. Their morale is so high they can lose over ¾ of the unit and keep going. Like knights they are impetuous and prone to charging without orders, this is perhaps their only flaw. People play as the Turks solely to use Janissary heavy infantry; people also play as the Spanish and Aragonese solely for lancers.

    Mamluk cavalry
    Charge 4 Attack 2 Defence 3 Armour 4 Speed 9, 20, 22 Morale 4 Cost 275 Support cost 70

    Dismount: In a siege for Saracen infantry.

    Mamluk cavalry is elite and armour piercing; they also have a small shield. The horse is unarmoured. At first glance Mamluk cavalry seem unimpressive, that is until you spot the armour-piercing bonus. Mamluk’s are equipped with an axe and this allows them to make a good job of killing armoured units. Your best bet is pinning an armoured unit with another unit and charging your Mamluks in from the rear to cut them up. With the aid of some simple spears Mamluk cavalry can and will destroy fancy units of knights and other heavy cavalry in this way. Mamluks don’t handle unarmoured targets very impressively, there are often many better units to send after the lightly armed targets.

    Ottoman Sipahi
    Charge 4 Attack 2 Defence 3 Armour 4 Speed 9, 20, 22 Morale 2 Cost 200 Support cost 65

    Dismount: In a siege for Turcoman foot.

    Ottoman Sipahi have a small shield. The horse is completely unarmoured. Ottoman sipahi are equipped with swords, this is why their charge is so low. This unit is rather weak for heavy cavalry but they can still get the job done. Just make sure you attack from a flank or something.

    Pronoiai Allagion
    Charge 6 Attack 4 Defence 3 Armour 5 Speed 9, 20, 22 Morale 8 Cost 425 Support cost 125

    Dismount: In a siege for Byzantine infantry.

    Pronoiai Allagion are elite and have a large shield. The horse is barded for partial protection. Pronoiai are the Byzantine version of feudal knights, they share the same high morale and equipment. There are only three differences: The first is in the weapon; while feudal knights have lances the Pronoiai only have spears. The second is that Pronoiai have a single point more armour. The third is that they are not impetuous. You can use this unit in the same way as feudal knights and they will perform well, however they will take a few more losses and do a tiny bit less damage when compared to their knightly cousins.

    Teutonic sergeants
    Charge 4 Attack 3 Defence 5 Armour 6 Speed 9, 20, 22 Morale 4 Cost 375 Support cost 40

    Dismount: In a siege for Order foot soldiers.

    Teutonic sergeants have a shield and a sword. The horse is unprotected. This unit has very good defences and a tolerable charge and attack. For best effects you should charge them into the rear of an engaged unit and let them hack it out in the melee. The shield only has a 0.5 modifier.

    2.11 Missile cavalry.


    Missile cavalry are one of the most difficult classes of unit to use. They require plenty of practice before they become truly useful to your army. When you do master them they become a deadly force capable of raining death on the enemy before nipping out of the way, leading the enemy into traps and forcing them to split their numbers. Watching someone use missile cavalry well is an incredible experience, with the cavalry endlessly moving to a better position luring, feinting, retreating and killing in an endless dance. Some people can manage many units of missile cavalry at once, with each one performing the aforementioned dance in perfect harmony. Such mastery is rare, as it requires hour after hour of dedicated training and more than a bit of ambidexterity

    The first thing to learn when using missile cavalry is that the skirmish AI is useless, worse than useless even. When you leave a unit of missile cavalry to skirmish on their own they will often pull back in a poor direction and allow themselves to become trapped. They will only skirmish from the unit they are targeting, this means an entire army can waltz up to them and attack them and the cavalry won’t move unless their target starts to draw closer. You should always keep an eye on your missile cavalry so you can pull them back or redirect them as necessary. Learn to do this and you will start to be more successful straight off the bat.

    The second most important thing you need to learn is infantry missile units kill mounted missiles with ease, therefore keep your missile cavalry out of range. Infantry missile units (normal bow, crossbow, arbalest and longbow. Not guns or javelins) have both superior range and superior accuracy when compared to the mounted versions. The mounted missile’s horse also provides a much larger target than a single man on foot. If you have to take out infantry missile units with missile cavalry then order them to draw their melee weapons and charge. Generally your cavalry will have the advantage in a melee – just make sure you aren’t charging particularly weak cavalry into one of the cavalry killing infantry units Longbowmen in particular are very good at giving enemy cavalry a heck of a shock.

    When waging a constantly moving war missile cavalry have (with a few exceptions noted in their relevant sections) two major weapons at their disposal – speed and stamina. All missile cavalry have a minimum speed of 9 walking, 20 galloping, 22 charging and this is on a par with most other cavalry. Many mounted missile units have much faster speed so they can outrun all but the fleetest light cavalry. Coupled with their blinding speed is outstanding stamina (again with a few exceptions noted in the unit descriptions), missile cavalry can gallop around the field for a long time before tiring.

    With a couple of exceptions all missile cavalry use the mounted normal bow. This means they have very little effect on heavy armour so don’t waste your arrows on heavily armoured targets. The two exceptions are jinetes and mounted crossbows. Jinetes use javelins that pierce armour with terrifying efficiency and mounted crossbows use the same crossbow as the infantry crossbowman. All mounted missile units except jinetes have exactly 28 arrows in their quivers, the same number as an infantry archer. Jinetes have just 4 javelins per man.

    So, bearing all this in mind, what should you be doing with your mounted missile units? You should target vulnerable units and try to damage them badly and draw them out of position, if they move towards your cavalry pull back and keep shooting until the unit is isolated and ready for a quick death. Charge several units of suitable killers (i.e. Don’t send in cavalry if you are luring spears) and crush the unit. Then go out and draw more units to their doom. Unless you have a very long time to spend in the battle try to draw two units at once, both in different directions and using two different teams of mounted missiles and killers. If you attack on many fronts at once the enemy are forced to split their army to deal with you, this makes them easy to surround and crush at will.

    When faced with dangerous units like knights try to aggravate them into charging your mounted missiles by launching a few volleys at them. The arrows will not do much damage but they may irritate the knights into action, after all knights are impetuous and proud and they often take bait like this. Since knights are slow and have poor stamina for cavalry you can safely lead them all over the battlefield in pursuit of your missile cavalry. Then, when the knights are very tired or exhausted you can surround them with several other units and kill them reasonably easily. This tactic also works with certain powerful infantry units like foot knights, Varangian guardsmen etc.

    Mounted missiles are best at: luring the enemy into traps, causing chaos and disorder in the enemy lines, leading powerful but slower units on long marches to tire them out, distracting the enemy and forcing them to play on your terms.

    M20
    Image M20: This is what often happens if you let the AI control your skirmishing missile cavalry. They are boxed in and will have to perform a difficult and slow wheel to the right if they want to escape. The enemy will probably catch them part way through this manoeuvre and have the advantage of hitting them in the rear. To the left of the picture is the corner of the map, behind them is the edge of the map, and the only way out is to the right. They will inevitably leave it too late to begin their move and they do not have anywhere to run to once the Varangian guards catch up with them. In essence this unit is dead.

    M21
    Image M21: This picture illustrates the range at which your skirmishing missile cavalry will begin to pull back. They are just beginning the manoeuvre now and because they are up against some slow infantry they will not have any problems getting to safety. If the Varangian guards were fast infantry like Janissary heavy infantry the cavalry would probably lose a few men from the back of the formation as they would be too slow to get to safety. If the missile cavalry were targeting other cavalry it would be far too late to get to safety.

    M22
    Image M22: This picture illustrates missile cavalry doing what they do best. The unit of the left has lured an enemy unit away from its army and is leading it further and further away by firing missiles and pulling back. The distance between the enemy and support is now great enough for a second unit of missile cavalry to nip in behind the enemy and shower them with arrows. No matter what this unit of Varangian guards tries to do they will be shot to pieces, chasing after the cavalry just wastes their energy. When the cavalry have whittled the enemy down suitably they will charge in and finish them with their swords, surrounding the enemy on all sides. Under normal circumstances the guards would rip both units of Turcoman horse to pieces but because they had lost half the unit to arrows and exhausted themselves running after the nimble cavalry they were cut to pieces by the cavalry when they charged.

    NONE OF THESE STATS INCLUDE THE SHIELD BONUS, YOU CAN FIND OUT WHAT KIND OF SHIELD (IF ANY) A UNIT POSSESSES IN THE WRITE UP AND THEN CHECK APPENDIX 3 FOR THE BONUS YOU NEED TO ADD TO THESE BASE STATS.

    Boyars
    Charge 4 Attack 3 Defence 5 Armour 5 Speed 9, 20, 22 Morale 6 Cost 550 Support cost 105

    Dismount: In a siege for feudal men at arms.

    Boyars are elite and have a large shield. They are a very solid unit as they are both good at range and up close. When they run out of arrows or need to attack close up you need not worry too much about them, let them draw their swords and get stuck in. If possible attack from an advantageous position to maximise their small charge bonus.

    Byzantine cavalry
    Charge 2 Attack 3 Defence 3 Armour 4 Speed 9, 20, 22 Morale 4 Cost 400 Support cost 85

    Dismount: In a siege for Trebizond archers.

    Byzantine cavalry are disciplined and elite. This unit is nice and versatile as they are capable of filling both the role of mounted missiles and the role of slow and tough light cavalry. Let them empty their quivers and then let them switch to a light cavalry role. Read the section on light cavalry below for some ideas on using them as light cavalry.

    Sipahi of the Porte
    Charge 4 Attack 3 Defence 6 Armour 7 Speed 9, 20, 22 Morale 6 Cost 500 Support cost 105

    Dismount: In a siege for Janissary infantry.

    Sipahi of the Porte are elite, disciplined and have a shield. There are only 20 men per unit, 21 if the unit belongs to royalty. Sipahi of the Porte replace Ghulam bodyguards as the Turkish royal unit. This unit are very powerful in melee combat so don’t worry about sending them in to fight up close and personal, just remember that they are vulnerable to being swamped due to the small size of the unit.

    Golden horde horse archers
    Charge 2 Attack 3 Defence 1 Armour 3 Speed 9, 24, 26 Morale 4 Cost 575 Support cost 30

    Dismount: Anytime for Golden Horde warriors.

    Golden horde horse archers are disciplined and their good morale makes them reliable when skirmishing and fighting in isolated areas. Because they use swords as melee weapons they don’t perform outstandingly against anything, however they are very effective at running down routers and delivering the coup de grace to weaker units.

    Horse archers
    Charge 2 Attack -1 Defence 0 Armour 2 Speed 9, 24, 26 Morale –1 Cost 250 Support cost 40

    Dismount: In a siege for archers.

    Horse archers are the bog standard unit of this category and therefore the worst. They have terrible morale so you must watch them carefully when they skirmish, if they get too far away from friendly units, run out of ammo or get surrounded they will be in danger of routing. They are also not very good in a melee, though they can run down routers reasonably well. Don’t use them if you can use any of the other types in this category.

    Mamluk horse archers
    Charge 2 Attack 3 Defence 1 Armour 3 Speed 9, 20, 22 Morale 4 Cost 375 Support cost 70

    Dismount: In a siege for desert archers.

    Mamluk horse archers are elite and have a small shield. They are reliable in most situations and should perform well enough as long as you keep them out of tough fights and let them pick off vulnerable units from an advantageous position.

    Mounted crossbowmen
    Charge 2 Attack 0 Defence 2 Armour 3 Speed 9, 24, 26 Morale 2 Cost 300 Support cost 50

    Dismount: in a siege for crossbows.

    Mounted crossbowmen are the only mounted missile unit to use the crossbow. This is both their advantage and their Achilles heel. The crossbow grants them a long range and armour piercing capabilities; it also curses them with a slow reload time. As long as you remember that they will only shoot at roughly half the speed of other mounted missile units you should have no problems. Don’t waste this unit by shooting at unarmoured units – seek and destroy anything with armour. Because they shoot at a slower rate this unit not only wastes its armour piercing potential against unarmoured units it is also less effective than the standard, normal bow armed mounted missile units because the standard bows will shoot at a faster rate and therefore do more damage when compared to mounted crossbows in the same amount of time. Try to keep this unit from hand to hand combat, let it chase routers if you must but only let it join a melee if things are desperate. This unit can always do more damage with missiles than swords.

    Spanish Jinetes
    Charge 2 Attack 2 Defence 2 Armour 3 Speed 9, 24, 26 Morale 2 Cost 250 Support cost 50

    Dismount: In a siege for feudal sergeants.

    Spanish Jinetes have a small shield and use javelins instead of a bow or crossbow. Because of this they don’t really fit into this section that well, neither do they fit comfortably into the javelin section. I have put them here because they are closer to being mounted missile units than javelin units and many of the tactics outlined above require only minor adjustment before they apply to this unit. The first adjustment is the skirmish setting – take it off or your men will not throw a single javelin. Javelins have such short range that the unit will skirmish back before successfully completing their throw. The second difference is in how many missiles they have and what those missiles are capable of. Jinetes only have 4 javelins per man and those javelins are deadly against armour – only naptha and siege engine projectiles are more deadly against armour than javelins. This means you need to select your targets with care and discretion or you will waste the fantastic opportunity presented by this unit. If some troublesome knights are bothering you or heavily armoured units are giving you nightmares just send in the jinetes and in a few volleys your troubles will be over. That is assuming you support your jinetes properly. Unlike the other units in this category jinetes really need the aid of a pinning unit to hold their target in place, giving them the time they need to aim and throw without being mown over. Jinetes are also very capable light cavalry so when their javelins run out switch them to the tactics outlined in the light cavalry section below. You can use jinetes in both the speedy and weak and the slow and tough styles without too many problems; they are a very flexible unit. With their light armour, speed, and flexibility this unit is made for desert warfare so take them with you when you go into the dunes.

    Turcoman horsemen
    Charge 2 Attack 1 Defence 0 Armour 2 Speed 9, 24, 26 Morale –1 Cost 300 Support cost 40

    Dismount: In a siege for Turcoman foot.

    Turcoman horsemen have a small shield. They are a bit feeble but not nearly as weak as the standard horse archers. Try to keep them out of the hand-to-hand fighting and always keep a close eye on their morale, as they are likely to break and run without much provocation.

    Turcopole
    Charge 2 Attack -1 Defence 1 Armour 3 Speed 9, 24, 26 Morale 0 Cost 300 Support cost 40

    Dismount: In a siege for archers.

    Turcopoles have a small shield. Once again this is not exactly a fantastic unit so just take advantage of their speed and missiles, keeping them out of close combat. Their morale is juts about tolerable but you still need to keep a watch on them.

    2.12 Light cavalry


    Light cavalry are not as powerful as heavy cavalry or knights and they have no ranged attacks. They do have one thing in abundance – speed. Light cavalry are the only cavalry capable of running down all mounted missile units; nothing is faster than the fastest light cavalry. A few units of light cavalry are a bit slow for their class, for example mounted sergeants have the same speed stats as most knights and heavy cavalry. However at the same time they are considerably tougher than most of the fleeter light cavalry. From this it is possible to infer the existence of two types of light cavalry, each with their own tactics.

    Speedy and weak light cavalry.
    This class included units like Saharan cavalry and Alan mercenary cavalry. Units in this class are always very fast indeed with an average set of 9 walking, 24 galloping and 26 charging. At the same time they often have weak charges and poor attack, defence and armour stats. Cavalry in this category usually have lighter weapons like swords and spears and either no shield or a small one. The horse is never armoured. This cavalry is best used for situations requiring speed, speed and more speed. Use them to run down routers and chase mounted missiles. Unless your target is routing always hit from the rear to increase your unit’s chances of survival. These units are usually very cheap for cavalry and this makes them rather throw away – send them to take out infantry missile units when you expect to lose your cavalry in the attack, or to take out siege weapons that threaten your position. Basically send them on any suicide mission where speed is more use than power. Just remember to keep an eye on their morale as it is often rather fragile and you don’t want them to rout before accomplishing their goal. After the goal is complete they can run away all they want

    Slower and tougher light cavalry.
    This class includes units like hobilars and mounted sergeants. Units in this category often have average speed, a good charge and reasonable combat stats. While many of them have some sort of shield the horse is always unarmoured. They are often armed with heavier weapons like spears and lances. This class is best used as a cut-price, inferior unit of knights so charge them at your enemy and keep on pulling them back and charging in again until the enemy breaks. Charge into pinned units from the flanks or rear and never let them stay in a melee as they do the most damage when charging. You can use these units for chasing routers but they are often too slow to catch up with mounted missiles. This class of light cavalry is often very handy for taking out infantry missiles units as they are expendable enough to take losses on the approach, have enough combat power to kill the infantry and fast enough to close to melee range inside a few volleys. Morale wise these units of light cavalry are more stable than their lighter cousins, this makes them suitable for suicide missions requiring a little more guts to complete. When you need cavalry to flank and charge into your foe but you do not have access to or the money to spend on knights and heavy cavalry these units of light cavalry make excellent substitutes.

    Light cavalry are best at: running down routers, chasing and disposing of mounted missiles, proving cheap cavalry, filling the gap in your army left by the absence of knights and heavy cavalry in the early campaign game.

    M23
    Image M23: Here you see some light cavalry chasing routers. This is the best place to put a great tip for chasing routers – don’t attack them move past them. This tactic will only work on routing troops in game versions past 2.01 as some people were exploiting the cavalry’s ability to run infantry over and dominating the multiplayer game unfairly. This is one of the few situations where you want to give up your cavalry’s charge bonus and order them to run at the enemy. Normally single clicking on the enemy and letting them charge on their own is better as it saves the men’s energy. Here the object is to order the unit to run to a point past the routers but along the path they are travelling. In this picture you should double click on the right hand edge of the picture. The cavalry will gallop up to the routers and engage them in combat, however they will not stop moving. This is why the tactic is so effective – the cavalry hit the routers and kill them in one or two combat rounds before moving quickly onwards. All you need to do is keep reissuing move orders so they move over the routers. You will take many more prisoners in much less time doing this.

    NONE OF THESE STATS INCLUDE THE SHIELD BONUS, YOU CAN FIND OUT WHAT KIND OF SHIELD (IF ANY) A UNIT POSSESSES IN THE WRITE UP AND THEN CHECK APPENDIX 3 FOR THE BONUS YOU NEED TO ADD TO THESE BASE STATS.

    Alan mercenary cavalry
    Charge 6 Attack 3 Defence 1 Armour 3 Speed 9, 24, 26 Morale 4 Cost 300 Support cost 50

    Dismount: In a siege for archers.

    Alan mercenary cavalry are very fast with a nice charge bonus, good morale and just about excusable defence. Best used as speedy and weak light cavalry.

    Hobilars
    Charge 6 Attack 1 Defence 2 Armour 3 Speed 9, 20, 22 Morale 0 Cost 125 Support cost 40

    Dismount: In a siege for Feudal sergeants.

    Hobilars are unique to the English and the French factions. They are available before mounted sergeants and act as a forerunner to that unit. When mounted sergeants are available they are better than hobilars in every way unless you are on such a tight budget you need to florin pinch Best used as slower and tougher light cavalry.

    Lithuanian cavalry
    Charge 6 Attack 2 Defence 3 Armour 4 Speed 9, 20, 22 Morale 2 Cost 225 Support cost 50

    Dismount: Anytime for archers.

    Lithuanian cavalry have a large shield and a spear. As light cavalry go they are very good when used with slower and stronger light cavalry tactics. In the campaign game though many would say that they are too hard to access to be worthwhile, they are probably right. In custom battles they can be a little more useful because they don’t require such a long build up

    Mounted sergeants
    Charge 8 Attack 2 Defence 2 Armour 3 Speed 9, 20, 22 Morale 2 Cost 175 Support cost 50

    Dismount: In a siege for feudal sergeants.

    Mounted sergeants have a large shield and a lance. They have the same irresistible charge as knights and some heavy cavalry units. The rest of the units statistics are solid enough. Use them as stronger and slower light cavalry and you can’t go wrong.

    Polish retainers
    Charge 8 Attack 3 Defence 3 Armour 4 Speed 9, 20, 22 Morale 4 Cost 300 Support cost 60

    Dismount: In sieges for Feudal sergeants.

    Polish retainers are uncontrolled and have a lance and a large shield. Like Lithuanian cavalry they are quite impressive considering that they are only light cavalry. Use the stronger and slower light cavalry tactics.

    Saharan cavalry
    Charge 4 Attack 2 Defence 0 Armour 2 Speed 9, 24, 26 Morale 0 Cost 125 Support cost 40

    Dismount: In a siege for Murabitin infantry.

    Saharan cavalry have a small shield and a sword. This unit is the archetypal speedy and weak light cavalry unit so use those tactics.

    Steppe cavalry
    Charge 6 Attack 2 Defence 1 Armour 3 Speed 9, 24, 26 Morale 0 Cost 150 Support cost 40

    Dismount: In a siege for spearmen.

    Steppe cavalry have a small shield and a spear. This unit can function with either the speedy and weak or the slower and tougher tactics, take advantage of this versatility.

    2.13 Camels


    Camels are strange things. On the battlefield they trot around looking so careless making very peculiar sounds. They are slow for mounted units and they look plain ridiculous when they run. In the desert they manage to look vaguely respectable but in lush grass or temperate climates they stick out like a sore thumb and look very unhappy. So what, apart from cheap laughs, can you get from camels? Dead horses, very large piles of dead horses at little cost in florins or lives that’s what. After polearms camels are the number one horse killers and they really help the Muslim factions deal with all those fancy and very deadly knights.

    Camels stink; their strange odour scares horses making it easy for the camel riders to kill their opponents. In more game oriented terms camels get a +2 bonus to attack and all horsemen are at a –4 penalty to their own attack stats when trying to kill a camel. In the desert the camels will get a bonus for the terrain type to the tune of +1 to attack, camels also fatigue slowly in the desert unlike all horse mounted units with an armour stats above 5 (cumulative, it includes armour bonuses from armourers etc in the calculations) so they often face tired horsemen. All this adds up to a bunch of dead horses. When facing the more advanced and powerful types of cavalry like chivalric knights you should try to mob them with a couple of units of Bedouin camel warriors or absorb their charge with spears and flank with your camels. The reason lies in the stats – even with all their bonuses camels are a bit weak in a punch up brawl when compared to the awesome power and defence of the advanced cavalry. If you take on a unit of chivalric knights one on one with camels you will lose, however if you outnumber them 2-1 there is going to be a sudden demand for new warhorses back in the enemy homelands.

    Camels should never leave the desert as they lose the +1 attack for terrain and get a –1 attack instead. They also lose the fatigue advantage. So while they still have some advantages they lose a lot of their sparkle and you are better off using polearms or something else.

    Because they are mounted troops camels will receive the same bonuses as horsemen when attacking infantry. This is not exactly advisable though; both camel units have horrible melee stats when not facing horses. You can make use of the Bedouin’s good charge from time to time but you cannot copy the knightly tactic of charging into the rear of a vulnerable unit, pulling back and charging again. Camels are too slow to pull back reliably and they are too vulnerable to safely leave the fight, knights are protected by their heavy armour as they turn and pull back but camels have very little armour and turning their back on the foe kills them.

    Camels present a large (and strangely shaped) target for missiles so try to keep them away from anything with missiles. In addition to being a big target camels are never armoured so they are very vulnerable to any kind of missile.

    Camel units are best at: killing horses, raising a laugh in dull moments between fights.

    M24
    Image M24: Camels fulfilling their one purpose – killing horses. One unit of camels has engaged the knights from the front; the second unit has quickly (well, as quickly as camels can) flanked the knights and charged into their rear. The knights are being cut to ribbons. If this was a fair fight with one unit of camels and one of knights then the camels might lose the battle after inflicting significant casualties. Because there are two units of camels the knights don’t stand a chance. With camels numbers really do count.

    NONE OF THESE STATS INCLUDE THE SHIELD BONUS, YOU CAN FIND OUT WHAT KIND OF SHIELD (IF ANY) A UNIT POSSESSES IN THE WRITE UP AND THEN CHECK APPENDIX 3 FOR THE BONUS YOU NEED TO ADD TO THESE BASE STATS.

    Bedouin camel warriors
    Charge 6 Attack 2 Defence 0 Armour 2 Speed 9, 14, 16 Morale 0 Cost 125 Support cost 40

    Dismount: Anytime for Muslim peasants.

    Bedouin camel warriors have a shield and a lance. This is the main unit of camels so just use it as described above.

    Berber camels
    Charge 2 Attack 0 Defence 0 Armour 2 Speed 9, 14, 16 Morale 0 Cost 300 Support cost 30

    Dismount: Anytime for desert archers.

    Berber camels have a shield and a bow. Honestly I can’t really see much of a point to this unit as they are too slow to act as missile cavalry and the Bedouin camels do a much better job in a melee. Redundant.

    2.14 Naptha and javelin


    And so we reach the second hardest type of units to use. While missile cavalry are the hardest to use javelin and naptha units are not far behind. I shall break this section into two subsections as the two unit types require slightly different tactics and have slightly different capabilities. All the units in this chapter have exactly four rounds of ammo each, four javelins or four naptha grenades.

    Naptha.
    These men are equipped with a form of primitive grenade that they will throw at close range into the enemy ranks where it explodes causing astonishing damage. Naptha grenades kill in one shot regardless of who you are, this makes them very handy for taking out royalty and generals as these men have several ‘lives’ and require killing several times before they actually die. However a single naptha bomb will kill you if you are Bill the peasant with a pitchfork and a grubby tunic or King Alfonso IV with the fancy armour and massive empire. Sometimes there is nothing so satisfying as blowing your hated rival to kingdom come with a grenade, one tiny explosion and problem solved It is certainly preferable to slowly wearing them down with troop after troop of soldiers and receiving heavy losses as you wait for him to die already

    Each naptha explosion can kill several men at once so they are best used on tightly packed groups. Bridges in particular provide excellent opportunities for naptha throwers and they can kill as much as ¾ of a unit in one volley – that is ¾ of a large unit like spears The large death toll is accompanied by a morale penalty for explosive weapons and is almost always an instant rout.

    Sounds good so far, one volley for devastation, kills pesky generals and royals, scares the enemy and generally looks cool. What is so hard about that? Simple – getting a volley off in the first place Naptha throwers have a tiny range, if you leave them on skirmish they will pull back before they even think about readying a grenade. You must always turn off skirmish if you want them to do something other than run away.

    So you’ve turned off skirmish, now you can blow things up right? Wrong, because of their short range and long priming sequence (pull out grenade, find match, light grenade, count to three, throw ) you will be lucky to get a single volley before the enemy reach and kill them. Of course if you get that volley and everyone in your unit lobs their grenade like they should you will rout the unit before they can cause any damage. Unfortunately this assumes you are facing an absolute idiot – not even the AI on easy is dumb enough to slowly stroll up to your naptha throwers. Instead they charge and when the enemy are running at full speed towards your naptha throwers you will be lucky to even reach the ‘light fuse’ stage of the priming sequence before they are upon you and killing your men. If it is a particularly auspicious day one or two men will throw a grenade into the melee as their comrades die, you can expect that one grenade to kill 4 men and two or three of those men will be yours. How do you combat this problem? You use a rubbish unit to pin the enemy in place, spearmen are ideal as they are cheap, bulky and last for a respectable amount of time in combat against most foes. Stand your naptha throwers behind the spears and take them off skirmish. Let the enemy charge into your spears and as soon as the fighting begins order your naptha throwers to open fire. They will fling their grenades over the spearmen’s heads and into the enemy; the resulting explosion will kill a lot of the enemy and some of your own spearmen. This is why you always use a cheap, expendable unit for pinning.

    Where ever possible place your naptha throwers on higher ground than their targets, this increases their range and keeps them safer. Also try to get them valour as quickly as possible; it increases their accuracy tremendously. Better accuracy=more grenades on target=more big explosions=more dead enemy

    Never let the naptha throwers do what they want, give them precise orders or keep them the heck out of the way. If left to their own devices they tend to blow up important and expensive units you want to keep. Losing a battle because your naptha throwers bombed your general is embarrassing so don’t let it happen

    Naptha throwers are useless when it rains or snows – without dry matches they cannot light their grenades.

    Practise these tactics, learn the missile range, experiment with them in different climates and situations and you will turn naptha throwers into a deadly force. Have fun

    Naptha units are best at: killing anything and everything with the aid of a junk unit, killing royals and generals, scaring the enemy, destroying dangerous units in one fell stroke.

    M25
    Image M25: This picture illustrates the naptha throwers range on a flat piece of ground. They can just target the enemy but if the enemy get pushed back even slightly the naptha throwers will have to move forward.

    M26
    Image M26: This is what you might call ‘Oooops’. Because they are on lower ground than their target (you can just see the slope of the land) with a friendly unit between them and the enemy the naptha throwers have lobbed their grenades straight into their friends and missed the enemy Never use naptha throwers when their target is higher up than them unless you really want to save the enemy the work of destroying your army.

    M27
    Image M27: Now this is much better The naptha throwers are on the high ground giving them an excellent shot at the enemy. As you can see they are wreaking havoc. If you look very closely in the middle of the picture, obscured by the dust clouds you can see a few grenades flying through the air. If you are wondering what happened to the dying naptha man of the far left of the picture, well he blew himself up

    M28
    Image M28: A close up of the damage caused by just three naptha grenades. In the foreground you can see several bodies being flung outwards by a single grenade, unfortunately most of the dead men are yours In the middle ground you can see a second explosion and this one is right in the middle of a tight cluster of enemy. They were just beginning their death animations as this picture was taken. Also in the middle ground is a large pile of dead enemy bodies – they were the victims of the first grenade to be thrown. If the naptha throwers had acted in unison and thrown their grenades at the same time there would be only a handful of living people in this picture

    Javelins.
    This unit shares most of its tactics with the naptha throwers but there are a couple of fundamental differences. Like naptha throwers you must take javelin units off skirmish mode if you want them to do something other than run away, they have a very short range. You also need to work in conjunction with a junk unit to pin the target in place giving the javelins the opportunity to release their missiles in peace. The difference is that unlike naptha units it is better to send the javelins around behind the pinned target and launch the missiles into their backs. While javelin units can throw their missiles over the junk units heads they are always more successful when they have an unobstructed view. This is because the javelins do not have an explosive radius, they must hit a man to do damage and a clear view aids accuracy and therefore damage. This method also reduces friendly casualties which is always a good thing, your junk unit is cheap and expendable but it still costs money to replace If you cannot avoid launching your missiles over the junk unit’s heads try placing your javelins on higher ground than everyone else, this not only increases their range and damage it also gives them a clear view.

    Javelins are armour piercing and therefore fantastic for taking out heavily armoured targets. Because of their short range they are also very accurate in comparison to the other missile units in the game. When you face a bunch of armoured, expensive and deadly units like knights javelins are an acceptable low budget – high gain solution as they will kill many people in each volley. If you target a unit of 53 knights from behind while they are pinned you can expect to kill around 7 men per volley, after you launch all four volleys there will be very little left of the knights and they will probably rout.

    Javelin units are best at: Killing armoured units, providing large and demoralising volleys of missiles that do a lot of damage.

    M29
    Image M29: This picture conveniently illustrates both the javelins maximum range and how best to deploy them on flat ground.

    M30
    Image M30: When you have to use your javelins from behind a friendly unit this is what you should do – stand on a hill above everyone else and throw into the melee. As you can just about see from the trajectory of the airborne javelins there will be some friendly casualties as the javelins are going to land slap in the front rows of both units. Just hope that more of the enemy die than your own men and be happy that you are killing some expensive and tough enemy troops in exchange for some relatively cheap men of your own

    Almughavars
    Charge 6 Attack 3 Defence 0 Armour 2 Speed 6, 12, 13 Morale 8 Cost 425 Support cost 60

    Almughavars are surprisingly good on the charge and attack, even if their defensive stats are rather crap. Therefore throw your javelins into your target unit and then rush in to finish off the confused and disorganised survivors in the melee. Because they are armed with a spear for melee combat you should use them on hold formation and try to keep the formation as neat as possible so you get the rank bonuses. Almughavars are mercenary units; they cannot be built in the campaign. Consequently they are rather rare.

    NONE OF THESE STATS INCLUDE THE SHIELD BONUS, YOU CAN FIND OUT WHAT KIND OF SHIELD (IF ANY) A UNIT POSSESSES IN THE WRITE UP AND THEN CHECK APPENDIX 3 FOR THE BONUS YOU NEED TO ADD TO THESE BASE STATS.

    Kerns
    Charge 3 Attack 2 Defence -3 Armour 1 Speed 6, 12, 13 Morale 0 Cost 125 Support cost 22

    Kerns are Irish, so you must conquer and hold Ireland to build them in the campaign. Once they have thrown all their javelins you can order them to charge in with their short swords for a quick shock to the enemy. Because of their horrendous defence don’t expect many kerns to survive the experience Think of this unit as cheap and therefore very disposable – while they take massive losses in a fight and flee quite quickly they are easy to replace and won’t break the bank.

    Murabitin infantry
    Charge 2 Attack 1 Defence -2 Armour 1 Speed 6, 12, 12 Morale 4 Cost 150 Support cost 37

    Murabitin infantry have a large shield and use a sword as a back up weapon. When it comes down to close combat they are not highly impressive, although they are somewhat better than kerns as their large shield offers a bonus to their defence when enemies are attacking them from the front. Once again think cheap and disposable.

    Naptha throwers.
    Charge 1 Attack 0 Defence 2 Armour 3 Speed 6, 10, 11 Morale 2 Cost 200 Support cost 37

    Naptha throwers are disciplined and should be kept out of a melee at all costs unless you want to lose them While their stats may not be as bad as some other units (kerns, peasants etc) the difference is in numbers – there are only 16 men in a unit of naptha throwers and that is on large unit sizes Sending them into a melee is usually asking them to die and while they are cheap and easily replaced this will make your life harder in the long run. Naptha throwers really benefit from valour – high valour makes them significantly more accurate and that is a good thing. Let them throw their bombs and then let them go home safely.

    2.15 Artillery


    Artillery is mostly for use against castle walls rather than people. While most artillery can shoot at people few can actually hit them. For the most part artillery is useless unless you need to attack a fortification, when you are up against some of the advanced castles you will be glad you packed a trebuchet or two All gunpowder or stone missile flinging weapons fire missiles that can bounce on impact. The ballista is the only weapon that does not have a bouncing missile.

    Ballista

    Ballistae are the worst artillery hands down. They do little damage against walls and have a short range (for artillery, compared to archers it is a long range) and this often leads to their crews getting killed by castle defences before they do much damage. Against people ballistae are reasonably accurate but since the missile will hit one, and only one, man they are not as good as the more conventional missile units. Ballistae can turn in place.

    Bombard

    Bombards are primitive gunpowder weapons available to the Christian factions. They are slow to reload but they have good range and damage. They cannot turn to aim at other targets so you must position them exactly where you want them in the battles deployment phase. Bombards have 3 safe shots and then a 10% chance of exploding with each subsequent shot.

    Catapult

    Catapults are the first decent siege equipment you get. They have enough range to bombard the more basic castles without taking return fire, however the mid level and advanced castles will have the range advantage. Catapults can turn in place so set them up in range of several juicy targets and let them work their way along them. The catapults stone missile will bounce on impact; the number of bounces is dependant on the terrain, angle of the missile etc just as in real life. This makes them reasonable against tightly packed infantry. Aim at a set of units very close together and target the foremost unit. The catapult will probably miss but the missile may bounce right through the other enemy units. Higher valour really helps accuracy – at valour 0 they will probably only hit their target one in every five shots.

    Culverin

    Culverins are proper cannon with a huge range. They can turn in place to attack new targets. The reload time is quite good for a siege weapon and accuracy is also quite good at low valour. The missiles do loads of damage to walls. Culverins can be used against infantry with some success but they are not exactly best used like that. If you need to demolish a castle as the Christians the culverin is the weapon of choice in the gunpowder age.

    Demi cannon

    Demi cannons are massive contraptions that are set up and not moved until the siege is over. They have good range and firepower so they are quite useful to the Muslim factions. They have a very slow reload time. This unit is guaranteed 20 safe shots and then it has a 1% chance of exploding with each shot.

    Demi culverin

    Demi culverins are smaller versions of the culverin. They have less range, less firepower and the same reload time. They will perform with some effectiveness against infantry if they are in a good position and firing into a mob. They are quite handy but always take proper culverins over demi-culverins when you can.

    Mangonel

    Mangonels are the best pre gunpowder siege weapons. They have good range and power but a very slow reload time. They are horribly inaccurate at valour 0 – I have seen a mangonel manage to miss a large castle wall with all but three shots until it ran out of ammo, considering that they have something like 28 rounds that is a lot of misses Mangonels cannot turn once set up. Mangonels are not anti-personnel weapons so use them against castles or not at all.

    Mortar

    Mortars are gunpowder weapons for the Muslim factions. They have quick reload times and a wide trajectory of fire. They cannot turn after being set up though. They are reasonably powerful but there are other, better weapons for bombarding walls. Not very good against people at all.

    Serpentine

    Serpentines are true anti-personnel weapons. They are not very good against fortifications but they are the best siege weapon to use against people. They are very fast to reload and have a long range. Their power is very lacking against buildings but the missiles still kill people in one shot. They can turn after being set up and when they have a few points of valour they are quite accurate as long as their target is not moving. If you absolutely must use artillery against people this is your tool.

    Siege cannon

    Siege cannon are the longest ranged artillery in the game and exclusive to the Muslim factions. They are obscenely powerful and can demolish a wall in just a couple of shots. They cannot turn after deployment, and the reload time is quite long. This unit has 10 guaranteed safe shots and then a 3% chance of exploding with each shot.

    Trebuchet

    Trebuchet are a slightly weaker version of the mangonel. Read that section and substitute average power instead of good power.


    Frogbeastegg's Guide to Total War: Shogun II. Please note that the guide is not up-to-date for the latest patch.

    Members thankful for this post (2):


  4. #4

    Default


    3. The Viking Invasion.
    The Viking invasion is the add-on for Medieval: Total War. It contains a new campaign set during the Viking invasions of Britain, because of this it has a whole new set of units for this era as well as some new units for the regular medieval campaign. None of the new units fall under a new class so I will not detail the advantages and disadvantages of each category, to see that just scroll up to the same category in the MTW section.

    A note on unit availability: I have noted when a unit is available for the player to build in the two campaigns. The unit is also available to custom and multiplayer battles set in that era. Saxon huscarles (and other similar units) are noted as being Viking only, this is because you cannot build them in the medieval campaign even though they sometimes appear in rebellions in the medieval campaign.

    3.1 New spears


    NONE OF THESE STATS INCLUDE THE SHIELD BONUS, YOU CAN FIND OUT WHAT KIND OF SHIELD (IF ANY) A UNIT POSSESSES IN THE WRITE UP AND THEN CHECK APPENDIX 3 FOR THE BONUS YOU NEED TO ADD TO THESE BASE STATS.

    Armoured spearmen
    Charge 5 Attack -1 Defence 2 Armour 3 Speed 6, 10, 11 Morale 0 Cost 250 Support cost 50

    Available in: Viking campaign and medieval campaign.

    Armoured spearmen are available in both the Viking and the Medieval campaigns. They have a round shield and, unsurprisingly, wear armour. This makes them more resistant to non-armour piercing weapons than the round shield spearmen they serve alongside but at the same time it makes them more vulnerable to armour piercing weapons. Fortunately this unit is tough enough to withstand even armour piercing attacks better than the regular round shield spearmen and this makes them the best spearmen in the dark ages. If you need a spear wall, and chances are you do, this is your unit of choice.

    Dismounted nobles.
    Charge 5 Attack 2 Defence 3 Armour 3 Speed 6, 10, 11 Morale 8 Cost 400 Support cost 50

    Available in: Viking campaign

    Dismounted nobles are elite, and they have a large shield. They are the dismounted form of mounted nobles and in the campaign they can only be obtained by ordering a unit of mounted nobles to dismount. In custom battles you can buy them separately. Dismounted nobles present something of a dilemma; while their stats are outstanding for Viking age spearmen they suffer from only having 53 men per unit. This means that they either cover a reasonable area when deployed or they get the full set of rank bonuses and cover barely any ground. I suggest forming them up in three ranks instead of the usual four, this is a compromise between fighting ability and formation width. While the formation becomes less effective the second it takes a loss (because there is no fourth rank to supply reinforcements without robbing from the supporting ranks) at least it is less likely to become surrounded.

    Fyrdmen
    Charge 5 Attack 0 Defence -1 Armour 1 Speed 6, 10, 11 Morale 2 Cost 200 Support cost 62

    Available in: Viking campaign and medieval campaign.

    Fyrdmen have a large shield. They are the Saxon peasant levies with reasonable equipment and basic training. In contrast with the standard round shield they are more expensive and cost more in upkeep. They also have a single point more in their attack stat and better morale. What does this mean? Fyrdmen are a more reliable and slightly more combat ready unit that can help you build a good shield wall. Their lack of armour makes them more effective against all the armour piercing units; the morale makes them more reliable. They are identical to the medieval feudal sergeants and the unit they are competing with for your florins is the same (spearmen or round shield spearmen).

    Round shield spearmen
    Charge 5 Attack -1 Defence -1 Armour 3 Speed 6, 10, 11 Morale 0 Cost 150 Support cost 50

    Available in: Viking campaign and medieval campaign.

    Round shield spearmen are the plain spearman from the medieval campaign with a new name. They have a round shield but this does not alter their defence bonus as round shields give the same bonus as the standard large shield. Just consider them flavour and use them in exactly the same way as the normal spearman.

    Royal Bodyguard
    Charge 5 Attack 2 Defence 3 Armour 3 Speed 6, 10, 11 Morale 8 Cost 300 Support cost 10

    Available in: Viking campaign.

    Royal bodyguard are elite and use a large shield. In the campaign you can only get this unit by dismounting royal bodyguards, in custom battles and multiplayer you can buy them. While they are in possession of even better stats than dismounted nobles royal bodyguards are also in possession of even smaller numbers. 20 men per unit means that this unit never gets the full rank bonus with fighting efficiency unless they have a front just 5 men wide For what it is worth you may as well just let them go berserk on engage at will - they have the stats to survive this tactically dim setting for spearmen

    Rus spearmen
    Charge 5 Attack 0 Defence 2 Armour 3 Speed 6, 10, 11 Morale 2 Cost 325 Support cost 62

    Available in: Medieval campaign.

    Rus spearmen have a large shield. They are nice spearmen in the early game and sit well against Chivalric sergeants and Saracen infantry. Use them when you have the chance.

    3.2 New Swordsmen


    NONE OF THESE STATS INCLUDE THE SHIELD BONUS, YOU CAN FIND OUT WHAT KIND OF SHIELD (IF ANY) A UNIT POSSESSES IN THE WRITE UP AND THEN CHECK APPENDIX 3 FOR THE BONUS YOU NEED TO ADD TO THESE BASE STATS.

    Arab infantry
    Charge 2 Attack 4 Defence -2 Armour 1 Speed 6, 10, 11 Morale 4 Cost 125 Support cost 45

    Available: Medieval campaign.

    Arab infantry are an attempt to match the Catholic men at arms. They have a small shield and a sword. While they are not as tough as their Catholic rivals Arab infantry can fight in the desert with few problems. It is extremely worthwhile getting them some armour upgrades if you are not going to use them in the desert as this improves their lifespan. If you are going to use them in a desert leave them as they are - they will be able to beat the cooked, heavily armoured units with ease. Another advantage of their lower armour stat comes into play against armour piercing units. While the well equipped Catholic men at arms will take a serious beating at the hands of armour piercing units these lightly equipped Arab swordsmen will have a much better time of it.

    Berserkers
    Charge 9 Attack 6 Defence 4 Armour 1 Speed 6, 12, 13 Morale 12 Cost 375 Support cost 7

    Available: Viking campaign and medieval campaign.

    Berserkers are crazy They have a large shield and they are elite and impetuous. There are precisely 12 men per unit on large unit sizes. They will slaughter vast hordes of enemies and path the field in dead. It all sounds a bit contradictory, doesn't it? Small units generally get pulped, impetuous units generally run off after the wrong targets and no unit could kill half an army on its own, could it? Well, as long as you target the correct units you can rely on berserkers to kick seven shades of hell out of the enemy and live to tell the tale Target spear units, peasant type units and anything without a lot of armour. Berserkers are not armour piercing so they are best used against lightly armoured targets. Don't let them run after cavalry, even though they are fast infantry they will not be able to catch up reliably. However if the cavalry is already engaged or is so close they will not have time to move before your berserkers catch up with them then by all means let your berserkers collect some dead horses. The only major don't for this unit is missiles - don't let them get shot up, these guys go into battle wearing nothing more than a pair of trousers and that doesn't make for the best in missile protection While this unit can charge headlong into many things and still do plenty of harm you are better of using them smartly so try to flank, use the high ground and you will get much better results. Because there are just 12 men per unit berserkers tend to go up in valour very quickly, let low valour berserkers kill their way through a few levels worth of peasants and simple spearmen before unleashing them on tougher units.

    Since I have seen many requests for help in killing berserkers I thought I'd add a line or two on what to do if you find yourself fighting against berserkers. Firstly shoot them Concentrate missile fire of any kind on them, bow fire is preferable because it allows you to stand a long way away. Even a single berserker killed by missile fire is a big gain for you and you should be able to kill at least several. Eventually the berserkers will get close, send in the heavies and engage them in combat. Use heavily armoured units wherever possible as berserkers have a harder time killing well-protected men. The key to winning the melee is numbers - don't just send one unit to fight the berserkers, send several and surround them on all sides. This will enable you to contain them, demoralise them and attack from all angles with the requisite bonuses. Expect to take a lot of losses, just as when you attack a royal or general. Above all be persistent and don't let them get away to regroup - there is nothing quite so mortifying as having a unit of previously routed berserkers regroup and attack your army in the rear and start a chain rout of your own worried warriors.

    Celtic warriors
    Charge 4 Attack 5 Defence -3 Armour1 Speed 6, 10, 11 Morale 0 Cost 125 Support cost 25

    Available: Viking campaign and medieval campaign.

    Celtic warriors have a small shield. They come in large groups - 133 men on large settings, and this aids them considerably. Celtic warriors die very quickly in battle, probably because they insist on walking around in just their trousers, so having large numbers does help them do damage. Armour upgrades are almost required with this unit, especially when you are using it to take on huscarles and Vikings. Because they have the unfortunate combination of low morale and high casualty potential you will also want to upgrade their morale wherever possible. If you cannot improve their morale then you can expect them to rout quite quickly. To improve their chances use them against weaker enemies, mob tougher enemies with as many people as possible and gain advantages by tactical manoeuvring.

    Dismounted Faris.
    Charge 2 Attack 4 Defence 0 Armour 2 Speed 6, 10, 11 Morale 4 Cost 150 Support cost 10

    Available: Medieval campaign.

    Dismounted Faris are elite, disciplined, and have a small shield. Their defence is terrible but they wield their swords well. Let them attack spear units rather than targeting units they don't get a bonus against. Always try and use advantageous positioning to offset their low defence and armour stats. Remember that you cannot build dismounted faris; instead you must (you guessed it) dismount a unit of faris

    Swabian swordsmen
    Charge 4 Attack 4 Defence 3 Armour 3 Speed 6, 10, 11 Morale 4 Cost 325 Support cost 45

    Available: Medieval campaign.

    Swabian swordsmen have a large shield, and have an armour piercing attack. This is a premium unit of swordsmen. They have better statistics than the feudal men at arms and are on a par with chivalric men at arms. Use them whenever you have the chance. The shield is not used in a melee, it guards only against missiles.

    Slav warriors
    Charge 5 Attack 0 Defence -2 Armour 1 Speed 6, 12, 13 Morale 0 Cost 100 Support cost 37

    Available: Medieval campaign.

    Slav warriors have a large shield. They are basically a cheap, expendable unit like the barbarians and peasants mentioned earlier in this guide. Point them at the enemy, let them charge in, leave them to do damage and then wait for the inevitable rout as they flee the field. Thankfully their routing will only affect non-elite, non-disciplined units so don't worry about them too much unless you have an army full of normal status soldiers.

    Viking Carls
    Charge 3 Attack 3 Defence 1 Armour 3 Speed 6, 10, 11 Morale 2 Cost 150 Support cost 37

    Available: Viking campaign and medieval campaign.

    Viking Carls have a large shield. They are an incredibly solid unit in the Viking campaign although they are less strong in the medieval campaign. Use them against the multitude of spear types you will face in the Viking era campaign.

    3.3 New Heavy Cavalry


    NONE OF THESE STATS INCLUDE THE SHIELD BONUS, YOU CAN FIND OUT WHAT KIND OF SHIELD (IF ANY) A UNIT POSSESSES IN THE WRITE UP AND THEN CHECK APPENDIX 3 FOR THE BONUS YOU NEED TO ADD TO THESE BASE STATS.

    Avar nobles
    Charge 6 Attack 3 Defence 5 Armour 7 Speed 9, 20, 22 Morale 4 Cost 425 Support cost 60

    Available: medieval campaign.

    Dismount: In a siege for armoured spearmen.

    Avar nobles are disciplined, elite, and have a large shield. As heavy cavalry go this is a damn fine unit capably of holding its own against anything but the anti-cavalry types. This unit is statistically identical to Khwarazmian cavalry but it has the supreme benefit of being out of the desert. Unlike the Khwarazmian cavalry you don't have to use this unit for Foreign Service and that makes it much better. The unit is also aided by the addition of a large shield that the Khwarazmian does not possess.

    Byzantine lancers
    Charge 6 Attack 3 Defence 2 Armour 3 Speed 9, 20, 22 Morale 4 Cost 250 Support cost 70

    Available: Medieval campaign.

    Dismount: In a siege for armoured spearmen.

    Byzantine lancers are disciplined, elite and have a large shield. They are a bit too weak to be true heavy cavalry, and to be honest they cannot do anything that the other Byzantine units can't do better. Try using a pinch of the 'stronger and slower' light cavalry tactics.

    Khazar royal cavalry
    Charge 6 Attack 3 Defence 4 Armour 5 Speed 9, 20, 22 Morale 6 Cost 400 Support cost 105

    Available: Medieval campaign.

    Dismount: In a siege for armoured spearmen.

    Khazar royal cavalry are elite and have a large shield. In many ways just another unit of generic heavy cavalry, charge, kill, recharge, kill some more...the standard heavy cavalry drill with nothing outstanding.

    Mounted nobles
    Charge 6 Attack 4 Defence 2 Armour 3 Speed 9, 20, 22 Morale 8 Cost 350 Support cost 105

    Available: Viking campaign.

    Dismount: In a siege for dismounted nobles (infantry version)

    Mounted nobles are elite, have a large shield and are impetuous. This unit is the Viking prototype of the later knight. Because they are only a prototype they are a bit weak so make sure to keep them far away from any of the anti cavalry units, otherwise go ahead and use them as you would knights.

    Royal bodyguards
    Charge 6 Attack 4 Defence 2 Armour 3 Speed 9, 20, 22 Morale 8 Cost 250 Support cost 62

    Available: Viking campaign.

    Dismount: In a siege for Royal bodyguards (infantry version)

    Royal bodyguards are elite, have a large shield and are impetuous. There are just 20 men per unit, 21 if the unit has a member of the royal family in it. If mounted nobles are prototype knights then royal bodyguards are prototype royal knights. Once again because they are prototypes they are weaker than the medieval version so you need to be a bit more careful with them. Otherwise use them as you would royal knights.

    3.4 New Light Cavalry


    NONE OF THESE STATS INCLUDE THE SHIELD BONUS, YOU CAN FIND OUT WHAT KIND OF SHIELD (IF ANY) A UNIT POSSESSES IN THE WRITE UP AND THEN CHECK APPENDIX 3 FOR THE BONUS YOU NEED TO ADD TO THESE BASE STATS.

    Druzhina cavalry
    Charge 4 Attack 1 Defence 2 Armour 3 Speed 9, 20, 22 Morale 2 Cost 325 Support cost 60

    Available: Medieval campaign.

    Dismount: Anytime for feudal foot knights.

    Druzhina cavalry are elite and have a small shield. Generic slow and strong light cavalry, nothing interesting. Well, not until you dismount them and get a large unit of feudal foot knights at a fraction of the cost of most other sources of feudal foot knights and the ability to dismount anywhere before battle. Don't train this unit for cavalry instead train it for the foot knights

    Horsemen
    Charge 6 Attack 3 Defence 0 Armour 2 Speed 9, 20, 22 Morale 4 Cost 175 Support cost 45

    Available: Viking campaign.

    Dismount: In a siege for round shield spearmen.

    Horsemen are elite, have a shield, and are impetuous. They are reasonable light cavalry for the Viking campaign, use them with the 'slower and stronger' style tactics for better results. Think of a slower version of Alan cavalry.

    Pictish cavalry
    Charge 4 Attack 2 Defence 0 Armour 2 Speed 9, 24, 26 Morale 2 Cost 150 Support cost 35

    Available: Viking campaign.

    Dismount: In a siege for Celtic warriors.

    Pictish cavalry have a small shield. Generic light cavalry, use with the 'speedy and weak' tactics for best results. Think of the Saharan cavalry from the medieval game.

    Viking raider cavalry
    Charge 4 Attack -1 Defence 2 Armour 3 Speed 9, 20, 22 Morale 0 Cost 150 Support cost 40

    Available: Viking campaign and medieval campaign.

    Dismount: Anytime for Viking carls.

    Viking raider cavalry has a round shield. They are rather crap as light cavalry goes but this is the only mounted unit for the Vikings. Try to use them as per the 'speedy and weak' light cavalry tactics, it improves them a little but all the same don't expect miracles. They dismount into the solidly reliable Viking carls, take advantage of this in battles where you don't need fast cavalry much as Carls are much better in a fight.

    3.5 New Missile Cavalry


    NONE OF THESE STATS INCLUDE THE SHIELD BONUS, YOU CAN FIND OUT WHAT KIND OF SHIELD (IF ANY) A UNIT POSSESSES IN THE WRITE UP AND THEN CHECK APPENDIX 3 FOR THE BONUS YOU NEED TO ADD TO THESE BASE STATS.

    Faris
    Charge 4 Attack 3 Defence 1 Armour 3 Speed 9, 20, 22 Morale 4 Cost 375 Support cost 70

    Available: medieval campaign.

    Dismount: In a siege for dismounted faris.

    Faris are elite, disciplined, and have a round shield. Pretty average as far as missile cavalry goes, they can mix it up reasonably in a melee as long as you give them some advantages over the enemy with positioning, fatigue etc. As usual keep them away from anti-cavalry units.

    Steppe heavy cavalry
    Charge 2 Attack 3 Defence 4 Armour 5 Speed 9, 20, 22 Morale 4 Cost 450 Support cost 45

    Available: Medieval campaign.

    Dismount: In a siege for armoured spearmen.

    Steppe heavy cavalry are elite and have a large shield. Statistically they are equipped to handle a fight quite well, although they are better at absorbing rather than dealing damage. This unit can sit back and shoot at the foe before charging in to finish them off, this makes then nice and flexible. This is one of the few mounted missile units that really takes off in a fight.

    Szekely
    Charge 4 Attack 3 Defence 1 Armour 3 Speed 9, 24, 26 Morale 4 Cost 375 Support cost 50

    Availability: Medieval campaign.

    Dismount: In a siege for Slav warriors.

    Szekely are impetuous. They have a shield. Statistically this unit is a faster version of the faris, however the szekely is not elite and it is impetuous so watch them carefully at all times or they will charge after a unit you don't want them to fight.

    Pictish mounted crossbows
    Charge 2 Attack 0 Defence 2 Armour 3 Speed 9, 24, 26 Morale 2 Cost 300 Support cost 7

    Availability: Viking campaign.

    Dismount: In a siege for Pictish crossbows.

    Pictish mounted crossbows are dark age mounted crossbows, the weapon is exactly the same as the medieval version. They are also reasonably light cavalry for the dark ages but as with the medieval mounted crossbows you are better off letting them shoot at armoured targets and keeping them away from close combat until they run out of ammo.

    3.6 New Axemen


    NONE OF THESE STATS INCLUDE THE SHIELD BONUS, YOU CAN FIND OUT WHAT KIND OF SHIELD (IF ANY) A UNIT POSSESSES IN THE WRITE UP AND THEN CHECK APPENDIX 3 FOR THE BONUS YOU NEED TO ADD TO THESE BASE STATS.

    Saxon huscarles
    Charge 4 Attack 4 Defence 4 Armour 3 Speed 6, 10, 11 Morale 6 Cost 425 Support cost 75

    Availability: Viking campaign.

    Saxon huscarles are armour piercing, elite and in possession of a large shield and bad attitude This unit is one of the best availably in the Viking campaign, in fact the only unit better than the huscarles is the Joms Vikings and maybe the berserkers. This unit is truly a case of wind them up and let them go - they kill anything wearing armour quickly, they have good enough attack stats to kill unarmoured targets quickly and their defence just plain rocks for Viking era infantry. They are allergic to armour piercing attacks though, so watch out for crossbows, javelins and axemen of all sorts. Because huscarles use a two-handed axe the shield is not used in melee, it protects from ranged attacks only.

    Viking landsmenn
    Charge 3 Attack 3 Defence 1 Armour 3 Speed 6, 10, 11 Morale 4 Cost 200 Support cost 52

    Availability: Viking campaign and medieval campaign.

    Viking landsmenn are elite, armour piercing, and have a round shield. This is the anti-armour counterpart of the Viking carl, send them after armoured targets and watch the carnage. Huscarles make these guys rather obsolete, as huscarles are better in every way.

    Viking huscarles
    Charge 4 Attack 4 Defence 4 Armour 3 Speed 6, 10, 11 Morale 6 Cost 425 Support cost 75

    Availability: Viking campaign and medieval campaign.

    Viking huscarles are identical to Saxon huscarles in absolutely every respect except name. Even the unit graphic is identical aside form a minor variation in shield graphic.

    Joms Vikings
    Charge 6 Attack 5 Defence5 Armour 3 Speed 6, 10, 11 Morale 8 Cost 725 Support cost 10

    Availability: Viking campaign.

    Joms Vikings are elite, impetuous, armour piercing and have a round shield. They are the best infantry, and possibly the best unit, in the Viking game. Fear them. A Joms Viking is a huscarl on speed - better charge, better attack, better defence and better morale. They are a rare sight and this is probably a good thing as they are quite overpowered. If you have to fight against them use armour piercing stuff and loads of it. Hit them with javelins and crossbow bolts, then charge in with huscarles or anything else with an armour piercing attack. Expect very heavy casualties.

    3.7 New Peasants


    NONE OF THESE STATS INCLUDE THE SHIELD BONUS, YOU CAN FIND OUT WHAT KIND OF SHIELD (IF ANY) A UNIT POSSESSES IN THE WRITE UP AND THEN CHECK APPENDIX 3 FOR THE BONUS YOU NEED TO ADD TO THESE BASE STATS.

    Viking thralls
    Charge 7 Attack -2 Defence -3 Armour 1 Speed 6, 10, 11 Morale -2 Cost 125 Support cost 37

    Availability: Viking campaign and medieval campaign.

    Viking thralls are Viking peasants with the advantage of being slightly less rancid than the peasant unit everyone else gets. They do get the spear rank bonus, which does boost their stats up a little better than the ones listed here. You can use them like (very) low-grade spearmen but why bother when proper spearmen are very close to hand? If you must use them in combat you should use them as a junk unit to pin an enemy while you attack with something better (although I can't see why the Vikings would need to pin anything as they have no javelins, no naptha and all their main fighting troops can charge headlong into anything and do a heck of a lot of damage) or to absorb missile fire. Use them as garrison troops.

    3.8 New javelin units


    Jobbagy
    Charge 4 Attack -1 Defence 0 Armour 2 Speed 6, 12, 13 Morale 0 Cost 150 Support cost 3

    Available: Medieval campaign.

    Jobbagy are typical javelin people, with the usual four missiles each. Let them use all their javelins before letting them enter a melee with their swords. Cheap and cheerful.

    Slav javelin men
    Charge 1 Attack 0 Defence -2 Armour 1 Speed 6, 12, 13 Morale 0 Cost 125 Support cost 22

    Availability: Medieval campaign.

    Slav javelin men are typical javelin men. They have a small shield and a reasonable set of stats for a throw away unit. Let them use all four javelins before letting them anywhere near a melee.

    Spanish javelin men
    Charge 1 Attack 0 Defence -2 Armour 1 Speed 6, 12, 13 Morale 2 Cost 125 Support cost 37

    Availability: Medieval campaign.

    Spanish javelin men are yet more generic javelins

    Bonnachts
    Charge 4 Attack 5 Defence -3 Armour 1 Speed 6, 10, 11 Morale 0 Cost 250 Support cost 2

    Availability: Viking campaign.

    Bonnachts are javelins with a slight difference. Instead of using normal javelins like everyone else the bonnachts use heavy javelins that do more damage. Each man only has one javelin. They have a round shield. They also have an excellent charge and attack alongside the usual none existent defence and armour. Let this unit pelt the enemy with javelins and then charge into the enemy to finish off any survivors.

    3.9 New missile units

    .

    NONE OF THESE STATS INCLUDE THE SHIELD BONUS, YOU CAN FIND OUT WHAT KIND OF SHIELD (IF ANY) A UNIT POSSESSES IN THE WRITE UP AND THEN CHECK APPENDIX 3 FOR THE BONUS YOU NEED TO ADD TO THESE BASE STATS.

    Irish dartmen
    Charge 3 Attack 2 Defence -3 Armour 1 Speed 6, 12, 13 Morale 0 Cost 150 Support cost 2

    Availability: Viking campaign.

    Irish dartmen are short-range missile troops. They have a small shield. Not that great but since the Irish have no archers this is your replacement. Try to use them on pinned units to compensate for the short range. Each man has seven darts and the darts are not armour piercing.

    Pictish crossbows
    Charge 1 Attack -1 Defence 1 Armour 3 Speed 6, 10, 11 Morale 0 Cost 200 Support cost 3

    Availability: Viking campaign.

    Pictish crossbowmen are identical to the medieval crossbow men in weapon, the melee stats still suck and that doesn't matter because you shouldn't be using them in a melee.

    Sherwood foresters
    Charge 4 Attack 6 Defence 5 Armour 2 Speed 6, 12, 13 Morale 12 Cost ??? Support cost ???

    This unit use longbows so they are armour piercing. They use a sword in close combat. This unit only has 12 men so they can get outnumbered very quickly, al the same they can be very dangerous in a melee due to their high attack stats. They can hide anywhere. Try using them as a cross between hashishin and Welsh bandits.

    Welsh bandits
    Charge 4 Attack 4 Defence 1 Armour 2 Speed 6, 12, 13 Morale 6 Cost 525 Support cost 9

    Availability: Viking campaign.

    Welsh bandits are incredible. They are the only unit apart from the English longbow men to use a longbow. They are fast on their feet and good in a fight, unlike their later counterparts they do not use axes with an armour piercing attack. Welsh bandits have swords. Use this unit to shoot armoured targets as you waste the arrows on unarmoured targets. Welsh bandits can hide anywhere on the battlefield, even if there are no trees. This makes them excellent for setting traps and leading surprise attacks.

    3.10 New Artillery


    NONE OF THESE STATS INCLUDE THE SHIELD BONUS, YOU CAN FIND OUT WHAT KIND OF SHIELD (IF ANY) A UNIT POSSESSES IN THE WRITE UP AND THEN CHECK APPENDIX 3 FOR THE BONUS YOU NEED TO ADD TO THESE BASE STATS.

    Organ gun

    Availability: Medieval campaign.

    Organ guns are anti-personnel artillery with a tremendously short range. They fire a large collection of small shot into the enemy and often shred the target unit. Unfortunately they take an age to reload so one shot is often all you will get per attack wave. The biggest danger with this gun is friendly fire - if it shoots into a melee your men will probably take most of the damage.


    Appendix 1: Cheats and command lines.
    These are included for reference; sometimes cheating is the best way to test out ideas if you are short of time. It can also be fun, not all cheats make your game easier.

    Cheat codes must be entered exactly as they appear here - including the full stop before and after the code. You must enter them on the campaign map screen; the method is the same for both Shogun and Medieval. An * after a code means that the code will affect both the player and the AI factions.
    Shogun
    .matteosartori. = Reveal the whole map
    .muchkoku. = Gives much koku *
    .mefoundsomeau. = Puts gold in all your provinces
    .mefoundsomeag. = puts silver in all your provinces
    .mefoundsomecu. = puts copper in all your provinces
    .viagra. = puts iron sand deposits in all your provinces
    .booyakasha. = fast build mode *

    Medieval and the Viking Invasion
    .worksundays. = fast build mode. Must have all your build queues empty for this to work. *
    .badgerbunny. = all buildings and units are available. You can still only build the units relevant to your faction, even though you appear to have all types available. *
    .deadringer. = gives 1 million florins *
    .conan. = take control of the rebels
    .matteosartori. = reveal the whole map
    .viagra. = puts iron in all your provinces
    .mefoundsomeau. = puts gold in all your provinces
    .mefoundsomeag. = puts silver in all your provinces
    .mefoundsomecu. = puts copper in all your provinces
    .kidsmode. = makes the AI very easy
    .nuttermode. = makes the AI aggressive
    .unfreeze. = produces an heir for your faction. The heir will be born as you hit 'end turn'.

    command lines for MTW
    These are not exactly cheats; instead you add them to your MTW or VI shortcut. Right click on your shortcut, and then choose properties. In the target box you should see something like:
    F:\Program Files\Total War\Medieval - Total War\Medieval_TW.exe
    if you have plain MTW or
    F:\Program Files\Total War\Medieval - Total War\Medieval_TW.exe -strictserver
    if you have both MTW and VI. To add a shortcut you must leave one space after the mark, then enter the command line. To use multiple command lines just leave a space between each one and remember to include the - at the start of each successive line. Choose to save your changes and exit the properties box. Then start the game with the shortcut.

    -ian - debug mode, runs in a smaller screen, you can move the camera about more in the battle maps to get close up views, you can disable the AI or switch factions using the number keys. The A key allows you to put the game on auto run.

    -loyalty:X - sets the auto tax to maintain X loyalty where X is the number you want. Always use more than 100 at the very minimum unless you want a lot of rebellions. I recommend 120 for a reliable income and reasonably reliable loyalty or 180 to maintain very high loyalty and rarely see a rebellion.

    -strictserver - a multiplayer related command that is on by default for all VI installations. Just leave it alone.

    -green_generals - for VI only. When a general dies his replacement won't be identical to him in stats, vices and virtues. Instead the new man will be slightly weaker. This one also affects the AIs generals.

    Appendix 2: Unit size chart.
    This chart shows how many men there are in each type of unit on each of the unit size settings in MTW.

    On small size: Bodyguards 20 cavalry 20 infantry 30 spears 50
    On default size: Bodyguards 20 cavalry 40 infantry 60 spears 100
    On medium size: Bodyguards 20 cavalry 53 infantry 80 spears 133
    On large unit size: Bodyguards 33 cavalry 66 infantry 100 spears 166
    On huge unit size: Bodyguards 40 cavalry 80 infantry 120 spears 200

    Appendix 3: Shield bonuses
    This section is with help from Kraxis.

    Large shields: +2 def and armour
    All cavalry and small shields: +1 def and armour
    Pavise shields: +3 armour
    In the unit_prod files (best opened with the Gnome editor) there is a section on shield modifiers. This is column 61 in the Gnome editor. The modifiers on the shields, the 1, 0.5 and 0.0 mean how effective the shields are. Most units have the modifier of 1 on them, but units such as Chivalric MAA and Chivalric Knights have a 0.5 modifier. A few units, such as the Hospitaller foot knights have the 0.0 modifier, effectively making the shield a piece of eye candy with no use at all. Column number 60 has information on whether a unit can use their shield in melee or whether it is limited to intercepting ranged missiles only. These two pieces of information are noted in the appropriate unit write ups, so to check what kind of shield bonuses, modifiers and abilities a unit has look it up in the main guide.

    Appendix 4: Armour piercing formula
    Again this section is with help from Kraxis.

    The formula for working out the armour piercing bonus against a specific target is as follows:
    (target armour - 1)/2 = bonus added to attack.

    That means that AP gives a bonus of +1 to attack at enemy armour of 3-4, +2 at 5-6 and so on. Upgraded armour is affected by this, effectively making added armour only half again as effective as it was supposed to. Cavalry armour affected by AP starts at 4 due to the horse/camel itself being a point of armour and still a soft squishy thing.
    So really while AP units are more effective against heavily armoured units it doesn't mean they will do poorly against unarmoured units, they just don't get the bonus.

    Appendix 5: Spears and the charging thereof.
    This is copied from a post I made on the topic of charging spears. It explains why, in my opinion, charging spears is not a good thing except in very specific circumstances.

    Right let us take Mr. Average Joe the spear unit, for our purposes a unit of Feudal sergeants with 133 men, valour 0 no upgrades. He has base stats of:
    Charge 5 Attack 0 Defence -1 Armour 1 Speed 6, 10, 11 Morale 2
    Now add in the rank bonus, applied evenly across the entire unit as it is in 4 ranks and perfect order:
    Charge 7 Attack 1 Defence 1 Armour 1 Speed 6, 10, 11 Morale 2
    Now add the hold formation bonuses/penalties like so:
    Charge 7 Attack -1 Defence 3 Armour 1 Speed 6, 10, 11 Morale 2
    There is mention of an extra point to defence when spears are in this setting, taking the stats to:
    Charge 7 Attack -1 Defence 4 Armour 1 Speed 6, 10, 11 Morale 2
    Now because this unit is not going to charge anywhere, it is going to stand still and take the charge, you can put it on hold position. This makes the formation much easier to keep dressed, keeping the bonuses at the level above for much longer. When the enemy hit the formation will ripple slightly and then go back to nice, neat, stat boosting ranks and the spearmen take a long time to die. They don't kill that many but what do you expect - they are spears and spears are made (with a couple of exceptions) for standing and not killing. The formation will take significant losses and remain effective for a long time. By the time there are enough casualties to cause effectiveness to really drop the unit will be routing anyway.

    Now let's take the same unit with the same valour etc, put them in hold formation and let them charge the enemy. The unit looks like this:
    Charge 7 Attack -1 Defence 4 Armour 1 Speed 6, 10, 11 Morale 2
    Firstly you can't really use hold position effectively in this situation so the formation is more likely to be pushed back or disrupted by the enemy. You can try whacking them on hold position the instant the charge hits but it can be a little unpredictable as to what position they will hold. It all depends on what kind of shape your men are in when the order is given - if they are still in a very neat formation then it should be reasonably obvious where they will hold, if they are more spread out or the front line is buckled (happens often, charging units often resemble a curve with the middle further ahead) then it is less obvious. I have also had occasions where the dense idiots in charge of the unit decide that it is a good idea to pivot around and hold position with their flanks to the enemy Suffice it to say it is not a good decision on their behalf and I do not ransom them back.

    Secondly, as I have already mentioned, the formation often gets disrupted on the charge and even a tiny disruption affects the bonuses. No neat formation=no bonuses for some men and this affects their fighting capability. Part of the formation will attack with the stats above, others will have the basic stats and this makes them far less effective in battle. They die, the formation slowly depletes and the bonuses start to disappear across the unit due to casualties and disruption. This can be countered somewhat by stopping your spears a short distance from the enemy, waiting for them to dress their lines and then charging. However you often don't get the full run up so your charge bonus is cut a little short because your men did not get up to full speed. It takes almost 3 seconds of charging to reach full speed and therefore the maximum charge benefit.

    Now you know what you risk when charging it is time to work out what you gain. The charge bonus. (gulp, hard maths )

    Right the units charge bonus is 7 as long as the man at the front has full rank support; if he doesn't it is 5. For the sake of my brain he has full rank support from now on unless mentioned otherwise This number is added to the attack stat when the unit reaches full charging speed. Therefore a charging spearman gets an attack value of 6 but only for a short time that is dependant on how the charge goes. On impact the spearman makes an attack at 6 against the enemy, if he kills the enemy then he will advance and use his charge bonus. Eventually he will either fail to kill or run out of momentum and the bonus is lost completely. Usually charges seem to last for about 3 dead men at the most. So that is what you gain, now for the detail and this is fiddlier than ever.

    As each man charges home he either kills his target and advances deeper into the enemy, fails to kill his target and stays where he is fighting, fails to kill his target and dies, or kills his target and dies. If the man advances he continues to use his charge bonus but the men behind him have to follow him exactly or he will lose his rank bonus, leaving him high and dry. If he fails to kill his target he stays put and is likely to continue receiving his rank bonus. If he dies, well he is dead :D
    Problem.
    If the unit is on hold formation, which it should be as spears really need this setting, then those who kill with their charge cannot advance without breaking this order. Therefore your charge is a bit wasted you one of the main purposes of charging is to get men into the enemy and attack from there. But at the same time if the unit goes impetuous or is not on hold formation then it will break up very quickly, the charge bonus disappears quickly and there are a lot of men without their neat little rank bonuses. They die unless the enemy rout very quickly indeed.

    So spearmen on their best settings are unable to take advantage of the best bonuses charging provides, on their worst setting they can take advantage of them but they lose a bit too much in the process.

    Now lets look at the kind of chances to kill these spearmen would get against some of their common targets. (Why am I doing this? This is even worse maths I could just leave someone else to do it...tempting ) Yes, that is a good idea - someone can work out the kill chances spears get against targets like feudal knights Have fun :wave: I shall do the froggy patented Easy Maths Reasoning© instead.

    Look at feudal knights; they have a devastating effect when they charge. Why? 8 charge bonus + 4 attack = 12. Now Chivalric knights get 8 + 5 = 13. Galloglasses get 8 + 5 = 13. A large number is to be found on all the good charging units. Now look at what the feudal sergeants get - a paltry 6. Crud in comparison. Well what about against swordsmen and their weak charges? Feudal MAA get 3+3=6 which is equally cruddy in comparison but, and this is the critical difference to me, swordsmen never get rank bonuses and they need to break up the enemy formation by dispersing inside it. For swordsmen charging is a tool that lets them do their job, unlike charge heavy units it is not their job. Knights=job to charge, swords=job to kill. Spears job is to hold the enemy, nothing more. They are not killers and never will be.

    So if it is all about the large numbers why not charge units like Muwahid foot as they get a bigger number? Simple - I already said charge them in the guide That is why they are different to other spears.

    So there is what you gain and what you lose and my reasoning behind it all. But to put it how I prefer to explain these things: (i.e. with no maths or numbers )
    When I charge my spears they die faster, lose the rank bonus as they become disordered and don't fulfil their function nearly as well. When I stand and receive a charge they survive with barely a loss unless they are massively outmatched and they do their job well. Spears are for pinning, someone else does the killing. Just an observation based on my experiences.

    Of course it is all a matter of preference - I like to take my people home after the battle, others don't care about losses as long as they win. Fair enough. Someone will probably come along and neatly take this post to pieces now and demonstrate why charging is better. Have fun

    Appendix 6: Ships
    Ship stats from the Gnome editor. Don't ask me what they mean as I have no idea Yes I know longboat is in there twice, maybe there are two versions of the ship?

    Stats are in this order: Range, attack, defence, speed, strength.
    Dhow 1,1,1,3,0
    Droman 1,1,0,4,0,
    Longboat 1,1,1,3,0,
    Galley 1,1,1,2,0,
    Barque 1,1,2,3,0,
    Baggala 2,2,2,2,0,
    Caravel 2,3,3,1,0,
    Firegalley 1,3,1,2,0,
    Wargalley 1,3,3,1,0,
    Cog 2,4,2,2,0,
    Boom 2,4,3,2,0,
    Gungalley 1,5,3,1,0,
    Carrack 3,6,3,3,0,
    Curragh 1,1,0,3,0,
    Boat 1,1,0,2,0,
    Longboat 1,1,1,2,0,
    Snekkja 2,1,1,3,0,
    Drakkar 2,2,2,4,0,
    Jarnbardi 3,3,3,3,0,


    Credits (in alphabetical order)
    AggonyShim2 for some battlefield ninja tips.
    arrrse for the archers on steep slopes tactic, and tips on Mongol light cavalry, gallowgalsses, royal knights and militia sergeants.
    A.Saturnus for a correction to the nizari section.
    barvaz for raising the issue of unit sizes on different settings.
    Brutal DLX for the reliable cavalry disengage method. Apparently a common multiplayer tactic but he was the first I saw to mention it. Also for help with the Sherwood foresters.
    Bushface for proofreading. Also for many contributions and suggestions.
    Clan Berserk for the unit stat comparison tool.
    cutepuppy for an addition to the thrall section.
    Duke John for providing some stat type stuff on the organ gun.
    Fragony for an addition to the pike section.
    Frankymole for suggesting adding which cheats affect the AI and which don't.
    fruitfly for pointing out a major error in the steppe heavy cavalry section, also for a jinetes tip.
    gaelic cowboy for suggesting the ship appendix.
    Ironside for correcting an error in the ballista section, also one in the futuwwa section.
    Kraxis for the longest list of alterations submitted so far
    Kristaps for a tweak to the feudal foot knight section.
    LordHugh for pointing out an omission in the Welsh bandits section.
    Louis de la Ferte Ste Colombe for helping me get some of these screenshots.
    Ludens for a thunderbomber tactic. Also for corrections in the Ottoman infantry and Korean skirmisher sections, and for finding the safe shots/chance to explode for the siege guns.
    Monk for a correction in the fanatic section, also a clarification in the Khwarazmian cavalry section, and a bit on Sherwood foresters.
    Motorhead for pointing out a couple of typos.
    Norseman for providing the formula to work out unit support costs.
    Oaty for some battlefield ninja tips.
    Puzz3D for help with an assortment of stats.
    Quokka for providing a list of support costs, also for a correction to the Ottoman infantry section.
    Shigawire for contributing the hold position tactic for pulling cavalry out of combat.
    Shinano for some battlefield ninja tips.
    Sinan for proofreading.
    Sjakihata for proofreading. Also for numerous tactical tips.
    SwordsMaster for spotting an error in the druzhina cavalry section.
    Tenkipanda for some battlefield ninja tips.
    The_678 for noticing I had missed out Sherwood foresters.
    TosaInu for help with the technical aspects of this guide. Without his help the guide could not exist. Also for suggesting the cheat/command line section.
    Tricky Lady for compiling the PDF version of this guide.

    A nod to the Bradygames Medieval: Total War official strategy guide is due - I borrowed their unit categorisation and layout to make sure I didn't miss any of MTW's 101 units. All the work here is my own though, I didn't copy the guide further than layout.

    The final credit is the hardest to write well as it is for the entire Total War community. Over the years I have seen so many good tactics, good unit discussions and just generally interesting conversations on the games that I have learned a lot from people whose names I cannot remember to add to the credits. I was once a lost beginner who couldn't tell the difference between a yari samurai and a yari ashigaru; thanks to my reading the forums on various sites I am much better now. I am giving back what I found in the first place.


    Frogbeastegg's Guide to Total War: Shogun II. Please note that the guide is not up-to-date for the latest patch.

    Member thankful for this post:


  5. #5

    Default

    You have reached the bottom, congratulations. I bet you skipped most of the guide on the way here just to see how long it was

    Note for moderators: I put the guide in the Main Hall because it seemed like the least inappropriate place; feel free to bat it elsewhere. I won’t bother asking for a sticky – if it deserves a sticky it will get one, if it doesn’t then it won’t. Simple.

    On August 3rd 2003 I announced work was beginning on a unit guide. I believe I said something along the lines of “it will get done quite quickly”, well that statement is now included in Famous Last Words 2003 edition Fast forward to the 9th December 2003 and the guide is actually done 5 months and 6 days work. My fingers hurt.

    Let me stress that this is only the beginning of the guide. Some of you will disagree with what I have written, I will have missed things out, forgotten things, got things wrong, and there are tactics I have never even thought of. I am not an all-knowing amphibian, just a frog contributing what I know. I hope I have limited the errors but new tactics and insights are always good so speak up. I have broken the guide up so each section only uses approximately half of the possible character limit so there is plenty of room for expansion. I can also add new pictures, if you feel something needs a diagram to explain it then say so. Please bear in mind that I am trying to keep this thing relatively fast loading so I don’t want too many pictures.

    Now to field the anticipated questions:

    Yes I will do a printer friendly version, but after the rush of alterations is finished. Maybe around the end of January.

    No I do not have too much spare time, I wrote this to practise my writing and learn some grammar, spelling etc. This is work to me. I also like to keep busy.

    No I wasn’t working on it non stop, more like an hour or two when I felt like it until I got near the end and speeded up. Plus a large part of it got destroyed when my hard drive broke.

    No it does not cover multiplayer in any way and IT NEVER WILL Multiplayer is a whole new guide.

    Yes I do know that I have created coding for pictures that don’t exist yet. There are no pictures using the S(number) or the V(number) codes. I put that in so I would have room for expansion if need be.

    No I am not going to do a copy of this guide else where on the orgs forums – one copy and one copy only. Too much work to have more than one like with the Beginner’s guide.

    Yes some of the unit descriptions are rubbish but that is where reader suggestions come in.

    Does anyone know where I can get a proper VI logo? I'd rather keep the matching scheme with the proper game logos instead of that large picture I have now.

    Analysis of version 1.0
    Length is MS Word = 80 pages
    Characters = 217,458
    Words = 37,024
    Pictures = 59 (29 assorted chapter headings, 30 tactical)

    Anyone asking what my next guide is going to be on will be horribly tortured for several hours before being executed

    Anyway I am now off to my secret nuclear bunker that has been carefully stocked with provisions for this occasion. Let the explosion of corrections, additions, alterations and bewailing my panning a patron’s favourite unit begin Please try to co-ordinate any food produce throwing – with a little variety we can make a buffet lunch, if everyone throws tomatoes it will get dull.
    Frogbeastegg's Guide to Total War: Shogun II. Please note that the guide is not up-to-date for the latest patch.

    Member thankful for this post:


  6. #6
    The Abominable Senior Member Hexxagon Champion Monk's Avatar
    Join Date
    Jan 2003
    Location
    YU-ESS-AY
    Posts
    6,667

    Default

    Hello Froggy nice to see you have finished your guide

    anyhow i have read (ok not all of it...but a good deal of it) through it, and there's a few things i need to point out. Please excuse my grammer is to early here...

    Should be noted that this is IMHO and i greatly thank all the research you have done...

    Archers: The archers should be deployed in no more thank two ranks deep, as those in the third and back ranks will suffer accuracy penalties. Kill ratio of the volley will drop.


    Fanatics: they are only avalible through Crusades, they are a Christian only Unit. I could be wrong, i will check this later to confirm edit: by fanatics i mean the fanatics themselves...not other religious units of course

    Foot Knights: Yes they are powerful, but just to damn slow besides being able to take a volley they have another talent, getting tired outn before combat is entered . Bunch of lazy bums, anyhow its bets to keep them mounted otherwise your heavy advantage may go to waste. should only be dismounted in seiges.

    Chiv MMA: these guys are Heavily armored, and as such tire faster than FMAA. this should be noted

    Khwarazmian cavalry: over estimation is the death of many men. So was the case here, These guys are NOT Kats, and in no way should be commanded as such. I know you have already said this but it cannot be said enough, they just don't have the power needed to contend with the Knights of the West. IMHO a waste of money, and in desert combat (the type most seen by Muslim forces in early) they are useless.

    Well thats all for my little bit of notes i wanted to make. I will return to read the rest of the guide when i have woken up (its 7:04 here right now). But very GJ on this. Aside from a few pointers i had to make this is a very nice and complete guide


  7. #7

    Thumbs up

    Hiya frog lady

    Top piece of work, although I skipped most of the tactics text and focused more on the unit descriptions. All very well done, and I may have a few additions but I think we should start a seperate thread on that and the mods should just sticky your work and allow only you to edit it so that the guide is presented as a whole, without countless replies confusing the inquiring reader...

    Oh, and thanks for the mentioning in the credits, but really these should belong to the MP community in general.
    Ignoranti, quem portum petat, nullus suus ventus est. -Seneca, Epistulae Morales, VIII, 71, 3

  8. #8

    Default

    Well, I read the entire thing before coming down to post and I must say, you must be the most dedicated TW player ever If I ever saw you on the field I would withdraw

    Love it Love it Love it You should ask for printing rights and sell these guides in glossy format at every game shop in town.

  9. #9
    AKA Leif 3000 TURBO Senior Member Leet Eriksson's Avatar
    Join Date
    Feb 2002
    Location
    n0rg3
    Posts
    3,510

    Thumbs up

    I read the entire guide,well done

    I also learned something useful,axmen are not a substitute to swordsmen,becuase they don't get the AP bonus,especially when fighting against spears,I guess the arabs infantry,viking carls and other such units have more uses now(for me that is)

    Also much appluads to the well done job at writing the guide,its the best
    Texas is Gods country! - SFTS
    SFTS = The rest =


  10. #10

    Default

    Thank you. This is fantastic. I especially like the graphics that show the examples. Truly amazing...

    InvalidOpcode

  11. #11
    Member Member Hajduk's Avatar
    Join Date
    Nov 2003
    Location
    Vinland
    Posts
    49

    Thumbs up

    Eggs-cellent


    My background includes military service & technical writing. I'm very much impressed by your guide.


    Many thanks
    --Hajduk--

  12. #12

    Default

    So it is good then? That is a relief

    Ok correction time.

    Monk
    Archer visability/ranks is mentioned in the large section on how to use each ranged unit. It is repeated in all 3 sections, however if you think it is not clear enough I can reitierate it in the beginning of the ranged unit section. Let me know.

    Fanatics - fixed and credited.

    Foot knights - which ones? Gothic? Chivalric? All three? Sounds like gothics to me.

    Chivalric MAA - not noticed that myself, sounds interesteding I shall run a few tests tonight and see what happens.

    khwarazmian cav- not sure how to pan these guys any more Already called them stinking roses I shall see what I can come up with to emphasis that they are not kataphraktoi.

    Anyway I shall expand your credit as necessary when I further edit the guide. Thanks

    Brutal DLX
    Changed your credit, is the new form to your liking? That is not a Bad idea for this thread, one locked sticky with the guide and one other topic for feedback. Space consuming though.

    Skudknight
    If you met me in multiplayer you should press your attack I've played several games and lost them all - great fun

    faisal, invalidopcode and Hajduk
    Thanks Gald the pictures were useful you wouldn't believe the trouble I had gewtting some of them. In the end I had to go multiplayer to get a couple of them because the AI wouldn't co-operate and be as stupid as it usually is.
    Frogbeastegg's Guide to Total War: Shogun II. Please note that the guide is not up-to-date for the latest patch.


  13. #13
    The Abominable Senior Member Hexxagon Champion Monk's Avatar
    Join Date
    Jan 2003
    Location
    YU-ESS-AY
    Posts
    6,667

    Default

    Sorry if i said something already stated in your guide, but i read this at about 6 am and posted about it at 7 am. I don't think i even understood half of what i was actually taking in .

    Foot Knights - yes was gothic, again blame the time zones

    Chiv MAA - In SP it labels them as heavily armored and in my games they seem to tire faster than FMAA, again i could be mistaken.

    Khwars- I was only stating what you had already said, but to the early Muslim player they are (imo) useless. One cannot gain an advantage over heavily armored Crusaders in desert warfare if one's own army is heavily armored. The point i tried to make.

    Ahh it feels good to actually see myself typing , Again great job on the Guide. It's taught me a thing or two that i never knew before.


  14. #14
    Member Member Hajduk's Avatar
    Join Date
    Nov 2003
    Location
    Vinland
    Posts
    49

    Question

    Hullo Frogbeastegg

    May I convert your guide into .pdf format? I've got Adobe Acrobat.

    With your permission, I would make the guide available to all. Or you could distribute it yourself. You would retain all rights. I would, of course, submit working and final versions to you for review and approval.

    I could format pdf book from html here or use original files if you're working on revisions or have additional material. A pdf version would have in-text hyperlinks and search features.

    Regard & thanks,

    Tony (Hajduk)

    PS My email address is available under my profile.
    --Hajduk--

  15. #15

    Default

    Hajduk
    I was going to convert this into a MS Word document without the forum coding and add in the pictures but there is no reason why it couldn't be a PDF instead. I would recommend leaving any conversion for a couple of weeks as there are likely to be a lot of changes, additions, clarifications etc. There si no way I can have covered everything

    It would probably be easier to use the forum version of the guide as the Word documents I wrote it in are more than hard to follow. There is also the matter of the pictures, it is hard to tell what is where unless you know what I named my screenshots.

    Monk
    Typing tired? I know the feeling I shall tweak the gothic foot knight entry later this evening, after I run a few test battles on the MAA. Get what you mean about the khwarazmian cav, I shall re-examen that entry as well.
    Frogbeastegg's Guide to Total War: Shogun II. Please note that the guide is not up-to-date for the latest patch.


  16. #16
    Member Member Hajduk's Avatar
    Join Date
    Nov 2003
    Location
    Vinland
    Posts
    49

    Lightbulb

    Quote Originally Posted by [b
    Quote[/b] (frogbeastegg @ Dec. 12 2003,13:29)]Hajduk
    I was going to convert this into a MS Word document without the forum coding and add in the pictures but there is no reason why it couldn't be a PDF instead. I would recommend leaving any conversion for a couple of weeks as there are likely to be a lot of changes, additions, clarifications etc. There si no way I can have covered everything

    It would probably be easier to use the forum version of the guide as the Word documents I wrote it in are more than hard to follow.
    Frogbeastegg,

    I'll follow your progress in the forum here. When you're done with the guide, please let me know.

    As you suggest, it will be easier for me to convert html (from this forum) into PDF. I also have software to produce e-books in MS Lit format used with MS Reader (which reads great on a tablet PC).

    Best of luck on your very worthwhile project
    --Hajduk--

  17. #17
    The Anger Shaman of the .Org Content Manager Voigtkampf's Avatar
    Join Date
    Nov 2003
    Location
    Holding the line...
    Posts
    2,745

    Default

    frogbeastegg, I'm speechless...

    Or typeless... Whatever... Made me take up my on guide I was doing for M:TW and toss it in the deepest of all dungeons that I have...

    Enormous achievement I salute you


    Today is your victory over yourself of yesterday; tomorrow is your victory over lesser men.

    Miyamoto Musashi, The Book of Five Rings, The Water Book

  18. #18

    Default

    Very well done. An interesting and beneficial read and will surely prove to be a very useful reference when playing.

    I am in no position to comment on any of the tactics and units descriptions, I will leave that to more knowledgeable people but the only comment I have is about the use of a non standard unit size which is correct for those who play the large armies but is different than the number in the unit files. As someone who is playing on default army size, I kept trying to make the conversion in my head when I was reading the guide. Just a petty comment.

    Excellent job, thank you.

    - barvaz
    warlore.org - An online M2TW game data browser.

  19. #19

    Default

    Monk
    I have compared the chiv MAA, feudal MAAS and gothic FK fatigue rates and they seemed identical. I took one unit of each into steppes 5/temperate/spring and got them to form a neat line and march around a lot. They all moved exactly the same distances at the same pace (marching or running depending on what I felt like). They all dropped fatigue bars at the same time. I made them fight against some chivalric spears and once again they all tired at the same rate. Tried it several times with the same result, if anyone else whats to repeat the experiemtn and double check that would be great. In deserts or snow the heavier armed men should tire quicker but I have already noted that (runs off and checks guide entries), any entries I missed will be bought up to date now.

    I have decided on my tweak to the khwarazmian cav - "Wearing this much armour in the desert will barbeque anyone, this unit is just begging for foriegn service as the factions capable of building this unit all start with hot provinces. Send them abroad or use them sparingly." That should make it nice and clear.

    Hajduk
    I will email you when things slow down enough for the conversion.

    voigtkampf
    What was your guide on? I wouldn't give up just because of my monster of a guide - there is space for many, many guides on this game without competition or repetition, that is the beauty of such a complex game. No two opinions are the same and new insights come from even the newest of players. Even after a year I am still suprised by some of the things that crop up on these forums.

    barvaz
    I had the same problem in reverse, I use large unit sizes and kept getting the numbers wrong when converting down. One of my proofreaders raised the same point but I forgot to do something about it. I'll knock together a unit size chart or something.
    Frogbeastegg's Guide to Total War: Shogun II. Please note that the guide is not up-to-date for the latest patch.


  20. #20
    (Insert innuendo here) Member Balloon Bomber Champion DemonArchangel's Avatar
    Join Date
    Jan 2003
    Location
    Washington D.C
    Posts
    3,277

    Default

    DAMN

    (is speechless, Nice Job Froggy)


    Quote Originally Posted by Louis VI the Fat View Post
    China is not a world power. China is the world, and it's surrounded by a ring of tiny and short-lived civilisations like the Americas, Europeans, Mongols, Moghuls, Indians, Franks, Romans, Japanese, Koreans.

  21. #21
    Arrogant Ashigaru Moderator Ludens's Avatar
    Join Date
    Nov 2003
    Posts
    9,059
    Blog Entries
    1

    Default

    Miss Frogbeastegg,

    Congratulations on the finishing of this truly magnificent piece of work, or should I say art? Thousands of Total-War gamers are going to benefit from your efforts, and as such you deserve to be praised.

    As far as I can see, there only some minor errors:
    -Korean Skirmishers are just bad swordsmen, not spearmen: The manual explicitly states that they use javelins and swords, and as such don't get a bonus against cavalry.
    -Korean Thunferbombers: a useful tactic to prevent overkill is to set them in wedge formation, so only the front-ones will fire. This works especially in the "historical" Mongol campaign, were in one mission you have 2 units of 120 thunderbombers However, like every advantage with the thunderbomber, it brings it own disadvantage (seems like in-game Yin-Yang dualism, if you ask me ) that in avoiding overkill, you get underkill so that a few enemy soldiers get closer, get blown up, and with them the thunderbombers at the front-line.
    -Ottoman Infantry: these have the same melee stats as Janissary Archers, not infantry (a typo, I suppose).

    That were the errors as far as I could see. Anyway, I shall look forward to reading all your future work, including (I hope) Frog Tzu: The Art of War.

    Ludens
    Looking for a good read? Visit the Library!

  22. #22
    Arrogant Ashigaru Moderator Ludens's Avatar
    Join Date
    Nov 2003
    Posts
    9,059
    Blog Entries
    1

    Default

    Quote Originally Posted by [b
    Quote[/b] (frogbeastegg @ Dec. 12 2003,11:19)]Anyone asking what my next guide is going to be on will be horribly tortured for several hours before being executed
    Any volunteers?
    Looking for a good read? Visit the Library!

  23. #23

    Default

    Ludens
    That thunderbombers tip is very good - I'd never thought of that or seen it mentioned before. Adding it in pronto. I shall correct the Ottoman infantry entry as well. I will test out the skirmishers in Shogun tonight, not that I doubt you instead it is a good excuse to load up the old game and indulge myself

    DemonArchangel
    Thanks

    EDIT:Yep, the skirmishers are definitely swordsmen. Turning those Yari samurai into pincushions in the name of research was fun Guide is now updated again.


    Frogbeastegg's Guide to Total War: Shogun II. Please note that the guide is not up-to-date for the latest patch.


  24. #24

    Default

    Wow


    This guide must have you took weeks (or months?)
    This is a really impressive work


    »Erzähle, Wandrer, wenn du nach Sparta kommst, daß wir, seinen Gesetzen gehorsam, hier gefallen sind.«


    CHIEF ARCHITECT


    visit our HTW website

  25. #25
    The Abominable Senior Member Hexxagon Champion Monk's Avatar
    Join Date
    Jan 2003
    Location
    YU-ESS-AY
    Posts
    6,667

    Default

    Greetings once again Froggy

    Thanks for listening and taking into account what i had to say, even though half of it turned out to be nothing .

    There is nothing more that I can find wrong with this peice of work. Once again Great job on it. Only thing is, now i don't have any excuses when i get beat

  26. #26
    Arrogant Ashigaru Moderator Ludens's Avatar
    Join Date
    Nov 2003
    Posts
    9,059
    Blog Entries
    1

    Default

    Quote Originally Posted by [b
    Quote[/b] (frogbeastegg @ Dec. 12 2003,22:45)]Ludens
    That thunderbombers tip is very good - I'd never thought of that or seen it mentioned before. Adding it in pronto. I shall correct the Ottoman infantry entry as well. I will test out the skirmishers in Shogun tonight, not that I doubt you instead it is a good excuse to load up the old game and indulge myself
    I just retried the Thunderbomber wedge. Turned out that not only the front ones died, but a few grenades actually exploded IN the wedge of thunderbombers (the landscape was hilly). However, this was fine by me because those One-Hunderd-And-Twenty man units were far to unwieldy

    The tactic didn't work always, though, but it did work at the gate of the castle (third battle of "historical" Mongol Campaign), and they scored a nice number of kills (twice their losses, and given the fact that I couldn't get them out of their due to their large formation and narrow space, so that they had to engage HtH...)

    But if you would ask me: "Would you want to be a thunderbomber in your own army?", the answer would definetly be "No".

    Ludens a.k.a. "Kaboom"

    BTW The unitguide still calls skirmishers "spearmen". I thought you updated it?


    Looking for a good read? Visit the Library!

  27. #27
    The Breath of God Member Divine Wind's Avatar
    Join Date
    Sep 2001
    Location
    Guarding the Shores of Japan
    Posts
    1,317

    Default

    Wow, fantastic work again FBE

    I hope the guys at CA making the manual for the upcoming R:TW take some ideas, and standards from your guides. Theyve really got something to live upto now
    "To fight and conquer in all your battles is not supreme excellence; supreme excellence consists in breaking the enemy's resistance without fighting.
    -Sun Tzu, the Art of War


  28. #28
    Father of the EB Isle Member Aymar de Bois Mauri's Avatar
    Join Date
    Nov 2003
    Location
    Staring West at the setting sun, atop the Meneltarma
    Posts
    11,561

    Default

    OOOOHHHHHHHHHH

  29. #29
    Member Member hoom's Avatar
    Join Date
    Oct 2002
    Location
    The country that replaced Zelix
    Posts
    1,937

    Default


    The manual we always should have had

    If that doesn't earn you the highest board honour, I don't know what can.

    I'll be reading it later I think
    maybe those guys should be doing something more useful...

  30. #30

    Default

    Luden
    Thanks again, I had updated the skirmishers but for some reason only part of the changes stuck. This time it is actually fixed. I have also tweaked the thunderbombers entry again to say that you often get some losses when using the wedge formation, not just when the enemy get too close.

    Monk
    No problem, you did what I asked in coming forward with ideas anyway. You still have an excuse to lose - there is no battlefield tactics guide You know how to use the units, you know how to handle a campaign but you haven't been given specific details on how to fight on the field. That's your new excuse

    Antalis::, Divine Wind, Aymar de Bois Mauri and arrrse
    Thank you I am hoping CA steal a few ideas as well, it would be nice to let someone else to the hard work so I can play RTW in peace If they don't I can see the complete RTW unit guide, groan. What would the highest board honour be anyway? Custom avatar? Keys to the forum (like they do with the keys to a city)? Special plaque to put above your avatar like the HOF ones? Small postal order for Amazon.co.uk? My name in lights? A personal bodyguard made up of royal knights? Since I like my avatar I think I shall take the personal unit of royal knights as they should come in handy fighting my way through the Christmas shopper crowds It took 5 months and 6 days to write but at a rate of about 2 hours a day when I felt like it. Part of it got lost when my hard drive broke so that added a month to the time.

    You know I could do an org front page announcement for this - if I could remember the password Oh well, it isn't that important.

    Oh, I have finally decided on how to word the final missing credit for the guide. At last. Been wracking my brains for ages
    Frogbeastegg's Guide to Total War: Shogun II. Please note that the guide is not up-to-date for the latest patch.


Page 1 of 6 12345 ... LastLast

Bookmarks

Posting Permissions

  • You may not post new threads
  • You may not post replies
  • You may not post attachments
  • You may not edit your posts
  •  
Single Sign On provided by vBSSO