


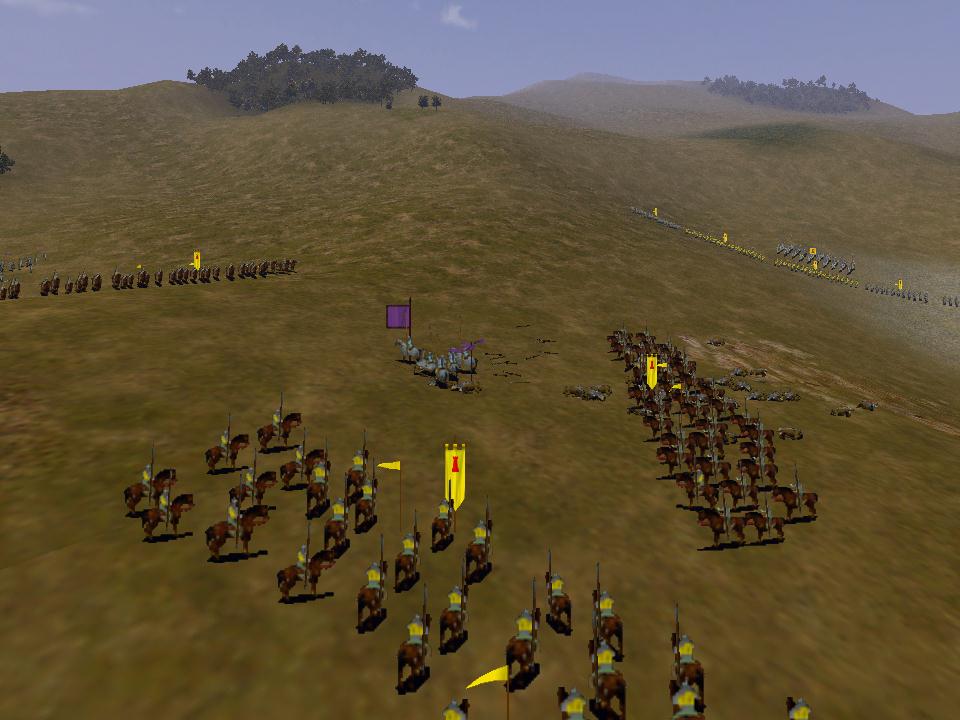
How to use Horse Archers
The text before you is a short guide on how to use one of the most trickiest units in Medieval Total War: the mounted archer. The information in this text has been gathered from these two threads:
-Teach me how to use HA
-Horse Archers
The following members have contributed to these threads: Aelwyn, Crash, Doug-Thompson, Fruitfly, Ichi, Katank, mbrasher1, mfberg, Oleander Ardens, PseRamesses and others. I thank them for sharing their wisdom and hope that their combined knowledge will prove useful for countless of players.
Contents
- How to use Horse Archers
- Hierarchy of Horse Archers
- Horse Archer Statistics
- Ichi's Guide on How to Kill high valour Kataphraktoi
- Useful replays
How to use Horse archers
Tips to start with:
1) Take them of the skirmish mode because the AI probably will do more harm than good. Control them yourself. You might want to leave skirmish mode on if your micro-management skills are not that good, but prepare for some nasty surprises then. Also, skirmish mode will be turned off if you order the HA to attack with alt-click or if they are caught by enemy units. Do not forget to switch it on again.
2) Start small. Using HA requires serious micro-managing and you don’t want to overload yourself so use one team of two or three units at most. Do not be afraid of the pause key. This may not be realistic but you need to compensate for the AI’s stupidity. A number of HA are also impetuous so you need to keep an eye on them. If you use multiple teams of HA, you will have to use pause key since it’s almost impossible to micro-manage them all.
3) Formation is a moot point. Open formations are cumbersome but allow for more freedom of movement. Deeper close formations are compact and can turn more easily which is important if you have skirmished near the edge of the map. Thinner close formations (2 ranks) do not get an accuracy penalty and can make a 180 degrees turn faster. You can also use wedge to turn fast and then switch back to close again.
4) Most HA have very poor morale, so build them or retrain them in a province with morale upgrades. The second most important upgrade is armour.
To learn how to use HA, you can start a campaign as Hungary. The Early campaign gives you many spearmen and peasants to use as target practice.
Correct use of Horse Archers
1) Use multiple ones. Use one to draw the enemy and then run them past other HA, which are sitting still. The enemy takes a while to switch to chasing the static ones that are closer in which case your baiting and shooting HAs switch roles. After a bunch of flybys, their units will be run ragged and shot to bits.
2) Isolate units by drawing them away and then attempt to get one HA between that unit and their army. Exhaust them by having them chase your HA all over the map. Eventually, you should get them surrounded by your HAs in which case they charge towards a HA only to have them run away and are shot by the other circling HAs and then try another only to have the same thing happen. See frogbeastegg's unit guide for an example of varangians shot up in this situation.
Finally, if they are isolated, worn out and have lost their formation you can charge in with your HA or other units, or go harass another enemy.
3) Avoid foot archers like a plague. At least don't missile duel them. If forced to fight them, hold down alt to force melee and charge them. Beware of strong melee archers, though.
4) On the other hand, the mere presence of units in the enemies back already gives a morale penalty, so it not always necessary to charge.
5) Avoid enemy light cavalry and pincer movements. This is a good reason to not use skirmish as you would end up skirmishing into your own units and get sandwiched or even into their main battle lines
6) HA make excellent rout-chasers because they are speedy and their low melee capability don’t matter much when the enemy doesn’t fight back.
The essential point about horse archers is NOT the casualties they cause. It is the disruption.
HA are not light cavalry who can do some ranged damage. They are to lure the enemy away, string them out, tire them and throw them into confusion. Melee fighting should be used only as a last resort, with a few exceptions. If you have to close in, rely on the charge and don’t get stuck in a slugfest. That is not what cavalry, and least of all missile cavalry, is meant for. You can use hold formation, hold position and (sometimes) ctrl + W to disengage easier. Then you can attack again or run away, whatever takes your fancy. But be careful with the low morale-horse archers.
Fruitfly added this specific tactic:
There's generally a lot of unused width on the battle map when you're fighting the AI, so if I've got plenty of HA, I'll group them into two pairs on either flank. One pair sits in front of the enemy, out of range and just off to the side to bait them, while the other pair does a wide arc to get behind them without attracting too much attention. Once they're in place, I'll get one of the pair in front to advance towards their flank and try to lure the end unit or two into attacking by peppering them with arrows.
If you can co-ordinate this approach on both flanks of the enemy (which needs 6-8 units of HA in total to be most effective), then the AI will be uncertain how to split its forces and you'll get a few units randomly breaking away from the main bunch to fight you. Once that happens, your HA are perfectly placed to encircle them and kill them off quickly and efficiently, before returning to repeat the process.
I find it impossible to co-ordinate more than two HA raids like this without using the pause button, but if you're able to skirmish with the enemy from all four sides, you can break up their formation in no time and end up with isolated units scattered across the entire map.
A note for the players of Shogun Total War: the tactics described in this guide also work for the two horse archer units in Shogun. In Shogun there is not such a pressing need to get behind the enemy because units do not have a shield modifier. However, the morale penalty still applies.
The Japanese Cavalry Archer has a strong charge and a good morale, but its melee capabilities are unimpressive and it isn't faster than Japanese Heavy Cavalry. Mongol Light Cavalry is speedier, more powerful, has a better morale and a good charge too.
Hierarchy of Horse Archers by Doug-Thompson and Katank
Strong horse archers
1) Russian Boyars — The best unit in this category. So good, it's scary: they are heavily armoured can take equal valour Kataphraktoi in melee. If the unit is a general, it can be used to pepper enemy from behind your lines. Very costly: 550 to buy, 105 to keep, requires armourer's guild and horse breeder's guild, but well worth it.
Speed: Normal for cavalry.
2) Turkish Sipahi of the Porte — Very good in combat, but difficult to obtain. Also, more mass in the unit would be nice. If this unit is a general, use as support fire. Requires a master bowyer and a master horsebreeder.
Available only in late. Speed: Normal.
3) Steppe Heavy Cavalry — The best missile cavalry unit you get in a regular playable faction. Heavily armored and competent in melee, and can win a missile fight with foot archers under the right circumstances. Available in Muscovy, Chernigov, Ryazan, Volga-Bulgaria, Kiev, Pereyaslavl and Khazar to all factions.
Requires armourer's guild and horse breeder's guild. Speed: Normal.
4) Egyptian Mameluk Horse Archers — This unit is above of the Faris, but only because a valour bonus is available in the Sinai. Build this unit there. If you get some that aren't from there from a Jihad, for example, retrain them there.
Requirments: bowyer's guild and horse breeder's guild. Speed: Normal.
5) Byzantine Cavalry — I have to put this one also above the Faris because this unit has good melee, which is important if they get caught. Faris have a better charge. The unit is disciplined too, which is very helpful in the hit-and-run, independent role of the HA. It does have a slightly higher upkeep cost than the Faris.
Requires a horsebreeder, a swordsmith's workshop and a bowyer's workshop. Speed: Normal.
6) Faris — HA with a good charge but less-than-outstanding melee. Think of them as Armenian cavalry with bows. The lower melee value hurts them a bit in chasing routers, too. If you're an Almohad train them in a province with an armourer and a weaponsmith to boost their melee. Available to the Egyptians and the Almohads.
Requirments: same as Byzantine Cavalry. Speed: Normal.
Fast horse archers
1) Hungarian Szekely — The best HA unit that you can get early. Low building requirements (horse breeder) compared to other good HA. Decent morale, good melee (equal to faris) and fast, fast, fast. The combination of speed and melee makes them the best routed unit-chasers in the game.
Speed: FAST.
2) Golden Horde Horse Archers — Not available unless you mod the game or bribe them. However, bribery can get you a very worthwhile number of them if the Horde goes rebel. They have ridiculously low upkeep and are slightly weaker but also faster than mameluke horse archers. Even without much valour, they're disciplined and first-rate rout-chasers.
Speed: FAST.
3) Turkish Turcoman Horse — This unit needs retraining in a province with a ribat ASAP to boost their morale. After that, they're OK as long as they're not in a melee. Watch out for their impetuousness. They can chase routers well enough. If they aren't from Tripoli, which gets a valour bonus, retrain them there.
Requires a horse breeder. Speed: FAST.
4) Turcopoles — Well, at least they're better than vanilla HA. Be sure to get the valour bonus from Antioch, if possible. Only HA available to Catholic factions, in Antioch, Edessa, Syria and Tripoli. The HRE gets them at a discount.
Requires a horse breeder. Speed: FAST.
5) Generic HA — Replace them with something better at the first opportunity. Their morale stinks and they rout if they're touched. Great for taking over early rebel provinces, though. They shoot up peasants and spears wonderfully. They can chase routers but aren't very good at it. Available to Byzantium, Turkey, Hungary and Russia/Novgorod.
Requirements: horse farmer. Speed: FAST
Special category (no ranking)
- Jinettes — These units should be used in pairs or to shoot at units pinned by other units. Use one Jinette to melee or lure, one to kill if there are no other pinning units around. Get in close and hit with those javelins. Javelins are armour piercing, so they are deadly to the Catholic forces, including royal bodyguards. You don't have to be afraid of a fight. Jinettes are also excellent melee cavalry for the price and great rout-chasers. One of the best affordable all-round cavalry units. TAKE THEM OFF THE SKIRMISH MODE
Available to all Catholic factions and Russia/Novgorod in Navarre, Aragon, Leon, Castile, Valencia, Cordoba and Granaga. Requires: horse breeder. Speed: FAST.- Mounted Crossbowmen — I don't like this unit as much as many other players. Their rate of fire is too slow for hit-and-run horse archer skirmishing. However, they can be devastating to a bodyguard unit stuck in melee with something else, especially if the mounted crossbowmen get around to the back. You can also use them as flankers and rout-chasers, but their melee ability isn’t very impressive. They are also impetuous, so take care. One of the few anti-armour units available early with low tech requirements, and the only mounted archer in the VI campaign. Available to the HRE, Italy, Poland, Hungary, Russia/Novgorod and the Picts (VI).
Requires: horse breeder. Speed: FAST.- Almohad Berber Camels — Anti-cavalry: think of them as a slow unit that doesn't have to worry about being charged by light cavalry. Get the valour bonus in Morocco and beware of foot archers. The big camels are vulnerable and they can't escape as quickly. Almohad only, in Morocco, Algeria, Tunesia and Cyrenacia, and requirements are a bit steep: you need a bowyer's workshop.
Speed: SLOW.
Horse Archers Statistics
Name......................Cost (upkeep)*...Speed**...Bonus***..Armor...Morale.....Ammo
Berber Camels............300 (30).........9/14/16.....2/0/0..............2.........0.............28
Boyar..........................550 (105).......9/20/22.....4/3/5..............5.........6.............28
Byz Cav.......................400 (85).........9/20/22.....2/3/3.............4.........4.............28
Faris............................375 (70).........9/20/22.....4/3/1.............3.........4.............28
Golden Horde HA.........375 (30).........9/24/26.....2/3/1.............3.........4.............28
Horse Archers..............250 (40).........9/24/26.....2/-1/0............2........-1.............28
Jinetes.........................250 (50).........9/24/26.....2/2/2.............3.........2..............4
Mamluk HA...................375 (70).........9/20/22.....2/3/1.............3.........4.............28
Mounted Xbows..........300 (50).........9/24/26......2/0/2.............3.........2.............28
Pict Mtd Xbows............300 (35).........9/24/26.....2/0/2..............3.........2.............28
Sipahi of the Porte......500 (53).........9/20/22......4/3/6.............7.........6.............28
Steppe Heavy Cav.......450 (45)........9/20/22......2/3/4.............5..........4............28
Szekely.......................375 (50).........9/24/26......4/3/1.............3..........4............28
Turcoman HA...............300 (40)..........9/24/26.....2/1/0.............2.........-1............28
Turcopole....................300 (40)..........9/24/26.....2/-1/1............3..........0............28
* # ##At normal unit size
** # Walk/Run/Charge
*** Charge/Melee/Defence
(Courtesy of Ichi-san)
Ichi's Guide on How to Kill high valour Kataphraktoi
In every game there comes a time when I find myself fighting the Byzantines and their high valour Kataphraktoi generals. These guys are tough, and can easily handle low valor spears, swords and other cavalry.
Here I have told a unit of Jinetes to melee with a Kataphraktoi unit, and then immediately pulled that unit back. When the Kataphraktoi chased, I surrounded it with 3 other Jinetes and made very quick work. This exploits the Kataphraktoi's one weakness, which is their slow speed. #This screenshot is from the end of the game, when all that was left was the Byzantine general.
Here I have done essentially the same thing, but with Turcoman Horse Archers. The Turcomen are set on skirmish (as were the Jinetes) so not a lot of micromanagement.
Elsewhere on the field at this time my other 12 units where in standard formation (missiles in front, infantry to the rear, cavalry on the flanks) holding a small knoll against the other Byz units.
(Link to the original thread: How to kill high valor Kataphraktoi without getting mauled)
Useful replays
SeljukSinan's Turkish Cavalry Tactics
This Winzip archive contains three replays made by SeljukSinan. In these replays he show some basic horse archer tactics. Turcoman Skirmish shows how a few Turkish HA trow a Byzantine army into confusion and negate its terrain advantage. Isolate gives an example of how a powerful army can be torn into pieces. Encirclement shows a back-attack by three Turcoman horse.
Warning: these are MTW replays and do not work on VI. It is possible to make them accessible with VI by changing their extension from '.mrp' to '.vrp' but when attempting this I experienced some trouble with MTW and with Windows XP. Try this at your own risk.
If you know other replays which show how to use horse archers and would like to share these, you can leave a message in this thread so I can put it here and other players can benefit from it.


 Reply With Quote


Bookmarks