Org Mobile Site
*****************************************************************************
MTW2: Regnum Dei - All Factions version 1.8.0 Iron
*****************************************************************************

Install Note
- Step 1: Make sure you backup your similar original CA files (*in case you want to put them back).
- Step 2: Copy / paste all the files we provided in here >>> Example: D:\Games\MTW2\data\world\maps\campaign\imperial_campaign
Overwrite the old ones. Enjoy.
The RDM Mod is a WIP (work in progress) - The 1.7 series are just initial working versions in today's MTW2 limits. RDM is a general type modification that mixes different modding styles (EB/RTR) with the game industry style of work and planning. Our goal is to reshape and remake MTW2 to reflect a more realistic and fun gameplay, better art and better historic accuracy.
Gameplay tips:
-When attacking with assassins - always move and strike in the same turn and make sure that your assault starts from outside the visual range of the victim or it's spies - this way you may double your chances for a kill.
-When your city is attacked also make sure that you always sally with your cavalry first and you take out his ranged units and then you move your ranged units to fire even at the closest ranges with leisure until they run out of ammo.
-The inquisitor spawning is in direct relation with the local faction standing with the Pope. They are a sort of punishment. Make sure that you don't forget about your duty for God.


********************************************************************************
New - Modifications in version 1.8.0 Iron: (Expansion from Nevada Modding Association "PFF - Because we care")
Small update: - Version "1.8.0a" - contains a small first turn nomad faction standings panel fix and updated new Mongol (invasion only) dismounted units.
- NCDS National City Defense System "Iron". This is a massive gameplay modification that targets the city defense national support garrison system. Each city that was/is owned by a national faction (not rebels) will always spawn a spear unit for each siege equipment constructed on the spot by the attacker (*5 rams = 5 spear / 1 ram = 1 spear). Note* In the original capital cities 1 ram will equal 2 spear. This system is for AI and the player but does not apply when assaulting with catapults and such. It is considered that the attack in this conditions was so fast that the defenders didn't had time to prepare city reinforcements because the attack may happen in the same turn. This system helps counter the initial rapid player/AI expansion tactics and counters the AI issue of not garrisoning fast enough his cityies to face your forces. If the local faction will try to retake their city then the local city troops will not spawn and fight against him/you.
- CCNG Capital City National Garrison. This system basically spawns just once a national small garrison army in defense of the capital city. It only applies when the human player is attacking and it is meant to increase the fun and gameplay experience. Even if the capital was conquered by another faction if you are not the local faction it is considered that the remnants of the initial local nobles (traitors) who are allied with the new ruleing faction will fight against you too. Also Jerusalem and Constantinople are the cities who have the most interesting defending armies also based on the local owner religion (*especially Jerusalem). So if a muslim faction attacks Jerusalem and the city is defended by a christian faction, then a small crusader army will spawn (just once) in the city as defending internal troops. Same with the muslims having the city - mulsim troops will be spawned to face the christians.
- AIS AI Initial Support. This is a script that gives to the AI factions (not player) at the start of the game 5000 gold to kick start their economy. This counters the fact that the AI sometimes starts to build stuff that he does not immediately needs for the campaign's start.
- AFS AI Financial Security. It is very easy to disturb the AI's economy and make him go on financial downfall. You just need to take from him some key cities and left most of his deployed armies intact in the provinces. By the time he will manage to raise to face your challenge his upkeep costs will get the best of him and virtually kill/freeze the faction and they will never evolve or recover. It is also possible to request huge sums of money for ceasefire damaging his income flow because he will stupidly accept your offer. Because of this issues the new system will activate it's self each time when an AI faction has -1000 gold so by the end of the turn they will receive a money transaction to help them jump over the zero. This transaction is not felt by the human player in the gameplay - pls note that the AI will avoid hard not to go on minus so the support he gets is only related to your actions so it is very rare and the AI will not exploit it because he does not "know" about it. The AFS system is designed to keep the game experience fun when fighting a specific faction until that faction is fully destroyed.
- No other difficulty modifications have been made since we consider this to be sufficient and we are more action orientated. Also we prefer more to help the AI a bit than to handicap the human player.
- CA Nomad Resistance - If a nomad faction has the last city destroyed and still has a character somewhere on the map they will become nomad again until they are fully destroyed.
- The diplomatic relations should be a bit calmer now at the beginning of the campaign helping you to establish more lasting alliances. Even so if you love alliances we recommend playing on medium difficulty.
- The bug showing the Aztecs, Mongols, Timurids in the year reports until they are discovered has been fixed.
- The bug showing multiple nomad invasions warn has been fixed.
- The Hungary's evolution has been better channeled.
- The Russian development has bee better channeled.
- Better unfreeze for the nomad factions.
- All known minor bugs are fixed except CA's ones.
Best played on Medium/Hard settings.
********************************************************************************
New - Modifications in version 1.7.7 Premium:
-Brigands and Pirates are reverted back to their original CA spawn rate. In previous RDM versions they were spawning twice as fast.
-1.7.7 Premium has also reverted to the 0.50 timescale (1 year=2 turns). After we did more research we consider that the generals’ age normally.
-Even if we added one unit of templar and hospitaller, etc in Rome we do consider that nobody will bother the Pope until they will become available historically. Also the Pope is now in Rome and The Papal States will be less aggressive military speaking.
-Extensive testing has been made so the factions will evolve even more historically. Most of the factions that need to attack the rebels from the early start will do it. All the Premium modifications have been done 95% to rebel armies and only 5% to the faction armies and only in 1 city per faction - to avoid messing with the CA faction balance. (5% = 1 more spear unit, 1 level up of experience for the general, etc). The goal was to keep the modifications minimal as possible.
-The radar has been removed for the Aztec faction when playing but it will be still restricted/hidden if playing any other faction than Aztecs. This is not affecting the normal radar map unhide for the rest of the factions at the appropriate time.
-The Aztec armies can only be loaded on ships on the northern parts of the empire (follow the coastline). Also avoid upgrading your cities (CA issue - you will no longer recruit there)
-The Jerusalem religious troops have been partially reduced - 2 units of Pilgrims have been added and 2 of fanatics removed. The idea is to hold a bit the Egypt’s expansion until the Turks can start to expand too.
-The Byzantines will take Sofia and only as a second stage they will move towards Asia Minor.
-Denmark will first concentrate his expansion on the northern lands.
-The Timurids and Mongols remain allied to the Turks. The invasions will come at their normal time so if you are playing one of the nomad factions pls. consider your self an early expeditionary force.
-The faction standings have been made more aggressive towards the rebels also some factions are no longer good friends and it will be harder to ally them from the start. Still the changes were in the minimal limits required without really messing with CA's numbers.
-Wallachia and Moldavia are still strong rebel provinces. (The rebel troops there are more wallachian now - rebel magyar troops have been removed from Bucharest and Iasi).
This version has been named Premium because of the extensive testing and balancing involved. Our motto is: "Minor changes for maximum historic effect while sticking to the original developers gameplay balance and vision".
Best played on Hard settings.
********************************************************************************
Old - Modifications in version 1.7.6:
-All the mod's data has been centralized and there is no need for new-faction separate files.
-All the new faction's AIs are now freezing from start if not played by human. If the AI plays them they will unfreeze (tested) at the time of the first invasion armies spawning or at the usual time for the Aztecs. By freezing the new factions AI to play before their time the CA strategic balance of the game is maintained.
-The nomad factions starting number of units on the map if played by human is minimal because of the low upkeep.
-The Turks, Byzantines, Spain, France, Scotland, England, and Hre are more aggressive now towards rebel settlements and they will attack faster.
-Jerusalem units have been edited to add 4 religious fanatics units.
-Rome has also been reduced and edited to reflect more the papal troops present there (+ one cathedral). One unit of fanatics, templars, hospitallers, swiss guard and great cross have been added the city.
-The Byzantines start now with one orthodox bishop and one high bishop (cardinal).
-More small tunes to rebels for better historical faction evolution balance.
-The starting date is now 1080 because of the existing starting historic CA characters at that time. The end date has been moved to 1700 for more playtime.
-1 year = 1 turn (timescale 1:00) if we reduce it to 0:50 (2 seasons) the characters will have a huge lifetime span - they will get around 100 years old. CA has 2.00 so 1.00 is more than sufficient.
Enjoy and feel free to post your feedback here. (*More feedback = better next versions) Also pls. note that all the old versions can still be downloaded.
********************************************************************************
Old - Modifications in version 1.7.5:
-Aztec faction AI was freezed (if not played with - until normal unfreeze by CA scripts). The aztecs are now added on the same map as playable faction. (*Many thanks to repman from TWC)
-All reported bugs have been fixed.
********************************************************************************
Old - Modifications in version 1.7.4:
- The double year and jihad message reports are now fixed as well as the problems when loading a save game and playing as Mongols or Timurids. Even on this new setting the invasion will come Invasion Image. When the time is right all your family members will exit the castles and settlements to pray to Allah and greet the incoming clan leaders.
- The 2 turns = 1 year - fully fixed. Timescale 1.00 was changed to 0.50 (*Many thanks to Trajan from TWC).
*******************************************************************************
Old - Modifications in version 1.7.3:
- The Mongols and the Timurids do have the invasions coming/spawning when the time is right. Also please note that you will get the "end of year rapport" twice as well as any religious war message. The inactive year message is actually inactive - don't bother about it.
- The Aztec invasion files have been separated (from the main mod files) to avoid them being too active while you play another faction.
- The simple CA rebalanced optional play file has been also upgraded.
******************************************************************************
Old - Modifications in version 1.7.2:
- The Turks are rebalanced to better face the Byzantines. (*very small changes)
**************************************************************************
Old - Modifications in version 1.7.1 Patch:
- The Aztecs, Mongols and Timurids campaign are now supplied on different files/folders to avoid them being on the same map enabled. If you want to play any other faction just use only the single txt file from this folder "Simple rebalanced CA campaign version" on the clean CA install.
- Scotland & England AI problems are now solved and other fine tunes have been introduced to affect a bit more some faction AIs in a historic manner of evolution.
Pls. note that v1.8 is still in work - this is more of a gameplay patch for v1.7
******************************************************************************
Old - Modifications in version 1.7:
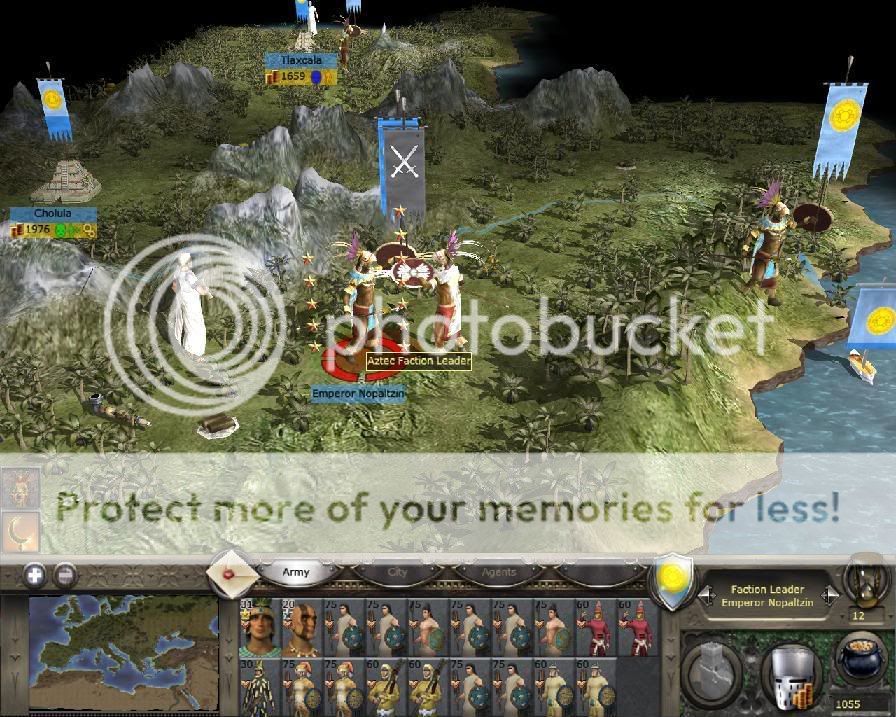
- The Aztec faction is fully enabled (in the building limits of CA). You can buy your way around the Americas or you can use a huge amount of gold to get a chance for a preemptive invasion of Europe. But first you need to defeat a huge uprising at home by Aztec nobles and native clans upset with your rule.
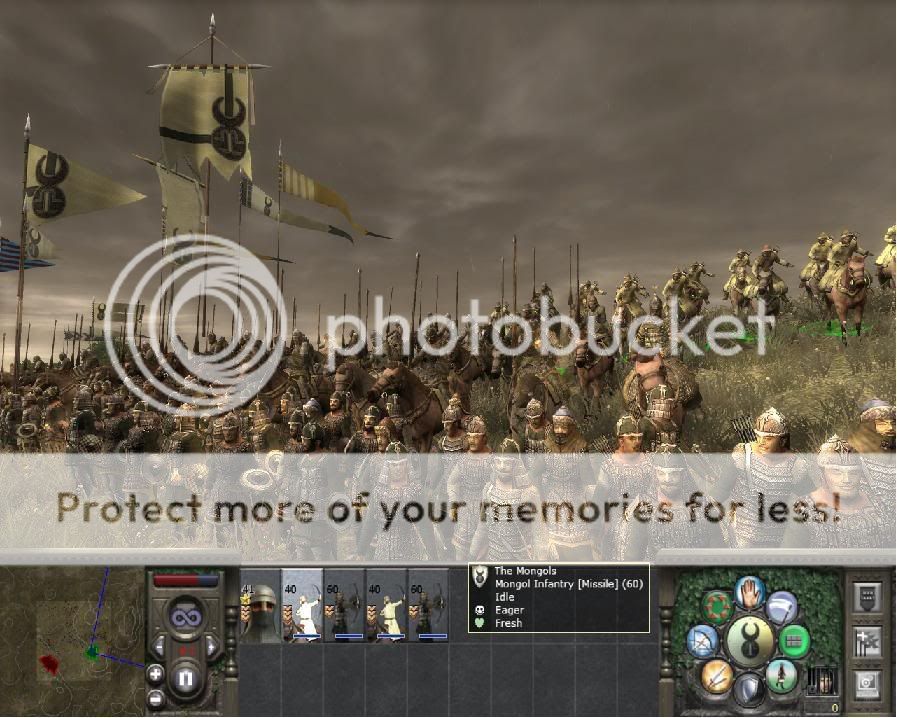
- The Mongol faction is fully enabled. (*You are an early clan leader but at war with some of the nomad clans and Russia - This was enabled because your units don't have upkeep and you will receive less money too to rebalance the low costs). When the rest of the unseen Mongol clans will unite under your rule the invasion will start).It is preferable to use the "more reasonable nomad invasions" file if you play a nomad factions. Also because the upkeep is zero we strongly suggest playing on hard difficulty campaign setting - so you will still have a challenge when playing.
- The Timurid faction is fully enabled. Use the same indications as for the Mongols. They are allied with the turks and not at war with Russia but only with the mongols. Also mos of their units have upkeep so the faction will recieve a bit more money.
- The Papal States are playable with ease. Calling a crusade is a bit difficult though. Attacking a faction will excommunicate it instantly and you also get to play with the inquisitors. You have no family btw.
- Walachia, Moldavia, Zaragosa and the Hamburg region have been modified to better channel the neighboring factions historic evolution.
- Spain, France, Germany, Byzantines and Russia got 2-3 more units to help with their AI evolution.
- 1 year= 2 turns remains
- Starting ending dates remain like in 1f.
- Two additional files (in folders) have been provided in case you don't want to have the new factions enabled but keep the existing faction tunes or you want to have more reasonable nomad invasions.
****************************************************************************
Old - Modifications in version 1f:
- Starting date is 1054 and ending date 1630 (covers the need for more time).
- All factions playable except the unfinished ones by CA (that will give CTDs opr miss buildings&units).
- 1 year = 2 turns (seasons)
- Wallachian regions a bit stronger (most independent regions in the area - +2 units)
- Spain Armies a bit stronger. (+1 unit)
- Papal States playable - still WIP.
Old - Modifications in versions 1a-1e
-Small tunes to unit locations, rebels, money updates, extesnive testing.
*****************************************************************************
DOWNLOAD LINKS: (RDM Mod: 18.262 cumulated downloads)
NMA Last 1.8.0a Iron
NMA 1.8.0 Iron
1.7.7 Premium
1.7.6 Modcraft
1.7.5 Modcraft
1.7.4 Modcraft
1.7.3 Modcraft
http://www.modcraft.net
Modcraft Server (Free mod hosting server)
The public discussion topic is this this one (TWC,ORG,PFF,MC)
The official dev thread is here.
Published by Nevada Modding Association and developed by The Trivium Organization.
Mod Developers: Burebista (Cain), Spartan, bdtj1815
(*Pls note that anyone can ask for membership and join the RDM mod team, NMA or TTO)
MTW2: Regnum Dei - All Factions version 1.8.0 Iron
*****************************************************************************
Install Note
- Step 1: Make sure you backup your similar original CA files (*in case you want to put them back).
- Step 2: Copy / paste all the files we provided in here >>> Example: D:\Games\MTW2\data\world\maps\campaign\imperial_campaign
Overwrite the old ones. Enjoy.
The RDM Mod is a WIP (work in progress) - The 1.7 series are just initial working versions in today's MTW2 limits. RDM is a general type modification that mixes different modding styles (EB/RTR) with the game industry style of work and planning. Our goal is to reshape and remake MTW2 to reflect a more realistic and fun gameplay, better art and better historic accuracy.
Gameplay tips:
-When attacking with assassins - always move and strike in the same turn and make sure that your assault starts from outside the visual range of the victim or it's spies - this way you may double your chances for a kill.
-When your city is attacked also make sure that you always sally with your cavalry first and you take out his ranged units and then you move your ranged units to fire even at the closest ranges with leisure until they run out of ammo.
-The inquisitor spawning is in direct relation with the local faction standing with the Pope. They are a sort of punishment. Make sure that you don't forget about your duty for God.


********************************************************************************
New - Modifications in version 1.8.0 Iron: (Expansion from Nevada Modding Association "PFF - Because we care")
Small update: - Version "1.8.0a" - contains a small first turn nomad faction standings panel fix and updated new Mongol (invasion only) dismounted units.
- NCDS National City Defense System "Iron". This is a massive gameplay modification that targets the city defense national support garrison system. Each city that was/is owned by a national faction (not rebels) will always spawn a spear unit for each siege equipment constructed on the spot by the attacker (*5 rams = 5 spear / 1 ram = 1 spear). Note* In the original capital cities 1 ram will equal 2 spear. This system is for AI and the player but does not apply when assaulting with catapults and such. It is considered that the attack in this conditions was so fast that the defenders didn't had time to prepare city reinforcements because the attack may happen in the same turn. This system helps counter the initial rapid player/AI expansion tactics and counters the AI issue of not garrisoning fast enough his cityies to face your forces. If the local faction will try to retake their city then the local city troops will not spawn and fight against him/you.
- CCNG Capital City National Garrison. This system basically spawns just once a national small garrison army in defense of the capital city. It only applies when the human player is attacking and it is meant to increase the fun and gameplay experience. Even if the capital was conquered by another faction if you are not the local faction it is considered that the remnants of the initial local nobles (traitors) who are allied with the new ruleing faction will fight against you too. Also Jerusalem and Constantinople are the cities who have the most interesting defending armies also based on the local owner religion (*especially Jerusalem). So if a muslim faction attacks Jerusalem and the city is defended by a christian faction, then a small crusader army will spawn (just once) in the city as defending internal troops. Same with the muslims having the city - mulsim troops will be spawned to face the christians.
- AIS AI Initial Support. This is a script that gives to the AI factions (not player) at the start of the game 5000 gold to kick start their economy. This counters the fact that the AI sometimes starts to build stuff that he does not immediately needs for the campaign's start.
- AFS AI Financial Security. It is very easy to disturb the AI's economy and make him go on financial downfall. You just need to take from him some key cities and left most of his deployed armies intact in the provinces. By the time he will manage to raise to face your challenge his upkeep costs will get the best of him and virtually kill/freeze the faction and they will never evolve or recover. It is also possible to request huge sums of money for ceasefire damaging his income flow because he will stupidly accept your offer. Because of this issues the new system will activate it's self each time when an AI faction has -1000 gold so by the end of the turn they will receive a money transaction to help them jump over the zero. This transaction is not felt by the human player in the gameplay - pls note that the AI will avoid hard not to go on minus so the support he gets is only related to your actions so it is very rare and the AI will not exploit it because he does not "know" about it. The AFS system is designed to keep the game experience fun when fighting a specific faction until that faction is fully destroyed.
- No other difficulty modifications have been made since we consider this to be sufficient and we are more action orientated. Also we prefer more to help the AI a bit than to handicap the human player.
- CA Nomad Resistance - If a nomad faction has the last city destroyed and still has a character somewhere on the map they will become nomad again until they are fully destroyed.
- The diplomatic relations should be a bit calmer now at the beginning of the campaign helping you to establish more lasting alliances. Even so if you love alliances we recommend playing on medium difficulty.
- The bug showing the Aztecs, Mongols, Timurids in the year reports until they are discovered has been fixed.
- The bug showing multiple nomad invasions warn has been fixed.
- The Hungary's evolution has been better channeled.
- The Russian development has bee better channeled.
- Better unfreeze for the nomad factions.
- All known minor bugs are fixed except CA's ones.
Best played on Medium/Hard settings.
********************************************************************************
New - Modifications in version 1.7.7 Premium:
-Brigands and Pirates are reverted back to their original CA spawn rate. In previous RDM versions they were spawning twice as fast.
-1.7.7 Premium has also reverted to the 0.50 timescale (1 year=2 turns). After we did more research we consider that the generals’ age normally.
-Even if we added one unit of templar and hospitaller, etc in Rome we do consider that nobody will bother the Pope until they will become available historically. Also the Pope is now in Rome and The Papal States will be less aggressive military speaking.
-Extensive testing has been made so the factions will evolve even more historically. Most of the factions that need to attack the rebels from the early start will do it. All the Premium modifications have been done 95% to rebel armies and only 5% to the faction armies and only in 1 city per faction - to avoid messing with the CA faction balance. (5% = 1 more spear unit, 1 level up of experience for the general, etc). The goal was to keep the modifications minimal as possible.
-The radar has been removed for the Aztec faction when playing but it will be still restricted/hidden if playing any other faction than Aztecs. This is not affecting the normal radar map unhide for the rest of the factions at the appropriate time.
-The Aztec armies can only be loaded on ships on the northern parts of the empire (follow the coastline). Also avoid upgrading your cities (CA issue - you will no longer recruit there)
-The Jerusalem religious troops have been partially reduced - 2 units of Pilgrims have been added and 2 of fanatics removed. The idea is to hold a bit the Egypt’s expansion until the Turks can start to expand too.
-The Byzantines will take Sofia and only as a second stage they will move towards Asia Minor.
-Denmark will first concentrate his expansion on the northern lands.
-The Timurids and Mongols remain allied to the Turks. The invasions will come at their normal time so if you are playing one of the nomad factions pls. consider your self an early expeditionary force.
-The faction standings have been made more aggressive towards the rebels also some factions are no longer good friends and it will be harder to ally them from the start. Still the changes were in the minimal limits required without really messing with CA's numbers.
-Wallachia and Moldavia are still strong rebel provinces. (The rebel troops there are more wallachian now - rebel magyar troops have been removed from Bucharest and Iasi).
This version has been named Premium because of the extensive testing and balancing involved. Our motto is: "Minor changes for maximum historic effect while sticking to the original developers gameplay balance and vision".
Best played on Hard settings.
********************************************************************************
Old - Modifications in version 1.7.6:
-All the mod's data has been centralized and there is no need for new-faction separate files.
-All the new faction's AIs are now freezing from start if not played by human. If the AI plays them they will unfreeze (tested) at the time of the first invasion armies spawning or at the usual time for the Aztecs. By freezing the new factions AI to play before their time the CA strategic balance of the game is maintained.
-The nomad factions starting number of units on the map if played by human is minimal because of the low upkeep.
-The Turks, Byzantines, Spain, France, Scotland, England, and Hre are more aggressive now towards rebel settlements and they will attack faster.
-Jerusalem units have been edited to add 4 religious fanatics units.
-Rome has also been reduced and edited to reflect more the papal troops present there (+ one cathedral). One unit of fanatics, templars, hospitallers, swiss guard and great cross have been added the city.
-The Byzantines start now with one orthodox bishop and one high bishop (cardinal).
-More small tunes to rebels for better historical faction evolution balance.
-The starting date is now 1080 because of the existing starting historic CA characters at that time. The end date has been moved to 1700 for more playtime.
-1 year = 1 turn (timescale 1:00) if we reduce it to 0:50 (2 seasons) the characters will have a huge lifetime span - they will get around 100 years old. CA has 2.00 so 1.00 is more than sufficient.
Enjoy and feel free to post your feedback here. (*More feedback = better next versions) Also pls. note that all the old versions can still be downloaded.
********************************************************************************
Old - Modifications in version 1.7.5:
-Aztec faction AI was freezed (if not played with - until normal unfreeze by CA scripts). The aztecs are now added on the same map as playable faction. (*Many thanks to repman from TWC)
-All reported bugs have been fixed.
********************************************************************************
Old - Modifications in version 1.7.4:
- The double year and jihad message reports are now fixed as well as the problems when loading a save game and playing as Mongols or Timurids. Even on this new setting the invasion will come Invasion Image. When the time is right all your family members will exit the castles and settlements to pray to Allah and greet the incoming clan leaders.
- The 2 turns = 1 year - fully fixed. Timescale 1.00 was changed to 0.50 (*Many thanks to Trajan from TWC).
*******************************************************************************
Old - Modifications in version 1.7.3:
- The Mongols and the Timurids do have the invasions coming/spawning when the time is right. Also please note that you will get the "end of year rapport" twice as well as any religious war message. The inactive year message is actually inactive - don't bother about it.
- The Aztec invasion files have been separated (from the main mod files) to avoid them being too active while you play another faction.
- The simple CA rebalanced optional play file has been also upgraded.
******************************************************************************
Old - Modifications in version 1.7.2:
- The Turks are rebalanced to better face the Byzantines. (*very small changes)
**************************************************************************
Old - Modifications in version 1.7.1 Patch:
- The Aztecs, Mongols and Timurids campaign are now supplied on different files/folders to avoid them being on the same map enabled. If you want to play any other faction just use only the single txt file from this folder "Simple rebalanced CA campaign version" on the clean CA install.
- Scotland & England AI problems are now solved and other fine tunes have been introduced to affect a bit more some faction AIs in a historic manner of evolution.
Pls. note that v1.8 is still in work - this is more of a gameplay patch for v1.7
******************************************************************************
Old - Modifications in version 1.7:
- The Aztec faction is fully enabled (in the building limits of CA). You can buy your way around the Americas or you can use a huge amount of gold to get a chance for a preemptive invasion of Europe. But first you need to defeat a huge uprising at home by Aztec nobles and native clans upset with your rule.
- The Mongol faction is fully enabled. (*You are an early clan leader but at war with some of the nomad clans and Russia - This was enabled because your units don't have upkeep and you will receive less money too to rebalance the low costs). When the rest of the unseen Mongol clans will unite under your rule the invasion will start).It is preferable to use the "more reasonable nomad invasions" file if you play a nomad factions. Also because the upkeep is zero we strongly suggest playing on hard difficulty campaign setting - so you will still have a challenge when playing.
- The Timurid faction is fully enabled. Use the same indications as for the Mongols. They are allied with the turks and not at war with Russia but only with the mongols. Also mos of their units have upkeep so the faction will recieve a bit more money.
- The Papal States are playable with ease. Calling a crusade is a bit difficult though. Attacking a faction will excommunicate it instantly and you also get to play with the inquisitors. You have no family btw.
- Walachia, Moldavia, Zaragosa and the Hamburg region have been modified to better channel the neighboring factions historic evolution.
- Spain, France, Germany, Byzantines and Russia got 2-3 more units to help with their AI evolution.
- 1 year= 2 turns remains
- Starting ending dates remain like in 1f.
- Two additional files (in folders) have been provided in case you don't want to have the new factions enabled but keep the existing faction tunes or you want to have more reasonable nomad invasions.
****************************************************************************
Old - Modifications in version 1f:
- Starting date is 1054 and ending date 1630 (covers the need for more time).
- All factions playable except the unfinished ones by CA (that will give CTDs opr miss buildings&units).
- 1 year = 2 turns (seasons)
- Wallachian regions a bit stronger (most independent regions in the area - +2 units)
- Spain Armies a bit stronger. (+1 unit)
- Papal States playable - still WIP.
Old - Modifications in versions 1a-1e
-Small tunes to unit locations, rebels, money updates, extesnive testing.
*****************************************************************************
DOWNLOAD LINKS: (RDM Mod: 18.262 cumulated downloads)
NMA Last 1.8.0a Iron
NMA 1.8.0 Iron
1.7.7 Premium
1.7.6 Modcraft
1.7.5 Modcraft
1.7.4 Modcraft
1.7.3 Modcraft
http://www.modcraft.net
Modcraft Server (Free mod hosting server)
The public discussion topic is this this one (TWC,ORG,PFF,MC)
The official dev thread is here.
Published by Nevada Modding Association and developed by The Trivium Organization.
Mod Developers: Burebista (Cain), Spartan, bdtj1815
(*Pls note that anyone can ask for membership and join the RDM mod team, NMA or TTO)
Thread Ratings provided by
Thread Ratings (Lite) -
vBulletin Mods & Addons Copyright © 2025 DragonByte Technologies Ltd.
User Alert System provided by Advanced User Tagging (Lite) - vBulletin Mods & Addons Copyright © 2025 DragonByte Technologies Ltd.
User Alert System provided by Advanced User Tagging (Lite) - vBulletin Mods & Addons Copyright © 2025 DragonByte Technologies Ltd.
Single Sign On provided by vBSSO