Results 1 to 15 of 15

Thread: The Battle for Rome

Hybrid View

Previous Post Previous Post   Next Post Next Post
  1. #1
    Senior Member Senior Member econ21's Avatar
    Join Date
    Oct 2002
    Posts
    9,651

    Default Re: Assembling

    Umpire notes on other generals

    Luca and Quintus are moving in parallel to Marcellus and Quintus but have made less progress. They only make contact in the mid-morning (turn 2), rather than early morning.

    Roll for the arrival of Appius (needs a 1): Gets a one.

    Roll for the arrival of Decius's advance guard: Gets a five.[/QUOTE]


    Quote Originally Posted by econ21

    Turn 2: Instructions to Quintus

    Your army is marching through an open area, sloping downwards towards an impassable river on your left. Your scouts approach you with two pieces of news:

    (1) There is a large enemy army approaching in your direction.
    (2) There are reports that Servius's army is drawn up in battle against another large enemy army.

    Only your advance guard is available to command at this point. The rear guard is still in column coming along the road and will only arrive at your position at the end of mid-morning.

    You must decide:
    (1) Whether to send the advance guard to aid Servius.
    (2) Move your advance guard into contact with the enemy army in front of you.
    (3) Hold and wait for your rear guard to arrive, deploying your entire army in battle formation at your current position.

    If you choose option 2, please send me a jpg of the advance guard's formation.
    If you choose option 3, please send me a jpg of your entire army's formation.

    If you find your earlier orders adequately cover everything, please just cut and paste them, resending them to me. Mark any ammendments in bold.
    Quote Originally Posted by econ21

    Turn 2: Instructions to Luca

    Your army is marching through an open area, sloping downwards towards an impassable river on your left. Your scouts approach you with two pieces of news:

    (1) There is a large enemy army approaching in your direction from the front.
    (2) There are reports that Marcelluss's army is drawn up in battle against another large enemy army, somewhat to your front and right.

    Only your advance guard is available to command at this point. The rear guard is still in column coming along the road and will only arrive at your position at the end of mid-morning.

    You must decide:
    (1) Whether to send the advance guard to aid Marcellus.
    (2) Move your advance guard into contact with the enemy army in front of you.
    (3) Hold and wait for your rear guard to arrive, deploying your entire army in battle formation at your current position.

    If you choose option 2, please send me a jpg of the advance guard's formation.
    If you choose option 3, please send me a jpg of your entire army's formattion.
    If you find your earlier orders adequately cover everything, please just cut and paste them, resending them to me. Mark any ammendments in bold.
    Further feedback to Servius

    Quote Originally Posted by econ21
    Good news! Appius is arriving on the field on turn 2 (mid-morning). Please include his troops in your jpg. They cannot get into combat this turn, but will be able to draw level with your line of deployment.
    Feedback to Decius

    Quote Originally Posted by econ21
    It is mid-morning and your army is still snarled up on the roads, moving behind Marcellus's army. Apparently, he is deploying for a major battle but your army will not reach the field yet.
    Last edited by econ21; 12-21-2006 at 21:19.

  2. #2
    Senior Member Senior Member econ21's Avatar
    Join Date
    Oct 2002
    Posts
    9,651

    Default Re: Assembling

    MID-MORNING (TURN 2) - PLAYER ORDERS

    The Eastern Battle

    Servius's Orders

    Quote Originally Posted by Lucjan
    Servius smiled to himself as he noted the formation of Marcellus's forces. When Decius's gauls arrived, had they not chosen the wiser path and taken Servius up on his offer, they wouldn't even matter anyway with the pathetic formation Marcellus had chosen. He had anticipated everything Marcellus could do and had just received word that Appius was arriving extremely shortly. With Appius falling into formation alongside him this battle would be over before it began.

    His orders for the front lines stood. "No change in orders for the bulk of the legion, follow the battle plan as was presented during formation, with only a few exceptions! In the Roman Division, our funditores are to focus on eliminating the skirmishers on the enemies left flank, gallic slingers to focus on eliminating the skirmishers and numidian cavalry on the enemies right flank, engage as soon as they are in range."

    His attention turned immediately to the gallic cavalry beside him, making certain to stress parts of his speech. "Redeploy to our left flank a short distance from our Italian spears on the end of the formation. If the enemy cavalry charges you, withdraw into the woods, if they give chase, draw them towards our gallic infantry. Once our gallic infantry engage circle around and hit the enemy cavalry in the flanks. If they don't follow you into the woods and engage our Italian spears instead, immediately charge back out of the woods and engage the enemy cavalry, our italian spears must hold strong."

    As the gallic cavalry commanders nodded, understanding his orders perfectly (they're one of the 2 divisions closest to Servius) he continued. "I'll keep a close watch on the enemy cavalry. If they chase you into the woods I'll leave it up to you and I'll remain here to conduct the battle from the front lines. If they engage our Italians I'll reinforce them from behind to bolster morale and make sure the enemy can't break through the line.

    Ah..now, to send orders to Appius. Summoning the nearest messenger, he began to relay his orders. "Advance into the woods in guard formation with the spears on the right, swords at center, velites behind the swords and Appius himself behind the spears. If our gallic cavalry are chased into the woods by Marcellus's cavalry, Appius's division is to release a volley of missiles into the enemy cavalry then charge. If our gallic cavalry are not chased, then Appius's division is to advance immediately out of the forest, if our main Italian Division is being attacked by the enemy cavalary, Appius's division is to immediately engage the enemy cavalry. If the enemy cavalry have withdrawn, Appius is to act as our buffer on the left flank against them by holding his ground at the edge of the forest.
    Diagram of planned move:


    Marcellus's Orders

    Quote Originally Posted by GeneralHankerchief
    Division I (Cavalry): Hold, and guard the flank. Hopefully Decius got the message and will bring his cavalry up behind you. Until he does, however, you're not moving. The Numidian Skirmishers will be detached and form a new division, Division VI (see below). If by some chance the infantry come chasing the skirmishers, then countercharge once they are beyond infantry support.

    Division II (Marcellus): Shift a little more over to the left. Previous orders apply (You are a last-ditch attempt to stop a flanking maneuver, but mostly you will stay behind. Intercept
    all cavalry flanking maneuvers on the left if necessary).

    Division III (1st Senate Legion): Hold. If Servius' men come into pila range, then exchange pila with the enemy. Target the triarii. My triarii, same orders apply (Triarii are to be slightly behind, guarding the missile units in the case of a flank attack. If it looks serious, then help
    the missiles out). Funditores, begin firing at the enemy missiles as soon as you get in range. If they are untargetable then target the Hastati. Velites, same orders apply (Velites, back them up. In the case of a cavalry attack you are to discharge as many javelins as possible and GET OUT OF THE WAY. Marcellus and the escort will be by shortly to relieve
    you). If Servius' army gets in range, then target the infantry.

    Division IV (2nd Senate Legion): You're still in reserve. Stay sharp.

    Division V (1st Senate Italian Alae): Hold. If Servius' men come into pila range, target their spearmen. That goes for you too, skirmishers.

    Division VI (Numidian Skirmishers): Advance forward at a trot. Target their Italian Spearmen when they come into range. Ideally all of your javelins should be used up. If you are pursued, get back to the safety of the heavy cavalry. If you are not, then continue harrassing their spearmen until you are out of javelins. Make your way back to the previous position either way.
    Diagram of planned move:


    The Western battle

    Quintus's planned move:

    Quote Originally Posted by Braden
    Orders:

    Quintus Naevius’s Consular Army of Gaul Battle Divisional Orders:
    General Orders for whole Army -
    "We are to join up with the Consuls army and hold his left flank. We will be anchoring our flank against the river away from any fording points."
    *Amendment: Sending Cavalry Ala forward to join Servius immediately. 2 Chevron Slingers to move forward and harras flanks of the enemy engaged with Servius. Rest of units await arrival of Rear Guard, we will deploy as a near complete formation (see attached jpg).
    As per instructions from the Consul we will attempt to engage Luca's forces as rapidly as we can.
    Front-Line Division -
    "Hold Position and prepare to receive enemy charge. *Amendment: Charge if enemy Pause within Javelin range, don't wait for them to loose at us! Guard your position."
    Second Line Division -
    "Exhaust all Javelins and Pila on enemy units once they have engaged with the Front-Line Division only. Charge to support them once you have used your ammunition."
    Missile Division -
    "Engage enemy troops of opportunity, advance to a position ahead of main formation and withdraw to the flanks before you become engaged in melee."
    *Amendment: Rear Guard slingers to join those already engaging as fast as possible.
    Cavalry Division -
    "You will be sequestered to Servius once we are on the battlefield, follow his instruction."
    *Amendment: Covered above in first notes.
    Following message sent to Servius, but rolled a one so it was intercepted and then went to Luca (50-50 chance between him and Marcellus]

    Quote Originally Posted by Braden
    “Consul,

    I send my cavalry to you immediately and some of my skrimishers to attempt to take some pressure from your position now.

    I await my rear-guard still before engaging Luca as planned.

    Quintus.”
    Ammendments to orders:

    Sorry, forgot to ask.

    Was the enemy army "approaching in my direction" already formed up or in
    column much as my one??

    If it is in column Quintus will order his 2nd Consular Legion to
    immediately secure their left flank against the river and engage the
    forward elements of the enemy whilst both sides wait for their
    rearguards to arrive.

    Please note that my cavalry ala will still be sent to Servius and
    general orders remain the same, charge enemy as soon as in range -
    javelin units behind only use missiles once front line is engaged.
    Slingers engage enemy infantry from flanks.
    Picture of ammended plan:


    Luca's Orders

    Quote Originally Posted by Swordsmaster
    The Advance Guard except the cavalry and Luca himself is to move to support
    Marcellus in whatever flanking manoeuvre is more appropriate to achieve
    local superiority ASAP and also send a message to Marcellus informing them
    that there is contact with a large enemy formation in my sector and I will
    need help.

    Luca himself and his cavalry will wait for the rearguard to arrive, and the
    arriving troops will deploy in 3 lines, with skirmishers ahead, principes
    and hastati in third line, and italians in second line of battle.
    Italian spearmen will take the centre, and the swordsmen the left of the
    line.
    Luca and his cavalry will stand to the right of the main formation.

    The troops may engage in missile fire until they expend all missiles.

    The skirmishers will fall back if contact is made to the left in order to
    present a very narrow front, and may engage suitably vulnerable enemy
    formations in h2h to help achieve local superiority.

    Luca will try to stay out of the battle, but if his commitment is required,
    he will join the cavalry alae in attempting flanking manouevres and
    dispersing enemy light troops.

    If the opportunity is presented, Luca and the cavalry will try and kill the
    enemy commander.

    If the enemy has an inferior number of cavalry, Luca and the cavalry alae
    are to attempt their destruction, if the number is superior, principes are
    to form up at the right of the formation to prevent flanking.

    Hastati and principes should be used as a reserve force to strike in
    critical moments or plug gaps in the main battle line. They should attempt
    to use up their missile weapons before engaging in melee.

  3. #3
    Senior Member Senior Member econ21's Avatar
    Join Date
    Oct 2002
    Posts
    9,651

    Default Re: Assembling

    MID-MORNING (TURN 2) - UMPIRE NOTES

    The Eastern Battle

    Servius's orders do not entail any approach to combat with Marcellus. There is a contradiction between his orders and his diagram over who are the nearest two divisions. I will have to make this explicit with all players and make sure their diagrams reflect this.

    Marcellus's only offensive move is to order his Numidian cavalry to engage with Servius's Italian spearmen (roll=5). Servius has ordered his Gallic slingers to counter this (roll=1 => not executed). It is unclear from the orders whether the Gallic cavalry should charge the Numidians, so they decided not to (50% chance). The Numidians killed 10 Italians, then retired due to lack of javelins.

    Feedback on turn 2 to Lucjan

    Your Gallic cavalry redeploy as ordered. Appius's division takes up position as ordered.

    The Senate line is passive, as is yours, except for minor skirmishing by their cavalry. Their Numidian cavalry separate from the rest of their cavalry, and menace the Italians spearmen on your furthest left with their javelins. Neither the Gallic slingers nor the Gallic cavalry intervene, and the Numidians retire when they have expended their javelins.

    Please give your orders for turn 3, including a diagram of how you anticipate things will look at the end of your move. Take care to identify the two divisions closest to your general and make sure this is accurately portrayed in the depiction of your general's location on your diagram. Also, please clarify the status of the Gallic slingers - I am treating them as effectively detached from the Gallic alae and incorporated into 1st Consular legion; is this right?

    Note that Quintus's cavalry alae is arriving on your left as reinforcements this turn. It will not be able to engage the enemy in turn 3, but will be able to move into position and be fully available to command on turn 4. Please include it in your diagram.

    Your current deployment and field of view is given in the attached jpg:


    Feedback on turn 2 to GeneralHankerchief

    The Consular line is passive, although you see two cavalry shuffle from the centre to the extreme flank of the Italian spearmen facing your right. Your Numidian cavalry approach the Italians spearmen cautiously, ready to flee if the Senate cavalry charge them. But the Senate cavalry do not move, so the Numidians target the Italian spearmen. The Italians hunker down behind their large shields and the Numidians expend their javelins to little effect, then retire.

    Please give your orders for turn 3, including a diagram of how you anticipate things will look at the end of your move. Take care to identify the two divisions closest to your general and make sure this is accurately portrayed in the depiction of your general's location on your diagram.

    Note that Luca's 2nd Italian Alae is arriving on your left as reinforcements this turn (turn 3). It will not be able to engage the enemy in turn 3, but will be able to move into position and be fully available to command on turn 4. Please include it in your diagram (see the word document I sent to you way back to find it's icons and composition).

    In addition, the advance guard of Decius's Field Army III is arriving to your rear as reinforcements this turn (turn 3). It will not be able to engage the enemy in turn 3, but will be able to move into position and be fully available to command on turn 4. Tamur will be controlling it unless I hear otherwise from him. There is no risk of interception or loss of messages: you may freely communicate with him, without going via me.

    Your current deployment and field of view is given in the attached jpg:[/QUOTE]


    The Western Battle

    Since the answer to Braden's query is that Luca's army is in column like his, I am going with his plan B.

    His advance guard moves into the battle area. His cavalry are sent to join Servius.

    Luca is sending his advance guard except his cavalry and Luca himself to support Marcellus. There is some confusion exactly what this is, but I am assuming it is the second Italian Senate Alae. Luca and his cavalry are waiting for the reserves, so they do not make contact with Quintus.

    Quote Originally Posted by econ21
    Turn 2 feedback to Braden

    Your scouts report that the enemy army facing you (Luca's Army of Italy) is in march column, as is yours. You detach your cavalry to move to join Servius; he will command that division henceforth. The remainder of your advance guard marches on the Senate army in the deployment you indicated. However, as you approach you still have not made contact by the end of mid-morning.

    You now have to decide whether:
    (a) to continue to advance on the enemy to your front;
    (b) to await your rearguard
    (c) to send your advance guard to aid Servius.

    Please provide a diagram of your deployment in whichever scenario you choose.
    Quote Originally Posted by econ21
    Turn 2 feedback to Swordsmaster

    You detach 2nd Italian Alae from your advance guard and send it to join Marcellus; he will command that divison henceforth. You and your cavalry await your rearguard and form up a battleline with it. Your scouts report there is an enemy formation advancing to your front.

    You have to decide:

    (a) whether to move to confront the enemy
    (b) hold position
    (c) to send more men to aid Marcellus.

    Please provide a diagram of your deployment in whichever scenario you choose.
    The Senate Reserves

    The Field Army III advance guard arrives on a 4+. They roll a 6.

    The rearguard will arrive on turn 4.

    Feedback to Tamur

    Quote Originally Posted by econ21
    Decius's advance guard finally reaches Marcellus's HQ and brings back word of his current situation (see the jpg). You will be able to deploy your advance guard by late morning (turn 3). It will not be able to engage any enemy that turn, but will be able to form up alongside Marcellus's army in any way you see fit. Please provide a diagram of your intended situation at the end of turn 3. It will be able to freely engage in turn 4.

    Note that your rearguard will arrive on turn 4 and again be able to get into position, but not engage until turn 5.
    Last edited by econ21; 12-21-2006 at 23:30.

  4. #4
    Senior Member Senior Member econ21's Avatar
    Join Date
    Oct 2002
    Posts
    9,651

    Default Re: Assembling

    LATE MORNING (TURN 3) - ORDERS

    The Eastern Battle

    Servius’s Orders

    Quote Originally Posted by Lucjan
    "This is getting us nowhere." Servius thought to himself. The risk of Decius's gauls arriving or having already arrived was already high, but there was yet no news from Quintus's side, although scouts did report a number of Quintus's cavalry approaching from the west. He was unsure yet if this was a good or bad thing.

    "We must move now." Looking to his messengers he ushered them over as quickly as he could.

    "You, to the Iberian division, order them move a bit further down our right flank and advance slightly behind our Roman division, when they come in range, release their javelins into Marcellus's flank, particularly the triarii, keep an eye out for hidden enemy forces on their right, if they see any, hold ground in guard formation and do not engage unless attacked, if none are present, then one unit is to flank the enemy triarii, the others are to attack the enemy skirmishers, if they run, then hold ground and anticipate a retaliatory charge by their second line."

    "You, to the Gallic infantry division. Order them form up alongside Appius's division, deep spear column ajoining his spears, and gallic swordsmen on the right. Advance behind our Italian division in conjunction with Appius's division. Spears engage the enemy cavalry, swords engage the enemy skirmishers!"

    "You, to Appius's Division, have him advance alongside our gallic infantry division towards the enemy cavalry, engage them with javelins if you can do so safely before they charge."

    "You, to our Gallic cavalry division. Have them form up on Appius's division's left flank and slightly back, when Appius engages the cavalry, flank them."

    "You, I hear that a group of Quintus's cavalry is coming our way, head out to them and order them to form up immediately behind our Iberians on the right flank and advance behind them. Also, bring me whatever word of Quintus's battle they can offer."

    At that, Servius turned to his two closest divisions, the Roman division and the Italian division on the front. "Romans, Italians! This dilly dallying has gone on long enough. Marcellus fears us, he will not engage like a man, instead he sends out his Afrikan slave warriors to do his fighting for him, and poorly at that I might add! That said, I bid somebody bring me a spoon, so that when I dig out that cowardly traitor's black heart it will be as painful for him as possible!

    Romans! Engage with pila first, then charge, march on their traitorous romans on the right. Slingers, engage their skirmishers on the right! Velites, target their libyan spearman at the center! Reaaaadyyy, MARCH!

    Italians! March on those wretched traitors that would dare consider themselves loyal men like you have shown yourselves to be. Engage with javelins first, then charge! Spears and swords on the far end, engage their skirmishers but keep a close watch for their cavalry, if their cavalry charge hold firm, both our gallic divisions and Appius's Italian division are being ordered as we speak to march on their foul horsemen! I will be accompanying them soon to be absolutely certain that their right wing crumbles before our might! Reaaaadyyy, MARCH!"

    With the call to march sounded, Servius rode quickly down the center towards the Gallic cavalry, then towards Appius's division. He would lead the march from that flank, intent on breaking the back of Marcellus's cavalry division, effectively defeating the senate's hope for a victory.

    (You are correct in assuming the gallic slingers have been attached to the Roman division. At the beginning of turn 3, the Roman and center Italian divisions are closest to Servius, at the end of turn three, the Gallic infantry and Appius's division are closest to Servius.

    I am assuming you mean Quintus's cavalry arrive on my right flank --as viewed from Servius's perspective, facing Marcellus-- as Quintus is engaged west of my current position, and I had assumed the map to be in line with the regular cardinal directions. If you do in fact mean my left, simply alter my orders to have Quintus's cavalry behind my gallic cavalry.)
    Diagram of planned deployment:


    Marcellus’s Orders

    Quote Originally Posted by GeneralHankerchief
    Division I (Cavalry): The Numidian Skirmishers will be once again included in the division. You are to advance at a slow pace, with the rest of the line. If all goes well Decius' cavalry will join you this turn. Guard the flank should Servius try anything.

    Division II (Marcellus): Advance along with the rest of the line, at a slow pace. Shift even more to the left, so that the two divisions you are closest to are the 1st Senate Legion and the incoming Italian Alae. Be in a position to assist the missile troops should they come under attack.

    Division III (First Senate Legion): Advance at a slow pace to the point where you can get into pila fire with Servius' infantry. Exchange pila but do not get into a melee unless you are forced into it. Trarii, get into position with the rest of the line. You are no longer needed to guard the flank. Missiles, advance with the infantry and attack whichever troops you have the best chance of downing. Run if Servius goes for you, but I do not think that it is necessary.

    Division IV (2nd Senate Legion): Advance, keeping pace with the Italians in front of you. You are still the reserves. Missiles on the right, begin to fire if you have a clear shot. The cavalry will assist you should you be in trouble.

    Division V (1st Italian Alae): Advance at a slow pace, maintaining a line with the 1st Senate Legion. Advance until you come into pila range with the Servians, but do not get into a melee unless you are forced into it. Skirmishers, target whatever unit you think has the best chance of going down. If you are chased, retreat. The cavalry will assist you should Servius try anything.

    Division VI (Numidian detachment): Make your way to the extreme right of the Senate cavalry, and advance along with them. This division no longer exists, and should be considered a part of Division I.

    Division VII (Italian Reinforcements): Move slightly behind and to the left of the 1st Senate legion, so you are behind the missiles. You are in reserve and should guard the missile troops. The next turn, you will ideally flank Servius on the left. Skirmishers, you may begin firing if you have a clear shot.

    Decius’s Orders


    Quote Originally Posted by Tamur
    Decius' orders if no message comes from GH:

    "My undying gratitude Publius for your report. I need you to lead the Advance force to the battle. Line up the Praetorian Cavalry to the left of Marcellus' line, near his skirmishers.

    Praetorians, advance to battle before the Alae, form up behind and to the left of Marcellus' line. Stay out of danger, and watch for an ambush on the left. When our 1st and 2nd Gallic Alae arrive, remain where you are, behind the Alae lines. You have nothing to fear in this battle except an ambush. Keep your eyes up and to the left, watching for anything. Immediately send messengers to Marcellus and to me if there are hidden troops on that flank, and then warn the Alae.

    1st Gallic Alae, when you reach the battle, line up on the left flank of Marcellus' battle line. Skirmishers should be in front of the line.

    2nd Gallic Alae, the same orders go for you, except line up to the left of your comrades and just a little ahead of them. Skirmishers should be in front.

    Alae, if you arrive in time to join battle, advance straight forward. If there is an ambush, your position will be precarious so listen for any warning from the cavalry.

    Alae Skirmishers, concentrate your fire on the Roman part of the front line. Your missiles may not have great effect, but the enemy will be off their guard for Marcellus' advance if you sting them hard enough.

    The rest of us will be there by noon. May Mars watch over us all."

    -------------------------------------------

    If a message does come unhindered from Marcellus, the orders remain the same, except that everything switches to the right flank. The picture should explain this.

    In that case, I have positioned the Alae in front of Marcellus' cavalry. If they can get into that position before Marcellus advances, then super. If not, they will line up behind Marcellus' cavalry.

    The image for these orders:
    The Western Battle

    Quintus's Orders for Turn 3

    Quote Originally Posted by Braden
    Advanced Guard Orders for turn 3. (NOTE: Going to try and cover all eventualities so these are actually orders but hopefully will cover for this turn and next turn at least)

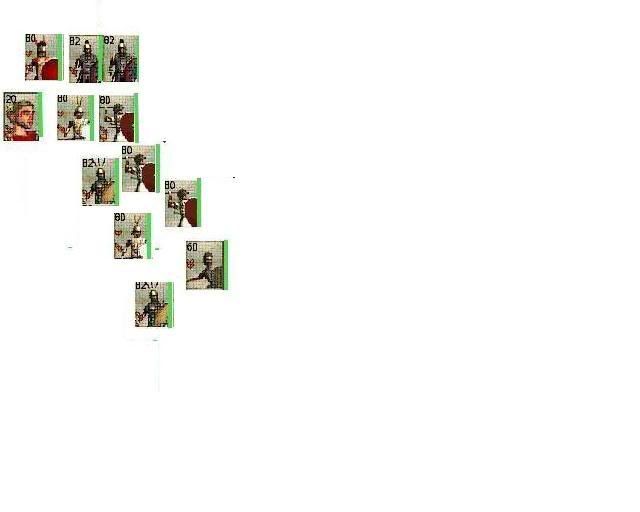
    Move forward to secure flank firmly against river (as pic -


    and align roughly on Servius' left flank position.

    The idea about moving the Advanced Guard forward was to ensure we secured that flank against the river mainly.

    Once up with Servius' forces Quintus will hold for the rest of the army and redress formation to the previously sent main battle formation:


    IF enemy Advance Guard move on Quintus' position or have reached near to Servius' flank then Quintus' Advance Guard will engage in combat agressively (charge in formation, missile troops bombard from flanks).

    IF the enemy Advance Guard are mainly Cavalry, Quintus' formation remains the same for his Advance Guard as above BUT the Velites will not be skirmishing away. They must hold and be bait for the cavalry, if the Velites are charged by Cavalry then the Triarii will break formation to counter charge the cavalry.

    Use of Pila and other missiles are at the descretion of the Centurions of the units, they will know when and where to use for greatest effect (assuming against facing units).

    Turn 4 and beyond.

    IF Qunitus either holds or defeats the enemy Advance Guard then the rest of his army will attempt to get "as close as" the main battle formation given above when it arrives - discounting engaged units who will NOT disengage from melee but will be supported by Rear Guard units as they arrive.

    IF Quintus DEFEATS the enemy Advance Guard, then units will redress upon arrival of Quintus' Rear Guard fully and engage the Enemy Rear Guard agressively (as per main orders, charge into Melee, 2nd row use exhaust missiles then charge into support).

    NOTES ON QUINTUS' Praetorians - Quintus will only engage in melee with already engaged units IF they threaten his right flank. He will attempt to outflank and rear-charge the enemy units causing the problem.

    Recap: The key issues are - Turn 3, ensure my advance guard have secured their left flank against the river and are on the left (or nearby) of Servius' formation. If the enemy advance guard is within range at that point they will attack agressively! If the enemy hang back then the advance guard will hold position, prepare to defend themselves and await the arrival of the rest of their army.

    Slingers - these will take on any targets they can range upon. That covers enemy on Servius' left as well as enemy directly threatening Quintus' own forces.

    After either Turn 3 or Turn 4 Quintus' forces will either be fully engaged and/or full battle formation and you can hand control over to Lucjan I think.

    It's a shame that I'll miss the end of this battle but I hope that I've been agressive enough to make a difference early on. If I can catch and destroy Luca's lighter advanced guard it'll turn the battle completely.

    Whilst I don't know I ASSUME that Luca's advance guard will mainly be cavalry + 2-3 infantry units, which my (mainly heavy) infantry units should be able to handle very well if dressed up well.

    Andy
    Luca’s Orders

    Quote Originally Posted by Swordsmaster
    Here are the orders for next turn, and attached the disposition once the rearguard arrives. If I misunderstood and the river is on the other side,
    the formation should be symmetrically switched.

    As I said before, as many missiles as possible should be used before engaging. This battle's formation is mainly defensive, waiting for MArcellus to resolve his conflict and flank the attacking army. Of course, if the opportunity is there, it should be taken.

    Principes, spearmen and hastati should be in guard mode.

    All troops should attempt to use their pila before engaging so as to maximise the effect.

    Cavalry should prevent flanking to the main formation and protect Luca.

    The unit of principes on the right flank is also there to prevent flanking and should be used either as reserves or face appropriately, or even attempt to flank the enemy themselves if the opportunity is presented.

    The other principe and swordsman unit are in reserve and should be used to plough the line if needed, or extend it to flank or prevent flanking.

    Now, the formation should advance until skirmishers make contact.

    Once this is achieved, and if pressed by the enemy, the slingers should fall to a position from which to continue harassing the enemy, and the velites towards the river flank, and using the narrow front offered, occupy a place in the line if needed.

    Luca may be used as an extra cavalry in a sensible way.
    Diagram of Luca's planned disposition:

    Last edited by econ21; 12-23-2006 at 21:36.

  5. #5
    Senior Member Senior Member econ21's Avatar
    Join Date
    Oct 2002
    Posts
    9,651

    Default Re: Assembling

    LATE MORNING (TURN 3) - UMPIRE'S NOTES

    The Eastern Battle

    From west to east:

    Consular Iberian alae - rolls a "1"; stalls in wood.

    Consular equites from Quintus's army of Gaul take up position on the western flank. The Senate 2nd Italian Alae (sent from Luca's army) takes up position opposite them on the western flank.

    Consular 1st Legion and 1st Italian alae move to attack the Senate 1st Legion and 1st Italian alae respectively. Those two formations ared ordered to march to meet them; however, inexplicably, the Italians stall. The Senate 1st Legion advances ahead and is charged by the Consular 1st Legion. The Consular 1st Italian alae charges its Senate namesake. Being the slightly larger formation so it overlaps slightly to the east. However, it has been ordered to engage the skirmishers, so it is not attacking the flank of the Senate main battle line. The Consular heavy infantry cannot catch the Senate skirmishers however.

    Consular Gallic alae are advancing on Senate skirmishers and cavalry. Ariminum garrison tries to engage Senate cavalry. Galiic cavalry alae provides support. Decius's 1st and 2nd Gallic alae have been ordered to take position on the threatened eastern flank of the Senate army. However, the 2nd Gallic alae stalls, as does the Praetorian cavalry. The Senate cavalry guarding that flank has been ordered to advance and hold until relieved by Decius's reinforcements. However, it rolls a "1". They were under the impression that they were facing two units of cavalry, not two full strength infantry divisions. The Tribune commanding them decides to fall back, taking up position on the eastern flank of Decius's Gauls. Contact on this flank is not made this turn, except for some skirmishing.

    Feedback to Lucjan


    Notes to Lucjan:

    You give your orders to advance to attack and your army moves as you instructed. The Senate legion (the Senate 1st legion) on the west advances to meet your approach and soon your 1st legion is locked in a bitter melee with it. However, the Senate Italian allies immediately to the east (the Senate 1st Italian alae) do not advance and so your 1st Italian alae marches to engage them, also becoming locked in combat. Quintus's cavary arrives to take up position on your western flank, although you notice with some alarm the arrival of a second Senate Italian alae (the Senate 2nd Italian alae) to face them. Your discomfort is increased when it becomes apparent that your Iberian alae has not left the woods as ordered - evidently there has been some confusion.

    On the eastern half of the battle, your Gallic alae, the Arminum garrison and your Gallic cavalry move advance together. The Senate cavalry facing them falls back. A Senate Gallic Alae (the 1st Senate Gallic Alae) moves to confront your combined advance.

    The Senate Gauls are evidently from Decius's army. To the distance of the Senate lines, you can see more reinforcements from that army form up in reserve.

    This is a diagram of what you can see:


    NB: BTW, you were right: Quintus's cavalry arrived on your right, not left. I should stick to east-west, it's less confusing. West is your right; east is your left. Also, note, I am representing Quintus's cavalry by a full strength equites unit (it should have been presented thus in the word document I sent at the beginning of the battle).

    You should now give your orders for turn 4 (early afternoon). Please give orders for each formation on the jpg - it is helpful to cover likely contingencies, but beware of double-guessing too much or you may confuse or constraint your divisional commanders.

    Note that 1st Legion and 1st Italian alae are tied up in melee and cannot respond to orders (except for the skirmishers and two uncommitted Italian units). The outcome will be determined this turn, although you can influence the decision through commiting further formations to the melees.

    Please take care to identify the two divisions nearest your general at the beginning and end of your move.

    Notes to GeneralHankerchief:

    You order a general advance, but disconcerted to see that Servius has also done the same. Moreover, from the woods to the east (your right), two strong infantry formations emerge (the Consular Gallic alae and the Ariminum garrison), bearing down on your cavalry. Your cavalry do not advance, but instead retire in the face of so much infantry. Thankfully, the 1st Gallic alae from Decius's army arrives to face the enemy advance, with your cavalry taking up a position on their flank. The 2nd Gallic alae and the Praetorian cavalry move up as central reserves. You know Decius's rearguard will be on the field at the end of early afternoon, but not able to engage the enemy until late afternoon.

    In the centre, your 1st Legion advances but for some reason, the 1st Italian Alae does not. Both formations are targeted by seemingly mirror image Consular formations: the Consular 1st Legion charges your 1st Legion; the Consular 1st Italian alee charges your 1st Italian Alae.

    On the west, some Consular cavalry emerge onto the field. Your 2nd Italian Alae arrives to face them.

    This is a diagram of what you can see:


    You should now give your orders for turn 4 (early afternoon). Please give orders for each formation on the jpg except those controlled by Tamur (ie the 2 Gauls and the Praetorian cavalry) - it is helpful to cover likely contingencies, but beware of double-guessing too much or you may confuse or constraint your divisional commanders.

    Note that 1st Legion and 1st Italian alae are tied up in melee and cannot respond to orders (except for the skirmishers). The outcome will be determined this turn, although you can influence the decision through commiting further formations to the melees.

    Please take care to identify the two divisions nearest your general at the beginning and end of your move.

    Notes to Tamur:

    You receive muddled reports from your advance guard. Apparently the 1st Gallic alae has taken up position on Marcellus's right flank (the east); it is supported by Marcellus's cavalry division but is being advanced upon by a superior force of Consular infantry and some Gallic cavalry.

    Your 2nd Gallic alae and your Praetorian cavalry have inexplicably not followed your orders and have been left in a central reserve position.

    This is a diagram of what your scouts report back:


    You should now give your orders for turn 4 (early afternoon). Please give orders for each of your formations - it is helpful to cover likely contingencies, but beware of double-guessing too much or you may confuse or constraint your divisional commanders. You are arriving with your rearguard onto the battlefield this turn; they will not be able to engage but you can move them into position.

    Please take care to identify the two divisions nearest your general at the beginning and end of your move.

    The Western Battle

    Quintus is still pressing his advance guard forward, aiming to make destroy Luca's advance guard. However, in mid-morning Luca ordered a halt to bring up his rearguard. He now moves forward to meet Quintus. Therefore, by the end of morning, Luca's army is deployed as a whole and is confronting Quintus's advance guard. Quintus's rearguard is further back.


    Instructions to Lucjan

    With Braden's departure, is it ok for you to give orders for Quintus too? His units are listed in the word file I e-mailed to you.

    The situation is that Luca's Army of Italy is operating to the west of Marcellus's Army of Afrika. It's western flank is anchored by an impassable river, but the ground slopes up to the east. Decius's Field Army III is in reserve, but in support of Marcellus's force. Luca and Marcellus's armies have become separated, although divisions can move from one to the other, taking one turn to effect the transfer. Luca has heard that Marcellus is facing Servius's army and has already detached the Senate 2nd Italian Alae to reinforce him.

    The situation is that Quintus's Army of Gaul is operating to the west of Servius's Army of Iberia. It's western flank is anchored by an impassable river, but the ground slopes up the east. Quintus and Servius's forces have become separated, although divisions can move from one to the other, taking one turn to effect the transfer. Quintus has learned that Luca's Army of Italy is approaching and so has pushed aggressively forward in mid and late morning, aiming to meet and defeat Luca's advance guard. However, what approaches you by noon is not Luca's advance guard, but his whole army in a single formation.

    Quintus's advance guard is outnumbered but will be joined by his rear guard this turn. The rear guard will not be able to fight this turn (turn 4 - early afternoon) but will be able to take up position. One option this turn is to pull back the advance guard so as to avoid contact until they have united with the rear guard. However, in fairness, I will also ask the player (probably TinCow) controlling Luca how they would react in such an eventuality.

    This is a map of the situation at the start of early afternoon (turn 4):


    Please provide your orders for this turn and provide a jpg of how you plan the battle to look at the end of this turn (if the enemy reacts according to plan). Please take care to identify the two divisions nearest your general at the beginning and end of your move.

    PS: I forgot that Braden had sent a slinger unit to Servius along with the equites to support you (it's the 2 silver chevron unit in 2nd Consular legion in the Word file). For turn 4, I will treat it as being included with the other skirmishers attached to 1st Senate Legion.

    Instructions to TinCow

    With the departure of Swordsmaster, is it ok for you to play the role of Luca?

    The situation is that Luca's Army of Italy is operating to the west of Marcellus's Army of Afrika, with it's flank anchored by an impassable river. Decius's Field Army III is in reserve, but in support of Marcellus's force. Luca and Marcellus's armies have become separated, although divisions can move from one to the other, taking one turn to effect the transfer. Luca has heard that Marcellus is facing Servius's army and has already detached the Senate 2nd Italian Alae to reinforce him. However, he also knows that he himself is facing Quintus's Consular Army of Gaul. To prepare for that, in mid-morning, Luca brought up his rearguard and then in late morning advanced to meet Quintus. He now spots Quintus's advance guard in battle formation.

    This is a map of the situation at the start of early afternoon (turn 4):


    Please provide your orders for each of your formations this turn. Also provide a jpg of how you plan the battle to look at the end of this turn (if the enemy reacts according to plan). Note that, given he is currently outnumbered, Quintus may decline to give battle and start to withdraw. Please prepare contingency orders for that situation. I will upload a word file (tincow_rome.zip) which has the icons for your units and their arrangement into divisions. You can easily cut and paste them in paint to form a diagram.

    Please take care to identify the two divisions nearest your general at the beginning and end of your move. The two divisions that start closest to you are exempt from the 1 in 6 chance of disregarding orders.
    Last edited by econ21; 12-24-2006 at 03:39.

  6. #6
    Senior Member Senior Member econ21's Avatar
    Join Date
    Oct 2002
    Posts
    9,651

    Default Re: Assembling

    EARLY AFTERNOON (TURN 4) - ORDERS

    The Eastern Battlefield

    Servius's Orders for Turn 4:

    Quote Originally Posted by Lucjan
    Discontented with the appearance of Decius's Gauls and the Iberian infantry's confusion, Servius began to bark orders frantically.

    "Messenger! To our Iberian infantry immediately! Tell them my orders are simple, engage the Italian soldiers on Marcellus's left flank."

    Looking further along the right flank he beckoned more messengers over.

    "You, quickly, to Quintus's cavalry, tell them to engage the skirmishers on our right flank immediately, if threatened by their Italian infantry, do not engage, Tell them to use their speed to outmaneouver them and try to keep their skirmishers on the run until our Iberians can tie up their Italians."

    "I need a messenger for the Roman division, quickly, you! Here, head to the right flank with haste, tell our slingers and velites on the right flank to go around to the sides of our Roman lines and unleash everything they have into the enemy roman's flanks. If our slingers are threatened by their Italians, withdraw but hit the Italians with any volleys they can safely throw as they do."

    "One more, to our Italian division. Quickly! Tell our unengaged units to flank the enemy lines engaged with the rest of their division."

    A glance to the left flank. "Another rider, to our gallic cavalry! Order them charge the enemy's afrikan cavalry!"


    He turned then to the gallic infantry beside him. "Come! It is time! Prove to the world that the disaster at Ancyra was no fault in gallic valor, and every bit the wretched trickery of the senate! I need one spear unit and one sword unit to engage the gallic lines in front of us. The sword unit should flank right. The other spear unit is to drive off their skirmishers and then provide protection to the flank of our Italian spears on the senate's Roman flank."

    His gaze went then to Appius. "It's time Appius, let's go! Spread out and engage the enemy in front of us, spears engage their velites, swords engage their swords, sword on their equites, Appius, you charge with me right into their cavalry general's unit. All units throw javelins first if you can do so safely. Velites, fire on any of their cavalry that you can unless the risk to our own is too great, in which case, fire on their gallic infantry. Head on! I'll check up on the gallic cavalry on the way and reinforce you immediately afterwards!"

    With that, Servius was off again, heading to make sure the gallic cavalry received their orders, then back to reinforce Appius against Marcellus's cavalry commander (Kaeso I think his name was?).

    ---The two divisions closest to Servius at the beginning are the gallic infantry and appius's italians. The two closest to Servius at the end are the gallic cavalry and Servius's italians.---
    Plan:


    Marcellus's Orders for Turn 4

    Quote Originally Posted by GeneralHankerchief
    Division I (Cavalry): Wait for Decius' Praetoria (Publius and Domna) to come up. If they do so, smash the enemy cavalry and then retire. If not, guard the flank.

    Division II (Marcellus): Nearest to 1st Senate Legion and 2nd Italian Alae. Blow the rally horn and prepare to countercharge the equites should they go after the missiles.

    Division III (1st Senate Legion): Missiles, expend as much ammo as you can while retiring until you are charged by the equites. Once that happens, RUN! Once Marcellus engages the equites I want the velites to come back and get into a melee with the enemy.

    Division IV (2nd Senate Legion): Retire a bit. If the enemy flanks the Italians, throw pila into their rear and counterflank them. If not, then shift to the right as a line. Do not engage unless they engage you. Missiles, target those Gauls to the right.

    Division V (1st Italian Alae): Skirmishers, fire at will. Should they flank cause as much trouble (missile-wise) as possible but retire. I don't want you getting in a melee.

    Division VII (2nd Italian Alae): One Swordsmen unit and one spearmen unit flank Servius. The other Spearmen unit is to be in reserve. If the equites get into a melee then I want that spearmen unit to attack the equites. If not, then just shadow the equites. Be prepared to shift directions should they flank you. Skirmishers, fire at will while retreating. If the equites charge you, RUN. If they get into a melee with Marcellus, then run back and engage them hand-to-hand.
    Plan:


    Decius's Orders for Turn 4

    Quote Originally Posted by Tamur
    Both 1st and 2nd Gallic Alae: charge through the Senate skirmishers attack the left flank of the line in front of Servius. Skirmishers, provide fire as long as possible and then withdraw behind the Gauls.

    Praetorian cavalry, join the other Senate cavalry on the right and join the other cavalry in the charge against the Consular cavalry, and against Servius himself. This is your hour!

    Rearguard Italians and Legion: None of us will be able to join battle till later in the afternoon, but for now we will move in two straight lines to the left flank of the battle line, with the Legion in front, the Italians behind, and I will follow you all. Our goal is to flank the entire Consular force on their right flank. And if this goes well, we are assured victory. So onward!

    The Western Battlefield

    Luca's Orders for turn 4

    Quote Originally Posted by TinCow
    Skirmishers - 3 units of Velites
    Battle Line - 2 Hastati, 3 mixed Italian infantry, 2 Principes, Luca's Bodyguard
    Slingers - 2 Gallic slingers
    Cavalry - 2 Italian Cav, 1 unidentified(?) general

    At start of turn, 2 closest divisions are Skirmishers and Battle Line.

    Orders:

    Slingers to move east, uphill until they can fire down on the enemy's left flank. They are then to commence fire, preferably at enemy velites and slingers.

    Skirmishers are to advance into range of the enemy and throw javelins, preferably at enemy hastati, principes, and triarii.

    Battle line is to move up until just out of range of enemy javelins (presumably right behind Skirmisher division.) During move, both principes are to shift to the right flank of the line, slightly behind the main line.

    Cavalry is to advance to the top of the slope on the enemy's left flank.

    At end of turn, 2 closest divisions are Skirmishers and Battle Line.

    If Quintus withdraws:
    Battle Line and Skirmishers are to charge after and engage the rearguard, if possible.
    Slingers are to remain in the rear.
    Cavalry is to charge down slope and attempt to capture or kill Quintus. They are to ignore other targets in this pursuit unless such a move puts them in serious peril. If Quintus escapes or they cannot engage him without serious peril, they are to run down the slingers and skirmishers.
    Plan:


    Quintus's Orders for turn 4

    Quote Originally Posted by Lucjan
    Quintus's orders are simple. His entire army is to withdraw from the field with Luca, his skirmishers and spearmen taking up the rear guard to protect against Luca's cavalry. He is to head immediately to Servius's location.
    Last edited by econ21; 12-24-2006 at 16:24.

  7. #7
    Senior Member Senior Member econ21's Avatar
    Join Date
    Oct 2002
    Posts
    9,651

    Default Re: Assembling

    EARLY AFTERNOON (TURN 4) - UMPIRE NOTES

    Eastern Battle

    Units failing their orders test: 1st Senate Cavalry Alae; 2nd Gallic Alae; Praetorian cavalry.

    After executing orders, the battle in the early afternoon essentially divided into three combat areas, as per this diagram:


    Western Combat Area:

    During late morning, the rival 1st Legions fought a dogged and equal combat. However, the intervention of the Senate 2nd Italian Alae on the western flank started to swing the balance towards the Senate. The late arrival of the Consular Iberian Alae emerging from the woods restored the situation. By mid-afternoon, both Legions were shattered and no longer effective fighting formations. The two rival Alae were both at half strength. All missile and skirmisher units were out of ammunition (as indeed they were in all engaged divisions). The Consular equites had scattered some Senate skirmishers but not intervened decisively in the heavy infantry struggle, much of the time being shadowed by both Senate Italian spearmen and the bodyguard of Marcellus himself.

    Central combat area:

    The rival 1st Italian Alae fought determinedly against each other. During late morning, the combat was equal - with the fine mercenary hoplites giving the Senate a slight edge. However, by early afternoon, the superior numbers of the Consular Italians allowed them to flank the Senate line. This was the signal for the Senate 2nd Legion to counter-flank. The detachment of a unit of Gauls was not sufficient to prevent the superior numbers and quality of the Senate forces prevailing. By mid-afternoon, the two 1st Italian Alae had both ceased to exist. The Senate 2nd Legion was at three quarter strength. There was a gaping hole in the middle of the Consular battleline.

    Eastern combat area:

    Consular 1st Gallic Alae and the Ariminum garrison attacked the Senate 1st Gallic Alae. Servius, Appius and the Gallic cavalry, supported by a unit of Italian swordsmen, charged the 1st Senate cavalry alae. The superior numbers of the Consular attackers overwhelmed the Gallic infantry and cavalry facing them. The entire Senate eastern flank was swept from the field. However, the cost to the Consular forces was significant. The Gauls loyal to the Senate fought gamely and the Senate Equites caught one Italian sword unit in the flank, destroying it. Servius and Appius both survived with intact bodyguards, but the other Consular formations - the Gallica Alae, the Ariminum garrison and the Gallic cavalry - are at half strength.

    The situation by mid-afternoon was as follows:


    Feedback to Servius

    You shake your head in disbelief. You have smashed the enemy's flank but it appears that the battle is lost. Your army has fought Marcellus's to exhaustion, but already a second, fresh, Senate army is lining up to take the place of Marcellus's Afrika veterans.

    Around you stand the bloodied victors of your flank attack - the Ariminum garrison, the Gallic Alae and cavalry. But the rest of your battleline is a mass of dead, wounded and routing soldiers. The 1st Legion and 1st Italian Alae are no longer combat worthy. On the western flank, the Iberian Alae are giving a good account of themselves against some recently arrived Italian Alae loyal to the Senate (you assume they are from Luca's army).

    But against you, Marcellus's 2nd Legion stands in the centre like a rock, battered but defiant. It is supported by Publius Laevinus's Praetorian cavalry and more Gauls. In the distance, you can see Decius's rearguard has arrived and has taken a position on the west of the battlefield, ready to overrun your Iberians.

    Quintus Naevius is gamely marching to the west, but still has not made contact with the enemy. News has already reached you of Oppius's ambush by the supposedly allied Carthaginians. One thousand six hundred soldiers you counted on fighting under your banner now lie dead in Sardinia. Tiberius Coruncanius is mustering three armies for the Senate at Bonovia, while Numerius Aureolus is bringing another three through Greece. Now is a time for a momentus decision, but your options are painfully limited.


    Feedback to Marcellus

    You used to have an army. A perfectly balanced Consular army; an army that you took to and from Afrika. You brought them back, to these blood soaked fields and this is where most of them will forever stay. All that remains of your men is the 2nd Legion, battered and mauled but still standing like a rock in the centre of what was your line. Your 1st Legion and 1st Senate Alae have been shattered and no longer exist as combat worthy formations. Your eastern flank - you Cavalry Alae and the 1st Gallic Alae from Decius's army - has been utterly overrun. The 2nd Italian Alae, sent by Luca, promised to help you turn the Western flank but that has been stalled by mercenary Iberians pouring out of the woods.

    Your army is ruined. But looking across the fields, so is Servius's. And now Decius Laevinus's army has arrived in full force. Who needs your Army of Afrika, when you have another one, all fresh and ready to go?


    Feedback to Decius

    You ride onto the battlefield - the noise and the chaos are alien to you, they are counter to every fine, orderly thought in your first class mind. You find Publius Laevinus, standing idly with his Praetorian cavalry and the 2nd Gallic Alae. They failed to move to protect the eastern flank and it has been overrun - your 1st Gallic Alae and Marcellus's cavalry eliminated. You shake your head in bewilderment - Publius has stood out of a fight again?!

    You ride on, hurrying forward your rearguard to take up their position on the western flank. There is little left to oppose them there - a fresh force of Iberians loyal to the Consul is locked in combat with a detachment of Luca's advance guard. Your plan can still work: an overwhelming blow on the western flank from your rearguard, pivoting around Publius's reserves and what is left of Marcellus's 2nd Legion. Your tidy mind is ticking over, calculating and already bringing order to the chaos of battle.


    The Western Battlefield

    Quintus is ordering his army to march to join Servius. His rearguard can move there directly. They arrive on turn 5 and can move but not engage.

    His advance guard is being pursued by Luca’s entire army, with the Consular triarii and velites acting as a reserve (the two silver chevrons slingers have already been transferred).

    Luca has ordered his men to pursue at the run, with the cavalry chasing Quintus.

    All formations follow orders.

    Senate cavalry can catch the advance guard. The triarii and velites attempt to hold off the Senate cavalry, who will soon be supported by the rest of Luca’s army. The triarii defeat one Italian cavalry troop and, with Quintus's held, the Praetorian cavalry troop with the Senate cavarly is also destroyed. However, they are unable then to make good their escape and are caught and eliminated by the Senate.

    Feedback on turn 4 to Luca

    Quintus's advance guard attempts to withdraw from the field, heading east - presumably to unite with Servius and join the battle with Marcellus and Decius's armies. You pursue aggressively with your cavalry. Quintus uses a cohort of velites and of triarii as to cover his withdrawal. Eventually, you destroy these two cohorts but at the cost of one troop of Italian cavalry and the Praetorian cavalry attached to the cavalry Alae.

    You march on in pursuit of Quintus. Quintus himself, plus the surviving principes and hastati from his advance guard have now joined up with his rearguard (a Legion and a strong Italian alae). By late afternoon (turn 5), your men will be on the battlefield with Marcellus - able to move into position, but not engage the enemy.

    This what you find when you arrive:


    Please give orders for each of the formations under your control, bearing in mind that you are merely deploying on the field and cannot fight this turn. Specifically, the formations you control are: Lucas's HQ; 2nd Senate Cavalry Alae (reduced to one Italian cavalry unit); 3rd & 4th Senate Legions; and 3rd Senate Italian Alae. Note that one Italian cavalry unit and the tribune unit are now destroyed. Take care to specify the two formations Luca is closest too at the start and end of the turn.


    Feedback on turn 4 to Quintus

    You order your army to march to join Servius. Your rearguard is behind you and can move there without complication. However, you are with your advance guard (Consular 2nd Legion, minus its skirmishers) deployed in battle against Luca's entire army. You attempt to withdraw from the field, using your spearmen (triarii) and skirmishers (velites) to cover your withdrawal. These two cohort exact a heavy price on the Senate cavalry - destroying half their Italian cavalry and the attached Praetorian cavalry. But the Senate cavalry effectively pins your two cohorts. This allows Luca's infantry to come up and destroy the triarii and velites. Luca's army then follows you west.

    By late afternoon (turn 5), what is left of your army arrives on the battlefield with Servius. You have your entire rearguard (3rd Consular Legion; 2nd Italian Alae), your HQ and the principes and hastati from 2nd Consular Legion. You will be able to move into position, but not engage the enemy.

    This what you find when you arrive:


    Please give orders for each of your formations, bearing in mind that you are merely deploying on the field and cannot fight this turn. Take care to specify the two formations Quintus is closest too at the start and end of the turn.

    Note: updates to TinCow, Tamur, Lucjan and GeneraHankerchief:

    I have now resolved turn 4 for Luca and Quintus, so there is a change in the end of turn situation for the generals involved in the eastern three-way battle. Quintus is arriving on the western flank of the battle in late afternoon (turn 5). Luca is arriving even further west in pursuit on the same turn. Both Luca and Quintus can only deploy in turn 5 (within limits); they cannot fight until early evening (turn 6).

    If the battle still rages by the end of turn 6, we will have a night turn 7 with very limited movement possibilities and then start day 2 of the battle with turn 1 being early morning (dawn).

    The situation at the start of turn 5 looks like this:

    Last edited by econ21; 12-24-2006 at 17:32.

Bookmarks

Posting Permissions

  • You may not post new threads
  • You may not post replies
  • You may not post attachments
  • You may not edit your posts
  •  
Single Sign On provided by vBSSO