
Originally Posted by
FactionHeir
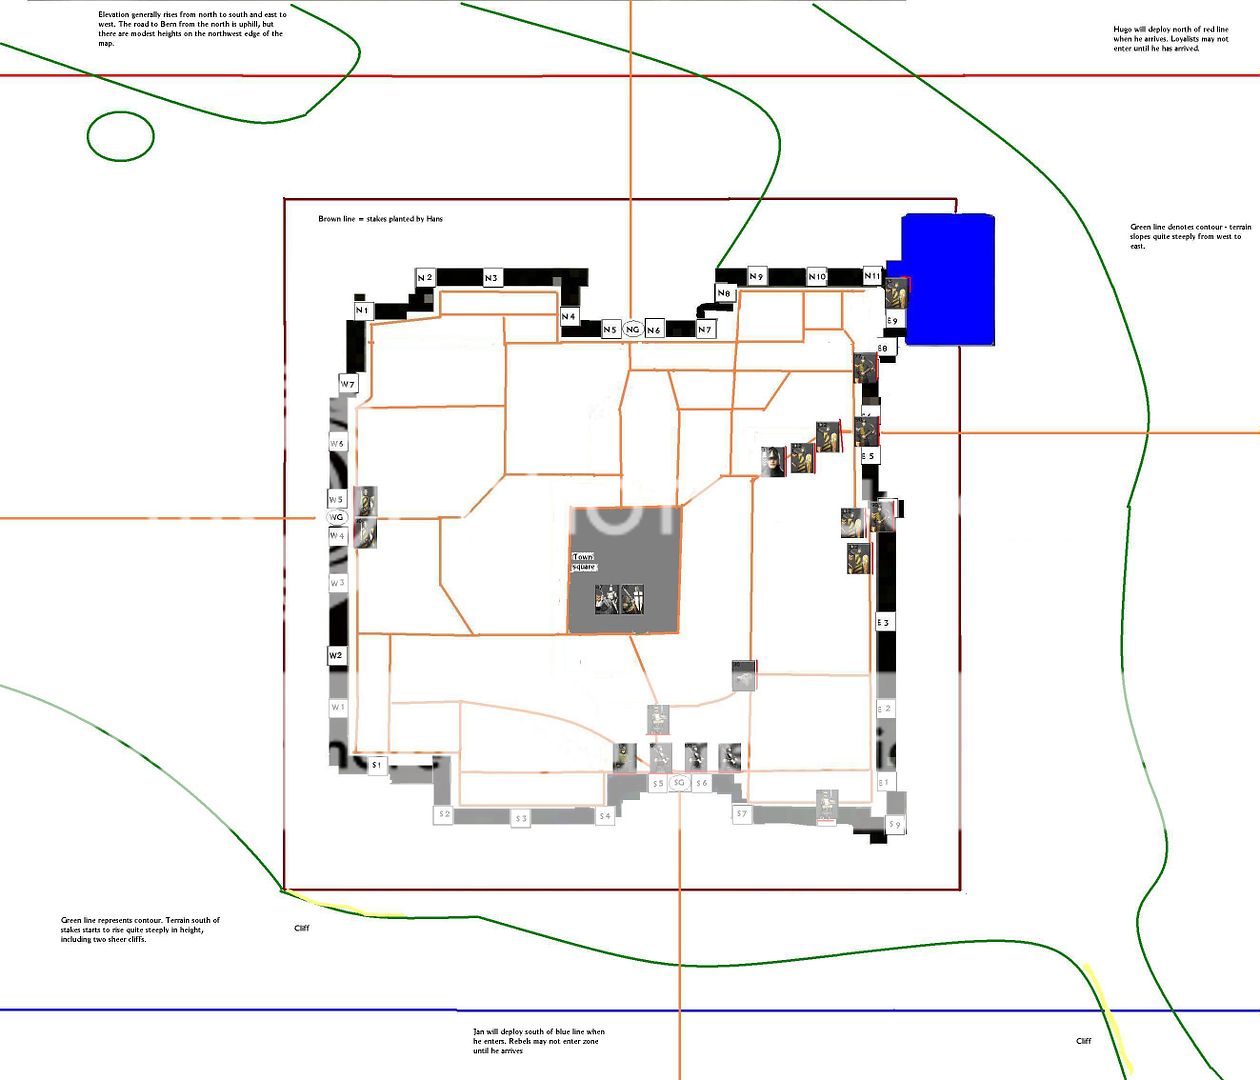
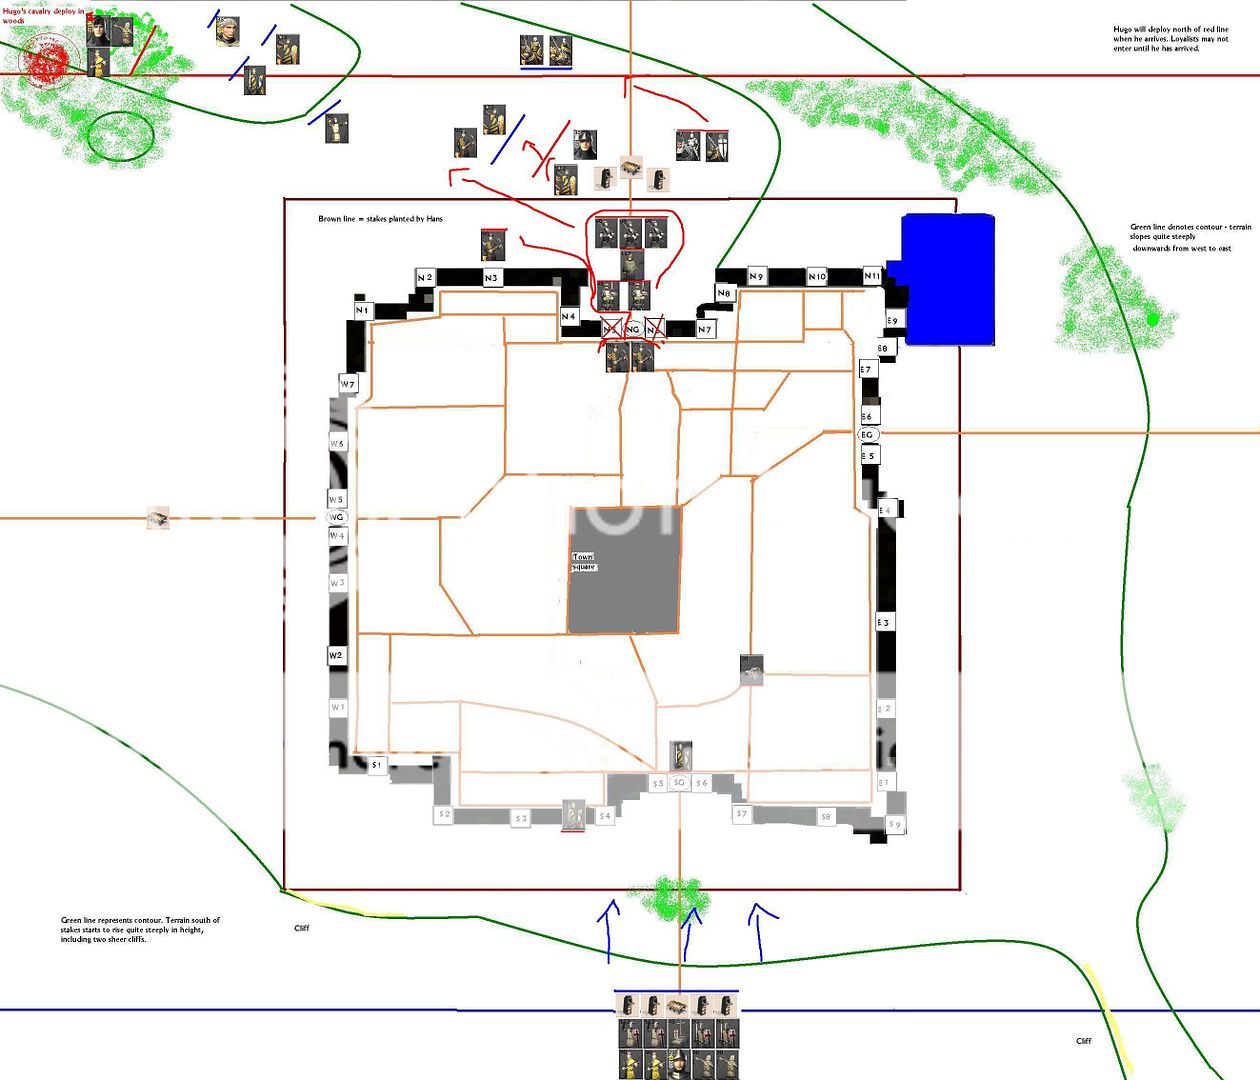
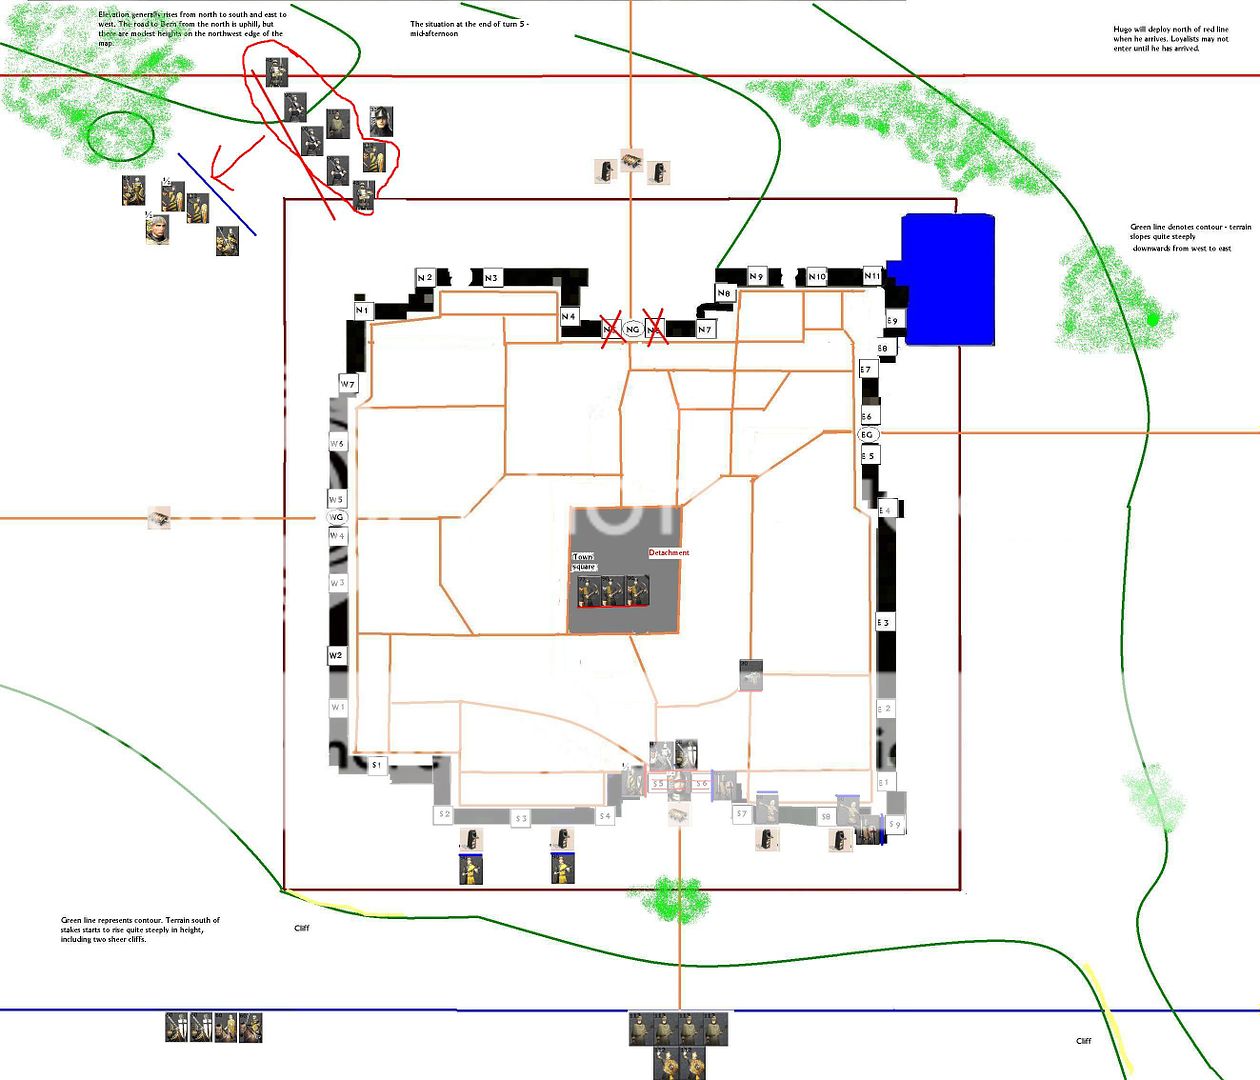
These are the slightly revised orders for my army. Note that here and in the jpg I sent you, I have made note of some woods. I saw these after loading up the map and noticed that I was able to hide troops within. I marked the main ones nearby on the map for you.
Firstly, the division set-up (I am assuming that I can change regiments around from divisions freely and merge them split them etc at will without causing the usual issues other commanders have in whichever way from your post?)
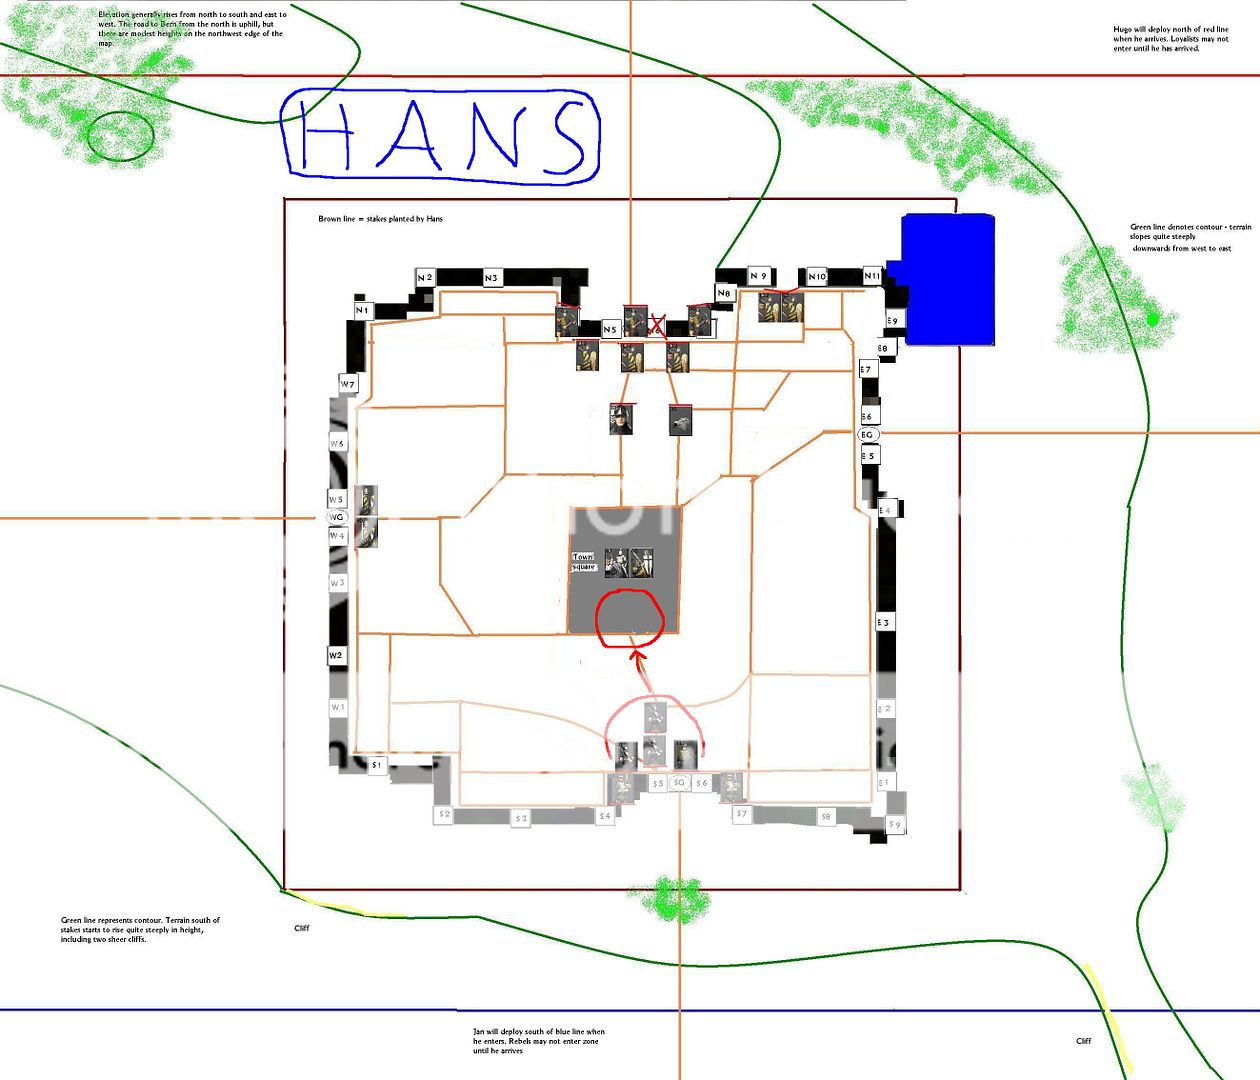
Divison 0: HQ [Hans]
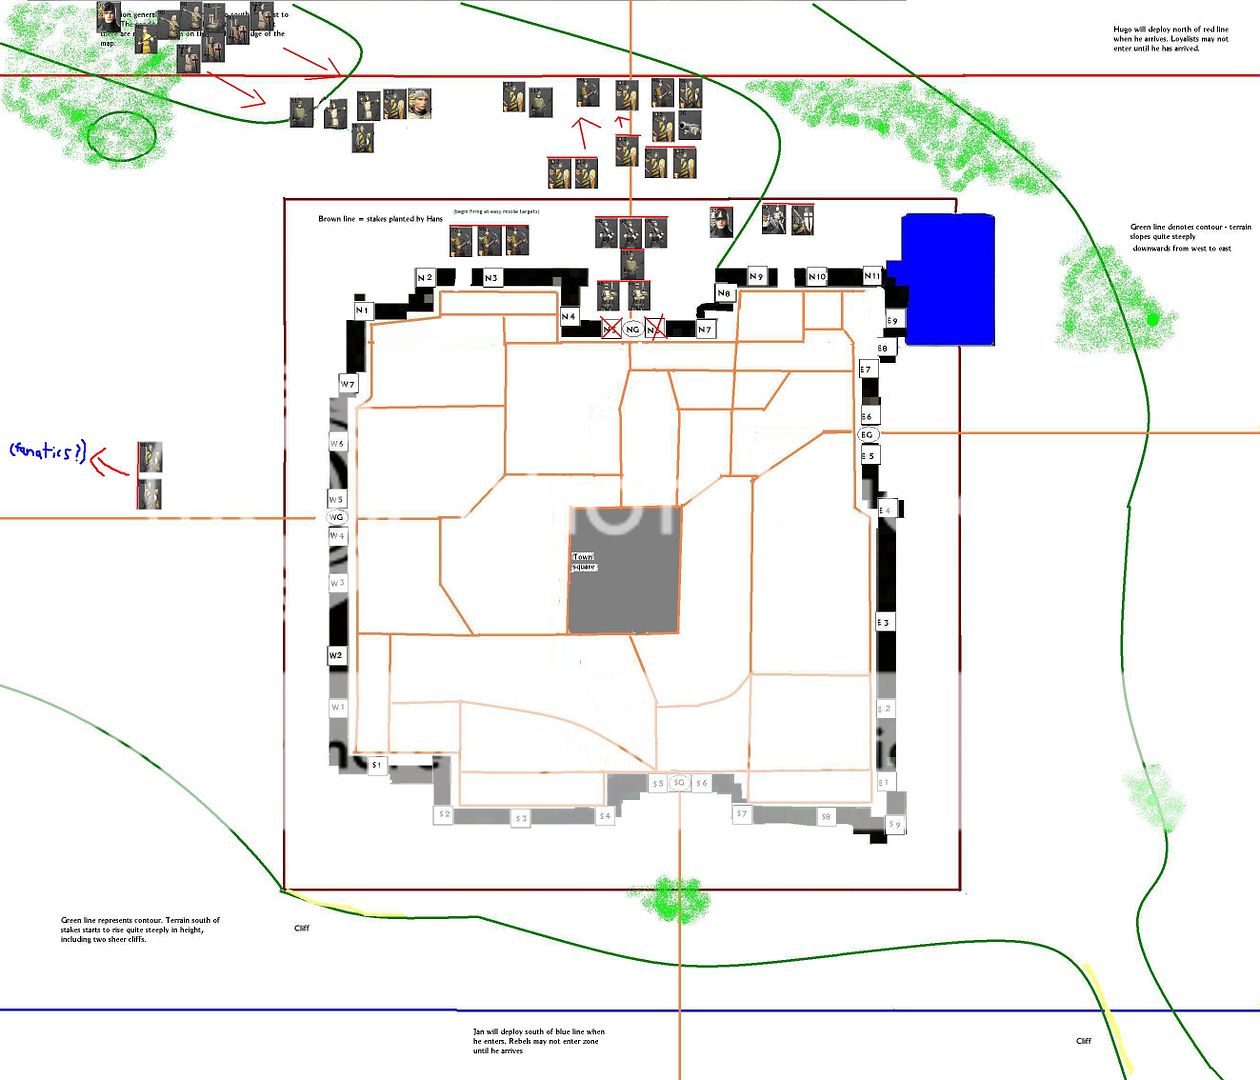
Division 1: 2 Pavise and 1 AS (the 2xp one) [Ernst]
Division 2: 2 Longbows, 1 DFK, 1 fanatic, 1 AS [Ludwig]
Division 3: 1 G.Bombard, 1 DFK [Horst]
Division 4: 1 ImpK, 1 DFK, 1 AS [Thorsten]
Division 5: 1 AS, 1 Fanatic [Rudolf]
Division 6: 1 Teuton, 1 CS [Wilhelm]
Division 7: 1 ImpK, 1 FK [Adalberth]
I guess I won't have to give a speech to myself, so orders for HQ are to remain steady and flank any force that approaches the longbows, while staying outside enemy tower range.
Overall speech:
Honorable Germans, Good Christians, Friends, Brothers in arms.
We are gathered here today to bring an end to the miserable heathens, heretics and traitors holed up inside Bern. Make no mistake in granting them mercy, for slaying them is a necessity and our holy duty to God. Indeed, they are not even fit foes for you fine men, but armed they are nonetheless, threatening to kill innocent women and children that we have sworn to protect.
So then, we have set up on this hill and will strike down the heretics that will arrive shortly to aid their devil worshippers. This will be our prime target, for once they are destroyed, we can begin our march onto the city in earnest. I expect every man to do his duty to God, the empire, his Duke and himself and show only steel and a warcry to our enemies, never turning your back without my express orders to do so.
Fear not however, for we are not outnumbered this day. Within a few hours, the honorable Jan von Hamburg will arrive with his crusaders to join us in fulfilling our holy duty.
And lastly, you all know me as a man who would rather die, than waste needless lives of those who serve him. Ask any of my retinue, whether I would ever shy from battle and let my men die. They will all tell you that I will charge headfirst into the fray and spread fear into their hearts, so that you may live to tell of it! Now, this does not mean that you will merely watch when I carve my mark into the heretics we will face shortly. You will fight when I ask it and fight with conviction, for only if we all fight together, will God's work be done!
--
Sir Ernst, you will command the pavise regiments and one regiment of armored sergents and attempt to shoot at any enemies that approach your view. Your primary targets will be the enemy cavalry, and most importantly, the enemy leader. Use the sergeants to hold off any attackers to allow the crossbows time to gain ground and for other divisions to come to your aid.
Sir Ludwig, your Longbows will too aim at any cavalry. When the enemy attacks, move the longbows out of melee and and resume firing. Your infantry is to hold the line and not let any enemy through to our missile units. Use your spearmen to break cavalry charges and fanatics to drag men off their horses. The knights will face any enemy heavy infantry and only aid against cavalry if necessary.
Horst, your bombard is to take down the main gatehouse towers. Infantry is at your disposal to protect your bombards. Signal to any nearby divisons if you require aid immediately. If there are considerable amounts of enemies swarming out of the gates, use flammable shots to break them, aiming for the largest mass of troops where possible.
Thorsten, you will protect our siege engines and use your cavalry to flank any unit bound by your infantry. You will also aim to support Horst's division when they require your help. Enemy cavalry will be your main target when close and never use your cavalry to engage enemy twohand units in prolonged melee, and try to keep your cavalry hidden in the nearby woods until ready to attack.
Sir Rudolf, you will aim to help Thorsten in protecting our siege equipment and otherwise attempt to flank the approaching enemy.
Sir Wilhelm, you will hold your position for now and only attack the gates when they are abandoned and no enemies are nearby. Once the gates are broken, you will retreat to your original positions, but be ready to swarm in when I signal you to do so. Hopefully Jan's crusaders will aid on your side.
If the enemy sallies, use your sergents to hold enemy cavalry or infantry while you use your cavalry to attack their flank or rear. When attacking with cavalry, always charge and withdraw to form up for another charge. Fight prolonged melee only against troops that you deem close to routing.
Captain Adalberth, your knight regiments are the best that I can muster at this point. You will attack any enemy nearby and stay out of the towers' range. Stay hidden inside the woods until you are ready to strike and take the enemy by surprise. You have ridden with me long enough to know how to handle cavalry so I will not waste words to tell you how. I shall remind you however, that charging through an enemy formation while you are engaged in melee is of utmost importance, and you have learned from me how to do so. As usual, charge, break and recharge. If you feel unable to handle the masses of enemies, attempt to ride down as many infantry as possible and cut any pursuing cavalry on your way back to my position.
Godspeed to you all.


 Reply With Quote
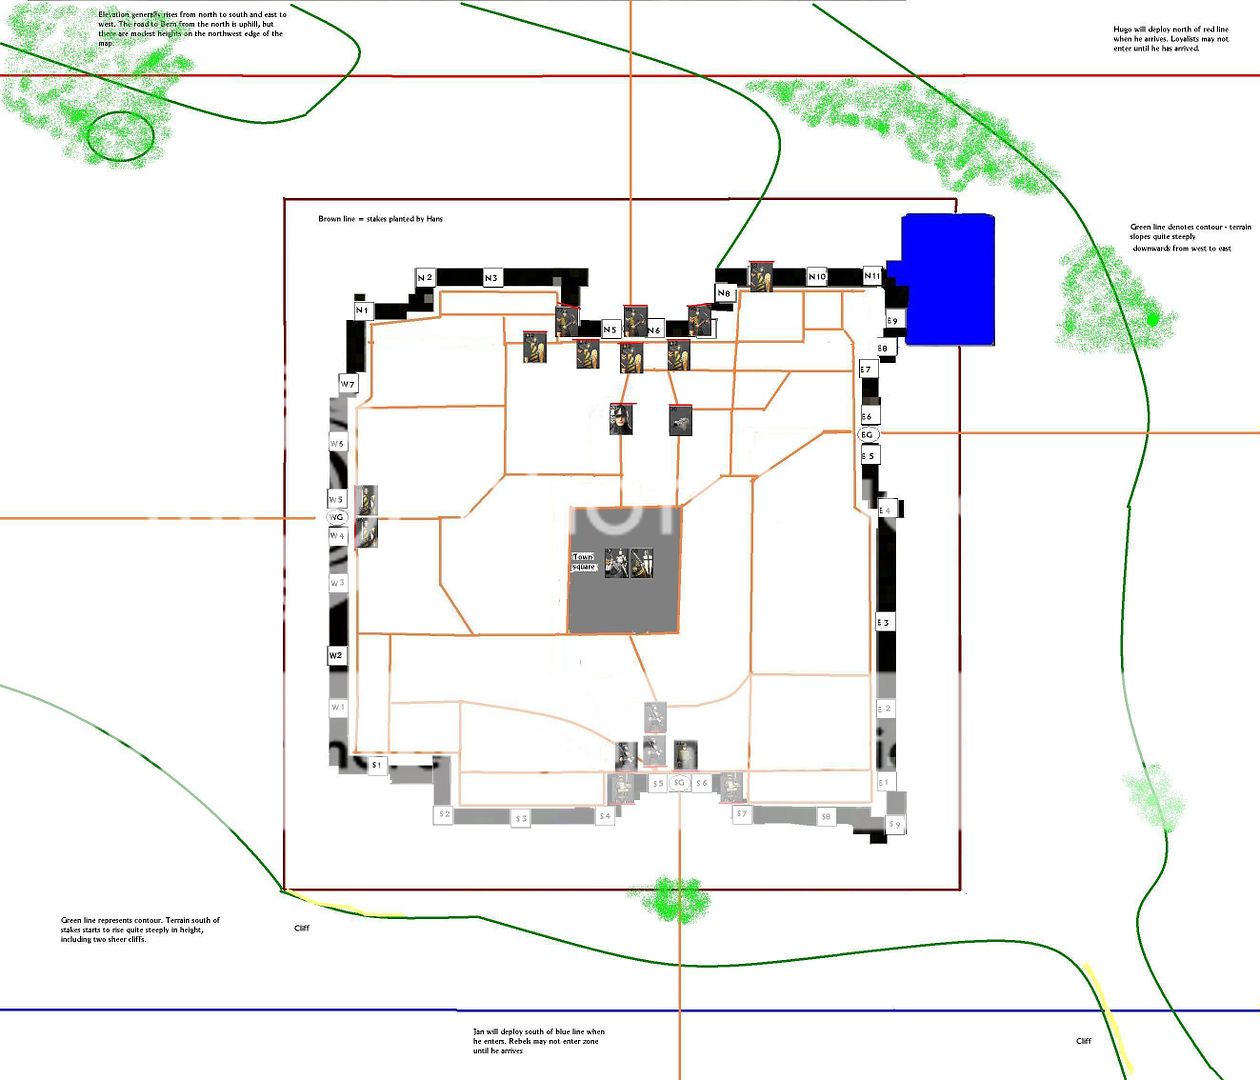


Bookmarks