Results 1 to 26 of 26

Thread: Gotterdammerung - A German WW2 DAR

Hybrid View

Previous Post Previous Post   Next Post Next Post
  1. #1

    Default Gotterdammerung - A German WW2 DAR

    Grittinks. This is a DAR of Nazi Germany's last months. The scenario which I am playing is on a hex map, 10 km per hex. The time scale is daily turns. It begins Dec. 16. It ends in Sept. '45, if I can hold on to Berlin. I am now on Turn 57 (February 10). Instead of committing my Pz. divisions to Wacht am Rhein, I canceled the operation and railed them off to the Ostfront. I shall describe the consequences.

    **This is a turn-based game, so posts are only up-to-date for my playthrough of the day: I move first for a day, then the Allies move. Much of my turns are spent assessing the damage caused by the Allies in their turn "yesterday".

    This has been a bloody bloodfeast:

    Spoiler Alert, click show to read: 


    I will post the Allied losses in a couple of turns.

    Monty's Quality Scale for Soviet Corps/Allied Divisions:

    (Numbers referring to Attack (Anti-personnel)-Defense numerals on Unit Counters)

    Unit Hierarchical Symbols

    17-16 and up: Good/Excellent
    13-12 to 16-16: Fair
    10-10 to 12-12: Decent
    7-6 to 9-9: Mediocre
    Below:

    Acronyms & Abbreviations:

    AD - Armored Division
    ID - Infantry Division
    IR - Infantry Regiment
    RD - Rifle Division
    RC - Rifle Corps
    TC - Tank Corps
    TD - Tank Division
    AT - Antitank
    SPG - Selfpropelled Gun
    RR - Rail Repair
    Cav - Cavalry
    Mech - Mechanized
    Inf - Infantry
    Amd - Armored
    Mot - Motorized
    Eng - Engineer(ing)
    Bde - Brigade
    Reg - Regiment
    Btn - Battalion


    WARNING: LARGE IMAGES; BE AWARE

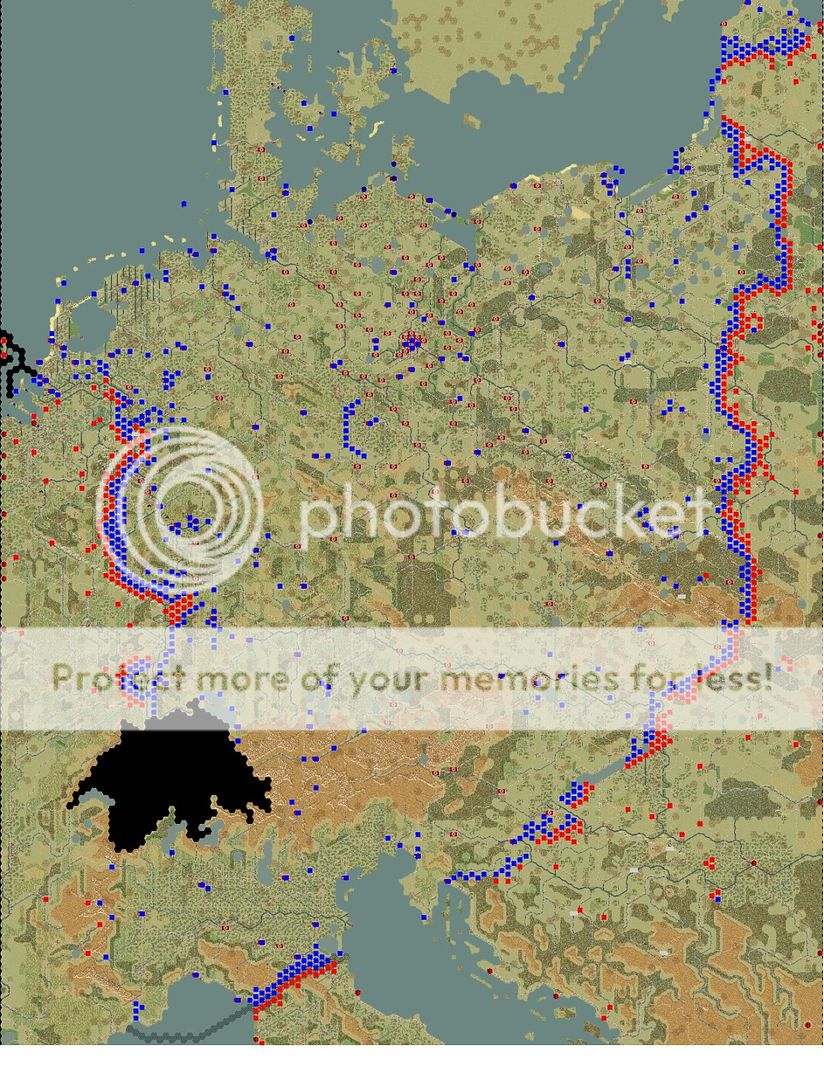
    Game Map and Frontlines as of Now:

    Spoiler Alert, click show to read: 


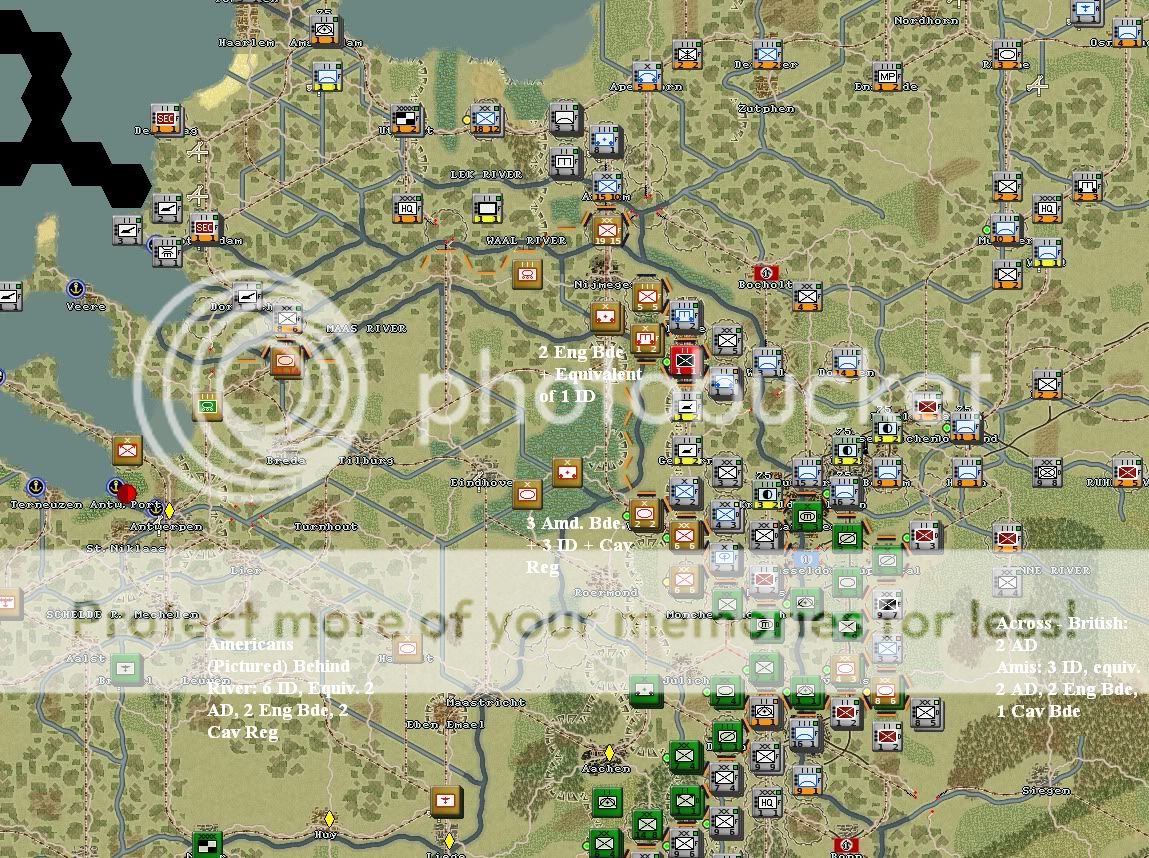
    Netherlands:

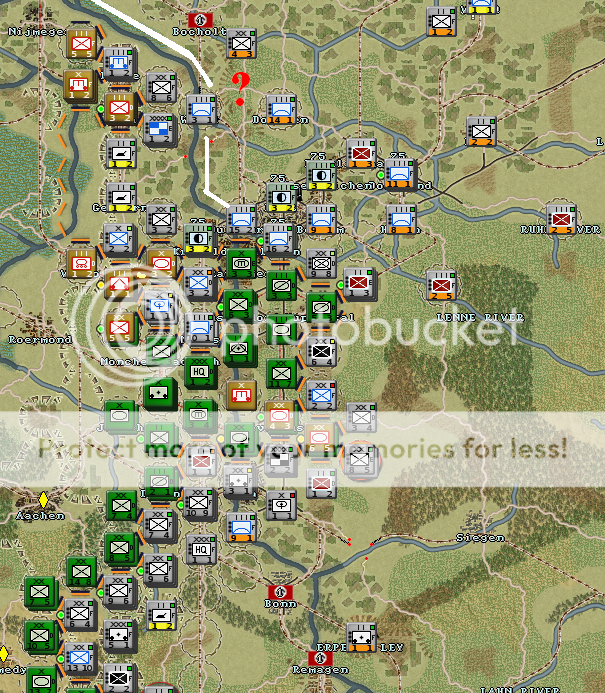
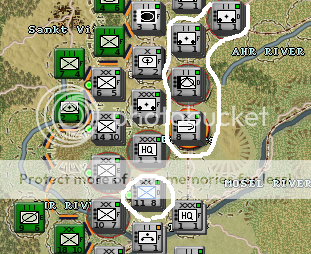
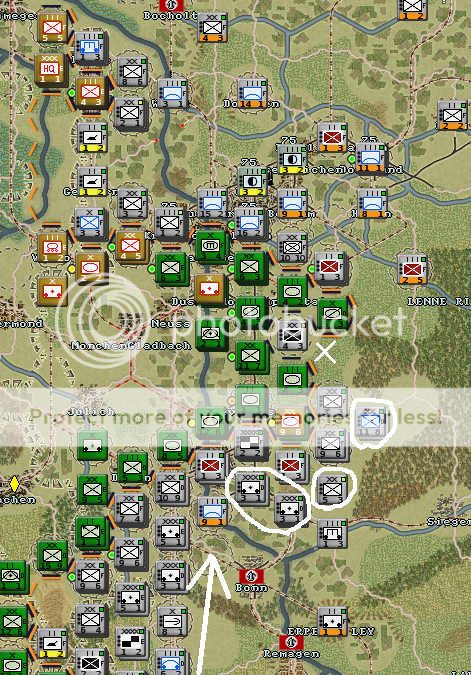
    The Allies have crossed the Rhine here in force after a breakthrough a week ago. Back in December, after I failed to launch the Battle of the Bulge, the Americans attacked strongly here and were repulsed. Unfortunately, some British corps were activated and gave me a lot of grief. Thankfully, the rest of the Commonwealth units will not be released until late March, at which point I will abandon the Netherlands and hide behind the Rhine. The Ruhr factories aren't under immediate threat, but the situation is developing poorly, and if he strips other parts of his line to exploit this gap...

    Spoiler Alert, click show to read: 


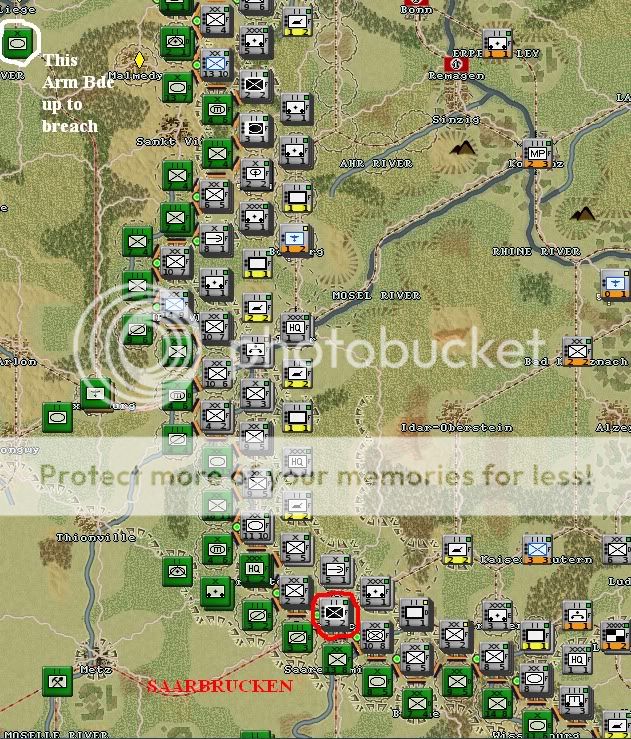
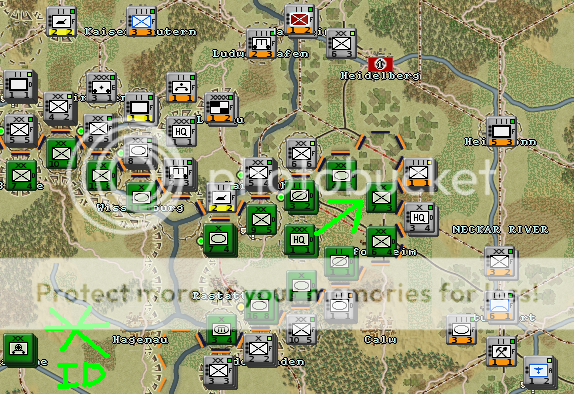
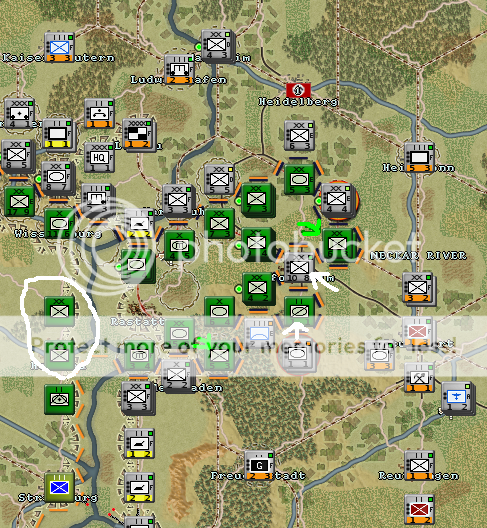
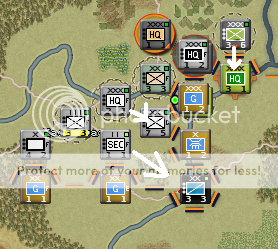
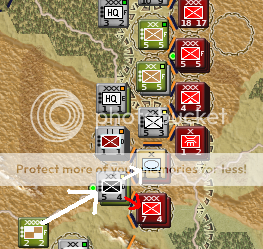
    West Front 2: Mostly quiet here, except for the south. In December and January, there was brutal fighting around Saarbrucken. Eventually, the Americans gave up. Many units have been moved from this sector to one of the two breaches in the West Front. Remaining (pictured) are: 9 ID, 3 AD, 4 Cav Reg, 3 Eng Bde, 6 Arm AT Btn, 1 Amd Btn.

    Spoiler Alert, click show to read: 


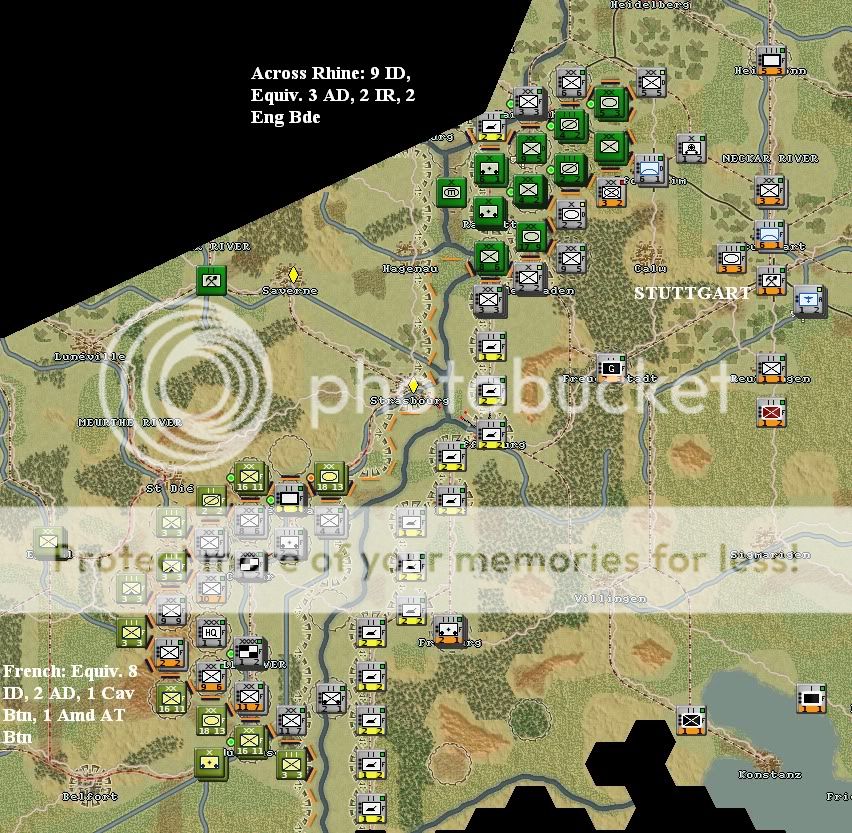
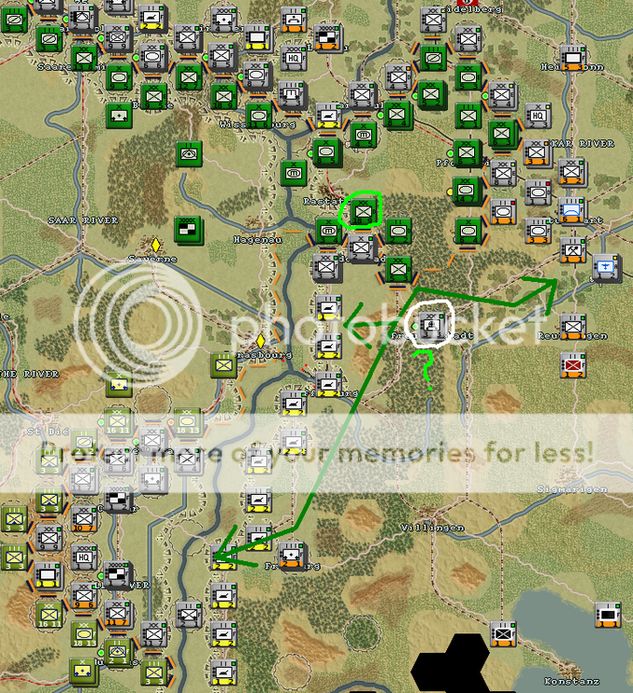
    West Front 3: Just south of Karlsruhe, a few kilometers west of Stuttgart, has been another massive crossing over the Rhine. This one is actually bigger than the aforementioned. Much bigger. Oh my. The Free French, at least, are keeping out of the way. They aren't all that strong, either. Maybe later, when they activate, I can quickly beat a withdrawal to the Rhine. Replacements for French units are very low, I hear.

    Spoiler Alert, click show to read: 


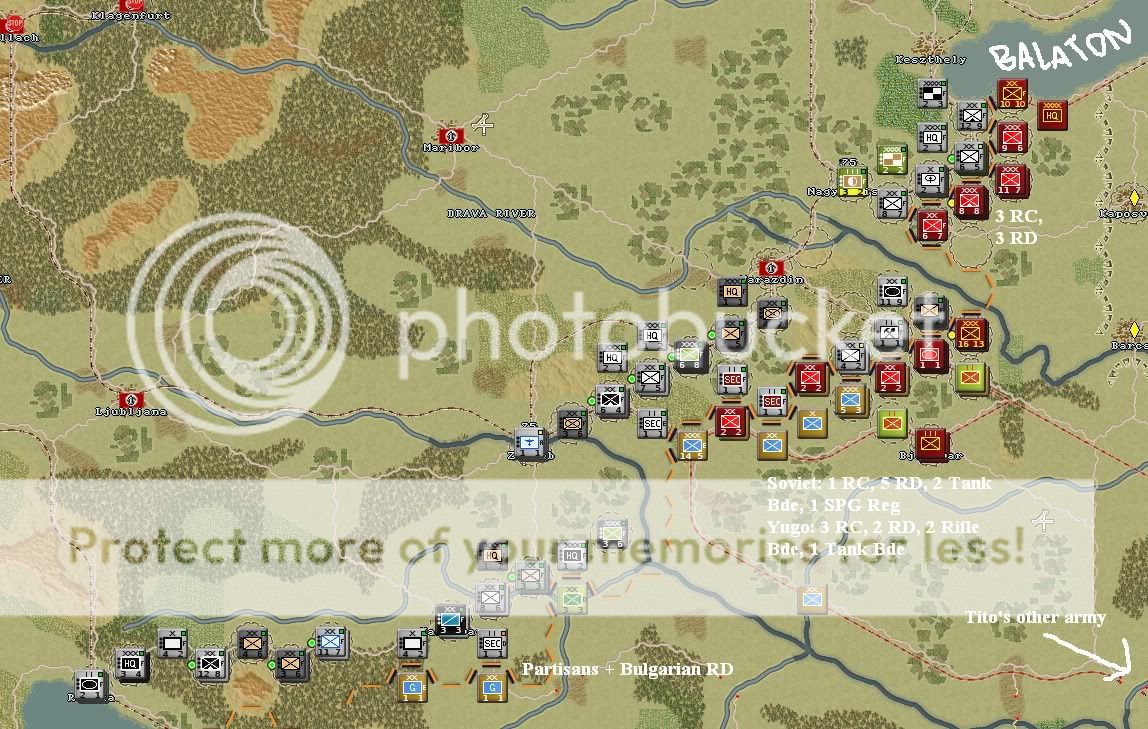
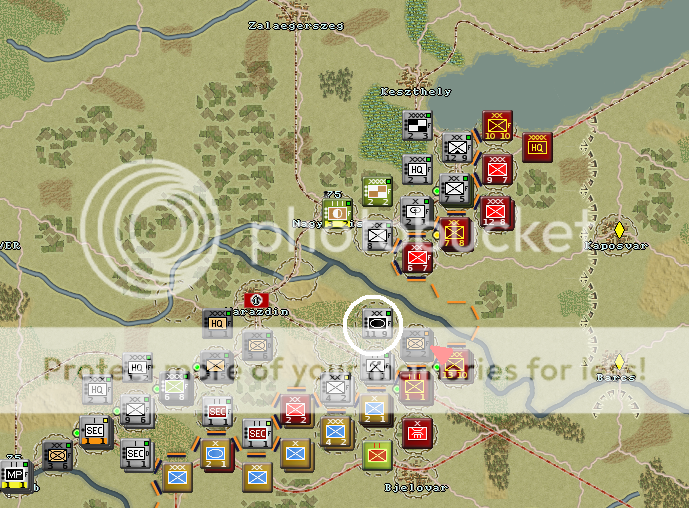
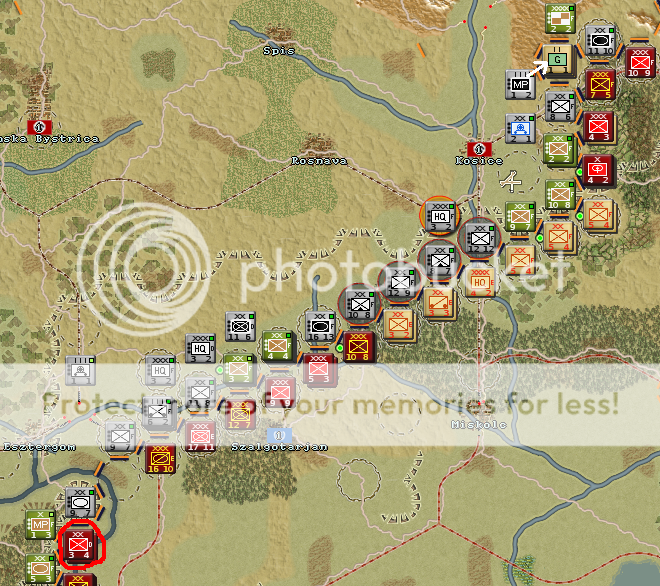
    Yugoslavia: I fell back to my current positions in December. For a week in early January, I tried to surround Tito's army in a trap, but was tricked myself. Not much of note occurred in the last month. I am facing here mainly Tito's PLA, some Bulgarians and a couple token Soviet rifle corps. Beside what he has in the front, Tito has another full army in the mountainous interior of Yugoslavia. I'm not sure why he's holding it back. Overall, my position here is quite secure.

    Spoiler Alert, click show to read: 


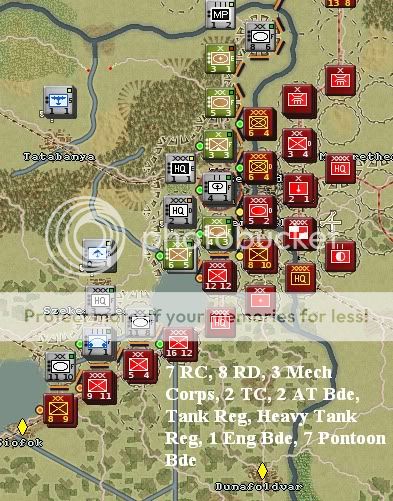
    Budapest: This has been the site of a grueling battle of attrition. For a month and a half, I held the entire city. In the last few days, however, I have been forced to abandon Pest and retreat behind the Danube. Everyone here is exhausted and depleted. Of course, I must hold here. A defeat would lead the Hungarians to lay down their arms and/or defect to the Soviets, something that would cripple me along half the Eastern Front.

    Spoiler Alert, click show to read: 
    [IMG]


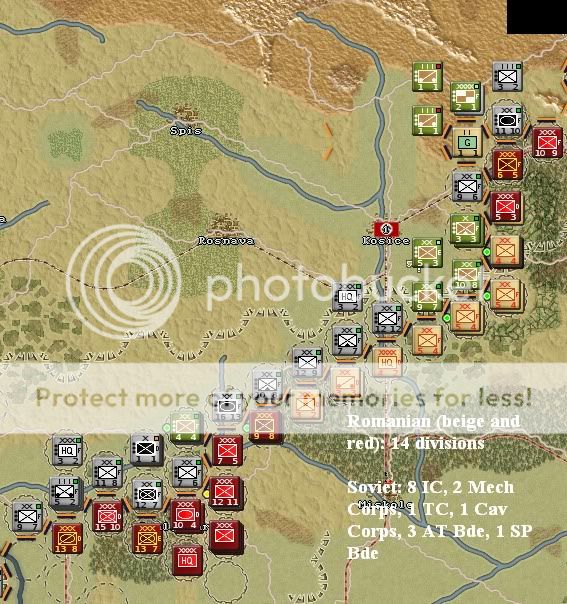
    Hungary: Pretty ok. The enemy is not strong here, and I've held my ground everywhere except along the flanks, where I was pushed back a few 10s of km.

    Spoiler Alert, click show to read: 


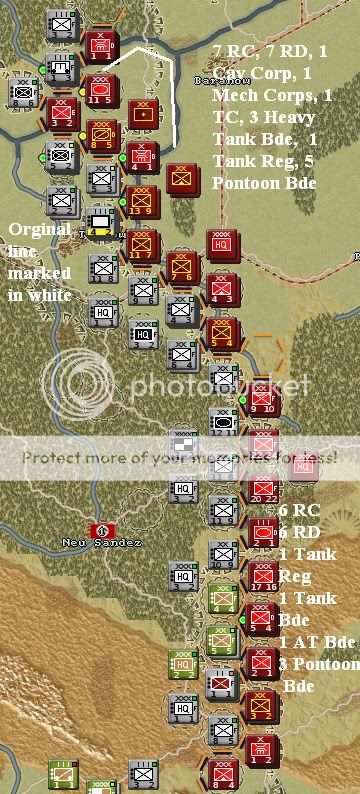
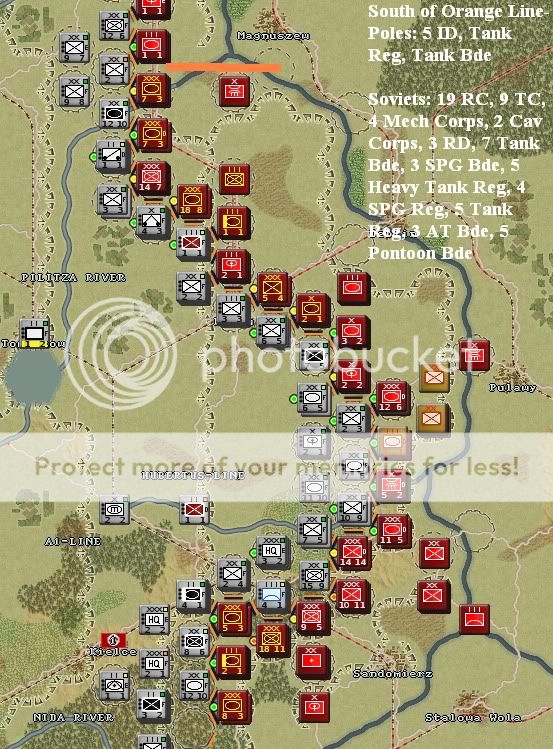
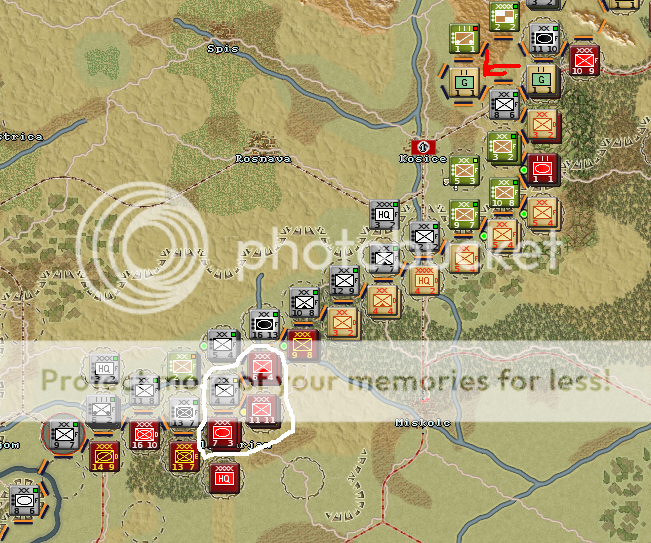
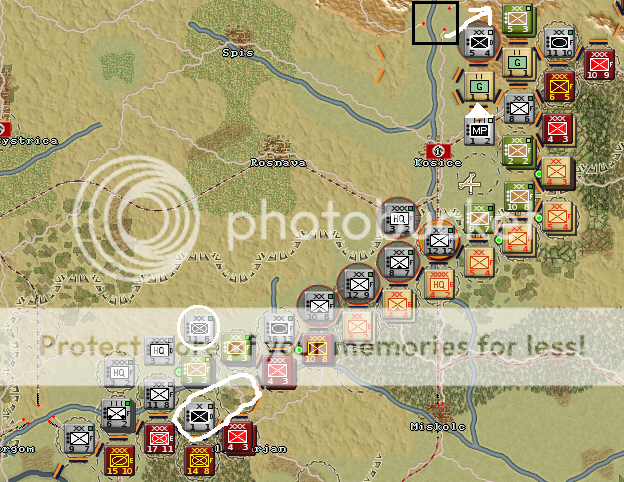
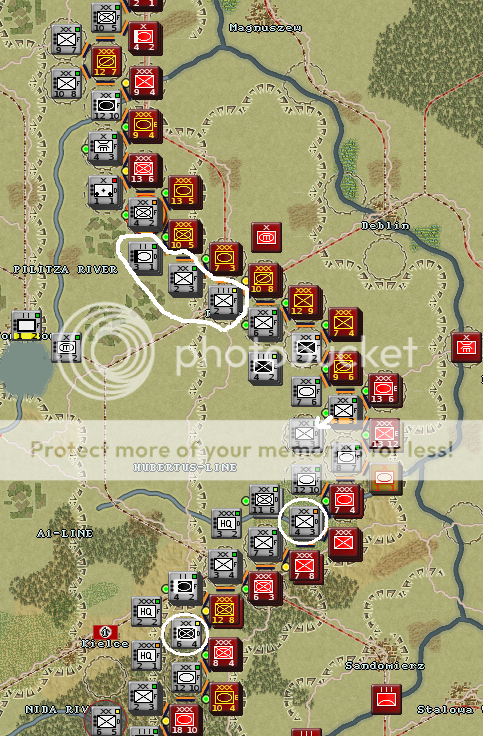
    Poland 1: Here, the middle area saw the greatest success. All Soviet assaults were smashed. At the bottom, I have stood my ground, giving up only 2 or three hexes. The Soviets have been concentrating here; the defenders are pretty chewed up. At the top, a Soviet bridgehead allowed them to drive me back from the river (marked) and swallow up a very small pocket. Stable for now.

    Spoiler Alert, click show to read: 


    Poland 2: In this sector I was pushed back a ways. My line up until mid-January was along the Vistula River, from top to bottom. Thankfully, I've usually been able to bring in reinforcements in time to set up defense in depth. There are several weak links in my line, and there is a preponderance of Guards armies in the area, but I'm not facing catastrophe here as of now.

    Spoiler Alert, click show to read: 


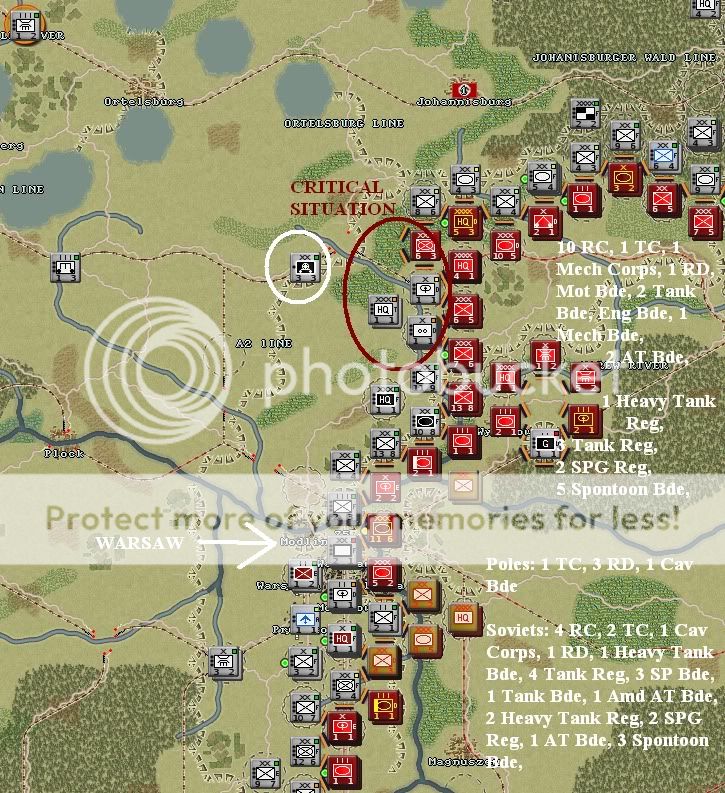
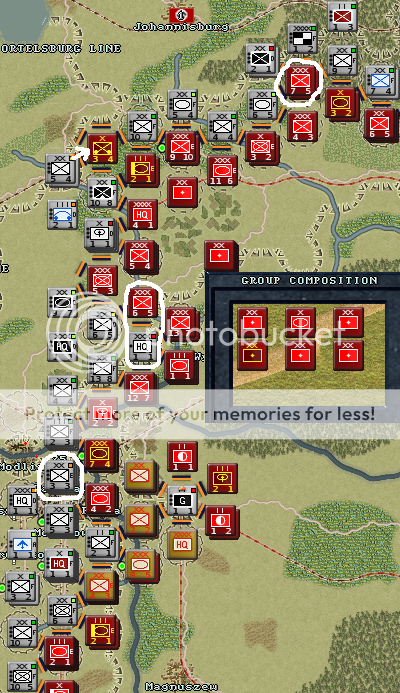
    Poland 3: In this sector, many important bridges have been blown by Soviet bombers. I am working furiously to repair or replace them. This is especially critical for the northern reaches, which are cut off from reinforcements and rail supply.

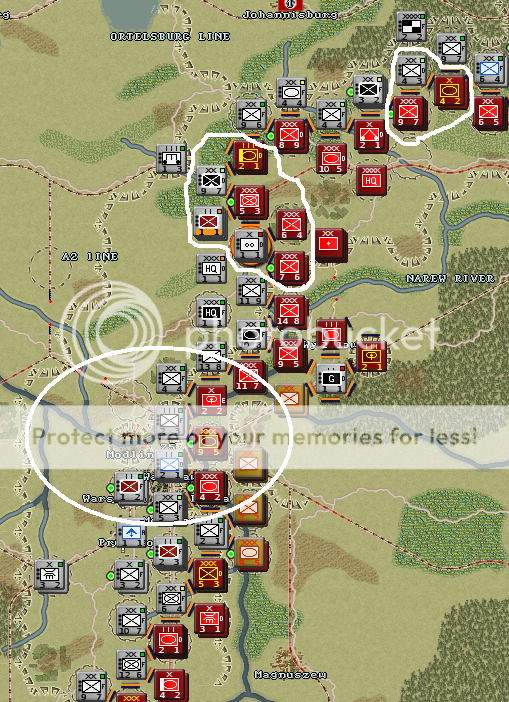
    You might have noticed that this is Warsaw. Warsaw is hanging on by the tetherhooks. It's being hit hard. Soviet fighter cover is thick here. Only my jets have survived the last month. In the north, a big hole has been blown through my line. Though the Soviets can't easily exploit it - he seems to lacks reserves - they can definitely roll down my weak line all the way to Warsaw if I can't do something. Due to my low rail transport, I have only been able to rail in the one indicated division.

    Spoiler Alert, click show to read: 


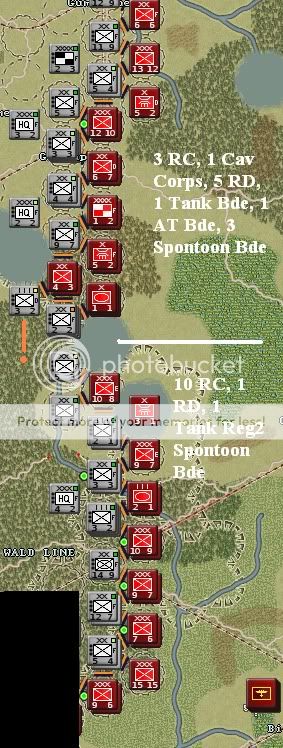
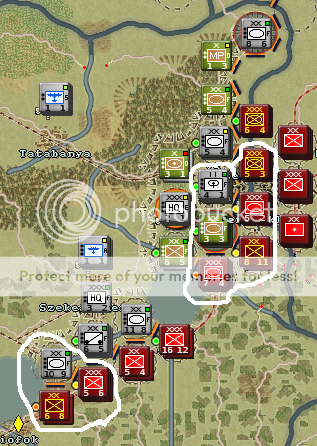
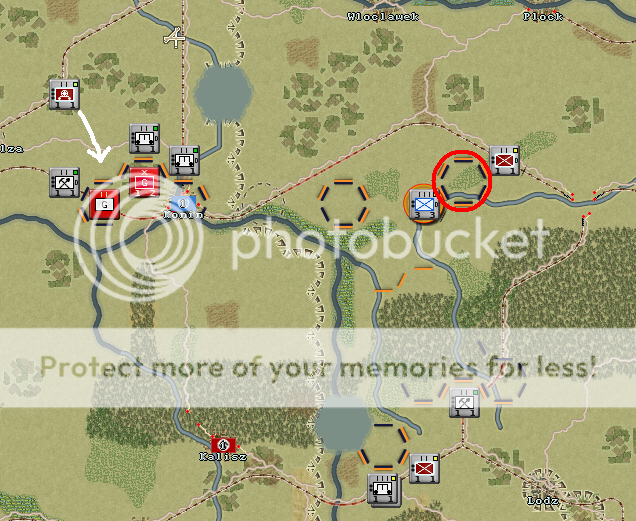
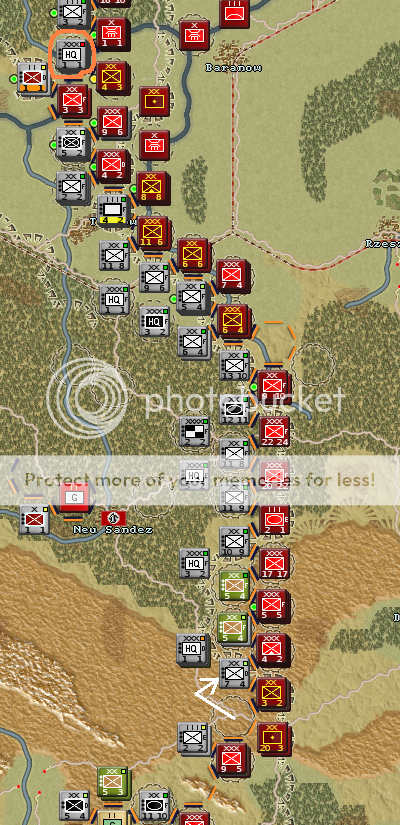
    Poland 4: The line here is solid everywhere except the very middle - between the two small lakes. I have few men there, and the Soviets have just moved in 2 more divisions. I am at the breaking point. A breakthrough there would endanger the entire southern half of the asector. Unfortunately, I don't have the transport assets to send more than a token relief force.

    Spoiler Alert, click show to read: 


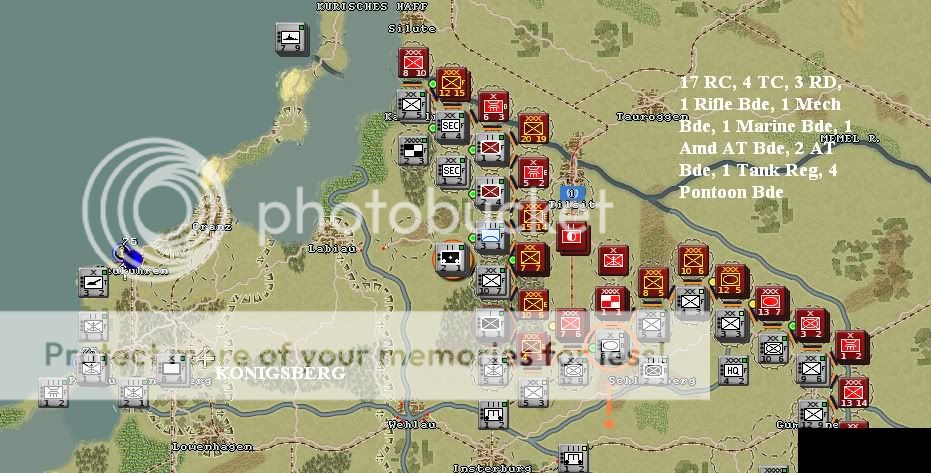
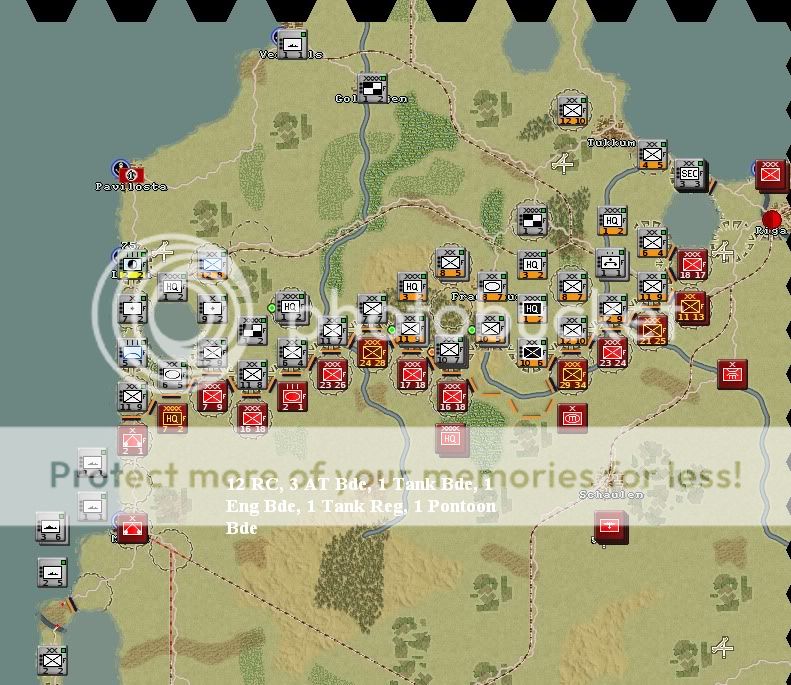
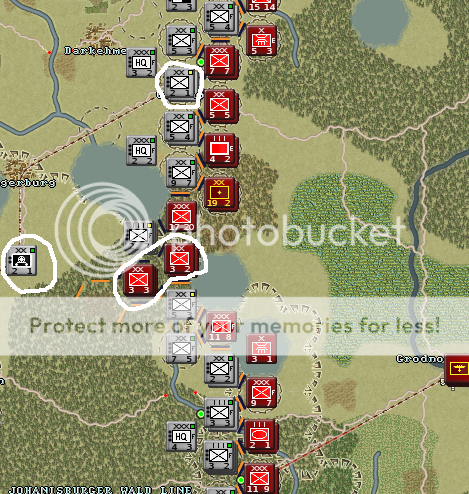
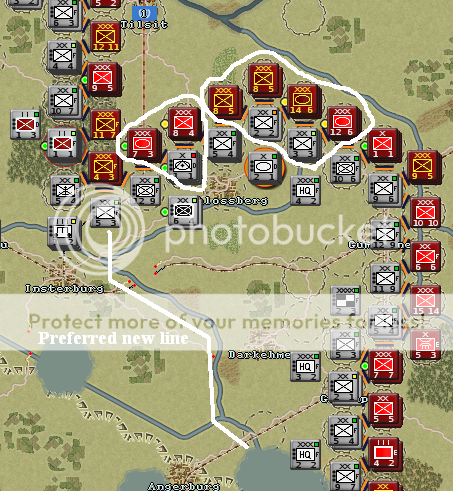
    Prussia: As you can see, I have been forced back from the river almost everywhere. A steady influx of reinforcements, however, has allowed me to erect a formidable defense. The Prussian port Neukuhren, north of Konigsberg, has been invaluable. I have shipped in units from Kurland and Denmark to bolster my force. Of course, the Soviets have also shifted an army or two away from the Baltic. Consequently, in one troubling spot (orange circle) the Soviets oppose me with 4 rifle corps and a tank corps. Another RC is in reserve and may be commited there too.

    Spoiler Alert, click show to read: 


    Kurland: Worthless piece of land. As soon as Hitler lets me, I'll ship out half a dozen divisions. What I have is more than enough to fend off with the Soviets, who have depleted themselves in the sector to beef up the one below.

    Spoiler Alert, click show to read: 


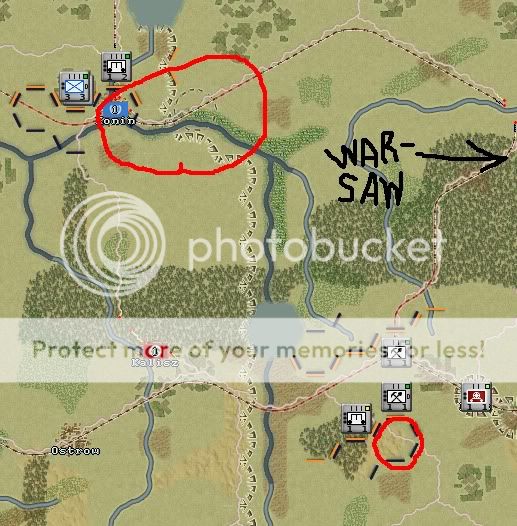
    Polish Interior: Just when I thought I had eliminated the partisan scourge, a few more revealed themselves and blew a couple major rail bridges. Anti-partisan TF consists of 2 Pioneer regiments, 2 RR Pioneer battalions, 2 infantry battalions, and an infantry regiment.

    Spoiler Alert, click show to read: 


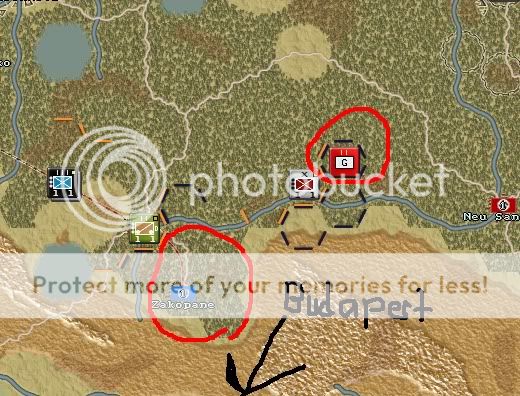
    Zakopane: I seem to have rounded up all anti-Nazi Hungarian partisans except for a few around Zakopane (which, yes, is technically in the southern tip of Poland). I have a few units there equivalent to 2 brigades, maybe.

    Spoiler Alert, click show to read: 


    Berlin: This is where most of my reinforcements show up. Currently, I have 6 ID, a Pz division, and a mechanized division sitting around here. I have other units doing the same elsewhere in Austria and Czecholovakia. This backlog is due to the difficulty of transporting men over long distances. Allied interdiction, I suppose.

    Denmark: I have an infantry corps garrisoned here. Eventually, Hitler will release it for whatever duties may need to be fulfilled at that point.

    Air: For the most part, I seem to have achieved air parity. End of turn Air Superiority was 35-43 in the Allies' favor. I have lost 25 planes for 122 so far today. From the old enemy loss report (c. January) that I managed to acquire, I can deduce that the British have been mauled, the Americans given a broken nose, and the Soviets slightly winded.

    Italy: Not yet.

    ____________________________________________________

    Note: Enemy OOB details are minimums, taken from what I can see. Fog of War is hiding some.

    Correction: I appear to have written "spontoon" instead of "pontoon" in some of the screenshots. I must have been thinking of Ancient Greece or something.

    Thoughts? Demands?
    Vitiate Man.

    History repeats the old conceits
    The glib replies, the same defeats


    Spoiler Alert, click show to read: 


  2. #2

    Default Re: Gotterdammerung - A German WW2 DAR

    Turn 58 (2/11/45)

    Berlin: Reinforcements today are a reconstituted Volksgrenadier Div, Volksturmm battalion from Gransee, and the 512 sPzJ Abt. in Austria.

    Air: Stormy weather in much of Germany. A total of 10 aircraft have been shot down so far today (both sides).

    Netherlands: The situation has of course worsened. I may need to consider a full pullback of my remaining forces north of Essen behind the Rhine. Unfortunately, I don't have enough units to cover all avenues of approach, so the Brits could eventually cross with pontoons over some undefended portion at their leisure, if they take a bit of time to probe..

    I estimate that 2 or three divisions would be required to stablize this sector.

    Spoiler Alert, click show to read: 


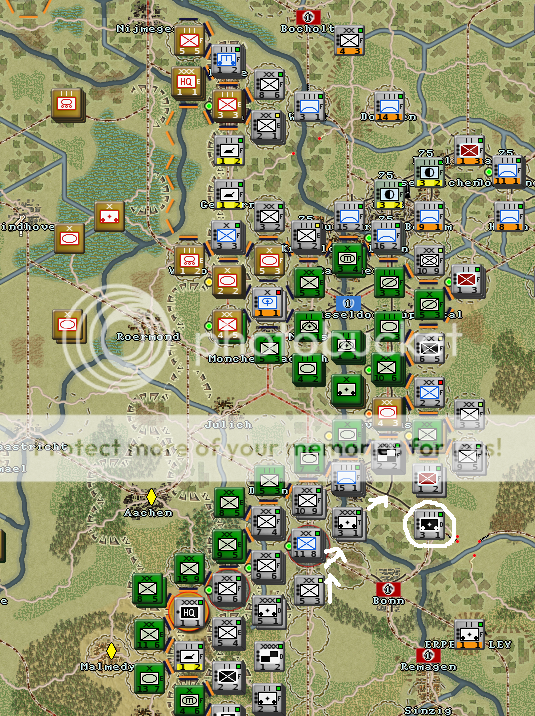
    West 3: The bridgehead - if it can still be called such - has further expanded. A couple of my incoming divisions were beaten up. I would need at least three more to stabilize this sector. The orange circle labels what appears to be an entrained US ID. No doubts about its destination.

    Spoiler Alert, click show to read: 


    Yugoslavia: Note that there is a small battle unfolding on the river-side flank. That Guards Rifle Corps is spearheading assaults on a Croatian position. Though I wouldn't bet on it holding for even another day, the decrease in the corps' stats is noteworthy. Also, check it: behind the Croatians is Das Reich in a fortified position. Das Reich is always good insurance, even if it lost at least a third of its strength in the major fighting that took place in the sector in January.

    Spoiler Alert, click show to read: 


    Budapest: The 1 PzDiv on the Balaton flank has easily repulsed a large Soviet probe. Three rifle corps and a division were involved. Though only two are visible in the last update (at the tops of their stacks), check the ATK-DEF reductions for yourselves. Silly Ruskies - you can't attack panzers without tanks of your own! Soviet attempts to infiltrate Buda have also been stopped, though at non-trivial cost.

    Spoiler Alert, click show to read: 


    Hungary: Notice the ID (actually a Jaeger division). It was hit hard. If it breaks, I will have to pull back the adjacent Mech Div (SS Polizei), as its position would become untenable.

    Notice the guerilla battalion trying to infiltrate me through the gap in my line. A Hungarian Hussar regiment puts it in its place, though their air support takes out an infantry and a tank platoon.
    My fighters did swoop in and shoot down some of their bombers, at least.

    Spoiler Alert, click show to read: 


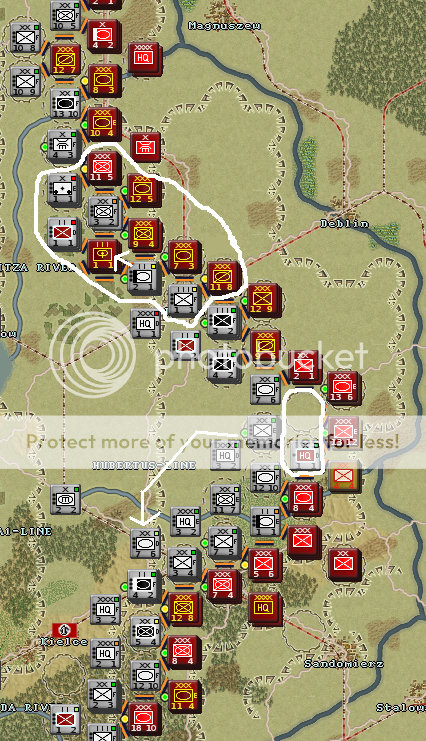
    Poland 1: At bottom, a rifle corps is moving to outflank my line. I had to commit my newly arrived reserves here, though I'm not sure what these scraps can do against a Soviet corps, no matter how depleted. I would use my threatened ID to flank the flanking corps in that attack, but that would leave it vulnerable to counterattack from the front proper. I jhoped that this wouldn't end badly.

    Unfortunately, it does. This is a horrendous defeat. I lose a battalion's worth of men, and the Hussar regiment (including its tanks) - to the enemy's platoon. Dozens of planes are downed on both sides. Turns out that the weather where these two encounters took place was fine. A definitive figure for aerial losses: 22 for 50.
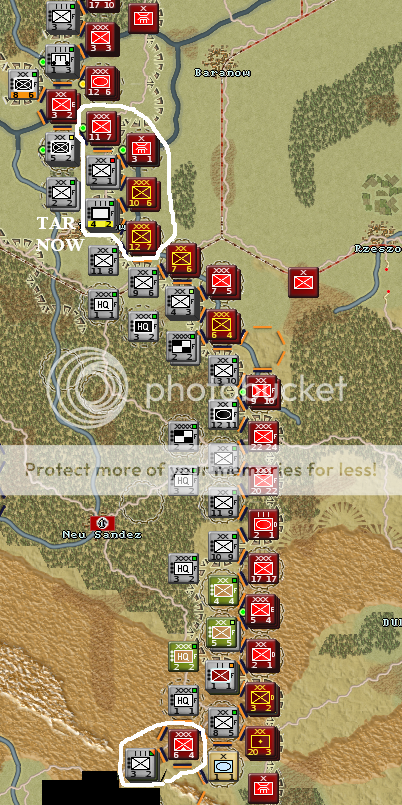
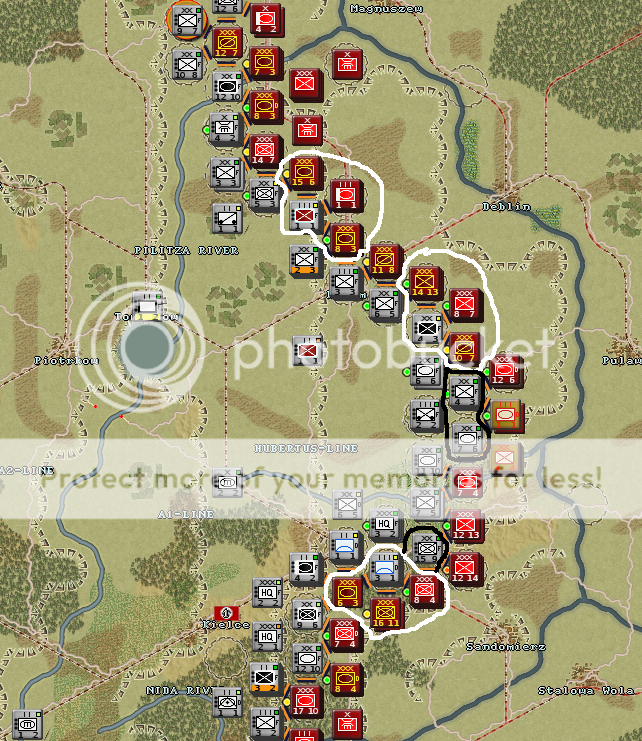
    At top, a lot is going on. Tarnow was attacked by opposing Guards RC, but held up nicely. Adjacent to it, the 544 VG division was badly mauled, but in the end stood fast. There's something else, but it can wait for a couple of days, I think. I would very much like a fresh division here.

    Spoiler Alert, click show to read: 


    Poland 2: The areas in white are trouble spots where I am being hit hard. Black are units that may have to be pulled back soon to shorten the line/preserve them. The Soviets have tons of AFV regiments and brigades in the sector, on top of having 16 Guards corps of various sorts (most having extensive organic armor assets of their own). Another factor is the exceptional health of these units. The Soviet supply network is healthy in this sector, as it is in Sector 3, NE Poland, and Kurland. A couple of divisions extra here, and I'd be fairly confident.

    Spoiler Alert, click show to read: 


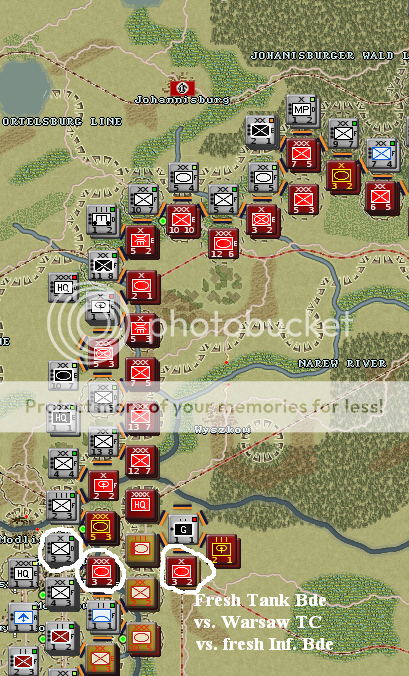
    Poland 3: Ah me! Warsaw was rocked by a cataclysmic attack. By the time it petered out, only a battalion was left in its position. Now, I've improvised a hasty defense consisting of an infantry brigade and 26 SPGs. These are facing two tank corps, a rifle corps, and two rifle divisions. They haven't advanced into the breach in the north, but given the rough handling the Warsaw-ward flank guards have been receiving, the gap may soon expand to 4 hexes, although now that the relief division has settled in, only one hex is open. For the moment.

    I badly need a division for Warsaw, and 2 divisions for the gap. Last of the engagements here was a small probe that pushed an infantry division from its trenches. Nothing too serious, I hope.

    Spoiler Alert, click show to read: 


    Poland 4:They've done it. They've penetrated past the isthumus there. 2 rifle divisions and a tank brigade. Also, he at some point sent a sizeable rifle corps to guard the flank of the breach. I desperately need a division here.

    Spoiler Alert, click show to read: 


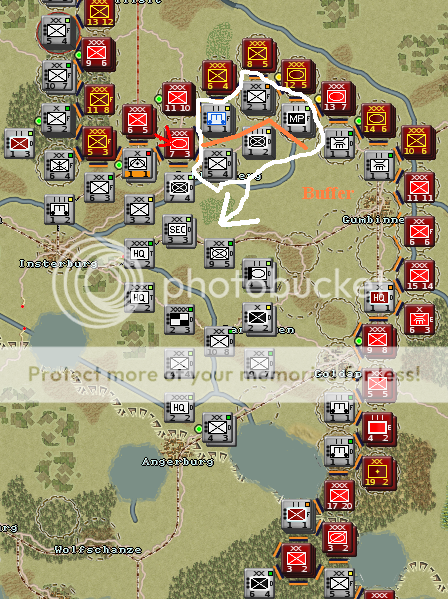
    Prussia: A Panzer division (with only 3 dozen tanks) embarked at Danzig and was shipped to Konigsberg. The hot spot I mentioned last time has grown more serious. That reserve corps was comitted, and the 5 RC and 1 TC attacked again. Both sides seem to have suffered outrageous casualties. What is worse, another RC from the riverbank (on the left flank, the only place where my line has not had to shift) has slunk away, to parts predictable. Accordingly, the opposite hex is under no immediate threat, so I will shift a security division and an SPG brigade to where they're most needed.

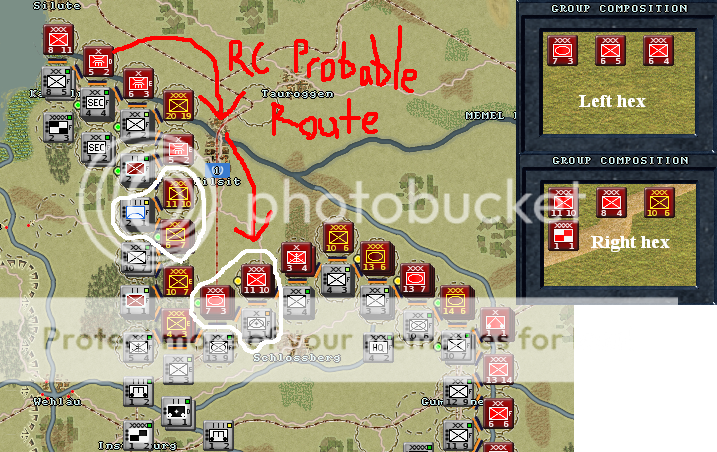
    A piece of good news: Two RC and an RD came against the other indicated hex, SW of Tilsit. It was not nearly enough; the attackers quickly stalled.

    Spoiler Alert, click show to read: 


    I ended up sending my best reserve division from Berlin to Stuttgart in West 3. Totaled, I would need at least a dozen divisions to stabilize the situation on all fronts, for perhaps a week. Even if I had unlimited rail transport, I would only be able to fulfill half of that.

    Audience, won't you say a word to the Muse?

    Spoiler Alert, click show to read: 
    Uh, no mechanics this time, I suppose. Anything specific about them you would like to know?
    Last edited by Montmorency; 10-21-2011 at 00:24.
    Vitiate Man.

    History repeats the old conceits
    The glib replies, the same defeats


    Spoiler Alert, click show to read: 


  3. #3

    Default Re: Gotterdammerung - A German WW2 DAR

    Thanks for the update. I'm reading this in suspense. :)
    Friendship, Fun & Honour!

    "The Prussian army always attacks."
    -Frederick the Great

  4. #4
    Shadow Senior Member Kagemusha's Avatar
    Join Date
    Mar 2005
    Location
    Helsinki,Finland
    Posts
    9,596

    Default Re: Gotterdammerung - A German WW2 DAR

    Great stuff!Thanks for posting this DAR.Keep it coming.
    Ja Mata Tosainu Sama.

  5. #5
    Oni Member Samurai Waki's Avatar
    Join Date
    Sep 2004
    Location
    Portland, Ore.
    Posts
    3,925
    Blog Entries
    1

    Default Re: Gotterdammerung - A German WW2 DAR

    Definitely a nail-biter!

  6. #6
    still making Bowser jokes Member Roach Kill Champion, Donkey Rocket Champion Double A's Avatar
    Join Date
    Feb 2009
    Location
    Moonwell Pass
    Posts
    4,606
    Blog Entries
    4

    Default Re: Gotterdammerung - A German WW2 DAR

    Invent nukes.

  7. #7
    Tuba Son Member Subotan's Avatar
    Join Date
    Sep 2007
    Location
    The Land of Heat and Clockwork
    Posts
    4,990
    Blog Entries
    3

    Default Re: Gotterdammerung - A German WW2 DAR

    Do you expect to be able to push the Allies back and avert the Götterdämmerung?

  8. #8

    Default Re: Gotterdammerung - A German WW2 DAR

    I can hardly expect to survive the winter.

    Once there's a full breakthrough, that's it. The enemy will run wild throughout the heartland and all I will be able to do is sit in place and hope my doomed armies delay them long enough to achieve a half-way historical end date.
    Vitiate Man.

    History repeats the old conceits
    The glib replies, the same defeats


    Spoiler Alert, click show to read: 


  9. #9

    Default Re: Gotterdammerung - A German WW2 DAR

    Episode 4 - Dealt a Bad Hand in Poland

    TURN 60 (2/13/45)

    BERLIN: Reinforcements are an ID, an IB, and an Inf Btn. Good news! The US 28 ID has withdrawn to parts unknown. The TF Linden/42 ID has disbanded.


    POLISH INTERIOR: A horde of partisans has materialized near Konin. However, they are in a bad position and may be trapped against the river if I move quickly.

    Spoiler Alert, click show to read: 


    NETHERLANDS: The pocket has largely been reduced. There's a diminished battalion with a 50mm AT gun, a StuG platoon, and 6 halftracks. I had the battalion charge a Wolverine battalion. Those who weren't killed or captured immediately actually managed to disable a platoon.

    The first bulge has been evacuated. Almost everyone, including almost all the artillery, is marching north.

    Spoiler Alert, click show to read: 


    WEST 2: Moving out. One of the American divisions has too.

    Spoiler Alert, click show to read: 


    WEST 3: With my position steadily worsening, I had my strongest division in the sector advance into lightly defended Pforzheim. I don't know what I was thinking; it could easily be surrounded now. A retreated ID and Pz Btn attacked a vanguard Cav Btn to improve its position. Air support allowed them to drive it away. Apparently, it is in a sorry state: most of it was mortars and transport vehicles. The only AFVs were 8 M8s and an M24.

    There are 2 ID on the other side of the Rhine. If these are meant to cross into the combat zone, the US will have 12 ID, 3 AD, and the equivalent of a Cav Div in the bridgehead.

    Spoiler Alert, click show to read: 


    BUDAPEST: Both Panzer divisions on the Balaton flank have been attacked. Moderate reductions in both attack and defense, on both sides. Looking at my records, the Soviets have come off worse: most of the reduction is associated with the loss of stockpiled "extra" supplies.

    Some probing around Buda. Soviets aren't doing too well.


    HUNGARY: As predicted, the ID failed. Polizei withdraws to the rear.

    The last Hungarian hex along the line is in danger of collapse.

    The Slovak partisans are being driven back, but reinforcements to the next sector have been delayed by a blow bridge.

    Spoiler Alert, click show to read: 


    POLAND 1: The weakest point in the line was demolished, but the Soviets failed to exploit it. Realzing that the next logical step for the enemy was to attack the other weak point to encircle it, the ID moved against the RC caight in the rear. It was so damaged that it fled back to its own line in headlong rout. Hundreds were captured. Of course, this means the ID loses its defense bonus. And there's still a gap in the line.

    Up top, another bridgehead is imminent.

    Spoiler Alert, click show to read: 


    POLAND 2: SS Nordland and an ID were pushed out of their positions, though they were quickly regained from the vanguard armor. Both have suffered grave losses, such that their effectiveness has been cut nearly in half.

    A bulge here is to be evacuated as well. Preliminaries have begun. This should free up at least a Pz Div.

    Elsewhere, the situation is getting worse even faster. NW of Radom, I have only scraps until the curve in the line.

    Spoiler Alert, click show to read: 


    POLAND 3: Warsaw holds, but the Soviets still have a lot of fight in them.

    Walter Girg has finally gotten into a sticky spot too sticky for him to get out of. His back to main-line Soviet corps, pressed by armor to the front - will he find a way? He did manage to fight his way north, where only a supply column blocked his path. He left a fifth of the trucks burning.

    North of Warsaw, a fresh fortified division was dislodged, forcing Totenkopf to relocate.

    The reinforcement ID engages the Mtr Bde occupying a small breach in the swamps. The Soviets lost about a battalion or two, and 5 dozen aircraft. I was mauled: the division had 2/3 of its assets shredded, and over 2 dozen planes were shot down. It did recapture the position, though.

    East, what was a troublesome situation ended as a crushing rout just a couple of days later. Catastrophe moves swiftly on the East Front. And the West Front too, come to think of it.

    In the Soviet rear, there is a stack of 5 artillery divisions and a tank brigade.

    Spoiler Alert, click show to read: 


    POLAND 4: They're pouring into that breach. An ID from the capital is being railed in, though the situation is equally desparate in many other sectors. I don't think this sector can expect more reinforcements for a few weeks - in other words, never.

    North, at Goldap, my defenses are being overwhelmed. One of the ad-hoc divisions simply vanished.

    Spoiler Alert, click show to read: 


    PRUSSIA: That hex has been attacked again, but the Soviet corps are gaining attack and defense. They are losing less than their replacement rate here. That doesn't hold for my units, unfortunately.

    Two other hexes nearby are being probed by the tank corps. They're not strong enough to last for long. I need to abandon the bulge so as to shorten my line, but all the good defensive terrain is too far away; my men will quickly be caught out of their trenches and cut up.

    Spoiler Alert, click show to read: 
    Last edited by Montmorency; 11-05-2011 at 03:40.
    Vitiate Man.

    History repeats the old conceits
    The glib replies, the same defeats


    Spoiler Alert, click show to read: 


  10. #10
    Peerless Senior Member johnhughthom's Avatar
    Join Date
    Sep 2007
    Location
    Looking for the red blob of nothingness
    Posts
    6,344

    Default Re: Gotterdammerung - A German WW2 DAR

    Good reading Monty, I've never managed to get to grips with HOI and I'm going to come back to this when I try again (when FTM is a bit cheaper) to give me a bit of a hand with some of the nuances. Nice to see I'm not the only AAR writer getting my butt handed to me.

  11. #11
    Guest Member Populus Romanus's Avatar
    Join Date
    Jan 2011
    Location
    Seattle Suburbs
    Posts
    1,335

    Default Re: Gotterdammerung - A German WW2 DAR

    Interesting read, I have never seen a strategy game like this.

  12. #12

    Default Re: Gotterdammerung - A German WW2 DAR

    Episode 5 - Prussian Peril

    TURN 60 (2/14/45)

    AIR: 26 for 54. As is demonstrated, and has been before, Soviet air power makes counterattack a foolhardy proposition.

    BERLIN: 2 ID in reinforcements, though one is battalion-strength.

    ZAKOPANE: Recaptured. Bagged some partisans.

    NETHERLANDS: The SS Lettische there is finished. Quite a shame. It's a significant blow. However, 3 IDs, hundreds of arty pieces and some armored elements are en route. That should be enough to stabilize the area south of Essen. As for the north, in the British sector...

    Oddly, the Amis seem not to have noticed those redeployments taking place. As a result, my divisions slunk away quite peacefully.

    Spoiler Alert, click show to read: 


    WEST 3: Now I've been blown wide open. He did indeed commit 2 fresh IDs just now. I'm not sure whence he got them, though. The southern Siegfried line is now in extreme danger of being rolled down. The Colmar bulge will inevitably be surrounded. I could evacuate it, but a corps would have to be left behind, and the not-inconsiderable French [B]1re Armee will quickly pour over the Rhine and just generally screw me. My best ID must be redeployed from Berlin to this place immediately, for all the good it will do.

    Spoiler Alert, click show to read: 


    YUGOSLAVIA: This Bulgarian ID has been sitting here for a while. Well, I don't want to let them build up overwhelmingly (I know that there are yet more Bulgarian divisions out there, not to mention a full Titoist army), so I'll try to take them piecemeal where they try it. That's why I'm moving to encircle this thing. At worst, I lose some supply temporarily. I seriously doubt he has corps in place to move in force to support this shrimp. Opportunism is all the Germans have to uplift them at this point.

    My Cetniks, while driving out the Bulgarian command, discover that:

    1. They have the army level artillery attached.

    2. There's a Tito-corps in the area.

    Spoiler Alert, click show to read: 


    HUNGARY: Budapest looks OK. A frail division tried to bridge the Danube at a weak point north of the city. I'll try to lure it in. Then again, maybe it will have the same result as the two bridgeheads.

    The SS partisan-hunters pushed the Slovak fighters all the way back to the Soviet front - though losing a company for a platoon - and the relieving divisions finaly moved into -

    Spoiler Alert, click show to read: 


    POLAND 1: They easily pushed a Soviet IC and tank bde away from the road. Twice that has happened. It indicates that the Soviets here are exhausted. It also indicates that those corps are experiencing a critical shortage of infantry. They're mostly MGs, AT rifles, and organic artillery now. The Hungarian ID's attack on a lone tank brigade stalled with serious losses due to air support.

    Quiet elsewhere.

    Spoiler Alert, click show to read: 


    POLAND 2: Bulge evacuated. Penetration by 2 Heavy-tank Regs and an SP Reg. Only a Heavy Pz Abt. survived, so I'll counterattack with it. Obviously, even if it miraculously succeeds it will never hold back the adjacent Mech Corps. But why not? It's not like it matters at this stage. Over 50km of front are flimsier than clapwood and will fall apart momentarily. The hex in question is a little cloudy, so maybe the Sturmoviks will keep away. Maybe 22 Tigers can figure something out. In the end, the battle is an ill-advised failure: 8 Tigers for 2 IS-2. Air support did show up.

    This is it, I think. This is the schwerpunkt. This is where I will break first.

    Spoiler Alert, click show to read: 


    POLAND 3: Warsaw is Erebus, but I'm cannibalizing other parts of the line to reinforce it.

    Walter Girg lives, but is still trapped.

    Spoiler Alert, click show to read: 


    POLAND 4: Nothing left in that hex, but no Soviet advance.

    PRUSSIA: Breakthrough. Subsequent measure.

    Spoiler Alert, click show to read: 
    Vitiate Man.

    History repeats the old conceits
    The glib replies, the same defeats


    Spoiler Alert, click show to read: 


Bookmarks

Posting Permissions

  • You may not post new threads
  • You may not post replies
  • You may not post attachments
  • You may not edit your posts
  •  
Single Sign On provided by vBSSO