Page 27 of 51 FirstFirst ... 1723242526272829303137 ... LastLast
Results 781 to 810 of 1522

Thread: Pics & History of your Empire

  1. #781
    " Hammer of the East" Member King Kurt's Avatar
    Join Date
    May 2005
    Location
    The glorious Isle of Wight
    Posts
    1,069

    Default Re: Pics & History of your Empire

    King Kurt's Almohad campaign continues!
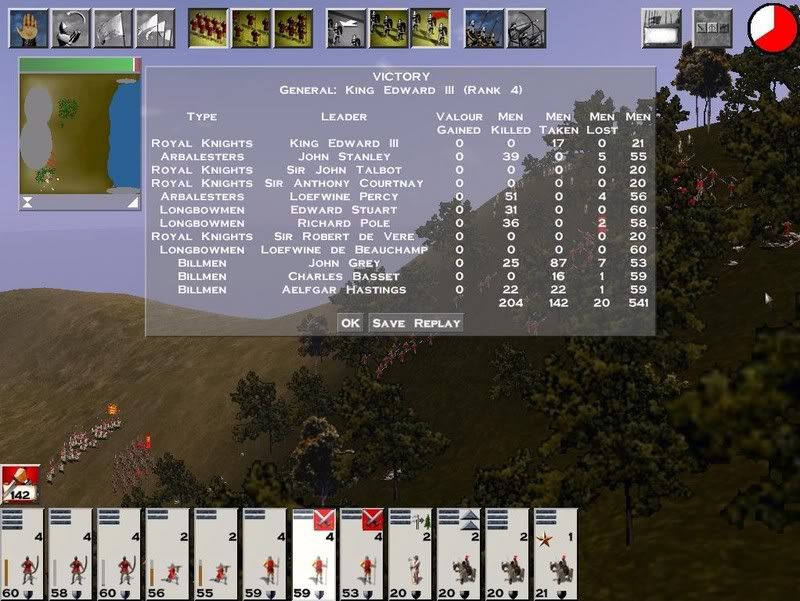
    Following the advice of Grand Visier Martok, I decided to sort out the Sicilians next - a faction I know well as I have just finished a campaign with them in the same period. I stabilised my northern border of Aragon and Castile - I have left the Spanish as a weak force in Navarre as a barrier and to prevent reemergances and put a resonable defence force in both. At the same time I gathered the Invasion force in Valencia - about 3 stacks under a 4 star prince - mainly AUM, plenty of missles including a merc unit of longbow, gulam and gulam bodyguard. I like mercs to give me some units which I can't raise myself - and always use it for seige artillery etc. Well the Spanish tried a last hurrah - attacking castile again. They were seen off and next turn I invaded Sicily - no sign of Sicilian boats, most strange, but they are at war with the Italians, so maybe they had sunk them?? - despite the presence of their 8 star King and a resonable force they scuttled off to naples. Same turn, a storm sunk the dhow in Striats of Sicily so we were temporaryily cut off. That was sorted next turn, but the Sicilian King came back with his friends. So, outnumbered, but not too bad, we slugged it out. I deployed a solid line of 6 AUM - valoured up a bit and silver shields - and a merc chiv sargents backed by 1 longbow, 2 arbs and a pavaise xbow. Add some murabtin javs, some gulam cav and a mtd xbow and you have it - all deployed on a hill with a load of reserves, cav first, to come on. The AI tried its normal trick of a outflank, but I sent my mounted xbow to the heart of their army to skirmish and pulled them on to my position. They had a lot of good cav with spears, militia etc - but no missles. My missles targeted the cav, wearing it down before contact, then it was down to a mass melee in around my position. A long slog, but they cracked when the King died - not long after the army fled. I suffered a bit - about 300 casualties - but the Sicilian army is broken - so it is off to Naples next turn.
    My first big battle with the Almos - those AUM are good - they just grind out a result everytime. I needed some Saharan cavalry for pursuit but otherwise the mix seems right. I'm tempted to have a pop at the Pope, but don't want to mess up my trade, so I will let them be I think.
    "Some people say MTW is a matter of life or death - but you have to realise it is more important than that"
    With apologies to Bill Shankly

    My first balloon - for "On this day in History"

  2. #782
    Wojewoda Pruski Member Loucipher's Avatar
    Join Date
    Dec 2005
    Location
    Province of Prussia
    Posts
    159

    Default Re: Pics & History of your Empire

    Quote Originally Posted by Martok
    That's precisely what I'm doing. In fact, I actually had to restart my campaign last night, as I realized I'd accidentally started the game in Domination mode the evening before.

    I also set the level to Hard this time, which is fairly unusual for me. (I have a general tendency to play on Normal, as I'm only a fair commander against the AI. ) I usually do so well with the Eggies, though, that I decided I should really up the difficulty a bit for when playing them. So we'll so see how things go.... [crosses fingers]
    Quote Originally Posted by macsen rufus
    Name the devil and appear he will

    I had a strong resolution to get some sleep last night. It failed. Eternal damnation on thee, Martok, for what ye hath done to me I succumbed to the temptation you so trickily incited, and played my newly started Fatimid GA campaign until 4 a.m.
    Anyway, here's how it went.

    I have immediately noticed that the Fatimids in XL are in much more favourable position than in the vanilla version. So, I built on that advantage right away Egypt started churning out troops immediately, while all provinces began teching up.
    After just four turns, I had Border Forts and Inn in every province, so with lots of gold I could think of flooding my enemies with mercenary armies. It took me just a few more years before my newly formed army ramshackled into Lesser Armenia (OK, I gave that bastid Reuben guy one chance to avoid destruction, but he kicked my emissary out through the front door )
    Well, destroying the Armenians actually took some pains. Those Nixarars are really just Katatanks by different callsign, and equally adept at dishing out massive beating to boot. Took me three attempts (which revealed my ineptitude as a Egyptian troops commander to the fullest extent) to root them out, and finally, I have overwhelmed them with sheer numbers. Well, when fielding mercenaries, one gets that warm fuzzy feeling that every casualty makes it a bit easier on your coffers, aye?
    Anyway, by 1097, the Armenians were history. What's more important, the example they were made of served very well to induce the Seljuks into signing an alliance with me. I was really content to hear my emissary report being welcomed with honours at the Sultan's court.
    With the heart-warming presence of a co-religionist ally on my back, I chose to expand towards the North African coast (and the rich mines there I planned to add to my powerful realm. A quick raid along the coast led me as far as Algeria, but then the disastrous news came: the Seljuk Sultan chose them Almoravid dogs over me! Well, I have had armies at the ready should Turks try to play coy with me (in past games in vanilla, they've had a long history of backstabbing me), so it came only as a moderate discomfort. In the meantime, I continued to roll east, eventually reaching all the way to Morocco.
    Then, the Seljuks went predictable. Their detachment invaded Arabia (one would think there are tastier targets around, but let them be my guests ), initiating hostilities against my kingdom and beginning their slip down the road to nowhere. I retreated my garrison to the fort. I already had one Jihad marker, so immediately, a standing Jihad army set forth to reclaim what was lost. Before it reached the destination, another one followed, as another Jihad marker appeared. In the meantime, I have hit all three Seljuk provinces I could reasonably afford to hit (Rum, Edessa and Syria) with everything but the kitchen sink - only left the garrisons in place to prevent rear area rebellions. My Jihad armies eventually reclaimed Arabia, and then went north through Mesopotamia, Edessa and Armenia. In the meantime, Lesser Armenia was churning out Saracen Infantry and Armenian Heavy Cavalry (at last, some troops I'm more adept at using ) which carried the brunt of the constant back-and-forth raiding of Rum and Anatolia. In the space of ten years, Seljuks were down to Georgia only, with my troops overwatching my new border with the Byzantines. A year after, a successful assault put an end to the Seljuk line
    Having suffered some minor setback with Almoravids, I sent one Jihad to help them out, with the net result of restoring status quo ante (i.e. my troops occupying Morocco). In the meantime, I have decided to make the mercs pay for their exorbitant wages and threw them at the Byzantines, together with some royalist slavedriv... err.. companions behind Trebizond and Nicaea fell one after another, and soon after, I have entered the walls of the Big C for the first time. For the next ten years or so, the Byzantines were trading blows with me, eventually losing Greece also, and only thriving in Bulgaria. In the meantime, my Khalifah has assembled a strong army to relieve the siege in Georgia, which was attacked by the Volgo-Bulghars. Having just their regular rabble of Slav Warriors and some light Steppe Cavalry (they wither really fast when confronted by AHCs/Murabitin Horsemen), they suffered sound defeat, and my Khalifah cashed in on the success, immediately pushing into Khazar as well. This brings me in the way of the Golden Horde later on, but with my sound strategic position, I almost feel like taking them on in the long run I'll see just how their supercharged MHCs will melt like snow when pelted by my new Arab Infantrymen (armour piercing short range fire is deadly - what would you say to half unit of Bedouin Camels annihilated with just one throw? ) safely tucked behind impenetrable walls of Saracen Infantry. Whoever survives, will be swept away with AHC coupled by Murabitin Horsemen (a real killers for being fast cavalry! ).
    In sum, I feel like I have finally grasped the Egyptians. Maybe I don't play them very historically (they'd probably use a lot of Saharan Cavalry, Arab Infantry, Desert Archers and those amusing Berber Camels/Bedouin Camel Warriors, while I tend to mimic the Western armies of shooters, spearmen, heavy cavalry and light cavalry), but at least, after a somewhat shameful early period I am beginning to kick asses and chew bubblegum - the problem being that I'm running all out of gum
    Loucipher
    Chancellor of the Void
    The Ninth Ring of Hell

    "Vexilla regis prodeunt inferni
    verso di noi; però dinanzi mira",
    disse 'l maestro mio "se tu 'l discerni".

    Dante Alighieri, La divina commedia, Canto XXXIV, 1-3

  3. #783
    Camel Lord Senior Member Capture The Flag Champion Martok's Avatar
    Join Date
    Mar 2002
    Location
    In my own little world....but it's okay, they know me there.
    Posts
    8,257

    Default Re: Pics & History of your Empire

    @UltraWar: Sorry to hear about your difficulties man. Hope you get them sorted out soon!

    @King Kurt: Glad you're learning to love the AUM's; personally, they're my favorite part of playing the Almos. They're pretty uber--and as you've already discovered--fairly well-suited to dealing with the Normans/Sicilians.

    Quote Originally Posted by Loucipher
    I had a strong resolution to get some sleep last night. It failed. Eternal damnation on thee, Martok, for what ye hath done to me I succumbed to the temptation you so trickily incited, and played my newly started Fatimid GA campaign until 4 a.m.
    Happy to be of service. I'm glad you feel more comfortable with them now, though! It really does just take a little practice to get used to the Fatamids' unit roster.

    Truth be told, your Fatamid campaign is already leaving mine in the dust--my campaign looks positively boring in comparison. All I've really done so far is take Syria & Mesopotamia. I also repelled the Seljuks' retaliatory invasion of Antioch, but just barely! The battle was looking pretty grim for a while, until finally the Caliph's oldest son was able flank the main Turkish line and kill their general. It was a close one, let me tell you! (By the way, Loucipher, I agree that Murabitin Horsemen are a marvellous little unit, especially for light cav. )

    I think my main problem was that I'd been focusing more on ramping up my infrastructure and navy--too much, as it turned out! I hadn't really trained enough troops when war broke out between me and the Seljuks; and as a result, it was touch-and-go for a while. I think I'm finally getting things back under control now, however. I've finally got all provinces pumping out troops (except for Tripoli, which I've designated as my shipbuilder for the time being), and should soon have my armies up to acceptable strength levels. Also, I will have coming soon to a battlefield near you....Gazi Infantry! Man, I just love those guys....
    "MTW is not a game, it's a way of life." -- drone

  4. #784
    Wojewoda Pruski Member Loucipher's Avatar
    Join Date
    Dec 2005
    Location
    Province of Prussia
    Posts
    159

    Default Re: Pics & History of your Empire

    Well, to become comfortable with them to the degree I'd call vaguely satisfying, I had to reread frogbeastegg's Unit Guide quite a few times, and play several quick random battles testing out various battle tactics In the end, though, it all paid off quite handsomely
    I'm pretty sure you'll catch up with me allright real soon, for once you render the Seljuks harmless, it's all really easy going: vs the Almohads you just have one-province border at all times, and vs the Byzantines you can work it out to have no more than two provinces to guard. With the massive wealth brought in by your own lands (the Fatimids' provinces include some real cash cows, bringing me well over 1000 florins each), you almost don't need trade. As my armies are kicking down Byzantine sandcastles and showing themselves up in the Eastern Europe already, I now have a proliferation of alliance pleas, and not a year passes by without some Emissary knocking at my mansion's main gate. I have just recently taken the fancy of accepting those guys' proposals - one would say I've just grown mellow, but personally, I prefer letting the traders step in after a period of bloody savagery. Then again, when the coffers of nations grow so big that the gold starts actually pouring out from them, the dogs of war shall be let loose again, and much of this wealth will disappear, while the rest shall change possession - preferably towards Fatimid treasury, hehehehe

    Right now, the way I see it, building your empire should be an important priority, but then again, not every province is worth investing your money into - at least not to begin with. I'd say taking Lesser Armenia (so you get the AHC early on, and quite a teched up province to boot), and then taking Rum and Armenia too would provide a serious kickstart towards your man-building ability, which is initially quite reduced, much like that of the Byzantines. And one thing that I now see as a must - get the Ribat in Egypt ASAP, and start punching out Jihad marks. And then, Seljuks can attack you all the way they like. They attack, you retreat to the fort, and hit the province with two Jihad markers at a moment's notice. The end result: you lose two or three yars worth of income, but gain a crapload of good troops - Desert Archers, Arab Infantry, and especially Murabitin Horsemen are nothing to scorn at, especially against Seljuks, who field insane amounts of Horse Archers (just let your Desert Archers get them) and basically not much worthwhile other than that. For 1000 florins, you get quite a decent army, capable of wiping the desert down to dry sand (literally) with anyone stupid enough to attack.

    And yes... Ghazi Infantry are almost a liability Boy, they really gave them Katatanks a wallop Right now, the Byzantines just sit tight in Bulgaria, with their Kata units reduced to single men (only the Emperor's unit is back at full 41, thanks to its regenerating ability). They are now accompanied by some rabble units, and a detachment each of their triangular-shield-toting swordsmen and their compound-bowmen from Trebizond. And guess what... I'm sending them some more Ghazis for carnage

    Spectators welcome for the show Tickets are sold at the front desk, 5 florins per noble, 1 florin per commoner. One servant/slave per noble allowed at no charge. Single file please
    Loucipher
    Chancellor of the Void
    The Ninth Ring of Hell

    "Vexilla regis prodeunt inferni
    verso di noi; però dinanzi mira",
    disse 'l maestro mio "se tu 'l discerni".

    Dante Alighieri, La divina commedia, Canto XXXIV, 1-3

  5. #785
    Professional Cynic Member Innocentius's Avatar
    Join Date
    Oct 2006
    Location
    Sweden
    Posts
    878

    Default Re: Pics & History of your Empire

    I know I have a tendancy to end campaigns when I'm doing real bad, but for this one, I'm determined to play it to the bitter end. No matter what embarrasing losses I take. With that said, ehere i go:

    The Bohemians - Early XL - Normal

    In 1087, Bohemia is a minor kingdom surrounded by the great countries of Poland, Hungary and The Holy Roman Empire. The little kingdom is only independant to that degree where it does not anger any of its neighbours, and its kings have to obey their superiour "brothers". That was all about to change though, under the rule of King Vratislav II.
    King Vratislav II of Bohemia was already at the age 28 in 1087, and was well-known for being a natural leader, a man who had the full support from his subjects. In 1087, Vratislav commenced his reign by quickly developing Bohemias defencive capabilites. Wath towers were constructed all across the borders, and archers as well as spearmen were recruited.

    Of all his potential enemies, Vratislav deemed the Holy Roman Empire as the most urgent target to neutralize. At the moment, they were weakened by their everlasting conflicts with the pope, and their inland provinces were only sparsely defended. In 1088, King Vratislav II invaded the German province of Franconia, the Germans fled without a fight, facing numerical superiority. Franconia with its fertile lands was a much welcome boost the economy of Bohemia.
    For a few years, the Bohemians sat back, establishing their foothold in Franconia before moving on to the next target. In 1091, Bavaria was invaded and fell without a fight. That way, King Vratislav had more than doubled the size of his kingdoms. The borders were now a lot more secure, the economy was flourishing and the Bohemians had carved themselves a new kingdom at the expence of The Holy Roman Empire.

    Peace came, although war still officially declared between the Bohemians and the Germans. King Vradislav kept asking for a truce with the Holy Roman Emperor down in Austria, but kept failing in convincing him. Not even offering him the hand of his daughter was accepted. Despite the hard-headedness of the Emperor, no actions were taken for a while.

    In 1094, the Germans finally made their counter attack, Franconia was attacked. The Bohemians faced numerical superiority, with the Germans outnumbering them more than 3:2. Nonetheless, the Bohemians took their stand, and glouriously defeated the invaders, despite their numerical superiority and better quality of troops.

    The Bohemians took their stand on a slight elevations (the best they could find) while King Vratislav himself rode around the enemy, drawing a full company of spearman away from the main army. The knights quickly out-manouvered the spearmen, charged the from uphill and killed them all. Once they were disperced, the King attacked the main body of the enemy from the rear, killing and capturing many.

    After this battle, many years of peace followed. Sons and daughters to King Vratislav II were born in the plenty, and several alliances were concluded, most notably the one with France, a powerful ally against the Germans.

    However, the Kingdom of Bohemia lacked a coastline, Vratislav new the importance and possible profit of trading, and thus aimed to provide himself with some coastal provinces. In 1102, Saxony was invaded. As they usually did, the cowardly Germans ran away. This time however, they had a fort to retreat to. This did not last for long anyway, and it fell in 1104. In the same year, a ceasefire wis finally signed with the Holy Roman Emperor. After many years of declared war (although only a few years of actual fighting) peace finally returned to the Bohemians.

    A long period of peace followed, and alliances were sealed with many countries, many of them distant and even unheard of to most Bohemians. The slow process of constructing a fleet in Saxony was commenced, but it was to take years before the Bohemians had a fleet to be reckoned.

    As he grew older, King Vratislav II started looking for a few last chanses of noble deeds, for which he would be remembered. The rebel province of Friesland was deemed to strong, so instead, King Vratislav himself commanded and army attacking Brandenburg in 1111, once again breaking the peace with the Holy Roman Empire.
    This time, the Bohemians had the upper hand, and except for a few unfortuneate casualties caused by a few crude decisions on the battlefield, the battle went as predicted:

    All of the prisoners were ransomed by the Emperor.

    Thus we leave the Bohemians and King Vratislav II for a while. The year is now 1112 and the Kingdom of Bohemia is now far stronger and bigger than it was initially, and King Vratislav has made himself famous all across Europe. He is now 53 years old, and hopefully has at least a few years yet to live. The line of heritaged is properly secured by his numerous sons, all of them being good warriors like their father.

    The Kingdom of Bohemia as of 1112:
    It's not easy being a man, you know. I had to get dressed today... And there are other pressures.

    - Dylan Moran

    The Play

  6. #786
    The Ultimate Grand Inquisitor! Member UltraWar's Avatar
    Join Date
    May 2005
    Location
    In my Romani Palacus
    Posts
    1,715

    Default Re: Pics & History of your Empire

    I've just fixed all my MTW problems and now ready for a campaign.
    Italian/Late/Expert sounds nice

  7. #787
    Kavhan Member Kavhan Isbul's Avatar
    Join Date
    Oct 2006
    Location
    Pliska
    Posts
    453

    Default Re: Pics & History of your Empire

    Interesting campaign, Innocentius. One progblem I have when playing with the Czechs in XL is that after destroying the HRE (the Germans usually get attacked from all sides), I find myself in their shoes - large borders and smaller, hostile Catholic neighbors. A further problem is that even if you deal with some of your immediate neighbors such as the Danes, the French, the Poles and the Hungarians, you usually find yourself in the same hard to defend position, but only facing more powerful enemies, as superpowers tend to develop in the corners of the map - in the East it is usually the Novgorodians or the Kievans with their superior boyars, Rus spearmen, plenty of cavalry and a decent navy of longboats; in the Balkans it is the Fatimids, who will have the best lands and the highest income; and in the west it will be the Spanish or the Almohads. It makes for a pretty tough camapign early, before you can get halberdiers and arbalesters.

  8. #788
    Professional Cynic Member Innocentius's Avatar
    Join Date
    Oct 2006
    Location
    Sweden
    Posts
    878

    Default Re: Pics & History of your Empire

    Quote Originally Posted by Kavhan Isbul
    Interesting campaign, Innocentius. One progblem I have when playing with the Czechs in XL is that after destroying the HRE (the Germans usually get attacked from all sides), I find myself in their shoes - large borders and smaller, hostile Catholic neighbors. A further problem is that even if you deal with some of your immediate neighbors such as the Danes, the French, the Poles and the Hungarians, you usually find yourself in the same hard to defend position, but only facing more powerful enemies, as superpowers tend to develop in the corners of the map - in the East it is usually the Novgorodians or the Kievans with their superior boyars, Rus spearmen, plenty of cavalry and a decent navy of longboats; in the Balkans it is the Fatimids, who will have the best lands and the highest income; and in the west it will be the Spanish or the Almohads. It makes for a pretty tough camapign early, before you can get halberdiers and arbalesters.
    No worries, Kavhan, I'll handle it all in my slow-moving, somewhat cowardly way My short term goal is taking Friesland, Pomerania and any random province I can grab. I'll stay away from most German provinces though as I, like you said, don't want to end up like a second HRE. The Hungarians are my allies who act as a shield towards the Cumans, so I'm not too worried about them. The Poles might be a problem though, and I'm thinking of conquering Silesia sometime (not too soon) to secure my borders with them.
    Also, I love the Bohemian roster. It ain't very special, except from the Bohemian Bowmen who totally rock the vanilla archers used by all other Catholic factions. Shame it's so tough to get my hands on cavalry though, I can't even recruit Mounted Sergeants yet...I need to add some mobile and router-chasing/archer-smiting units to my roster.
    It's not easy being a man, you know. I had to get dressed today... And there are other pressures.

    - Dylan Moran

    The Play

  9. #789
    Senior Member Senior Member naut's Avatar
    Join Date
    Dec 2005
    Posts
    9,103

    Default Re: Pics & History of your Empire

    Innocentius, nice campaign. Personally when I am the Bohemians I prefer striking south before going elsewhere.
    #Hillary4prism

    BD:TW

    Some piously affirm: "The truth is such and such. I know! I see!"
    And hold that everything depends upon having the “right” religion.
    But when one really knows, one has no need of religion. - Mahavyuha Sutra

    Freedom necessarily involves risk. - Alan Watts

  10. #790
    Kavhan Member Kavhan Isbul's Avatar
    Join Date
    Oct 2006
    Location
    Pliska
    Posts
    453

    Default Re: Pics & History of your Empire

    I started a campaign as the Bohemians in XL, early, expert, this weekend and I am doing OK. I will post some screenies later, but I did exactly what Rythmic mentions - went south instead of north. I had a rough start, with me being the only faction to fight the HRE, at least successfully. Somehow the Germans were able to take out the Venetians, which predetermined the direction of my expansion. Finally everyone joined the fray and the HRE were destroyed with me ending up allied to all my neighbors and having Bohemia, Bavaria, Austria, Tyrolia and Venice. With all these borders requiring at least a stack, Venice and some income from trade proved to be vital. I do not believe you can get the same income from getting to the Baltic and the Northern Sea.
    In the meantime, the Serbs and the Cumans destroyed the Hungarians and the Danes and the French started a war next door. When the Serbs made an ill advised attack on one of my ships in the Adriatic I took Croatia and Hungary from them, and the Byzantines finished them off, and I tried to keep the war between the Danes and the French balanced, eliminating all of the high ranking French generals with inquisitors. At one point the Genoese had a civil war and I took Tuscany from the rebels.
    By that time the Fatimids became a superpower and started to give the Byzantines a hard time, kicking them out of Asia Minor and taking their islands one by one, while marching several stacks in the direction of Constantinople. Needless to say, it made me a bit nervous. I was fighting the Cumans as I wanted to take Carpathia, and ended up taking it together with Moldova and Wallachia, which of course cased me to be a bit overstretched. The only thing I could do to the Fatimids was to sink their ships and take Crete. Fortunately enough, the Spanish who became rather powerful in the west sent a crusade to Tripoli, which succeeded, as the Fatimid sultan was stranded on Cyprus. The result was a civil war and the reemergence of the Seljuks (in Egypt, out of all places), and then another civil war. The Byzantines recovered and I was happy to see the situation in the Middle east stable with no faction a huge threat.
    The Sicilians lost all their heirs attacking the Pope, and at the end simply disintegrated, so I took full advantage seizing Sicily and Malta. Sicily was especially nice in terms of added income. It was close to 1204 and I was building up in order to get arbalests and halberdiers out as quickly as possible, and I was content to lead a peaceful campaign, allying myself with almost everyone. The Spanish became a problem though, as they started ravaging through Western Europe, rolling over everyone, getting all the way to the Scandinavian peninsula and soon I was staring at a dozen stacks in a few provicnes accross my border. They even managed to successfully launch a crusade to Palestine. My inquisitors took care of their princes and by 1210 there were rebels all over the map, and I started breathing easier, taking Lesser Poland and then getting a ceasefire from the Poles. The Germans reemerged and allied themselves to me.
    Now I made my first mistake - I took Franconia from the Danes. It coincided with my first weak ruler - he was born a 6 star commander all right, but developped Very Lazy and Often Drunk pretty quickly and by the time he ascended to the throne he had puny 2 command stars and 2 or 3 plumes, no piety. When I attacked the Danes, I lost half my allies, including the Byzantines. The latter did not waste any time in attacking me in Hungary and won a close battle, due to the invincibility of the katanks - I had 6 units of arbalests shooting at two units of katanks and at the end 10 katanks still managed to break through my wall of chivalric sergeants. Anyway, I retook Hungary the next turn, destroyed the Byzantine fleet except for one dromon and took Rhodes, and here is where I stand now, 1217. I should be in a good position to win the game - the Byzantines have only one or two battles left in them, there is no power in the west and so far noone has been able to take advantage of the power vacuum left by the demise of the Spanish. Even if someone manages to become a threat through a reemergence, I have my inquisitors to take care of any catholic faction. No big bully managed to develop in the Middle East, and the Horde should take care of the Kievans (who so far have not been able to even take Volhynia from the Polish).
    To sum it all up - I think that the only viable long term strategy for the Bohemians is to get to the Mediterranean as quickly as possible - otherwise there will be huge cash problems. Also, failing to go south soon enough will render the Bohemians unable to do anything against the superpowers which tend to emerge there. Being catholics, they can use inquisitors to egt rid of any catholic threads, but if the fatimids get to Constantinople and conquer the Balkans, it will be very tough to push them out, as the Bohemians cannot crusade. Not impossible with high tech troops, but certainly difficult. Taking steps against them as soon as they start to become a threat is therefore important.
    Last edited by Kavhan Isbul; 12-11-2006 at 18:18.

  11. #791
    Wandering Fool Senior Member bamff's Avatar
    Join Date
    Jan 2006
    Location
    A constant state of denial
    Posts
    625

    Default Re: Pics & History of your Empire

    Apologies all - this one is rather long.....a fair bit happened in this 32 year chunk!

    The Chronicles of Bamff’s English

    Chapter 6 – The Reign of King Edward III Begins (1201 – 1233)

    The English chronicles fall strangely silent for the first five years of Edward III’s reign. Historians have long since argued whether this was because Edward had some dark secret that he was determined to keep silent, or whether it was because nothing much actually transpired during this time. A far more likely explanation is that Bamff of Brisbane, the chief scribe responsible for noting the achievements of the empire, simply lost his frantically scribbled campaign notes.

    Whatever the reason, the next recorded entries in the chronicles are dated 1225. It would appear that Edward III had concentrated in consolidating his kingdom during this period, and in building his forces in Navarre and Aragon in readiness for the ever more likely outbreak of hostilities with the burgeoning kingdom of Spain.

    For some years now, Lord Martok of the Duchy of Theguild has warned Edward that it would only be a matter of time before Enrique II’s covetous eyes would sooner or later lead to a full scale Spanish invasion north across the Pyrenees. Martok was a trusted advisor, who had served Edward’s father well, and Edward had wasted no time in following his advice on this matter. It was important to seize the initiative in this coming war – but Spain was a Catholic kingdom, and as such any initial strike would not be looked upon favourably by Rome. A diversion was required – and Edward had a perfect plan. He called a meeting with his generals, Sir Richard Plantagenet, commander of the English garrison of Navarre, and Lord Howard of the English army in Aragon.

    Charles Greystoke, Bishop of Wessex, recorded the following conversation:

    Lord Howard implored King Edward “My Lord, the Spaniards ready themselves to strike. Their armies in Castille and Valencia grow ever stronger. Our troops are ready. Let us strike the first blow now.”

    Edward calmly responded “The time is not yet right, Howard. We will strike at Prussia and Pomerania first.”

    Sir Richard Plantagenet reacted incredulously “My Lord, those lands belong to the kingdom of Poland, not Spain. I would not presume to question your judgement, your majesty, but…”

    “And yet you do so. No matter Richard, old friend. I thank you for your counsel, gentlemen – and believe me I do value your services. I would have no others to lead my armies in Navarre and Aragon, nor would I wish any other to stand at my shoulder on the field of battle. My dear father, may he rest in peace, was an average field commander, it is true. It was his skills as a strategist and diplomat that saw our kingdom grow under his rule. We must tread warily around Pope Giovanni. Invading the Poles is a diversionary tactic, designed to occupy Rome. Giovanni will issue a Papal decree on Poland’s behalf. As only one such decree may be in force at any one time, it will free our hand to strike at Spain. Go, my generals – return to your garrisons and await my orders, for I assure you, war with Spain is indeed imminent.”

    While there is some uncertainty as to the accuracy of Greystoke’s recording of this conversation, little doubt remains that the bishop had a taste for the melodramatic. It is also possibly indicative that Greystoke’s descendants many years hence would enjoy careers as script writers of B grade medieval films.

    Edward’s invasion of the northernmost Polish provinces proceeded forthwith. Sir Charles Curthose and his men land in Prussia, and meeting no resistance, march immediately on Konigsberg Castle. Sir John Eadwulf leads the force invading Pomerania. Again the Poles withdraw to the safety of their castle.
    Pope Giovanni II does not disappoint King Edward. In January 1226, an emissary arrives from Rome carrying the Papal decree that all English forces must withdraw from Polish territory forthwith. Edward orders Curthose and Eadwulf to withdraw to Sweden, and at the same time sends word to his fleet commanders that all Spanish shipping is to be sunk on sight.

    Lord Wojno of Bohemia is determined to exact revenge for the English invasion. He leads a large army into Franconia. Sir George Herbert is our provincial commander. Whilst the Polish invasion takes all somewhat by surprise, he immediately sets about readying his defences to meet the invader. It will be a monumental task. His forces number only some 977 men, and the Polish army is some 2,168 strong. Herbert sets his defences on a hillside, and prepares to stand or die. Wave after wave of Poles crash upon the English line, but Herbert’s men stand firm. As the dust of battle clears, 704 Poles are dead, including Lord Wojno himself. 921 Poles surrender to Herbert’s men, and 543 flee back across the border to Bohemia in complete disarray. Herbert has carried the day, but at a frightening cost – 618 Englishmen have fallen – almost 2/3 of his total force.

    Reinforcements are despatched immediately to bolster the depleted garrison of Franconia.

    Edward prepares to unleash his forces in Navarre and Aragon, but events have overtaken him. In 1227, it is the Spanish who strike first. Don Ramon de Bonifaz leads a massive army of 3,268 men into Aragon to take on Howard’s force of 1,933. Howard is a skilled defender, however, and redresses this numerical imbalance by choosing to face the Spanish force at the Puente de Santiago, on the Ebro River. The northern end of this bridge is where Howard sets his men, with his arbalests lined up the hill that rises from the river’s bank, and billmen standing at the bridge itself.

    The battle is joined. Of the first wave of 240 Spanish militia sergeants that charge the bridge, not a one crosses to the English side. Some 195 have succeeded in crossing to the kingdom of heaven, however, with but 45 men surviving the hail of arbalest bolts and longbow arrows to flee in terror.

    Don Ramon de Bonifaz himself leads the second wave. He somehow rallies 26 of the panicked survivors of the first assault to join him in this second assault. With his men falling like flies all around him, de Bonifaz stoically pushes forward until his remaining troops break and run. Once again he steadies the nerves of the survivors, and with but 85 men he again leads his troops toward the blood soaked bridge.

    Lord Howard is impressed with his Spanish counterpart’s ability to rally his troops, and is heard to comment to an aide “Say what you will of de Bonifaz – he is indeed a leader of men.”

    The third assault proves as disastrous for the Spanish as had the first two. The air is rent with the screams of the Spaniards as a hail of arbalest bolts and arrows strike home. The Spanish general grimly presses on, even though only 34 men remain at his side as he steps onto the bridge. Only 3 survive the next hail of bolts, de Bonifaz is not among them.

    Lord Howard is visibly moved by the heroism of de Bonifaz, commenting “And so dies a hero. A bloody fool, perhaps, to march so willingly into the face of that reception, but a brave man and a bold leader nonetheless.”

    With Spanish morale flagging after the death of their beloved general, Prince Felipe attempts to inspire his men. The “charge of the Prince’s Guard” is perhaps one of the saddest chapters of this battle for the Spanish. Of the 21 knights that charge the bridge, there is but a sole survivor. Prince Felipe is amongst the first to die. 2 of these brave knights share the distinction of being the first and only Spaniards to cross the bridge, but any elation they may have felt was short-lived, as they were summarily hacked down by the English billmen.

    Further Spanish assaults are also repulsed, with heavy casualties inflicted. Late in the day, the English suffer their first and only losses of the battle, as 3 billmen fall to Spanish arrows, before a hail of bolts cause the Spanish archers to flee.

    The Spanish troops withdraw, having suffered a humiliating defeat. 867 Spanish corpses litter the field. Not a single prisoner is taken.

    In 1228, the Poles accept our offer of a ceasefire, and an uneasy peace is restored to our eastern borders. The Holy Roman Empire remains an enemy, but her forces are too weak to offer a credible threat.

    Lord d’Anghiera is chosen by King Enrique to lead the next Spanish assault on Aragon. Yet again, Lord Howard finds himself facing a Spanish force in excess of 3,000 men. Again he picks his field most skilfully, choosing a hilltop with commanding views of the valleys on all sides. The Spaniards are forced to march uphill into a hail of arrows and arbalest bolts. The Spanish spearmen and cavalry flee as the archers hold their ground. Howard’s hobilars and two squadrons of royal knights led by Sir Aelfgar Mortimer and Sir Nigel Howard charge down the hillside and make short work of the stranded archers, then withdraw back into position to await the next wave. Wave after wave of Spaniards are repulsed, with heavy casualties. As the Spaniards withdraw, 1,008 of their men lie dead on the valley floor. 367 Spanish prisoners are taken. Lord Howard’s cunning leadership has resulted in the loss of only 32 English lives.

    In 1229, King Edward is satisfied that he has his troops in position to execute his planned annihilation of the Spanish armies. Sir Edmund Stuart leads the invasion of Algeria. The garrison are taken completely by surprise, and flee to the sanctuary of Algiers castle. At the same time, Prince John and a further English army have landed in Morocco. The Spanish defenders once more take flight.

    1230 brings a double helping of welcome news to King Edward. First comes the news that Don Pero de Oliveres, the leading Spanish commander in Cordoba has mysteriously perished at a banquet in honour of King Enrique. It is no mystery to those members of the English court who are aware that Guy of Gisbourne had recently departed for Cordoba. A general too fond of his wine is all too easy a target for a man so skilled in the use of poisons.

    Further good news comes from Portugal. The extremely pious Don Lope Vermúndez has had enough of the excesses of King Enrique and his son Alfonso, and has sent word that he wishes to swear allegiance to Edward and the English crown. Edward despatches his own emissary forthwith, to accept this offer, and to provide Vermúndez with 3,000 florins with which to raise a local army.

    “The cards are indeed falling favourably…” muses a very content King Edward.
    The following year, our spies in the east send news of the emergence of an incredibly strong force of soldiers. This army is said to number in the tens of thousands, and each and every one of them is reputed to be a fierce and capable warrior. They call themselves the “Golden Horde”, and have already over-run the Byzantine provinces of Khazar and Volga-Bulgaria. It appears that they intend to sweep westwards.

    With Sir Edmund Stuart struck down by a mysterious disease in Algeria, Sir Thomas Scrope has assumed command in that province, and embarks immediately on the assault of Algiers castle. It is a well protected fortress indeed, and whilst Scrope succeeds in his aim, it proves a pyrrhic victory, with his forces all but wiped out in the battle. Reinforces are despatched from Morrocco to shore up this garrison’s strength.

    As Scrope’s forces raise the English flag in Algiers, King Edward finally unleashes his attack on Spain. Lord Gascoigne leads a strong force into Valencia, Sir Richard Plantagenet’s men march south into Castille from Navarre, and King Edward himself lands in Leon with a strong invasion force.
    The Spanish in Leon flee without a thought of their own dignity. The enormous Spanish armies in Castille are ripped to shreds by Plantagenet’s force, with over 1,600 Spaniards killed or captured. English casualties are 580. It is a similar story in Valencia, and again the Spanish are forced to withdraw.

    This series of humiliating defeats would appear to be more than the Spanish people can bear. Rebellions break out in Cordoba, Granada, and Tunisia as 1231 draws to a close. It is an interesting historical sidenote that the rebel forces in Cordoba are lead by none other than King Enrique’s own son, Alfonso.

    The pain of the Spanish King intensifies in 1232. Whilst he may have seen off the rebel forces in Cordoba, his son Alfonso has died leading the rebels, and our inquisitors have made Cordoba a place of fear, terror, and mistrust, as they burn in excess of 14,480 “heretics” throughout the province.
    Meanwhile in the East, the Golden Horde seize Kiev from the Poles, and Crimea from Byzantium.

    King Edward leads the invasion of the rebel province of Granada in 1233. The rebel forces are crushed, with the few survivors fleeing the field to take refuge within the walls of their stronghold. The noose is tightening around Enrique’s neck – soon all of the Iberian peninsula will be in English hands....

    Last edited by bamff; 12-19-2006 at 00:54.

  12. #792
    Wandering Fool Senior Member bamff's Avatar
    Join Date
    Jan 2006
    Location
    A constant state of denial
    Posts
    625

    Default Re: Pics & History of your Empire

    A couple of quick queries (assuming you didn't doze off sometime during my last post!) - firstly one about inquisitions - has anyone else ever seen so many victims burned up in one go as I had in Cordoba? 14,480! I hadn't managed my inquisitors all that closely, and all 6 wound up in the same province, but still....

    Second - is there anywhere that lists out the "new" units and factions available in either the XL or BKB mods? I'm loving the write-ups, but struggling a little with some of he unit descriptions (just because I have no idea what they are and what they do)?

  13. #793
    Professional Cynic Member Innocentius's Avatar
    Join Date
    Oct 2006
    Location
    Sweden
    Posts
    878

    Default Re: Pics & History of your Empire

    Quote Originally Posted by bamff
    Second - is there anywhere that lists out the "new" units and factions available in either the XL or BKB mods? I'm loving the write-ups, but struggling a little with some of he unit descriptions (just because I have no idea what they are and what they do)?
    I don't know about the Muslim units mentioned on this page, but if you mean/include Bohemian Bowmen, they're just simply better archers than vanilla archers (haven't seen any stats for them though) and are a lot better at melee.
    It's not easy being a man, you know. I had to get dressed today... And there are other pressures.

    - Dylan Moran

    The Play

  14. #794
    Camel Lord Senior Member Capture The Flag Champion Martok's Avatar
    Join Date
    Mar 2002
    Location
    In my own little world....but it's okay, they know me there.
    Posts
    8,257

    Default Re: Pics & History of your Empire

    Nice Bohemian campaigns, guys--looking forward to hearing more.

    Well I was finally able to play my Fatamid campaign a bit this weekend. I was finally able to push the Seljuks out of Edessa after a bloody battle (I really do hate their HA's!). I immediately moved to reinforce my position there and shore up my nothern border.

    Unfortunately, the Armenians took advantage of my attention being directed against the Seljuks, and launched a surprise invasion of Antioch. My garrison there was seriously undermanned--I only had a few Nubian spearmen, desert archers, and Prince Assad along with his GB--so after engaging in a brief battle in which I did as much damage as I could, my surviving forces retreated back to the city. The Armenians quickly surrounded it and laid siege.

    Days afterward, Lord Adir--by grace of Allah, amir of Egypt and the Caliph's chief minister--learned of these events from ships's crews that had fled Antioch's port prior to it being overrun. He immediately sent messengers to both Edessa (where the Caliph was overseeing the province's formal annexation into his kingdom) and to his close friend Lord Hassan, King of Jerusalem.

    Adir and Hassan quickly set sail with a large number of troops, and days later landed on the shores of Antioch just several miles south of the city. After their men were fully disembarked, Adir & Hassan rendezvoused with the Caliph, who had brought part of his army from Edessa to deal with the Armenians. Together, they marched to their position to relieve their beleagured brethren.

    All expected a hard fight for Antioch, but it never occurred. The Armenians--clearly not expecting the Caliph to arrive so soon, or at least not with as many men as he did--chose instead to abandon the siege entirely, and withdrew northward back to their capital. Prince Assad rode out from the city, glad to see his father again. The Caliph thanked his followers Adir and Hassan for riding to his aid, and they returned to their respective governorships.

    Until this incident, the Caliph had been intent on driving the Seljuks out of Asia Minor. Since the Armenians had had the audacity to attack one of his great cities, however, they had now incurred his wrath. He would now not rest until he had brought them beneath his heel. He henceforth began gathering together a mighty army, so as to fell a great stroke against them....

    [Author's note: The Armenians invading Antioch really took me by surprise. I've never before seen them make an aggressive move against me so early in the game, and had to scramble like mad to counter them. It was fortunate that I happened to have a decent-size stack of units in both Egypt and Palestine, otherwise I would've been in real trouble!]
    "MTW is not a game, it's a way of life." -- drone

  15. #795
    Camel Lord Senior Member Capture The Flag Champion Martok's Avatar
    Join Date
    Mar 2002
    Location
    In my own little world....but it's okay, they know me there.
    Posts
    8,257

    Default Re: Pics & History of your Empire

    Wow bamff, that was a great write-up. Definitely one of the more humorous ones I've read in a while (at least compared to my own)! The following passages were the ones that caused me to chuckle and/or laugh the most:

    Quote Originally Posted by bamff
    The English chronicles fall strangely silent for the first five years of Edward III’s reign. Historians have long since argued whether this was because Edward had some dark secret that he was determined to keep silent, or whether it was because nothing much actually transpired during this time. A far more likely explanation is that Bamff of Brisbane, the chief scribe responsible for noting the achievements of the empire, simply lost his frantically scribbled campaign notes.
    Quote Originally Posted by bamff
    While there is some uncertainty as to the accuracy of Greystoke’s recording of this conversation, little doubt remains that the bishop had a taste for the melodramatic. It is also possibly indicative that Greystoke’s descendants many years hence would enjoy careers as script writers of B grade medieval films.
    Quote Originally Posted by bamff
    1230 brings a double helping of welcome news to King Edward. First comes the news that Don Pero de Oliveres, the leading Spanish commander in Cordoba has mysteriously perished at a banquet in honour of King Enrique. It is no mystery to those members of the English court who are aware that Guy of Gisbourne had recently departed for Cordoba. A general too fond of his wine is all too easy a target for a man so skilled in the use of poisons.


    Great job, man. Seriously.
    "MTW is not a game, it's a way of life." -- drone

  16. #796
    Wandering Fool Senior Member bamff's Avatar
    Join Date
    Jan 2006
    Location
    A constant state of denial
    Posts
    625

    Default Re: Pics & History of your Empire

    My Lord Martok, you do favour us with your kind words....

    Seriously though - thanks, it's nice to know that I managed to entertain. I will confess I had some fun writing that one!

  17. #797
    Wandering Fool Senior Member bamff's Avatar
    Join Date
    Jan 2006
    Location
    A constant state of denial
    Posts
    625

    Default Re: Pics & History of your Empire

    As a further note, it is great to see so many and so varied histories being reported....and reading behind the lines, it is intrigueing to see the differing strategies employed...I must confess I am feeling a little less adventurous than most, having chosen the English as my faction....I'm thinking Aragon will be next for me, but I still have a long way to go as England yet...wouldn't mind trying Turkey either, but I have never really succeeded as a muslim faction...

    Great work all!

  18. #798
    Camel Lord Senior Member Capture The Flag Champion Martok's Avatar
    Join Date
    Mar 2002
    Location
    In my own little world....but it's okay, they know me there.
    Posts
    8,257

    Default Re: Pics & History of your Empire

    Quote Originally Posted by bamff
    I will confess I had some fun writing that one!
    .....And it showed--which is probably why it was such an enjoyable read.
    "MTW is not a game, it's a way of life." -- drone

  19. #799
    " Hammer of the East" Member King Kurt's Avatar
    Join Date
    May 2005
    Location
    The glorious Isle of Wight
    Posts
    1,069

    Default Re: Pics & History of your Empire

    Episode 3 of King Kurt's Almo adventure!!
    The Empire looked nice and steady - secure borders, good income, leading on GA points - time for some expansion!! Surveying the scene, I decided to attack up the west coast of france as that impacted least on my trade. I marched into Aqutaine just after the French had kicked out the English. I also started the naval war against the French. Some how in the naval exchanges, I managed to start a war against the Italians - I don't think I attacked one by mistake, but all of a sudden I was in a war with Italy and France.
    Aquataine fell and then it was Britany and Anjou. The French counterattacked, so I withdrew from both provinces. So, 2 lost provinces - I make that Jihad time!! 2 for Britany, 1 for Anjou. These forces with the existing forces enable me to retake Britany and Anjou before moving on to Normandy, Flanders, Ile de france and Burgandy.
    At the same time Italy dived into Aragon with my forces occupied up north. Thanks to another Jihad and what I could gather from around Spain, I was able to retake Aragon - and have the Doge to ransom to boot. This was vital as money was getting low as trade was wrecked by the naval war with France and Italy. I also had a Balkan adventure, attacking Serbia and Greece from Naples, but got beaten back. Then the Pope attacked me in Naples twice. He was sent packing and is now extremely weak and ripe for the plucking. The French dived into Morroco and Granada, but were beaten back, killing the French King in the process.
    So, after some scary moments, things look OK. Fighting France and Italy was nearly a costly mistake. I have weathered the storm, my money is back looking healthy and the French look a spent force. After a regroup, I anticipate driving through central France into northen Italy - but that will be in the next exciting episode.
    "Some people say MTW is a matter of life or death - but you have to realise it is more important than that"
    With apologies to Bill Shankly

    My first balloon - for "On this day in History"

  20. #800
    Kavhan Member Kavhan Isbul's Avatar
    Join Date
    Oct 2006
    Location
    Pliska
    Posts
    453

    Default Re: Pics & History of your Empire

    I am afraid I lost interest in my Bohemian campaign - the Byzantines never attacked me again, and just turtled in Serbia and Bulgaria. They only left a small garrison in Constantinople of an archer and a urban militia, and I invaded with 4 mounted crossbowmen. The idiotic AI withdrew, which was smart as it would have lost, but it abandoned its capital to me withought a fight. I reinforced Constantinople expecting a desprate attack, but the Greeks never attempted to regain it despite the fact that they had plenty of units in Bulgaria and Greece, and a few large stacks in Anatolia, which they could transport to their capital in two turns. Then I used mounted crossbows to chip away at an all-katank army in Greece (and these had silver armor upgrade plus an 8 star general). After two battles the katanks were wiped out except for three of them, who managed to escape to a castle. I abandoned the province and the next turn invaded again with 4 or 5 units of mounted crossbows, and invaded Serbia and Bulgaria with massive armies, expecting two tough battles with plenty of casualties on my side. No such thing - the imbeciles abandoned Bulgaria without a fight as they did not want to risk the Emperor being trapped in the fortress and besieged, then they also retreated from Serbia (this time leaving a large garrison in the castle to starve in two turns), but they accepted the battle in Greece - 3 katanks against 200 mounted crossbowmen! Those three valiant fools were shot down in a battle taking a little less than a minute, most of which was moving my units within shooting distance. The end result of the whole thing was that the Balkans were conquered with only a few skirmishes and no major fight, a few nice Byzantine stacks were wiped out without entering a battle, and on top of all that I gained 30k in ransom.
    Such completely stupid moves by the AI just ruined it for me . Now the campaign is pretty much won - the Horde is yet to present itself, but they will run out of gas before they reach me, and even if they manage to establish a foothold in the steppes, I doubt they will ever be able to expand to a degree in which they can become a serious threat. All other threats have been reduced to minor powers struggling to survive and waging petty wars against each other. I do not see any point to continue the campaign, as it will be boring as hell, conquering the map at a slow pace and perhaps only a battle or two worth mentioning with the Mongols.

    I started a new campaign with the Teutonic order in High on expert, GAs, and so far it has been fun and a good challenge, as all my neighbors seem to hate me, and the Horde will be making its way towards my lands very soon. I will try to play this campaign with a self-imposed rule of attacking only non-Catholics (and this will include rebels) and try to win on GA points. The Pope approves, and I also have the Holy Father's word that in this case backstabbing an ally is OK, because a word gived to a heretic or a heathen is not the same as one given to one's Catholic brethern, and therefore a sneak-attack on any enemy of the faith does not really constitute a betrayal.
    Last edited by Kavhan Isbul; 12-14-2006 at 20:07.

  21. #801
    Wandering Fool Senior Member bamff's Avatar
    Join Date
    Jan 2006
    Location
    A constant state of denial
    Posts
    625

    Default Re: Pics & History of your Empire

    Nice work King Kurt - looks like you are really on a roll now!

    And Kavhan - I know where you are coming from, once you get to a pretty dominant point it is hard to maintain enough enthusiasm to keep going, especially when the AI won't put up a fight. Sorry to ask (again! No wonder I got the title "Crack brained") but are you playing the XL mod? Just wondering on the basis of the faction names.....

    This next instalment of my English campaign is much shorter than the last (and you would hope so - it only covers 5 years!), so no need to be reaching for the "no doze" this time!

    Here goes:

    The Chronicles of Bamff’s English

    Chapter 7 –King Edward III (1233 – 1237)

    In the year of our Lord 1233. The kingdom of Edward III of England stretches from Ireland across the western parts of the European mainland. The eastern borders of his kingdom are Franconia in the north, stretching southwards through Switzerland to Genoa. Its northernmost provinces include the Scandinavian states of Norway and Sweden. Even the northern parts of the African continent fall under English rule, with Morocco and Algiers both part of Edward’s realm. One obstacle stands between Edward and the complete domination of Western Europe. King Enrique II of Spain continues to cling to the province of Cordoba. Edward has decreed that it is high time for this situation to be “corrected”. Sir Richard Plantagenet, renowned as a “skilled attacker” leads the English armies into Cordoba. King Enrique of Spain is not known as a brave leader of men, but he has no avenue of escape. The English naval blockade has ensured that no Spanish forces may either leave Cordoba, or enter it to reinforce the beleagured garrison. Enrique has no option but to stand his ground and fight.
    The gently rolling hills of Cordoba do not provide ideal ground for an attacking army, but such is Plantagenet’s skill that he soon manouvres his forces into positions atop two small hillocks. The Spaniards stand on the other side of the shallow valley, forced to pull back from their original encampment along the valley floor.
    In their haste to reposition themselves, the Spaniards have left their catapult and ballista crews in the middle of the valley that separates the two armies. These men bravely stand at their posts, and commence firing upon the English.
    Sir Charles Langton’s knights bravely charge along the valley, ignoring the fire from Spanish archers and the ballista crews. The Spanish artillery are massacred; their weapons destroyed. The Spanish king sends an entire regiment of Spearmen to aid the artillery units, but it is all too late. The spearmen have orders to extract some revenge for Spain, and as the 9 surviving knights withdraw, they are pursued by the Spanish spears. Langton knows that he cannot stand and fight – 9 knights against 100 fresh spearmen in good order would be suicide. Withdraw he must – but he is a savvy enough commander that a withdrawal is not necessarily a defeat – indeed it can be a victory. He marches his knights in good order along the valley floor, slowly enough to encourage his Spanish pusuers. The Spaniards take the bait, and are soon pursuing Langton’s men along the front of the main English line. It is a tactical mistake that few will live to regret. The Spaniards have unwittingly marched right into the teeth of the beast, and it now bites hard. 177 arbalests and 180 longbowmen make short work of the Spanish spearmen, with Langton’s men turning to provide the coup de gras by riding down several of the routing survivors before withdrawing.
    Enrique is furious, and his rage overwhelms his powers of reason. He orders a skirmish line of two units of javelinmen forward to strike back at the English. A javelin has but a fraction of the range of an arbalest or longbow, and none survive to reach a range from which they may do any damage.
    Next it is the turn of the jinetes to take the fight to the invader, and at the same time Don Alfonso de Luna’s royal knights charge the English left flank. Two volleys reduce the knights numbers to 10 men. One final volley leaves two wounded knights riding quickly from the field. Meanwile, the jinetes have achieved nought but an increase in the Spanish death toll.
    While this carnage had been unfolding, Sir Richard had sent one unit of billmen and an accompanying squadron of royal knights forward on both flanks. These units now wheel inwards, as the English chivalric sergeants, billmen, chivalric men at arms, and fyrdmen steadily advance in a line at the Spanish centre. Enrique is trapped! Surrounded by the English, he panics, and leaving his own royal guard stranded, he flees. His men fight to the last, all 20 dying for their ignoble king. They are by no means alone in that regard – as the dust of battles settles, 807 Spaniards lie dead or dying on the field. 205 surrender to the English. A mere 53 Englishmen have died for their kingdom.
    News arrives from the east that the Golden Horde have taken Volhynia. Apparently their fearsome reputation is now such that the Polish garrison simply fled as soon as word had arrived that the horde had crossed the border. These new arrivals in Europe do indeed appear formidable, and King Edward instructs his agents in the region to watch their movements closely.
    The following year, the Horde are pressing the Byzantines hard across all provincial borders. So much so that Byzantine agents offer King Edward an alliance. The desperation of Byzantium is clear, and Edward uses this to his advantage, negotiating very favourable terms for the alliance, which he then accepts graciously.
    King Edward is indeed an astute ruler, and his skills and acumen extend far beyond the diplomatic arena. He has noted that the local populace of the recently acquired province of Switzerland appear to be unusually skilled with the halberd – far more so than is the case elsewhere in Europe. King Edward decides that this is something that will indeed be useful in securing our eastern borders, and decrees that several regiments of Swiss Halberdiers shall be trained forthwith.
    In 1237, the few remaining defenders of Cordoba Castle raise a tattered white rag, and the commanding general offers his sword to Sir Richard Plantagenet to formalise the surrender. King Enrique was one of many who did not survive the siege, though in his case it would appear that it was not starvation or disease that brought about his demise. When viewing the body, Sir Richard notes a number of odd wounds. He surmises that one or more of Enrique’s subjects may have tired of their king’s ineffectual rule….
    With King Enrique’s demise, the remaining Spanish held provinces of Tunisia and Cyrenaica rebel. The kingdom of Spain has been consigned to the footnotes of history books. Lord Scrope marches immediately on Cyrenaica, taking the province without a struggle.
    Prince John leads our forces from Algeria into Tunisia, and is joined by forces from our new allies, the Byzantines. He positions his arbalests and longbowmen high on a hill on the rebel flank. The unimaginative Byzantine general marches his men straight at the rebel force. This does not bother Prince John – these troops are expendable in his opinion, as they have not cost a single English florin to train, equip, and maintain. The English archers wreak a terrible toll on the charging rebels (and, it must be said, on our Byzantine allies, with a number of lancers and infantry falling to "friendly fire" in the midst of the melee). Once battle is joined, and the rebels are pinned against the Byzantine line, Prince John orders his cavalry to hit the rebel forces from behind. They are routed. Tunisia is now also in English hands....and King Edward muses to himself that now at last, Egypt's "long wait" may be at an end....

    Footnote: originally I had no intention of taking Tunisia and Cyrenaica - but weak rebel garrisons just were too tempting....and now I find King Edward reminding me that Martok had suggested taking out the Eggies a while back and now they are all that separates Cyrenaica and Palestine....

  22. #802
    Assassin Member Cowhead418's Avatar
    Join Date
    Nov 2005
    Location
    Chicago
    Posts
    426

    Default Re: Pics & History of your Empire

    I know I'm a bit late on this update (compared to others), but I can only find time to play on the weekends and sometimes do not get to playing it at all.

    The Volga Bulgars: 1110-1139

    RAPID EXPANSION

    Khan Subudai II was much like his father. Authoritarian in nature, he had a terrible loathing for disobedience. Though he was accused many times of being an iron-fisted dictator, he was a benevolent ruler that deeply cared for the progress of his nation and the prosperity of his people. Subudai had much to live up to, as bards were already singing the praises of his accomplished father and cementing his name into legend. He knew that in order to gain the fame he craved that expansion was necessary, and he eagerly yearned for control of the neighboring lands. However, opportunities for expansion were limited due to allied control of these territories. Subudai was a man of honor and refused to entertain any suggestion of betrayal.

    On the western frontier, Novgorad was secured, but hostile, vicious viking hordes still threatened Volga-Bulgarian security. Seizing the moment, Subudai sent a sizable force into Finland in an attempt to capture his enemy the Prince of Novgorad. The general, Prince Mongke, split his forces in half in an attempt to encircle the opposing army. However, the enemy Prince wasted no time in fleeing to safety across the Baltic Sea. Finland had been taken without bloodshed. His lust unsatiated by this new acquisition, Khan Subudai II ordered the immediate construction of a fleet. He knew that economic and expansive opportunities lay across the open waters, and he wanted his nation to establish a naval presence.

    By now, a second Muslim force had made its way into the wide expanses of the steppes. The Seljuks had seized control of Khazar, and already thousands of barbaric Turkish troops were pouring into the north, threatening to expand even further. To the Volga-Bulgarian people, the Seljuks were fellow Muslims, and the population opened their arms in proposed religious brotherhood. Subudai, however, had starkly different thoughts on his mind. The Seljuk Sultan had already dismissed his offer of partnership multiple times, and he eyed with suspicion the build-up of Turkish armies along his borders. Rejecting the advice of his military advisors, Subudai declared war on the Turks and sent an invasion force into Khazar, where the enemy garrison quickly retreated to the fort.

    The impact was immediate. There was widespread protestion to Subudai's brash decision, and several allies cancelled their former treaties, including the Lithuanians. In a decisive move, the Fatamids remained firm in their friendship, and offered to apply pressure from the south. Surprisingly, the Turkish people were among the most vocal protestors to the war, and several groups openly called for secession amidst the heightened political pressure.

    The very next year, an army of nearly 2000 Turks sought to regain Khazar, and the Lithuanians showed their support by invading Muscovy, which they took without a fight. The Volga-Bulgar army charged with defending Khazar was led by the Khan himself, followed by the heir to the throne Prince Ogadai and the Prideful Prince Khogibag. Subudai chose to stand his ground, despite being outnumbered more than 2 to 1. He gave a riveting pre-battle speech, and prepared his men for battle. His force was composed of mostly cavalry and archers, with some armored spearmen and Bashkorts mixed in. When the first wave of Turks came forward, it was made up of mostly horse archers. A long missle duel soon commenced, and when the battle started to turn against the Turks they conducted a massive cavalry charge. It was a hard-fought battle, but the superior Bulgarian Royal Cavalry with javelin and archer support won the day, and much of the Turkish army was captured, including a notoriously talented general. After the first wave was defeated, the rest of the Turkish force was summarily routed. Nearly half of the Turkish army was captured, and Subudai for the first time showed his brutality by ordering the execution of almost 1000 Turks.

    Though the battle was the first, it was to be the last. The crushing defeat caused the Turkish empire to descend into chaos, with several thousand troops in open revolt. Their entire presence in the steppes was destroyed in one fell swoop, and the Turkish sultan wisely sued for peace. The following year, VB armies descended on Muscovy and Smolensk, adding a new territory to the mix. A few years later Lesser Khazar was conquered, and the size of the empire had nearly doubled.

    Over the next several years, Subudai fortified his borders and fostered extensive plans in order to bring down what he called "those traitorous scoundrels." His hatred for the Lithunanians went so deep that his health dramatically declined. In the year of our Lord 1139 A.D., the beloved Volga-Bulgarian ruler died of sudden heart failure, caused by an overload of stress and emotion. Subudai's biggest fear was that he would be overshadowed by his father, but his accomplishments proved to be remarkable. The size of the empire had nearly doubled, and the economy was now flourishing. A fleet had been constructed, and the reach of the VB navy went as far as Ireland. Vast improvements were being made in agriculture, and infrastructure was expanding rapidly. Most importantly, Subudai had made a determined statement to the world that the Volga-Bulgars were not to be taken lightly. The Seljuks had been a rising world power, but now their empire lay nearly in utter chaos.

    Despite this, the coronation of the new Khan was a depressing moment in VB history. Ogadai I was neither a capable nor a powerful monarch, and he was not trusted by his fellow blood relatives. The transition of power was a bloody struggle, and several old Princes talked of rebellion. Ogadai will have to act fast to avoid Civil War...

    Western Front:


    Southern Front:


    Rest of the Empire:


    Khan Ogadai I:


    Royal Line:


    Diplomacy:


    Alleged Traitor:


    Glorious Achievements:
    Last edited by Cowhead418; 12-15-2006 at 07:03.

  23. #803
    Wandering Fool Senior Member bamff's Avatar
    Join Date
    Jan 2006
    Location
    A constant state of denial
    Posts
    625

    Default Re: Pics & History of your Empire

    Great write up Cowhead!

    Pardon the ignorance I am about to demonstrate with these queries, but I am allegedly "crack brained" after all, so please make some allowance for this....

    Which mod is it that you are playing?

    Secondly, a "bashkort" is a unit type that I am not familiar with (having thus far only played vanilla MTW and MTW:VI). What is it exactly?

  24. #804
    Hammer of the Scots. Member r johnson's Avatar
    Join Date
    Jun 2006
    Location
    Leicestershire, England.
    Posts
    144

    Default Re: Pics & History of your Empire

    An enjoyable read Bamff, you've got skill in writing as your have in battles.
    (\_/) Add the bunny 2 ur sig
    (o.o) and help him achive
    (>.<) global domination!
    (_)(_)

  25. #805

    Default Re: Pics & History of your Empire

    Quote Originally Posted by bamff
    Secondly, a "bashkort" is a unit type that I am not familiar with (having thus far only played vanilla MTW and MTW:VI). What is it exactly?
    A people from around the Ural region. In the XL mod they are represented as either spearmen, javelinmen or a spear/javelin hybrid, can't remember which now.
    “The majestic equality of the laws prohibits the rich and the poor alike from sleeping under bridges, begging in the streets and stealing bread.” - Anatole France

    "The law is like a spider’s web. The small are caught, and the great tear it up.” - Anacharsis

  26. #806
    Member Member Geezer57's Avatar
    Join Date
    May 2005
    Location
    Wichita, Kansas USA
    Posts
    890

    Default Re: Pics & History of your Empire

    They're a spear/javelin hybrid, as you thought. They have four javelins, and have 5/1/2/1/4 for stats (charge, attack, defense, armor, & morale). The numbers come from the MTW_XL_EARLY_UNIT_PROD11.TXT file, so might vary in later periods.
    My father's sole piece of political advice: "Son, politicians are like underwear - to keep them clean, you've got to change them often."

  27. #807
    Kavhan Member Kavhan Isbul's Avatar
    Join Date
    Oct 2006
    Location
    Pliska
    Posts
    453

    Default Re: Pics & History of your Empire

    Bamff: I am playing the XL mod, and so is Cowhead. The bashkorts are a really nice hybrid between spearmen and javelinmen, and I personally find them to be the best javelin infantry in the XL mod. True, almughavars and armored almughavars are even better, but the Bashkorts are cheaper and have a far greater impact, especially for the two factions that can use them - the Volga Bulgars and the Cumans. The Volga Bulgars lack any missile units other than vanilla archers (unless they get to certain provinces and build them up quite a bit), and the Bashkorts provide some very effective range attack, when used properly, especially in defensive battles. The cumans lack any spearmen other than vanilla spearmen, and the bashkorts can act as a high morale spear unit if necessary - they will not do wonders, but a unit of them can hold a MHC long enough to allow another unit of Bashkorts to pepper the enemy with armor piercing javelins. The bashkorts also have a low upkeep and require only a spearmaker's workshop and nothing else, and the Cumans and Volga Bulgars can build them everywhere they go. The only downsides are that they are available only in early and high, and their lack of armor.

  28. #808
    Wandering Fool Senior Member bamff's Avatar
    Join Date
    Jan 2006
    Location
    A constant state of denial
    Posts
    625

    Default Re: Pics & History of your Empire

    Quote Originally Posted by r johnson
    An enjoyable read Bamff, you've got skill in writing as your have in battles.
    Thanks for the vote of approval! I will endeavour to keep the write ups coming!

    As for the battles - I have had my share of absolute disasters, don't you worry. While it is true I have been extraordinarily lucky in this English campaign, had I written up my preceding Sicilian and Saxon campaigns, you would certainly have seen some differing results!

  29. #809
    Wandering Fool Senior Member bamff's Avatar
    Join Date
    Jan 2006
    Location
    A constant state of denial
    Posts
    625

    Default Re: Pics & History of your Empire

    Thanks for the info, Geezer57 and Kavhan Isbul....

    I am trying to resist the temptation of downloading and installing a mod until after I have tried my hand as Aragon and Turkey....but I will confess I am weakening!

  30. #810
    Wandering Fool Senior Member bamff's Avatar
    Join Date
    Jan 2006
    Location
    A constant state of denial
    Posts
    625

    Default Re: Pics & History of your Empire

    Whoops! Double post - sorry guys!
    Last edited by bamff; 12-18-2006 at 03:00.

Page 27 of 51 FirstFirst ... 1723242526272829303137 ... LastLast

Bookmarks

Posting Permissions

  • You may not post new threads
  • You may not post replies
  • You may not post attachments
  • You may not edit your posts
  •  
Single Sign On provided by vBSSO